Christmas decorating feels warmer when the smallest details tell a story.
And honestly, a tiny mitten hanging from a branch can be just as charming as a fancy ornament.
These DIY Christmas mitten decor ideas for a cozy home turn leftover fabric, thrifted sweaters, and simple ribbons into festive accents.
Ahead are ten approachable projects for a fresh 2026 holiday look, with easy steps and styling tips worth saving.
1. Chunky-Knit Christmas Mitten Tree Ornaments
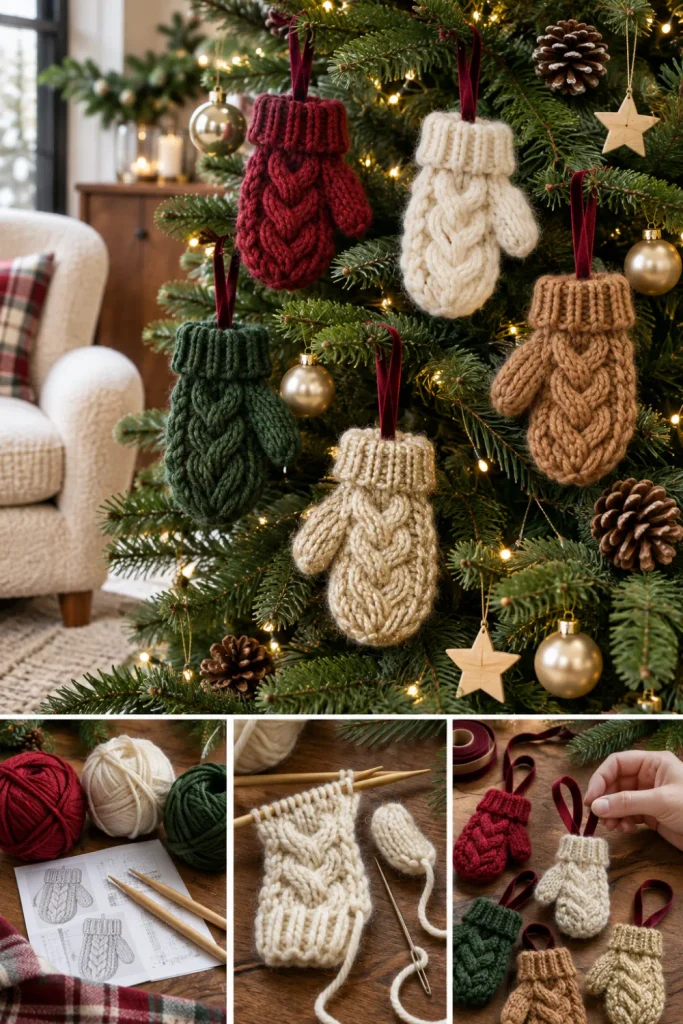
Oversized stitches bring cabin charm to a Christmas tree.
Choose miniature mittens in cream, forest green, or cranberry, mixing textures without crowding the branches.
Simple Steps:
- Knit or repurpose two tiny mitten shapes.
- Stitch their edges, leaving the cuffs open.
- Tuck in a pinch of cotton stuffing.
- Attach velvet loops and hang near warm-white lights.
Tip: Repeat one yarn color across the tree for a polished, collected look.
2. Rustic Plaid Christmas Mitten Mantel Garland
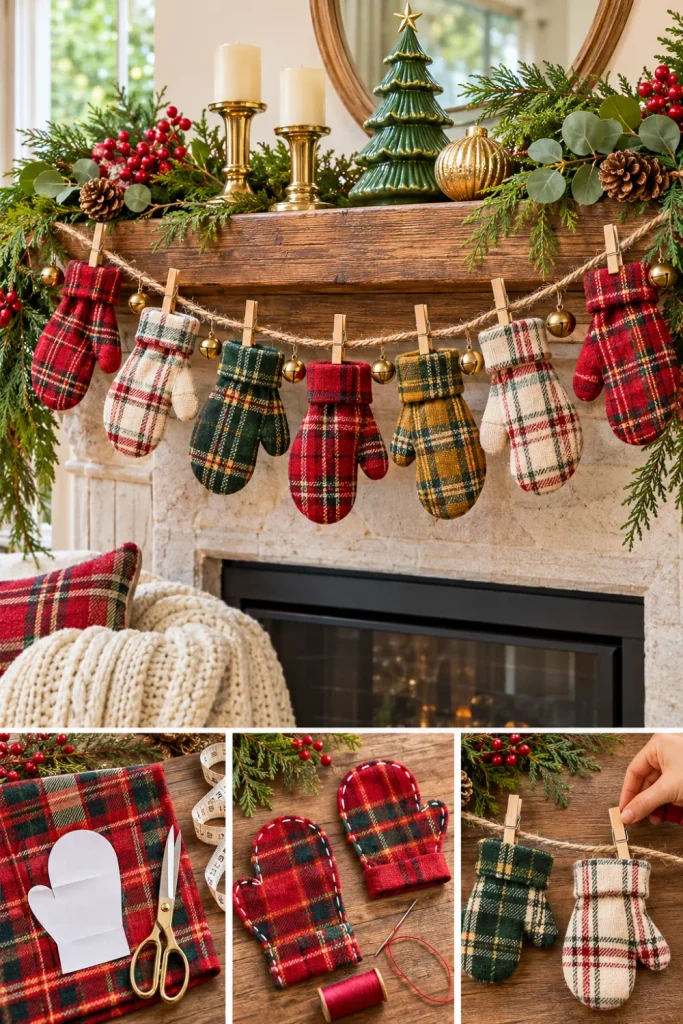
Plaid mittens add farmhouse warmth without making the mantel feel busy.
Pair tartan with greenery and exposed wood for a relaxed arrangement.
Simple Steps:
- Trace mitten templates onto plaid flannel.
- Cut matching pairs and stitch together.
- Clip the mittens to jute twine with miniature wooden pegs.
- Drape the garland over the mantel alongside cedar sprigs.
Tip: Keep fabric away from flames and hot fireplace surfaces; use battery-powered candles nearby.
3. Mini Felt Christmas Mitten Advent Calendar
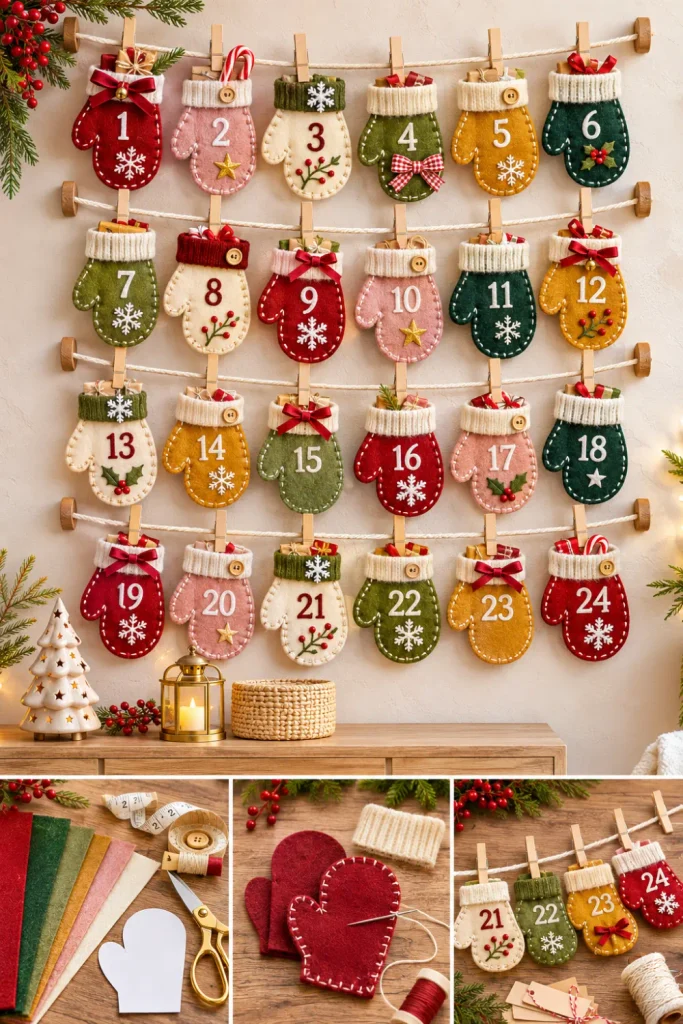
This playful countdown doubles as colorful wall decor.
Twenty-four felt mittens hold holiday treats or handwritten activities.
Simple Steps:
- Cut 48 mitten shapes from sturdy felt.
- Sew pairs together, leaving the tops open.
- Add numbers 1 through 24 using fabric paint.
- Hang them on ribbon rows with small clips.
- Fill with notes, stickers, or wrapped sweets.
Tip: Use a consistent palette of blush, red, and sage to make the display feel intentional.
4. Vintage Upcycled Sweater Mitten Door Wreath
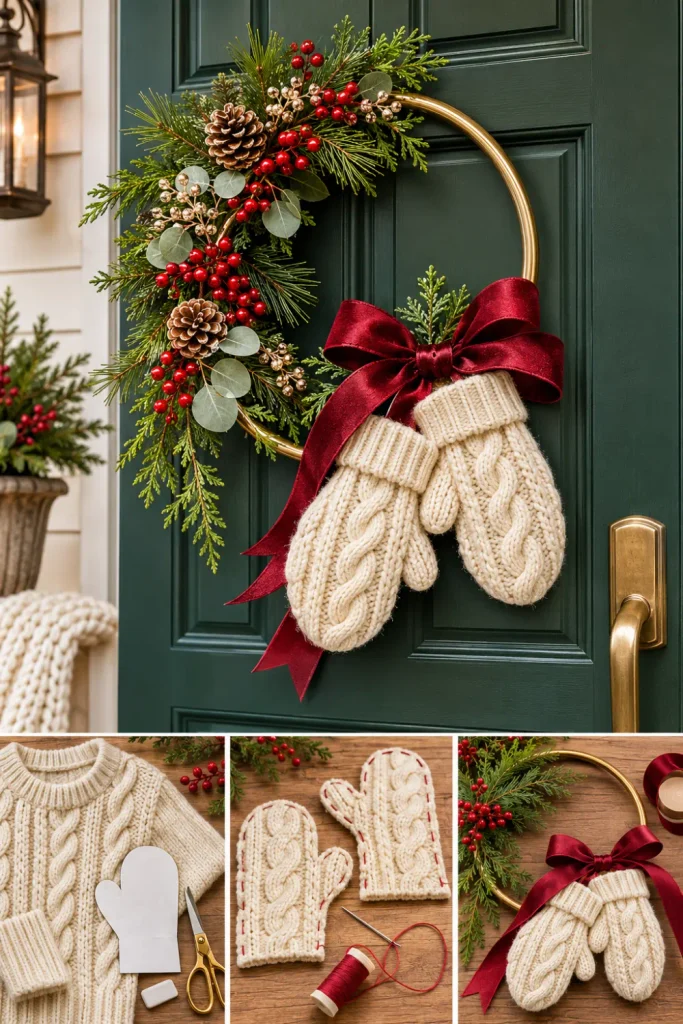
An old cable-knit sweater deserves a second life.
Its texture contrasts beautifully with a brass hoop and winter greenery.
Simple Steps:
- Cut two mitten silhouettes from a washed sweater.
- Stitch edges securely and add light stuffing.
- Tie the mittens together with a long satin ribbon.
- Fasten them to a metal hoop with faux pine and berries.
Tip: Hang under a sheltered porch to protect delicate knit fabric from rain.
5. Personalized Christmas Mitten Stocking Wall Display
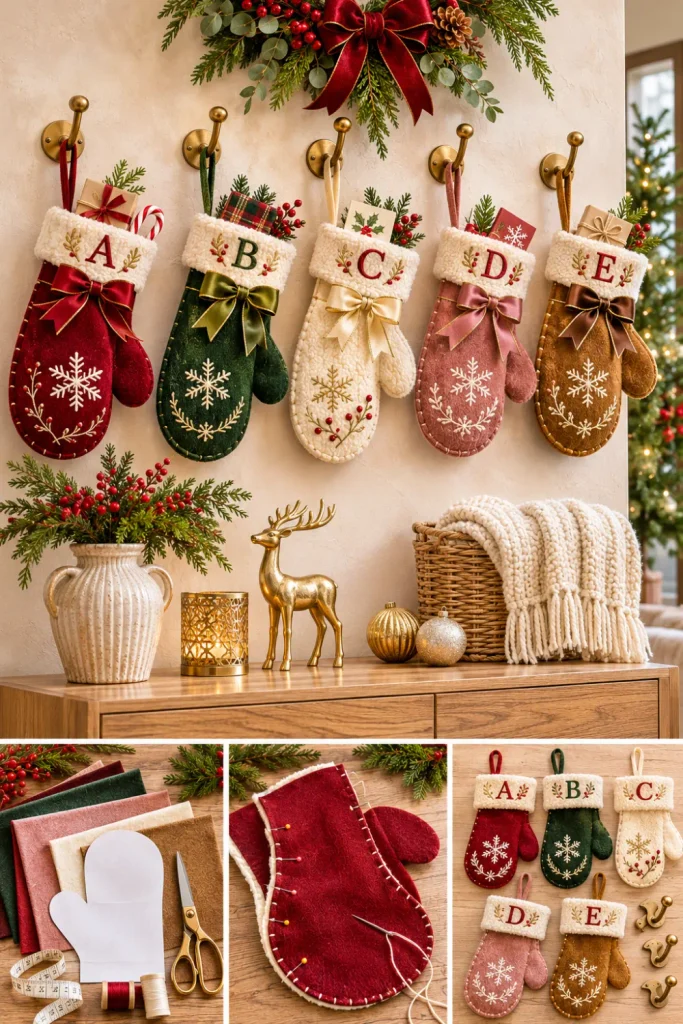
No fireplace? No problem.
A row of named mitten stockings creates a sweet focal point above a console, in a hallway, or beside the Christmas tree.
Simple Steps:
- Sew large felt or fleece mittens with open cuffs.
- Add embroidered names or iron-on letters.
- Attach sturdy hanging loops.
- Hang each mitten from individual wall hooks.
- Slip in lightweight gifts or handwritten greetings.
Tip: Match cuff colors while varying initials for a coordinated, personal finish.
6. Elegant Velvet-Ribbon Christmas Mitten Centerpiece

A dramatic ribbon can make even humble handmade mittens look luxe.
This dining-table centerpiece combines rich fabric with metallic accents and fresh winter textures.
Simple Steps:
- Fill a low wooden tray with pinecones and greenery.
- Arrange three small cream-colored mittens at different angles.
- Thread burgundy velvet ribbon through their cuffs.
- Add brass bells and flameless taper candles.
Tip: Keep the arrangement low enough for guests to see each other across the table.
7. Scandinavian Linen Christmas Mitten Table Decorations
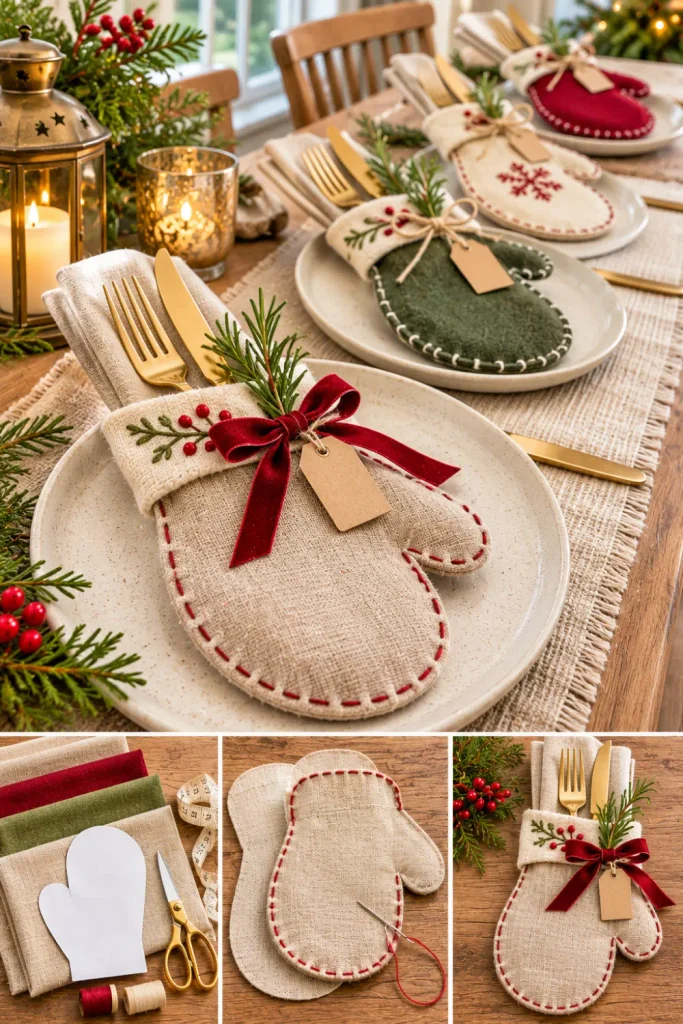
For a quieter holiday mood, try natural linen, simple stitching, and tiny evergreen sprigs.
These mitten-shaped cutlery pockets feel festive without overwhelming minimalist place settings.
Simple Steps:
- Cut two linen mitten shapes per guest.
- Sew the sides and bottom, leaving cuffs open.
- Slip folded napkins or cutlery inside.
- Tie each cuff with narrow cotton ribbon.
- Add a handwritten name tag and rosemary sprig.
Tip: Wash and press the linen first for crisp edges and a clean, understated finish.
8. Embroidered Christmas Mitten Shadow-Box Wall Art
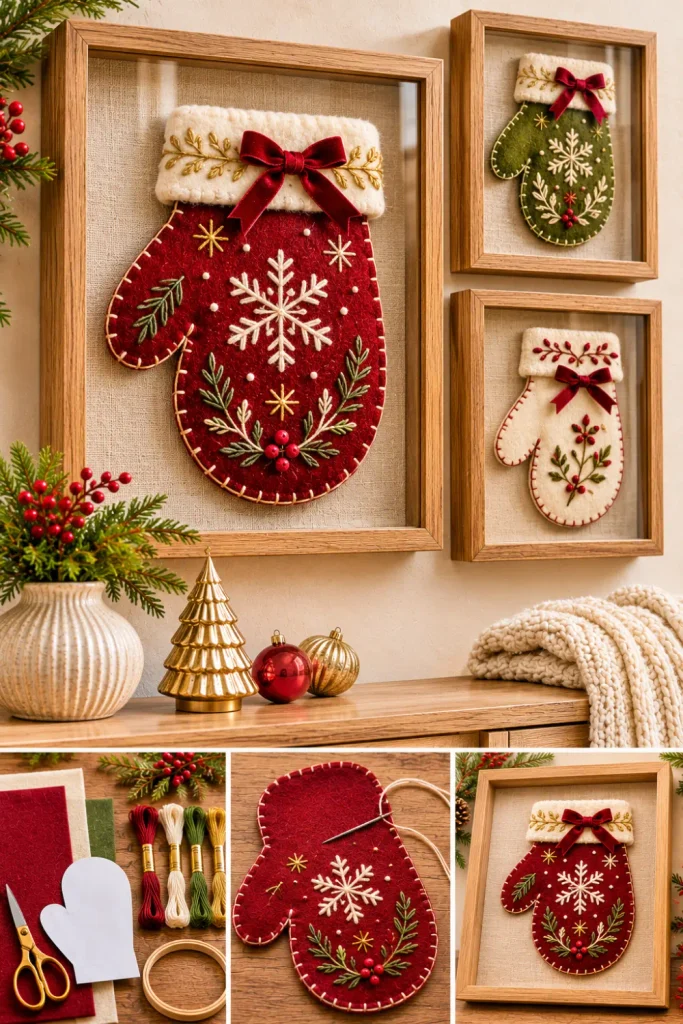
A small shadow box turns embroidery into a keepsake you’ll want to display every December.
Think delicate snowflakes, initials, and vintage-inspired stitches in modern colors.
Simple Steps:
- Cut a mitten from thick neutral felt.
- Embroider stars, snowflakes, or a family initial.
- Mount it on textured paper with archival-safe adhesive.
- Add a ribbon bow inside a deep shadow-box frame.
- Place it on a shelf or gallery wall.
Tip: Leave generous blank space around the mitten so the stitching becomes the star.
9. Colorful Patchwork Christmas Mitten Staircase Garland
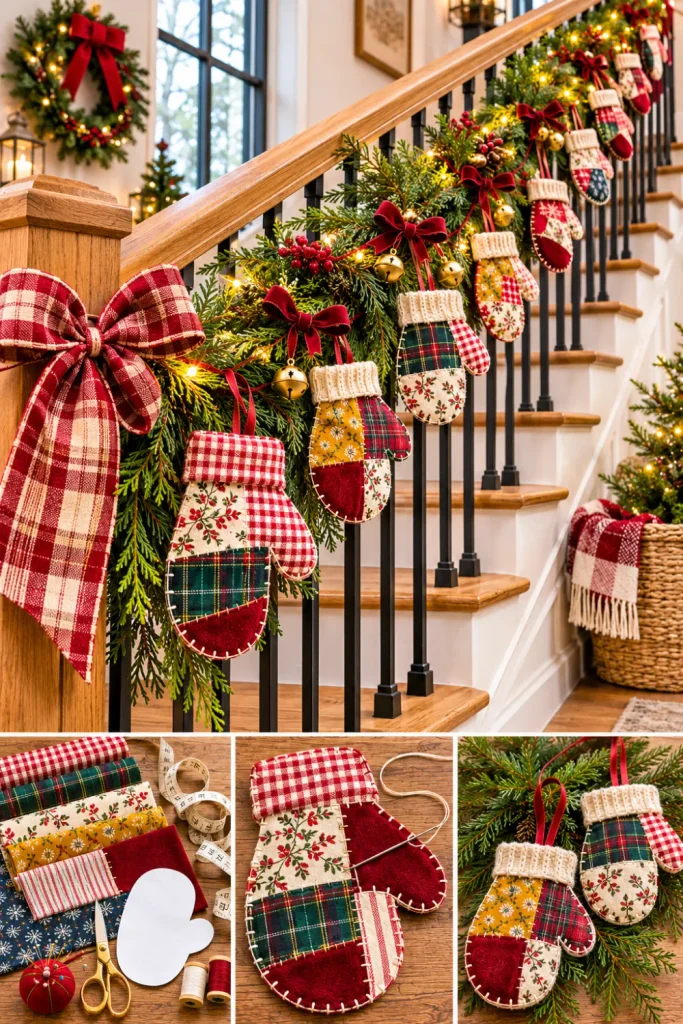
This is the cheerful, slightly mismatched project that makes a staircase pop.
Scrap fabrics become a joyful mix of checks, florals, and jewel tones.
Simple Steps:
- Sew fabric scraps into small patchwork panels.
- Trace and cut paired mitten shapes.
- Stitch, lightly stuff, and add hanging loops.
- Tie mittens to a garland secured along the banister.
- Weave in soft fairy lights for sparkle.
Tip: Secure decorations outside the handrail’s gripping area and keep stairs completely clear.
10. Cozy Christmas Mitten Entryway Welcome Basket
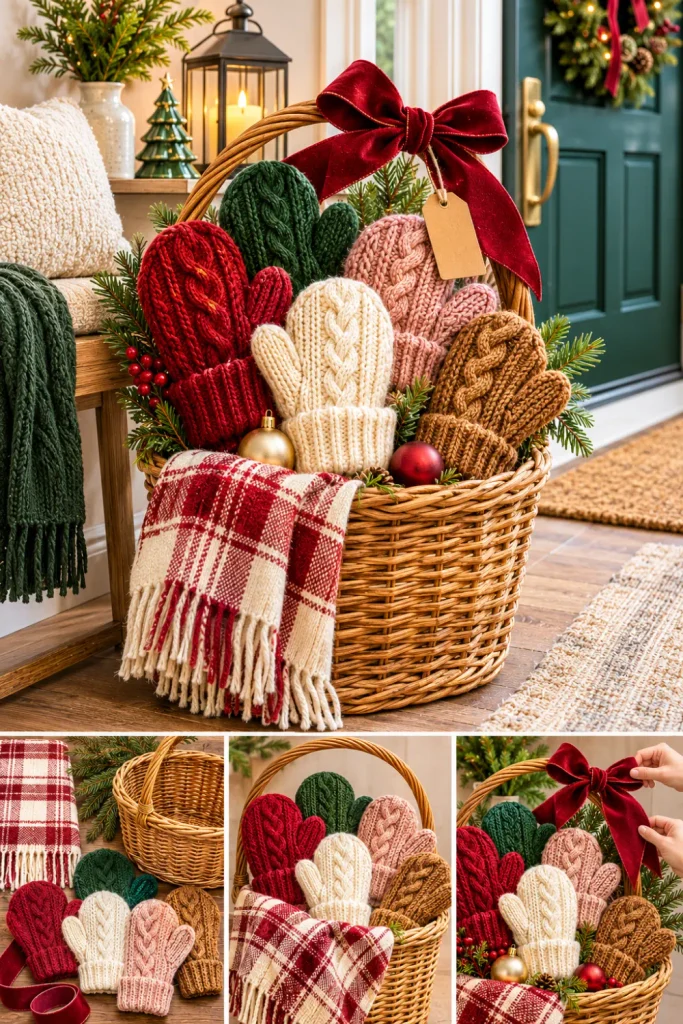
Give guests a festive hello before they even remove their coats.
A woven basket filled with oversized knitted mittens, winter branches, and ribbon creates an inviting entryway vignette.
Simple Steps:
- Place a folded plaid throw inside a sturdy basket.
- Layer in clean knitted mittens and faux cedar stems.
- Add a few shatterproof ornaments for color.
- Finish with a wide velvet bow on the handle.
- Set beside a bench without blocking the walkway.
Tip: Echo the basket’s colors in your doormat or nearby wreath for visual continuity.
Final Thoughts
The secret to beautiful DIY Christmas mitten decor is repetition with a little personality.
Pick two or three colors, reuse materials, and vary scale instead of buying supplies.
Quick Decorating Checklist:
- Start with one focal project, like the mantel garland or door wreath.
- Repeat one ribbon, fabric, or greenery detail elsewhere for cohesion.
- Photograph your finished arrangement in daylight, showing texture and a clear focal point.
Next, photograph each finished project vertically, add descriptive Pinterest pin titles, and link readers to your full DIY tutorial.