Summer is officially knocking on the door, and let’s be real: your nails are the ultimate accessory for every iced matcha latte and beach day selfie you’ve got planned.
If you’ve been scrolling through your feed and wondering how everyone is getting those ethereal, dreamy floral patterns without spending three hours in a salon chair, the secret is out.
It’s all about blooming gel. This magic-in-a-bottle allows colors to spread and melt into each other effortlessly, creating a soft-focus effect that looks incredibly high-end but is surprisingly easy to DIY at home.
In this guide, we are diving deep into the most aesthetic floral trends of the season.
You’re going to get 15 fresh, Pinterest-worthy design ideas ranging from minimalist daisies to bold tropical vibes.
Whether you’re a nail art pro or a total beginner, these looks will give you that “just stepped out of the salon” glow-up all summer long.
1. Daisy Bloom on Clear Base
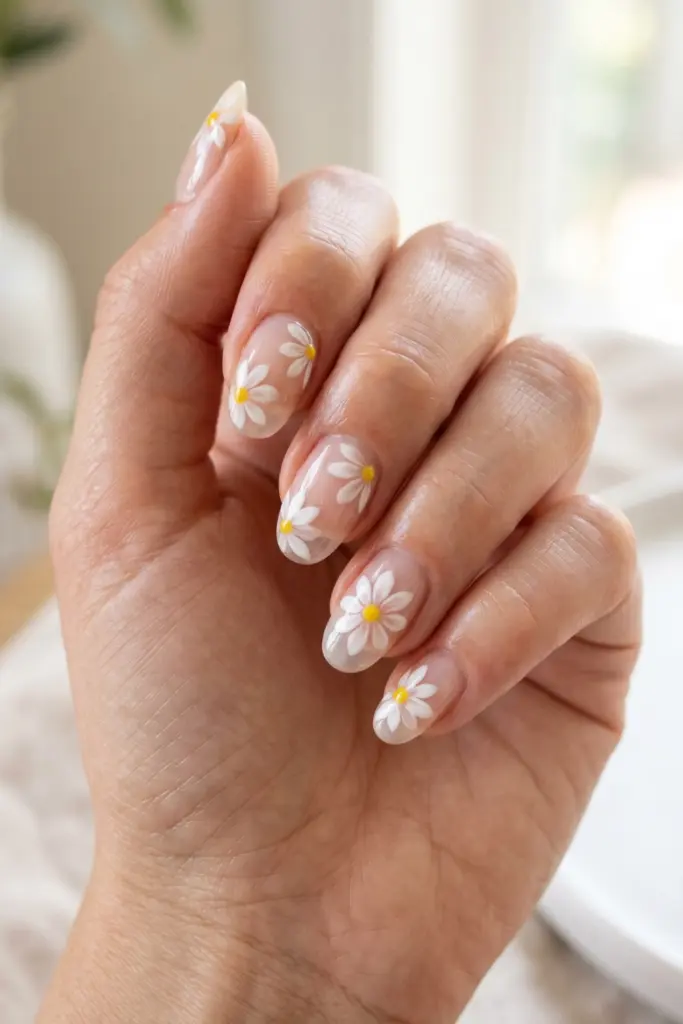
This look is the definition of the “clean girl” aesthetic with a botanical twist.
It’s airy, fresh, and perfect for anyone who wants a subtle nod to summer without a heavy color commitment.
The clear base makes the white petals pop in a way that feels modern and chic.
Steps:
- Apply a clear base coat and cure.
- Spread a thin layer of blooming gel (do not cure!).
- Use a dotting tool to place five white dots in a circle.
- Let the dots “bloom” for 30 seconds, then cure.
- Add a tiny yellow dot in the center and finish with a top coat.
Pro Tip: Use a very thin layer of blooming gel so the daisies don’t spread too far and lose their shape.
2. Pastel Tie-Dye Blooms
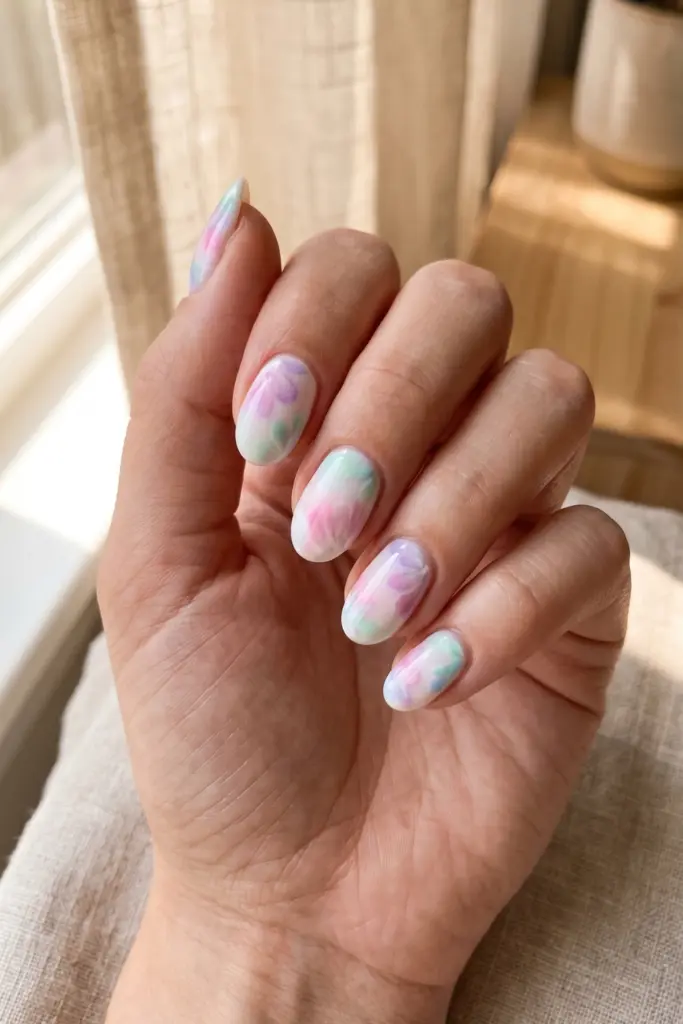
If a sunset and a wildflower field had a baby, this would be it.
This design uses soft pinks, lavenders, and mints to create a swirling, dreamy effect that looks like expensive watercolor art.
It’s playful yet sophisticated enough for a summer wedding.
Steps:
- Apply a white or nude base and cure.
- Apply your blooming gel layer.
- Drop random dots of pink, lavender, and mint onto the wet gel.
- Use a fine liner brush to lightly swirl the colors into petal shapes.
- Cure once you love the blend, then top coat.
Pro Tip: Don’t over-swirl! The beauty of tie-dye is in the organic, unforced movement of the gel.
3. Minimalist Single Bloom Accent
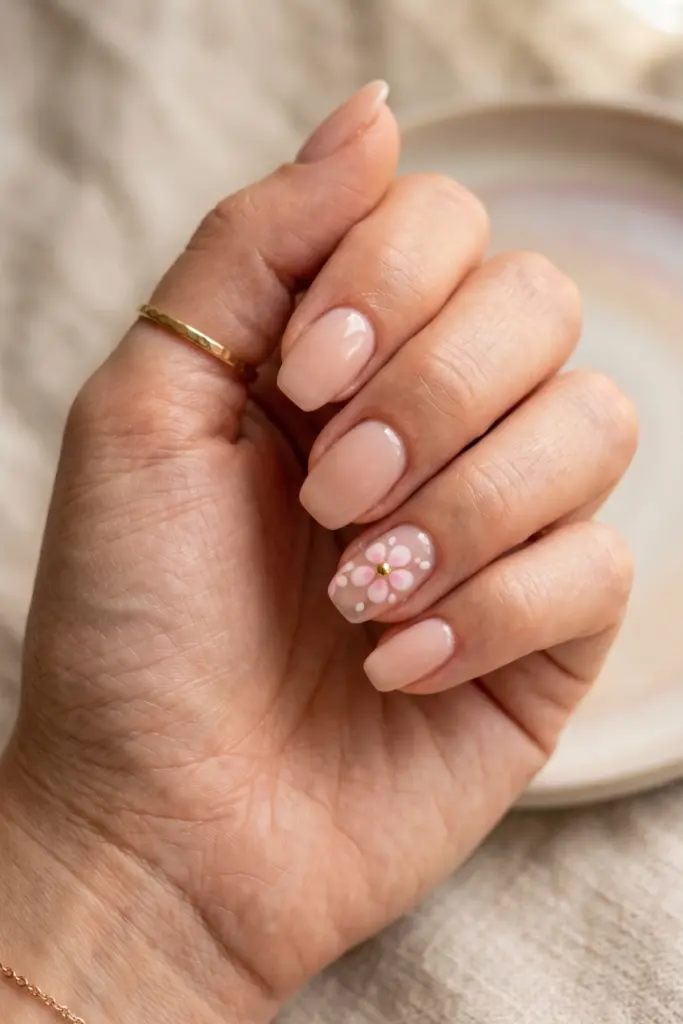
Sometimes, less really is more.
This design is for the person who loves a “quiet luxury” vibe.
By keeping four nails a simple nude and focusing all the “bloom” on the ring finger, you create a sophisticated focal point that isn’t overwhelming.
Steps:
- Paint all nails a sheer nude and cure.
- On the ring finger only, apply a layer of blooming gel.
- Place three dots of white or soft pink in a cluster.
- Wait for the “bloom” effect to expand, then cure immediately.
- Add a tiny gold stud in the center of the bloom for extra flair.
Pro Tip: Match your nude base to your skin tone to make the single bloom really stand out.
4. Cherry Blossom Pink Tips
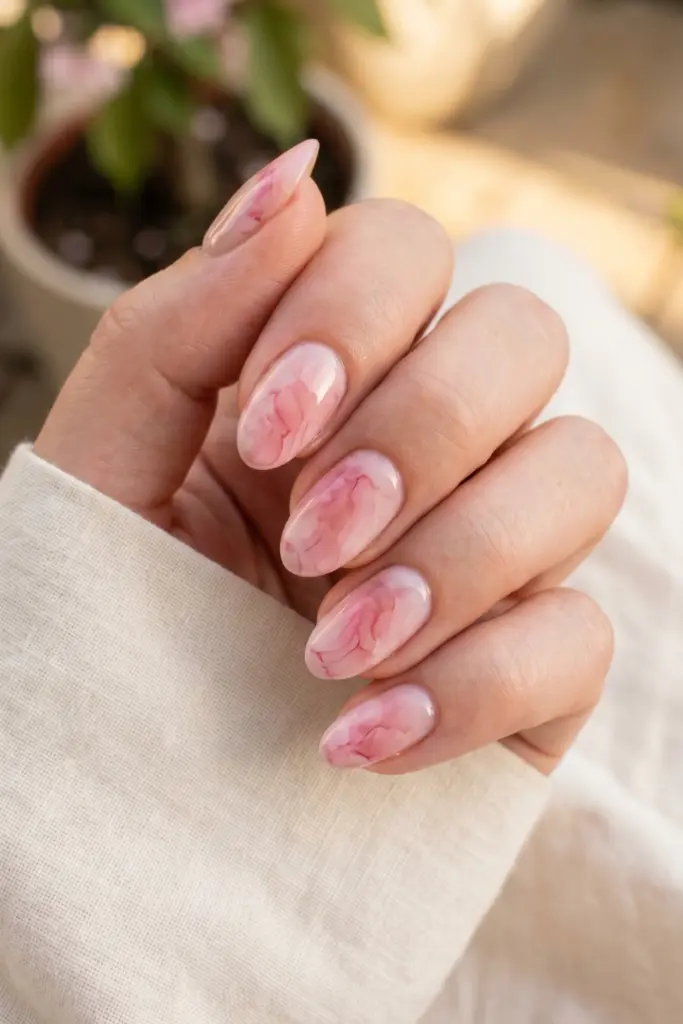
Forget the traditional French manicure; we are doing a floral upgrade.
This design places delicate pink blossoms right at the tips of your nails, mimicking the falling petals of a cherry tree in spring.
It’s romantic, feminine, and totally timeless.
Steps:
- Prep nails with a sheer pink base.
- Apply blooming gel only to the top third of the nail.
- Drop tiny specks of light and dark pink gel into the wet layer.
- Watch them fan out toward the edges, then cure.
- Seal the look with a high-shine top coat.
Pro Tip: Apply the blooming gel with a gradient “faded” edge toward the middle of the nail for a softer look.
5. Sunflower Yellow Petals
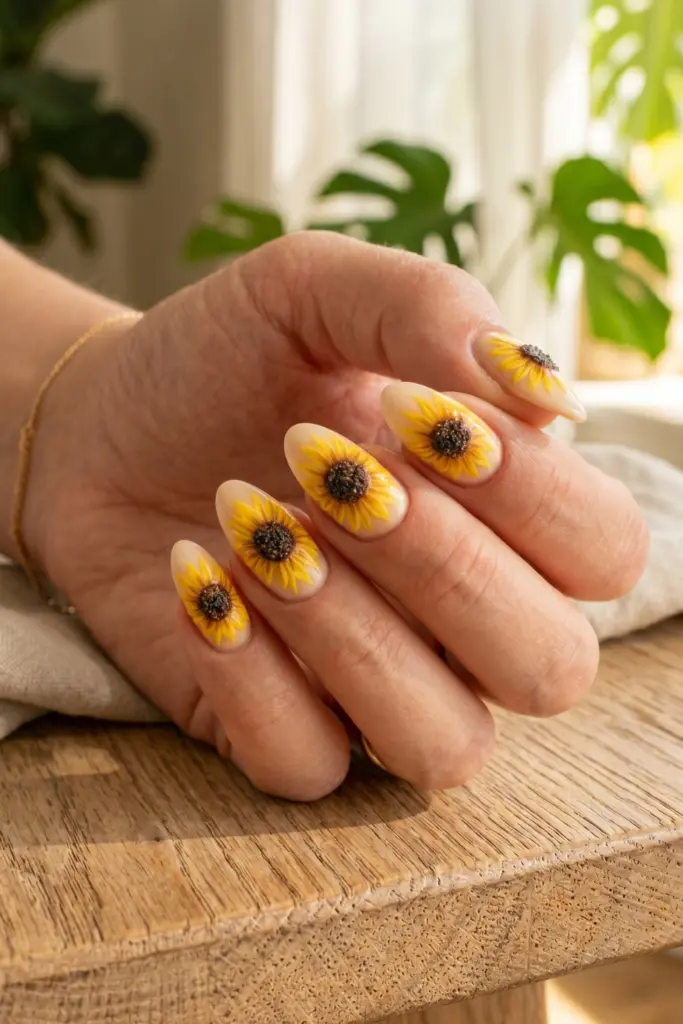
Nothing says summer like a sunflower.
These bright yellow petals against a neutral base bring instant happiness to your fingertips.
It’s a bold, cheerful design that pairs perfectly with denim shorts and a white linen top.
Steps:
- Apply a creamy beige base and cure.
- Coat the nail in blooming gel.
- Use a bright yellow gel to create long, thin teardrop shapes in a circle.
- Once the petals soften at the edges, cure.
- Use a dark brown or black dotting tool to create a textured center.
Pro Tip: Use a toothpick to drag the yellow gel outward for pointier, more realistic petals.
6. Lavender Field Ombre
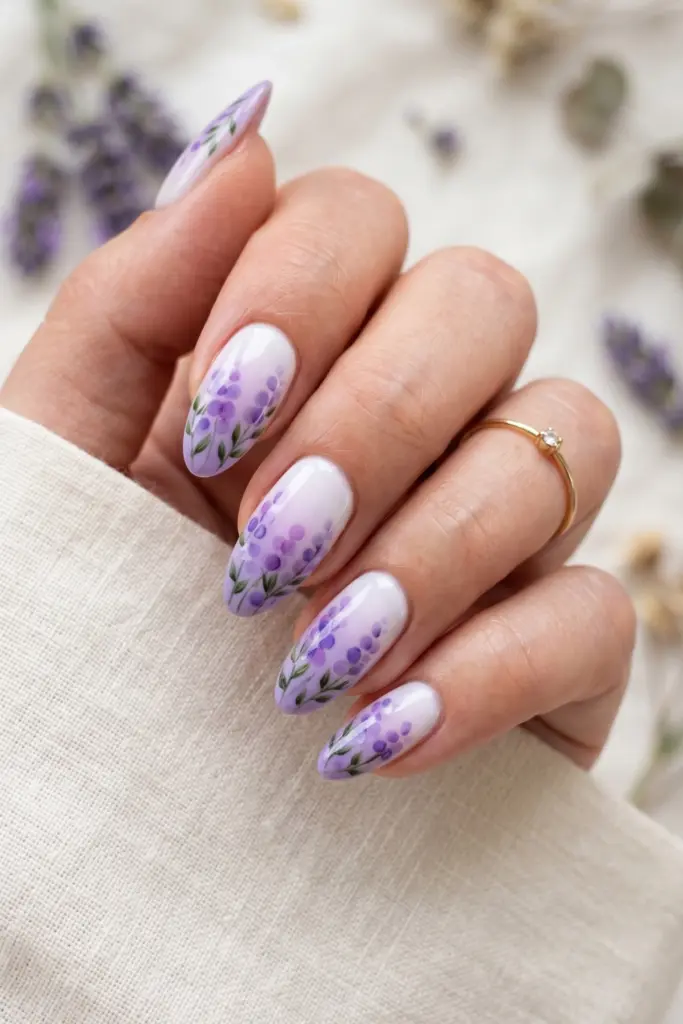
Imagine walking through the French countryside—that’s the vibe here.
The purple-to-white ombre provides a soft, hazy background for scattered lavender blooms.
It’s a very soothing aesthetic that works beautifully on longer nail shapes like almond or coffin.
Steps:
- Create a vertical ombre using white and soft purple gel, then cure.
- Apply a layer of blooming gel over the entire nail.
- Dot various shades of purple in small clusters.
- Allow the clusters to bleed into one another, then cure.
- Add a few tiny green leaves using a detail brush.
Pro Tip: Keep the ombre subtle so it doesn’t compete with the blooming lavender petals.
7. Tropical Hibiscus Flowers
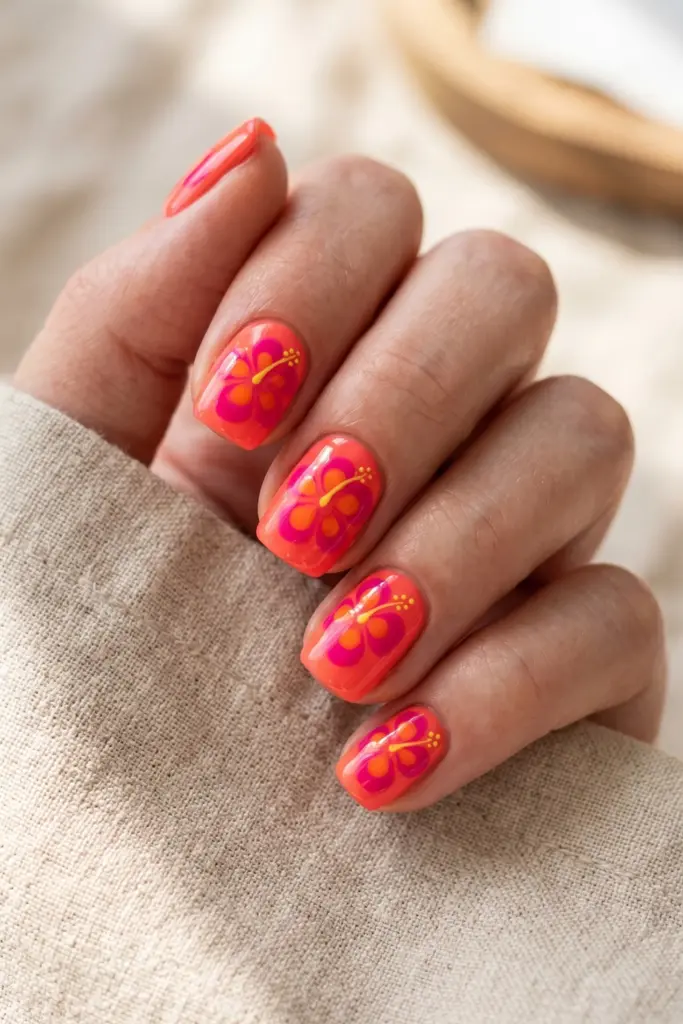
Ready for a vacation?
This design uses bold fuchsia and orange to mimic the vibrant life of a tropical island.
It’s energetic, loud, and looks incredible against a summer tan. It’s basically a margarita in nail form.
Steps:
- Apply a bright coral base and cure.
- Apply a generous layer of blooming gel.
- Drop large circles of fuchsia, then drop a smaller orange circle inside the fuchsia.
- Let the colors melt together into a “fiery” bloom, then cure.
- Add a long, thin yellow line for the hibiscus stamen.
Pro Tip: Work on one or two nails at a time so the colors don’t bleed too much while you’re working on the other fingers.
8. Baby’s Breath Dotted Blooms
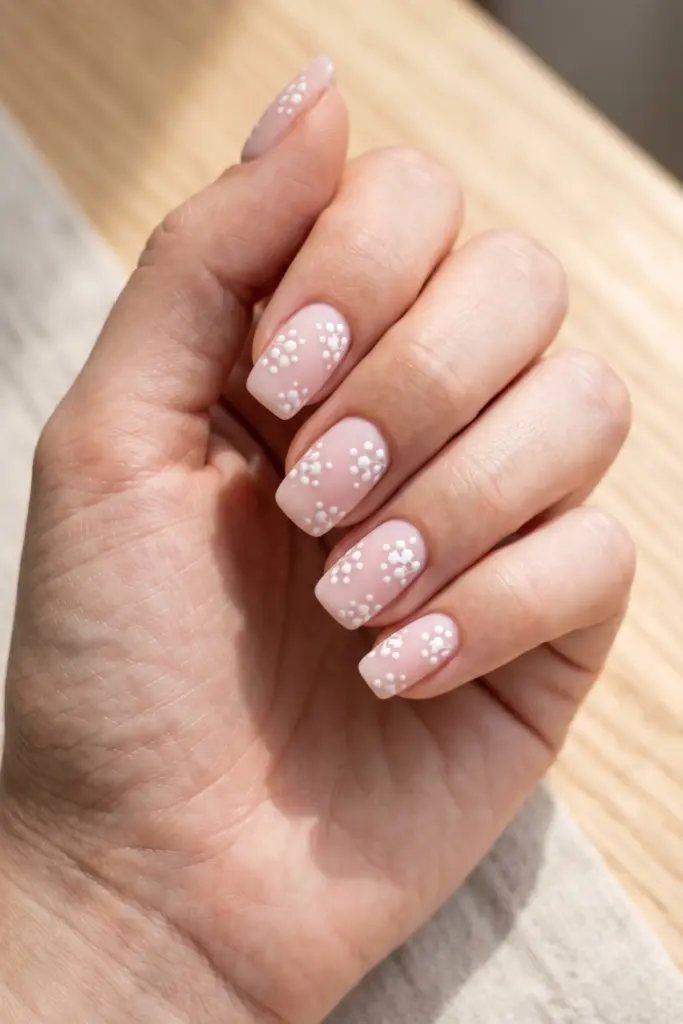
This is for the lovers of all things “cottagecore.”
It’s incredibly dainty and sweet.
By using tiny white dots on a sheer pink base, you create a look that is reminiscent of a bridal bouquet or a field of baby’s breath.
Steps:
- Apply two coats of sheer, milky pink and cure.
- Apply blooming gel.
- Use the smallest dotting tool you have to make tiny white “clouds” of dots.
- Wait just 5-10 seconds (you want minimal spreading here) and cure.
- Finish with a matte top coat for a soft, velvety feel.
Pro Tip: A matte finish makes these tiny flowers look much more realistic and delicate.
9. Rose Gold Foil Flowers
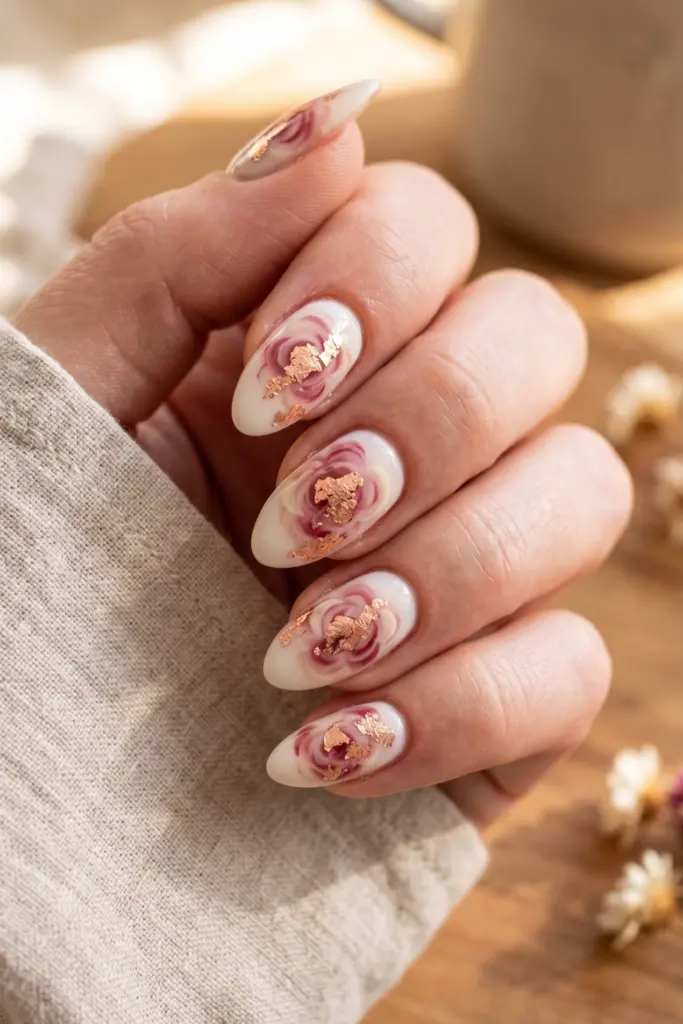
If you like a bit of “glam” with your garden, this is the one.
Blooming roses are already stunning, but adding rose gold foil takes them to a whole new level of luxury.
It’s perfect for an evening event or a summer gala.
Steps:
- Apply a soft white or cream base and cure.
- Apply blooming gel.
- Swirl red or deep pink gel in a circular motion to create a “rose” look.
- Cure once the “petals” look soft.
- Press small flakes of rose gold foil into the sticky layer, then top coat.
Pro Tip: Use a lint-free wipe to press the foil down flat so your top coat stays perfectly smooth.
10. Watercolor Blue Blooms
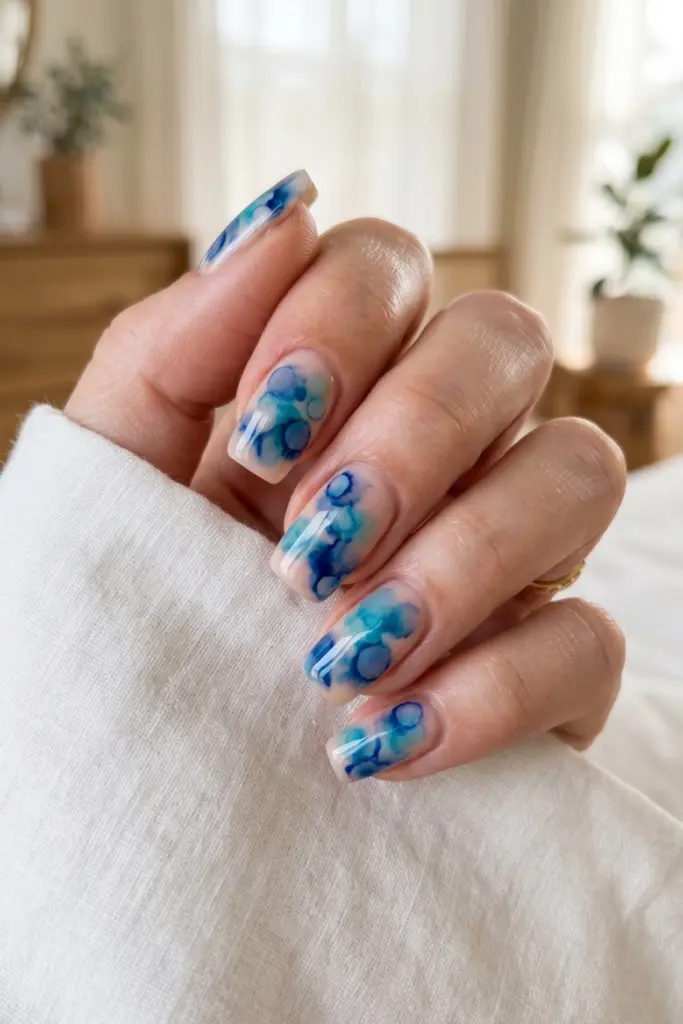
Cool down the summer heat with these ocean-inspired blues.
This design feels like looking into a clear Mediterranean pool.
The teal and blue shades melt together on a nude base for a sophisticated, “artsy” vibe.
Steps:
- Apply a nude base that matches your nail bed and cure.
- Apply blooming gel.
- Drop navy blue, sky blue, and teal in overlapping circles.
- Use a brush dipped in a little alcohol or base coat to help “blur” the edges further before curing.
- Top coat for a glass-like finish.
Pro Tip: Layering different shades of the same color creates depth that makes the “watercolor” look more authentic.
11. Neon Coral Flower Power
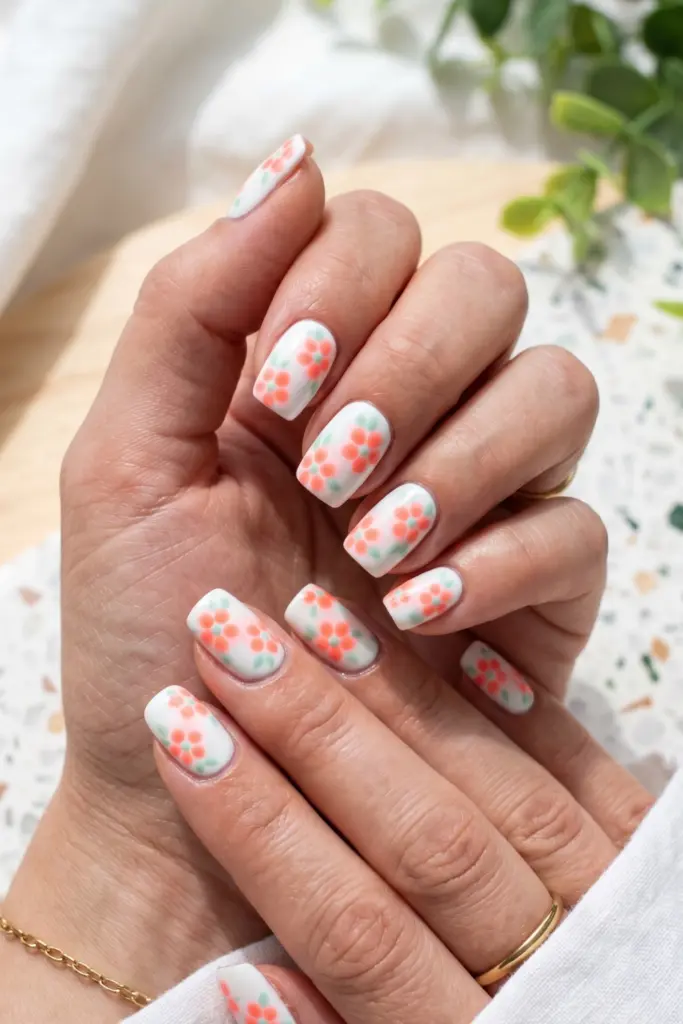
Neon is a summer staple, but it can sometimes feel a bit “too much.”
Using blooming gel to create neon coral flowers softens the intensity while keeping the fun.
The addition of tiny green leaf dots makes the whole look pop.
Steps:
- Apply a white base (this makes neons look brighter!) and cure.
- Apply blooming gel.
- Place bright coral dots in a flower pattern.
- Quickly add tiny green dots at the base of the “flowers” and let them bleed together.
- Cure and apply a high-gloss top coat.
Pro Tip: Don’t be afraid to let the coral and green touch; the slight bleed makes it look like a real garden!
12. White Petal Negative Space
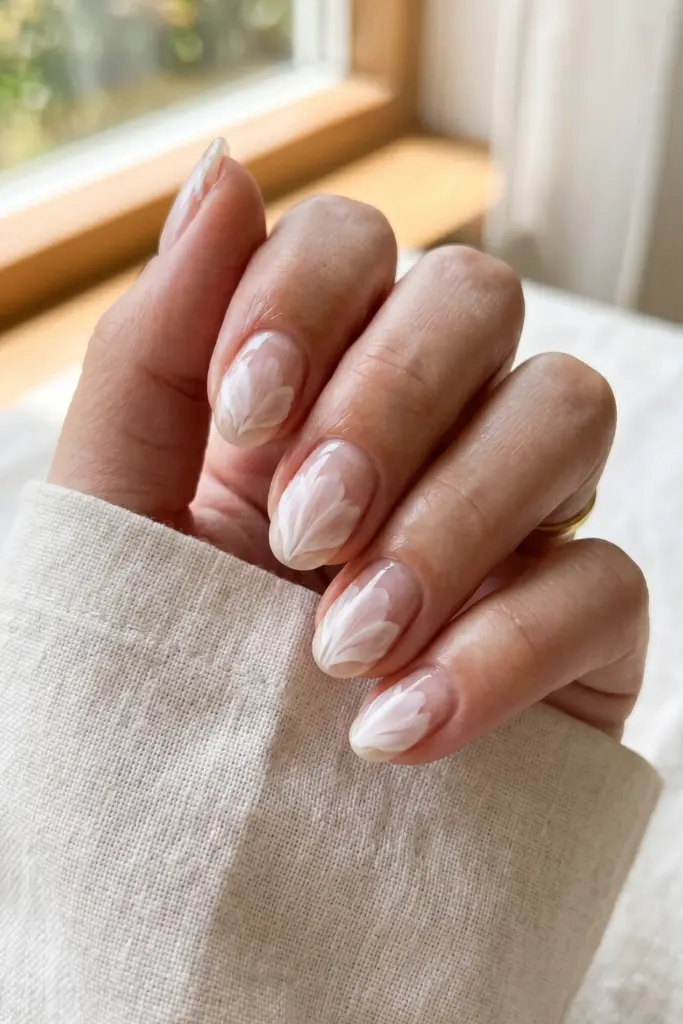
Negative space designs are always a hit because they grow out so seamlessly.
By placing white blooming petals only along the cuticle line, you create a “framed” look that is incredibly modern and unique.
Steps:
- Apply a clear base or a very sheer nude and cure.
- Apply blooming gel only in a “U” shape around the cuticle area.
- Drop white gel into the wet “U” shape and let it fan outward toward the tip.
- Cure once you have a soft, feathery look.
- Finish with a top coat to seal the edges.
Pro Tip: This look is great for shorter nails, as it draws the eye toward the base, making the nail bed look longer.
13. Peach Blossom Gradient
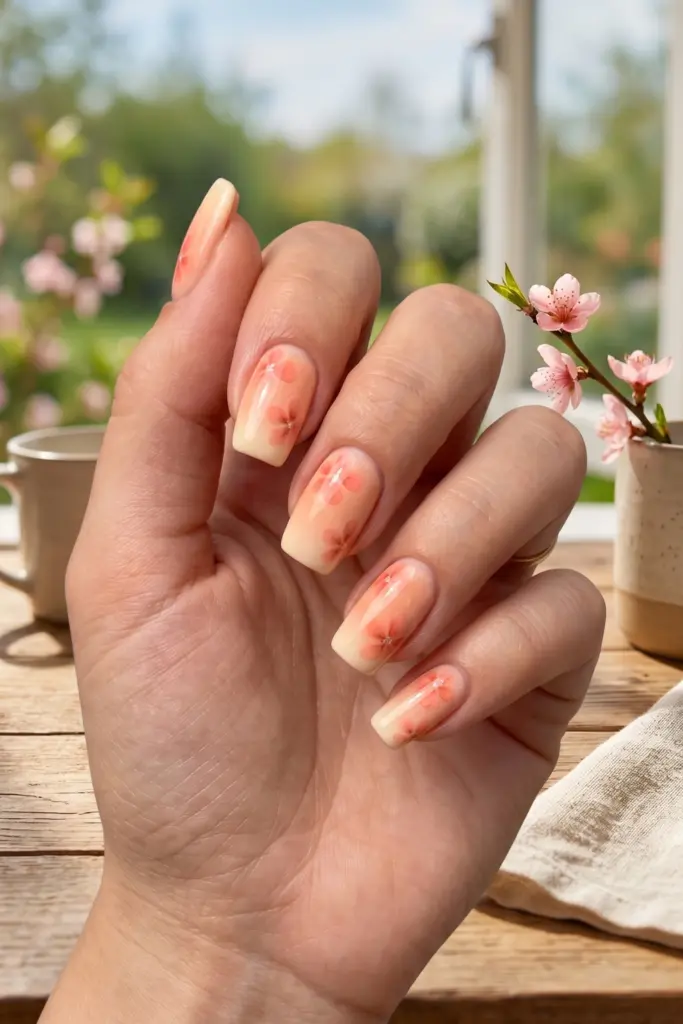
Peach is the “it” color for summer, and for good reason.
It’s universally flattering.
This gradient look starts with a peach-to-cream transition, topped with soft blossoms that look almost like they’re glowing from within.
Steps:
- Sponge on a peach and cream gradient and cure.
- Apply a layer of blooming gel.
- Use a slightly darker orange-pink to create small, five-petaled flowers.
- Let them spread until they look hazy, then cure.
- Top coat with a shimmer finish for extra summer glow.
Pro Tip: Use a makeup sponge for the gradient to get the smoothest transition possible.
14. Mint Green Leafy Blooms
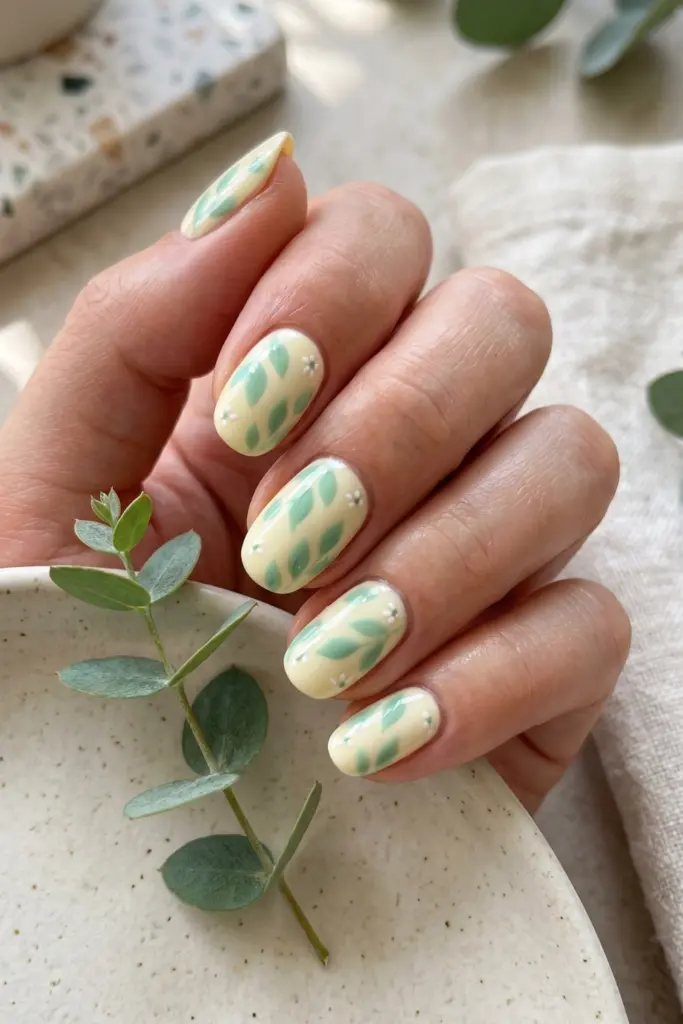
This design is like a breath of fresh air.
It moves away from traditional “petals” and focuses more on the leafy, botanical side of a garden.
It’s earthy, cool, and looks amazing with gold jewelry.
Steps:
- Apply a pale yellow base and cure.
- Apply blooming gel.
- Use mint green to create leaf shapes (think elongated ovals).
- Drop tiny white specks in between the leaves to act as “tiny blooms” and cure.
- Top coat and enjoy the botanical vibes.
Pro Tip: Vary the size of the leaves to make the design look more organic and less “stamped” on.
15. Purple Orchid Swirls
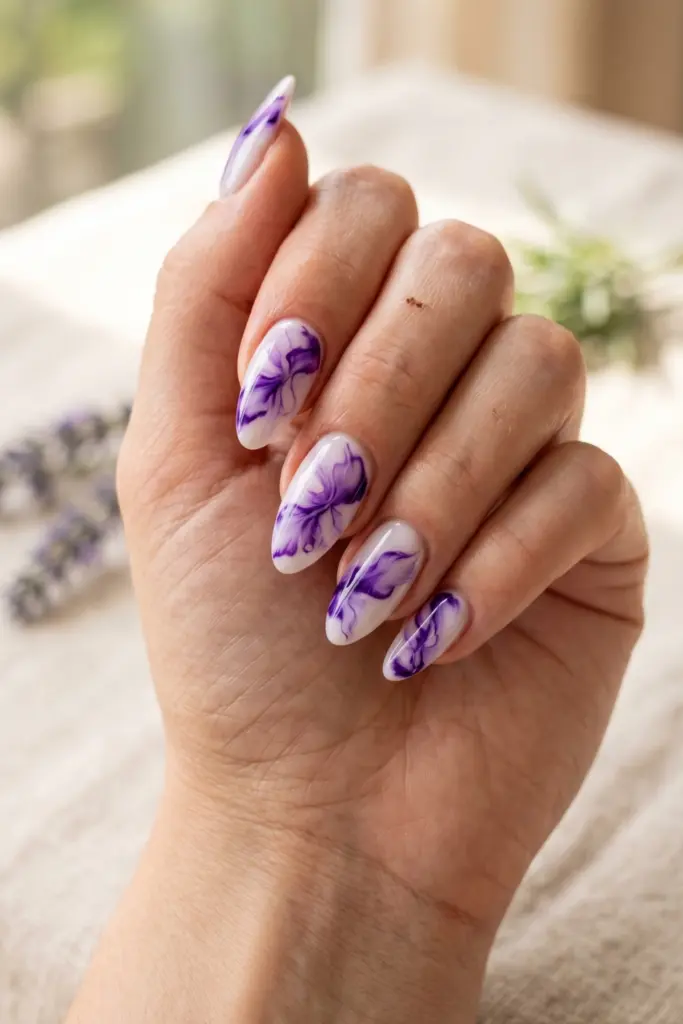
Orchids are the height of elegance, and this design captures their intricate beauty perfectly.
Against a milky white base, the deep purple swirls create a high-contrast look that is both dramatic and classy.
Steps:
- Apply two coats of milky white gel and cure.
- Apply blooming gel.
- Use a fine brush to “wiggle” deep purple and lavender lines across the nail.
- Wait for the lines to soften into orchid-like “veins,” then cure.
- Top coat for a professional, marble-meets-floral finish.
Pro Tip: Keep the swirls thin; they will expand significantly in the blooming gel!
Final Thoughts
The beauty of blooming gel is that there are no mistakes—only “happy accidents.”
Every time you use it, the result is slightly different, which is exactly what gives it that hand-painted, artisan feel.
If your flowers spread a little too much, call it “abstract art.”
If they don’t spread enough, call it “detailed minimalism.”
The key to a long-lasting summer mani is all in the prep.
Make sure you’re cleaning your cuticles and buffing the nail surface before you start.
And honestly?
Don’t be afraid to mix and match these designs!
A “lavender field” thumb with “baby’s breath” fingers would be a total vibe. Now, go grab your gels and start blooming!
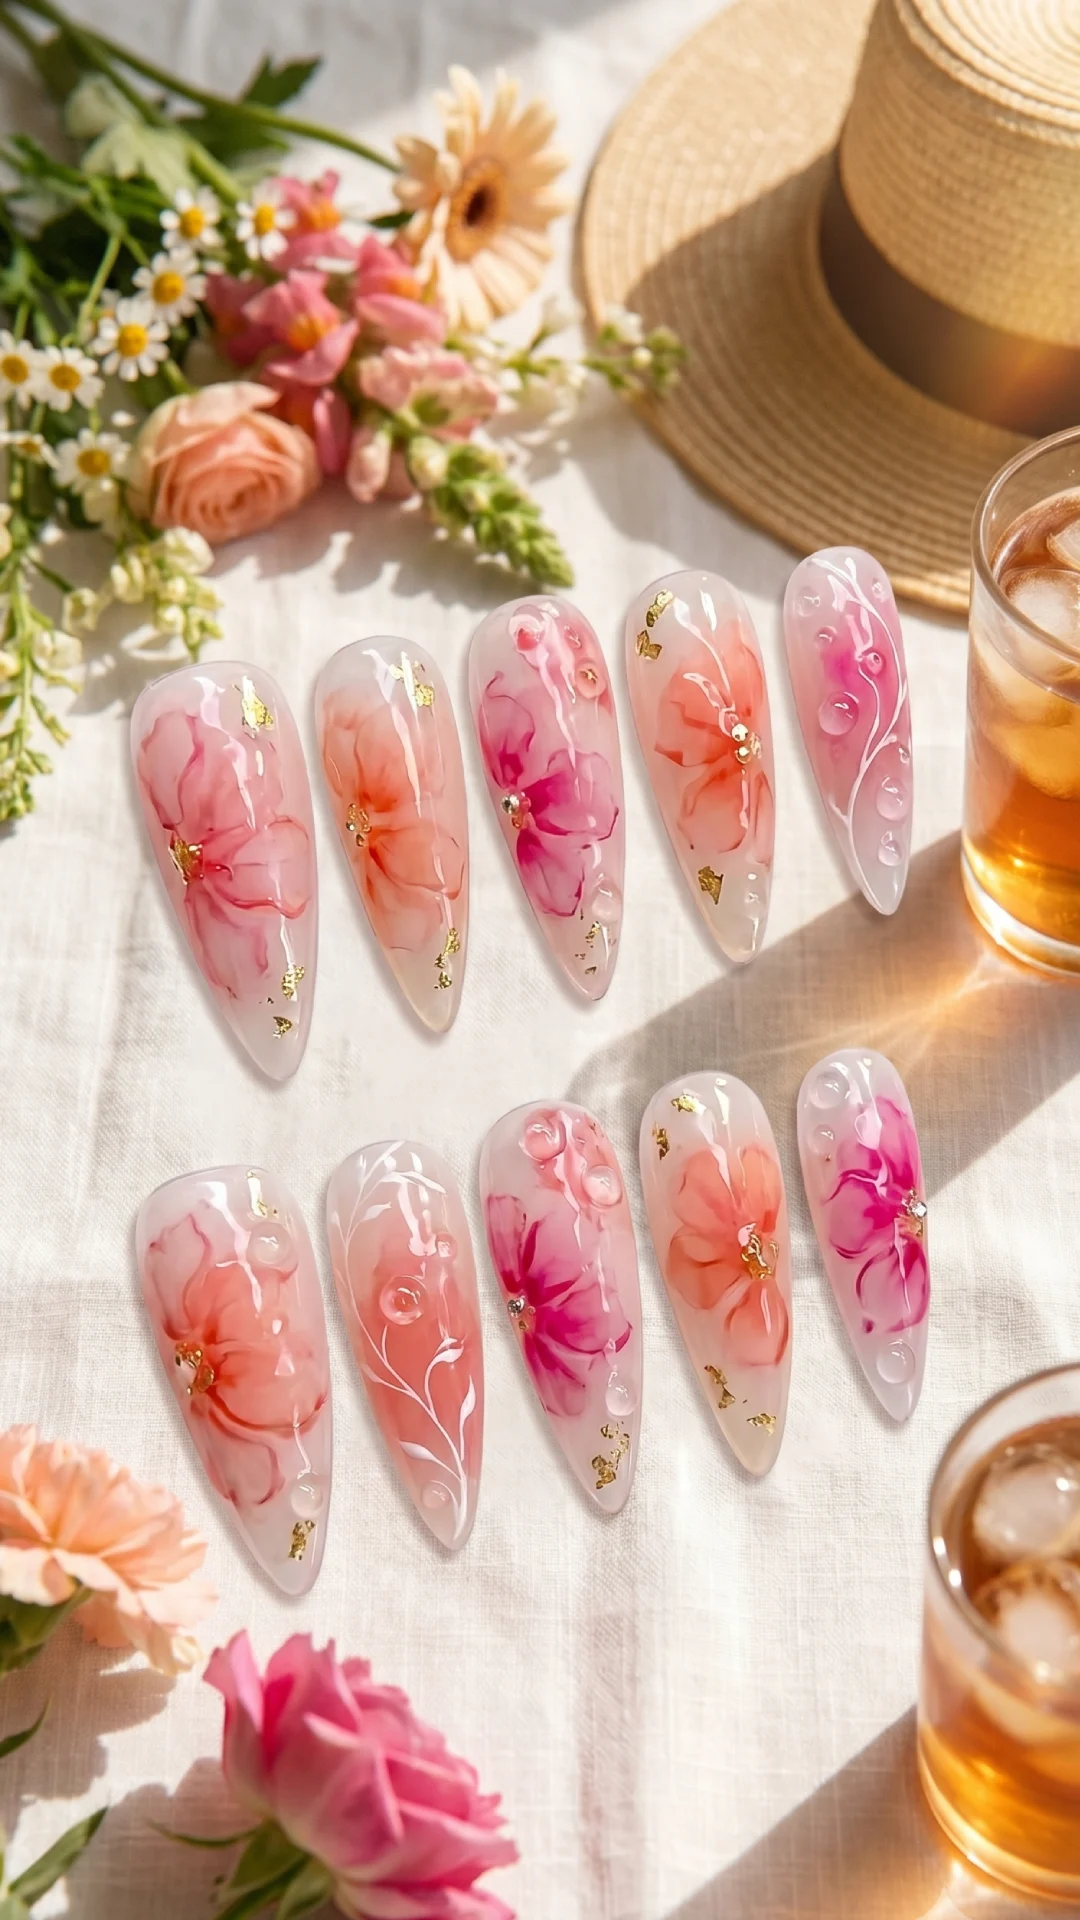
Simple Blooming Gel Summer Nail Designs for Effortless Summer Style
Discover the prettiest simple blooming gel summer nail designs that bring fresh floral vibes to your manicure. Perfect for sunny days, these nail ideas combine soft pastel shades with blooming gel artistry for a chic seasonal look. #SummerNails #BloomingGel #NailDesignIdeas
Pin it on Pinterest