Back-to-school season is the perfect excuse to refresh your manicure with richer colors, playful patterns, and polished little details.
These trendy fall-inspired back-to-school nail design ideas blend cozy autumn style with youthful, classroom-ready charm.
From classic plaid to sparkling jewel tones, you’ll find wearable inspiration, easy step-by-step ideas, and practical tips to help your nails look effortlessly put together.
1. Plaid & Prep (The Classic Argyle)
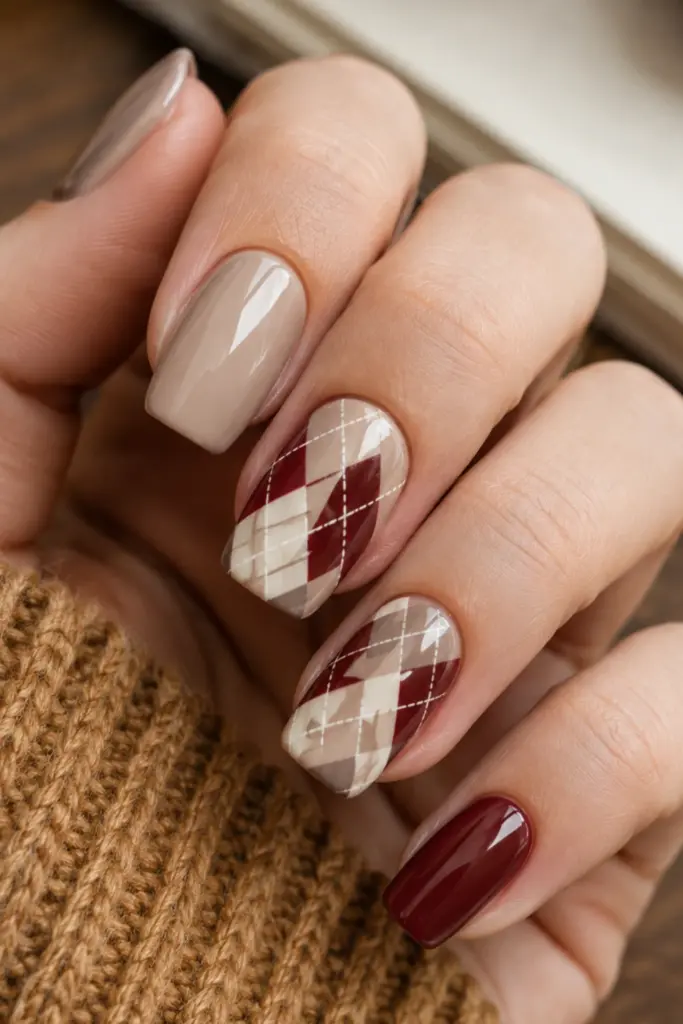
Nothing says polished back-to-school style quite like plaid.
Argyle adds a preppy twist while keeping the manicure distinctly autumnal.
How to create it:
- Apply a nude or beige base.
- Add thin diagonal lines in burgundy and cream.
- Layer a second diagonal line to create diamond shapes.
- Finish with tiny intersecting accents.
Tip: Keep the lines thin and slightly imperfect for a softer handmade look.
Final thought: This design works beautifully on short square or almond nails and pairs especially well with sweaters, cardigans, and loafers.
2. Rustic Orange & Gold Foil (The Gilded Pumpkin)
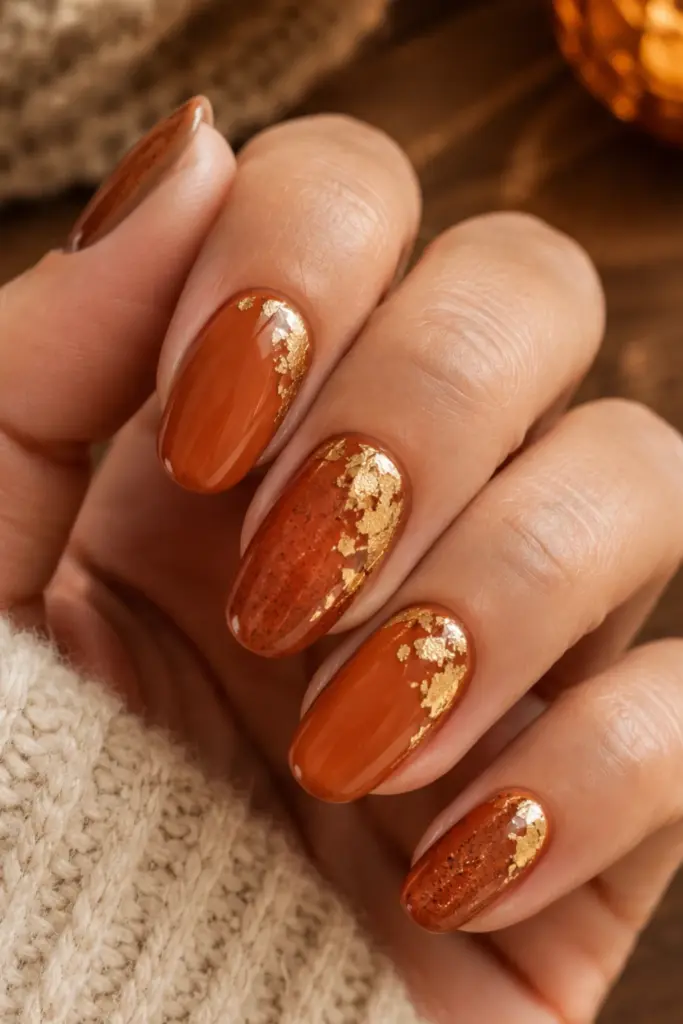
Turn pumpkin-inspired orange into something sophisticated with delicate metallic touches.
How to create it:
- Paint each nail a warm burnt-orange shade.
- Apply random pieces of gold foil near the cuticle or sidewall.
- Add a glossy top coat.
- Leave some foil edges intentionally irregular.
Tip: Choose a coppery orange instead of a bright pumpkin shade for a more grown-up finish.
Final thought: Gold foil catches the light beautifully, making this a fun choice for the first week of school without feeling overly festive.
3. Matte Olive Green with Snakeskin Accents (The Edgy Scholar)
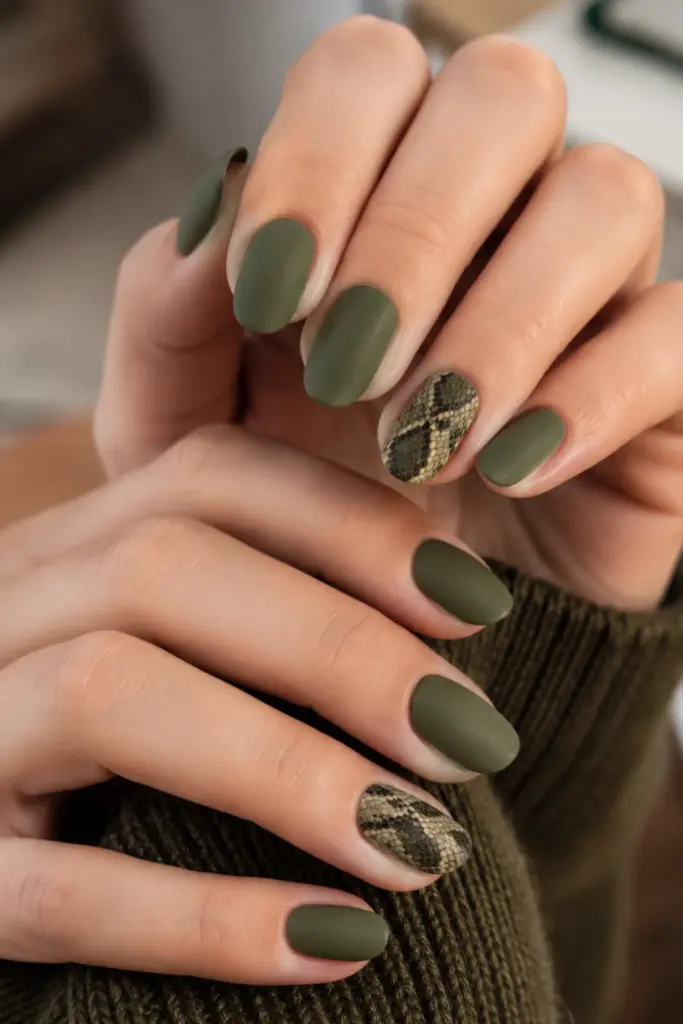
Olive green feels earthy, trendy, and surprisingly versatile.
Adding snakeskin creates just enough attitude.
How to create it:
- Apply matte olive polish to most nails.
- Paint one or two accent nails in a lighter green or nude.
- Add a delicate snakeskin pattern using a fine brush.
- Seal the accent design carefully.
Tip: Use darker olive shades for a moodier autumn aesthetic.
Final thought: The mix of texture and color makes this manicure stand out while still looking polished enough for everyday school outfits.
4. Moody Maroon & Burnt Orange Swirls (The Autumn Marble)
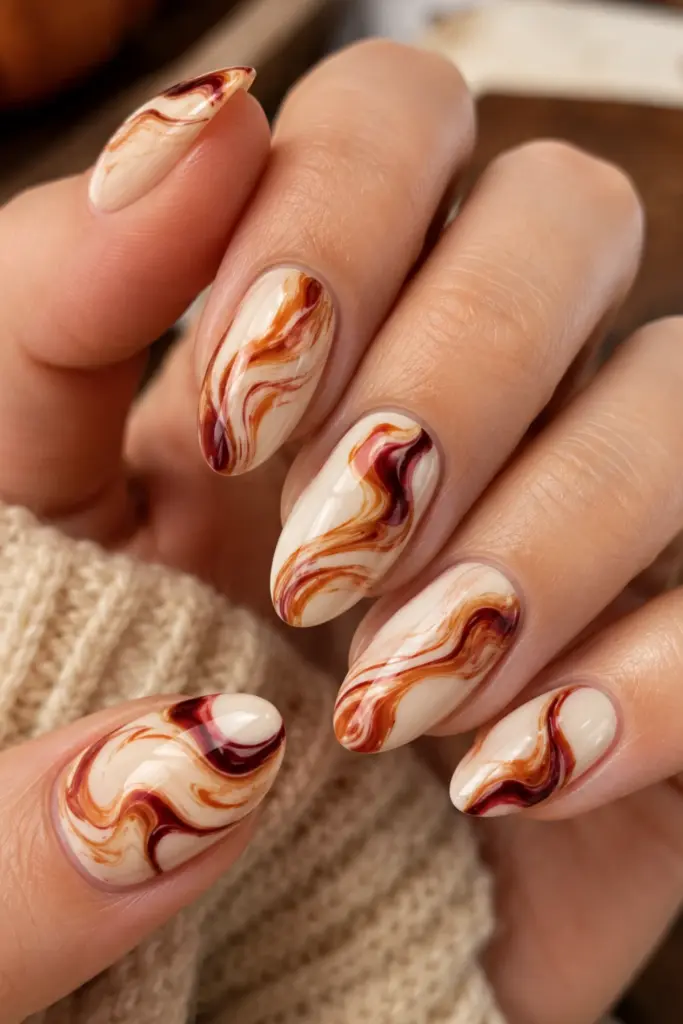
Swirled colors create a flowing marble effect that looks complicated but is surprisingly approachable.
How to create it:
- Start with a warm cream base.
- Add thin curved lines of maroon and burnt orange.
- Gently swirl them with a detailing brush.
- Add a glossy finish.
Tip: Avoid overworking the colors. A few clear sections of base color help the swirls look intentional.
Final thought: This is a great transitional manicure when summer is fading but autumn weather has not fully arrived.
5. Minimalist Nude with Dried Florals (The Pressed Petal)
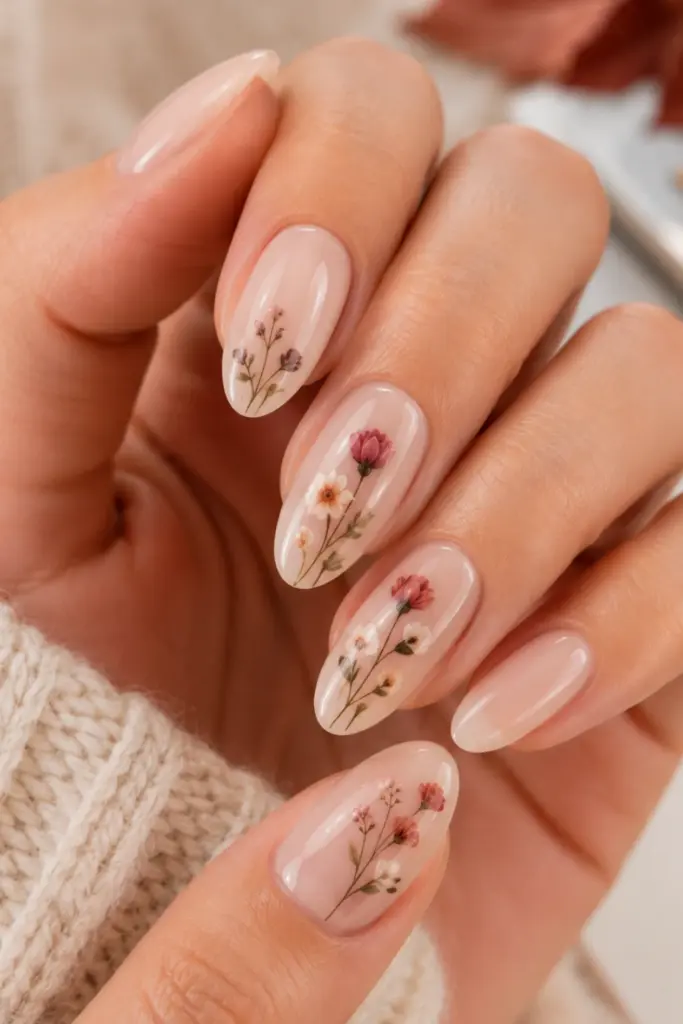
For a quieter look, combine sheer nude polish with tiny botanical details.
How to create it:
- Apply a sheer pink or nude base.
- Paint small dried-flower-inspired stems.
- Add tiny petals in muted rust, mauve, or cream.
- Finish with a soft, glossy topcoat.
Tip: Place the flowers off-center instead of covering the entire nail.
Final thought: This delicate style is perfect for students who love feminine nails but prefer something subtle.
6. Chocolate Brown & Baby Blue Contrast (The Color Block)
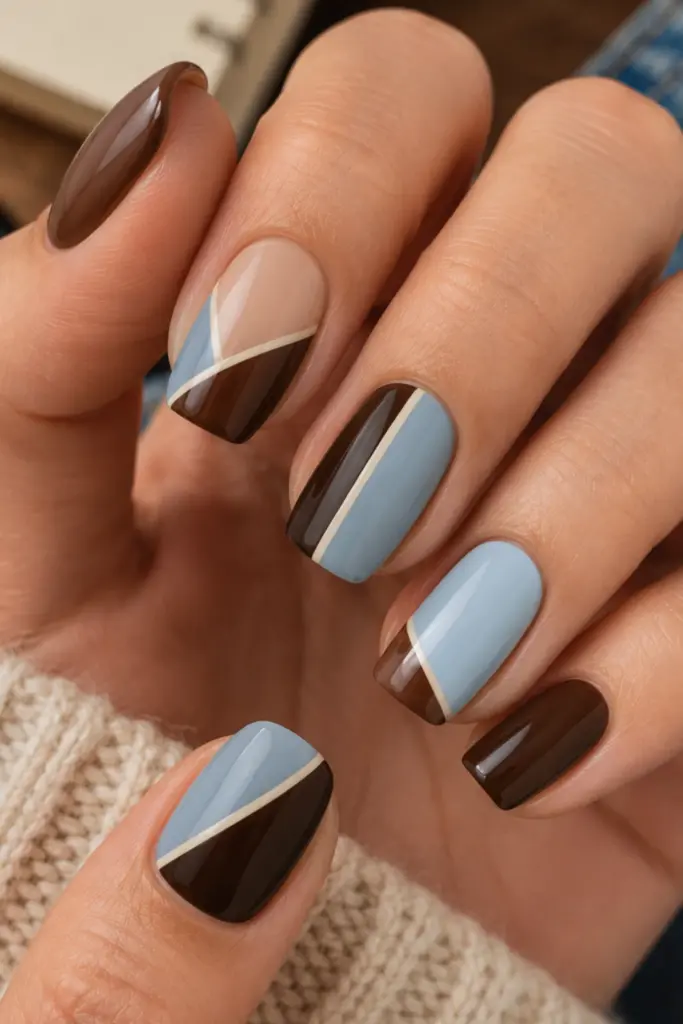
Unexpected color combinations can make a simple manicure feel fresh.
Chocolate brown and baby blue are especially cute together.
How to create it:
- Divide each nail into two geometric sections.
- Fill one side with chocolate brown.
- Fill the other with baby blue.
- Add a clean nude or cream separator line if desired.
Tip: Use a fine striping brush for crisp edges.
Final thought: The contrast feels modern and playful, making it easy to coordinate with denim, knits, and neutral school basics.
7. Silver Chrome & Deep Purple (The Galaxy Storm)
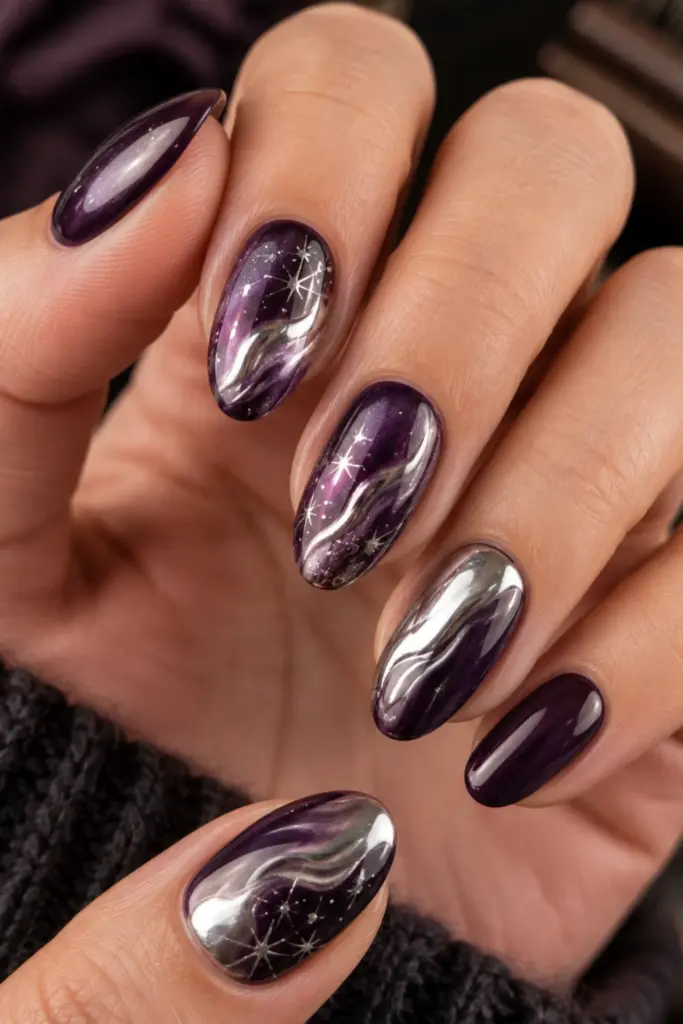
Deep purple instantly gives nails a mysterious autumn mood, while silver chrome adds a futuristic edge.
How to create it:
- Apply deep purple polish.
- Add small chrome details to selected nails.
- Create wispy starburst or cloud-like accents.
- Seal with a high-shine top coat.
Tip: Keep chrome concentrated on one or two nails so the manicure stays balanced.
Final thought: This look is ideal for anyone who wants something bolder than classic fall colors without going completely over the top.
8. Warm Taupe with Leopard Print Tips (The Fierce Neutrals)
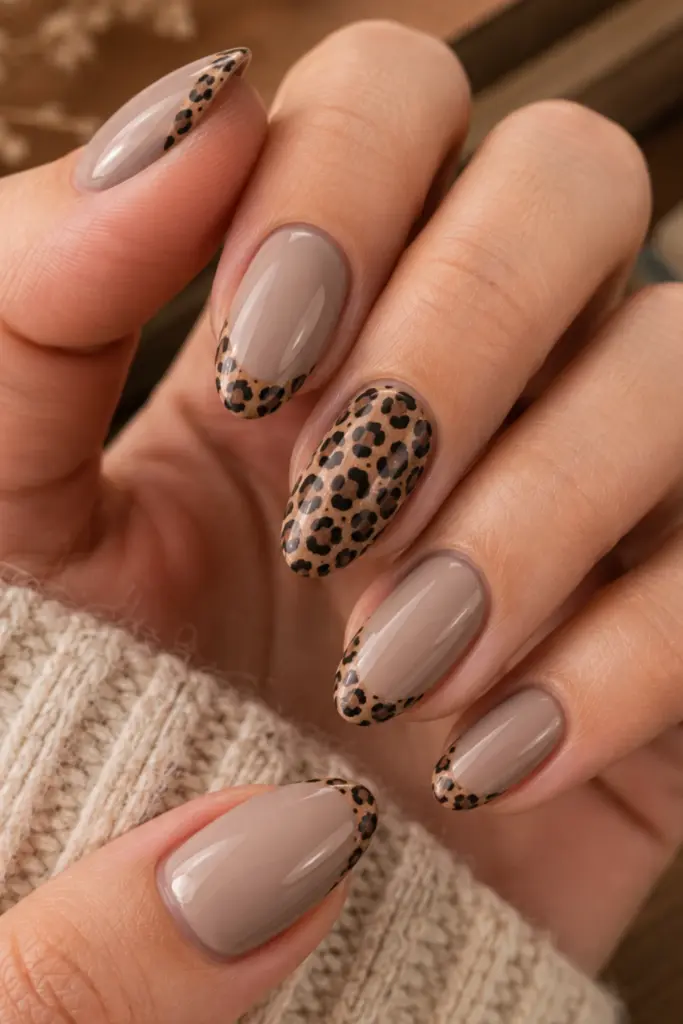
Leopard print becomes surprisingly wearable when paired with soft taupe.
How to create it:
- Paint nails a warm taupe shade.
- Create French tips in a slightly lighter neutral.
- Add small irregular leopard spots.
- Outline selected spots with dark brown.
Tip: Use tiny spots rather than large ones for a cleaner school-friendly finish.
Final thought: Neutral leopard tips give you personality without making the manicure difficult to style.
9. Mustard Yellow & Cream Croc Effect (The Textured Trend)
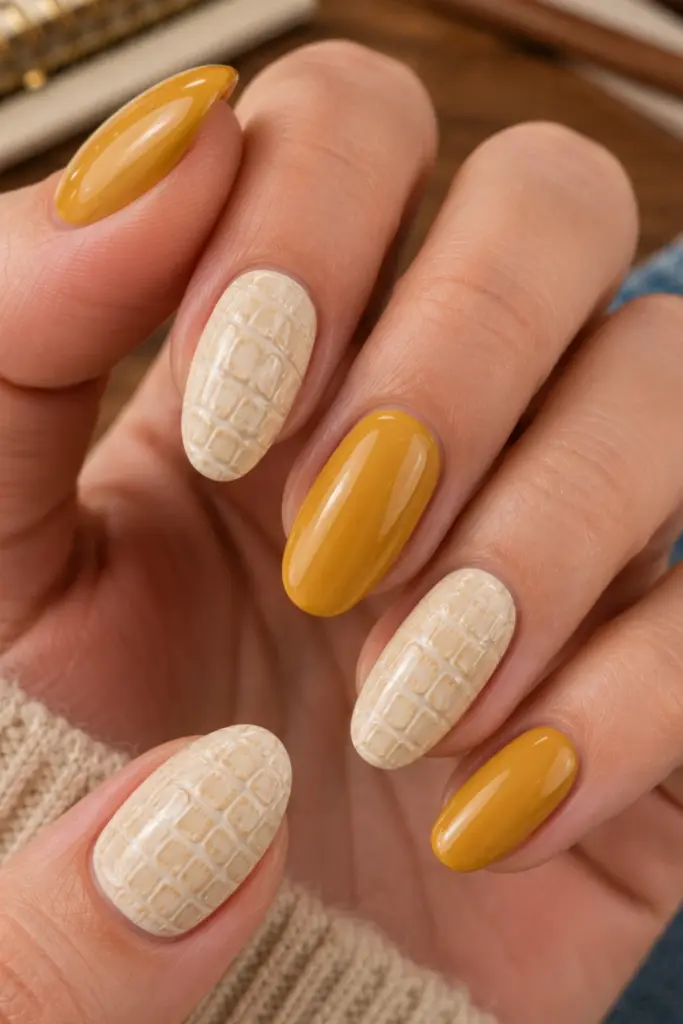
Mustard yellow brings instant autumn energy, while a cream croc pattern adds dimension.
How to create it:
- Paint alternating nails mustard and creamy ivory.
- Create a subtle crocodile texture on the cream nails.
- Use a glossy top coat to emphasize the texture.
- Keep the surrounding nails simple.
Tip: A muted mustard looks more sophisticated than a neon yellow.
Final thought: This design feels fashion-forward and works particularly well with denim jackets and oversized autumn sweaters.
10. Deep Teal & Gold Half-Moons (The Negative Space)
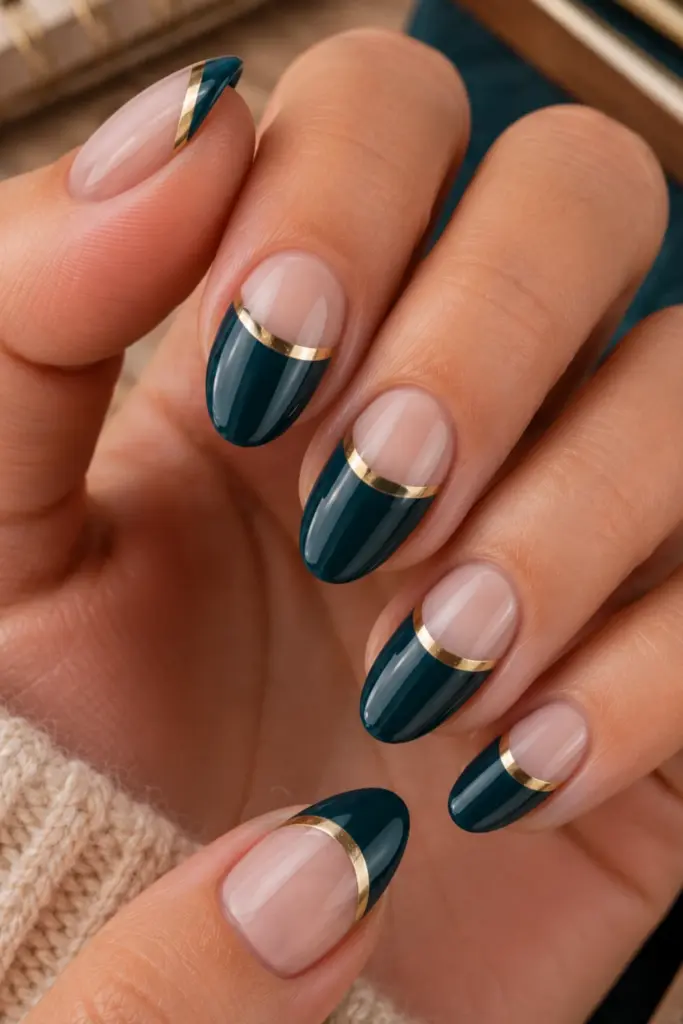
Negative space keeps darker colors feeling light and modern.
How to create it:
- Begin with a clear or nude base.
- Paint deep teal around the tip or lower half of the nail.
- Add a narrow gold half-moon detail.
- Clean the edges before sealing.
Tip: Use nail guide stickers to create symmetrical curves.
Final thought: The open space gives this dramatic color combination a clean, sophisticated finish.
11. Apple Cider Glitter Ombre (The Sparkle Spice)
Warm cider tones become extra charming when blended into delicate glitter.
How to create it:
- Apply a caramel or cinnamon base.
- Concentrate fine gold glitter toward the tips.
- Blend downward for a soft ombre effect.
- Finish with a glossy top coat.
Tip: Fine glitter creates a smoother, more wearable gradient than chunky glitter.
Final thought: This manicure is cozy, festive, and perfect for adding sparkle without looking like a holiday manicure.
12. Matte Black with White Line Art (The Minimalist Sketch)
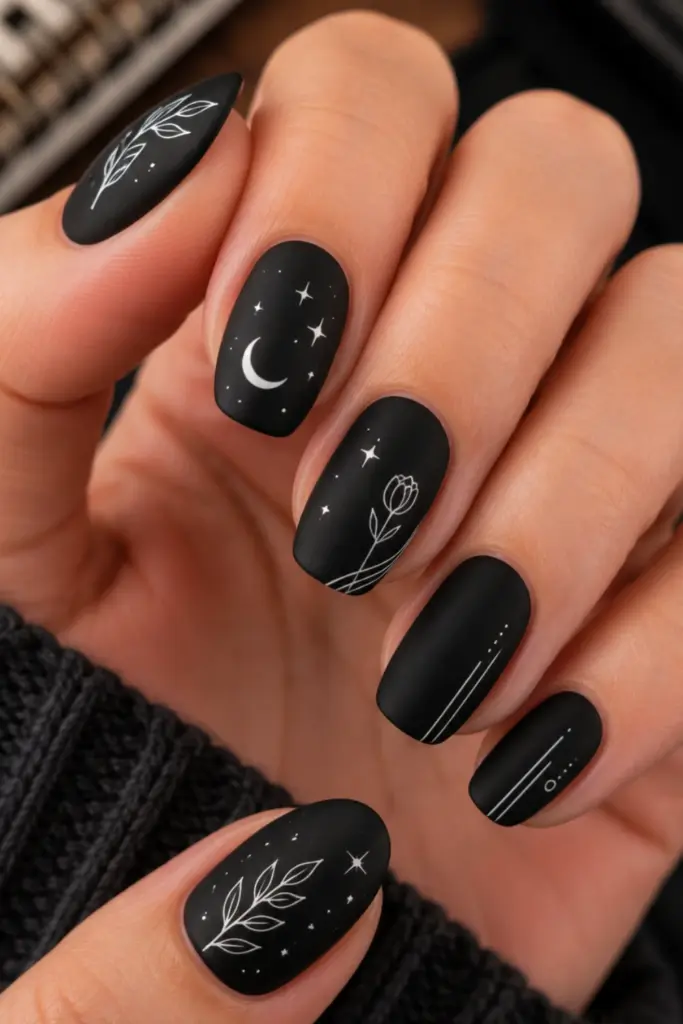
Black can feel surprisingly sophisticated when paired with minimalist white artwork.
How to create it:
- Paint nails matte black.
- Use a fine brush to add tiny stars, leaves, dots, or abstract shapes.
- Keep each nail’s artwork simple.
- Use a matte finishing coat.
Tip: Practice the line-art design on paper before painting directly onto the nail.
Final thought: The monochrome palette makes this look easy to wear with virtually any back-to-school outfit.
13. Burgundy & Dusty Rose Floral Accents (The Romantic Fall)
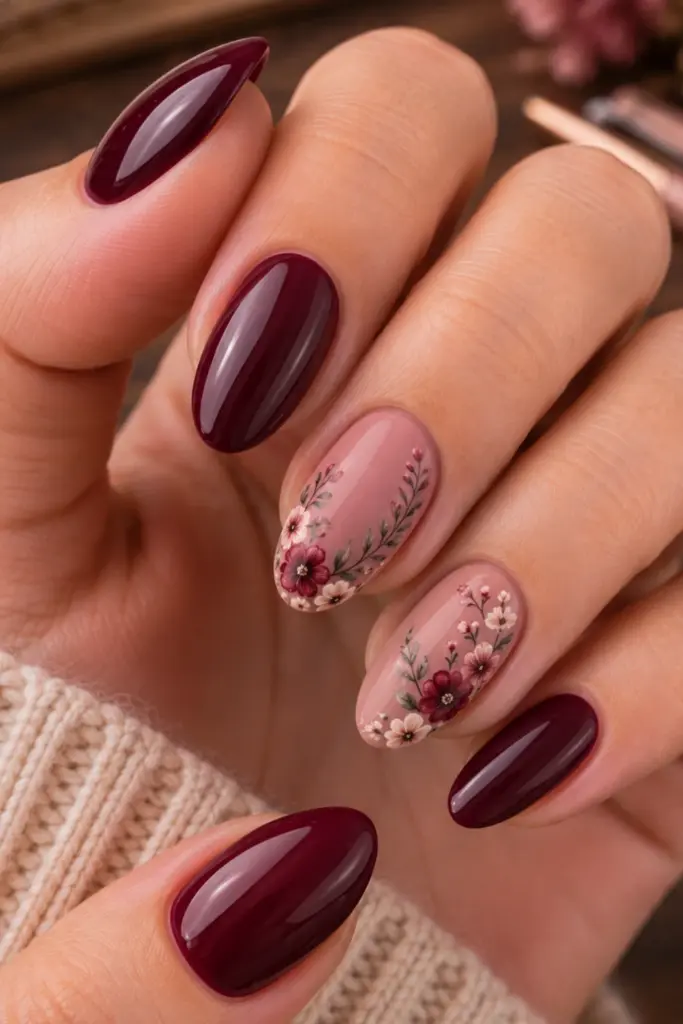
Burgundy gives this floral manicure a richer seasonal feel, while dusty rose keeps it soft.
How to create it:
- Apply burgundy polish to several nails.
- Use dusty rose as the base for accent nails.
- Paint small floral clusters with cream and muted green.
- Finish with a glossy top coat.
Tip: Keep flowers concentrated near one corner for a modern composition.
Final thought: This romantic design feels feminine without becoming overly sweet, making it a lovely everyday option.
14. Cinnamon Brown Tortoise Shell (The Vintage Vibe)
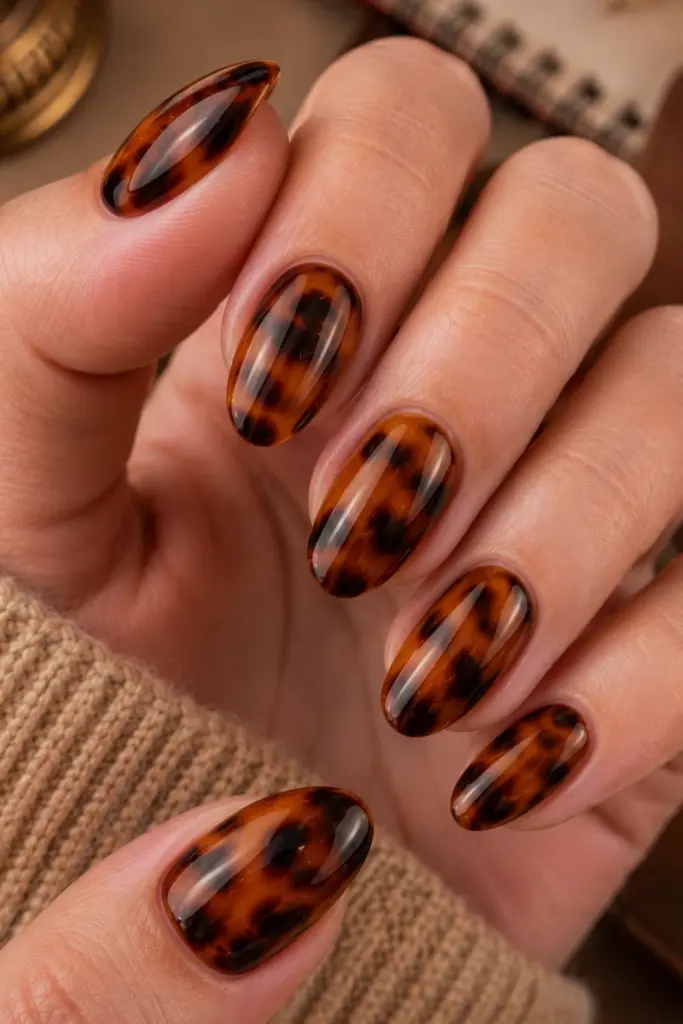
Tortoise shell is practically made for fall.
Cinnamon brown gives it a warm, vintage-inspired twist.
How to create it:
- Start with a translucent caramel base.
- Add uneven brown patches.
- Layer darker cinnamon details over selected areas.
- Blend gently before curing or sealing.
Tip: Vary the size of the patches so the pattern looks naturally organic.
Final thought: Tortoise shell works especially well on almond or oval nails and looks gorgeous beside gold jewelry.
15. Emerald Green with Chunky Gold Glitter (The Jewel Tone)
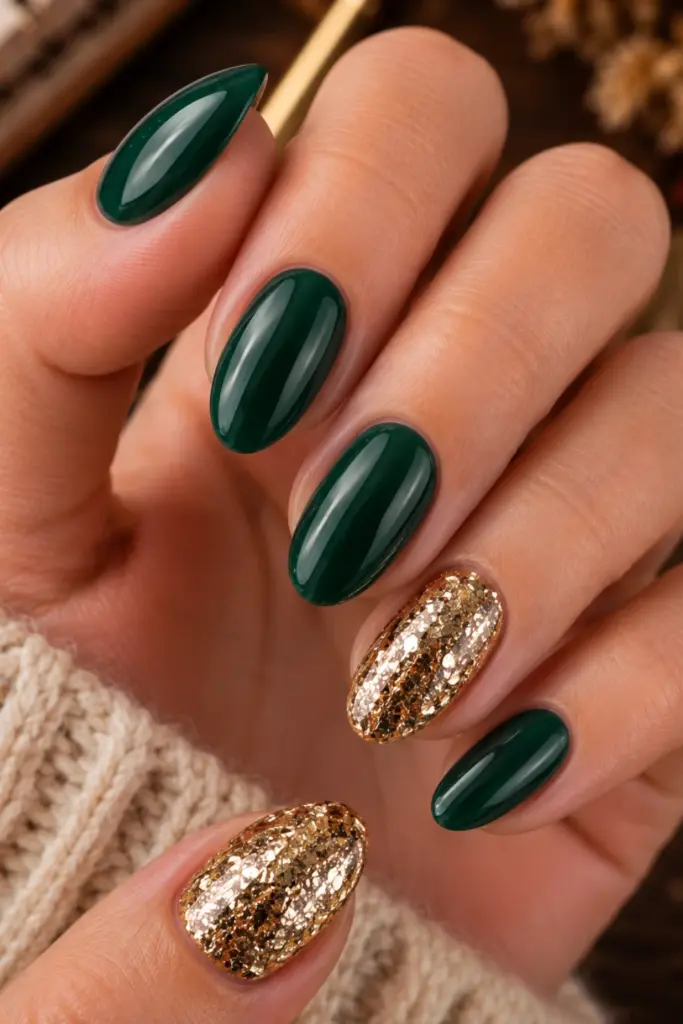
Finish the collection with rich emerald green and eye-catching gold glitter.
How to create it:
- Paint most nails a deep emerald shade.
- Add chunky gold glitter to one or two accent nails.
- Apply a glitter-friendly top coat.
- Clean around the cuticles for a crisp finish.
Tip: Try a dark forest emerald if you prefer a more muted autumn effect.
Final thought: Emerald and gold create an instantly luxurious manicure that feels festive, stylish, and surprisingly wearable for school.
Final Thoughts:
Making Your Fall Back-to-School Nails Last
Choosing a cute design is only half the process.
Good preparation can make even detailed nail art look cleaner and last longer.
Before painting:
- Shape nails evenly and gently buff the surface.
- Push back cuticles carefully.
- Wipe nails clean to remove oils.
- Apply a quality base coat.
While creating nail art:
- Work in thin polish layers.
- Let each layer dry or cure properly.
- Use fine brushes for tiny details.
- Keep cleanup tools nearby for sharper edges.
For longer-lasting results:
- Seal the free edge of each nail.
- Reapply top coat when the shine begins to fade.
- Avoid picking at lifted polish.
- Protect nails with gloves during chores.
For Pinterest-worthy inspiration, consider saving designs according to your mood: preppy plaid for classic outfits, earthy olive and cinnamon for cozy days, jewel tones for a glamorous finish, and minimalist nude designs for everyday wear.
Rotating between these styles keeps your manicure fresh throughout the fall semester.
The best back-to-school manicure does not have to be complicated.
A thoughtful color palette, one standout detail, and tidy application can transform a simple set into something that feels completely intentional.