Getting ready for class shouldn’t mean waking up an hour early just to fry your ends with a curling iron.
Mornings are stressful enough without wrestling with hot tools.
By making the switch to heat-free methods, keeping your strands strong and undamaged becomes totally effortless.
Protecting those delicate lengths while maximizing your sleep schedule is a major game-changer for the semester.
Plus, finding the right routine means waking up with gorgeous texture already locked in.
Here are 20 easy, cozy, cute, back-to-school, heatless hairstyle designs and ideas for healthy hair.
This guide gives you the exact tools needed, foolproof step-by-step instructions, and easy enhancements for every single look.
Let’s dive right into these gorgeous, time-saving routines!
1. Overnight Robe Tie Heatless Curls
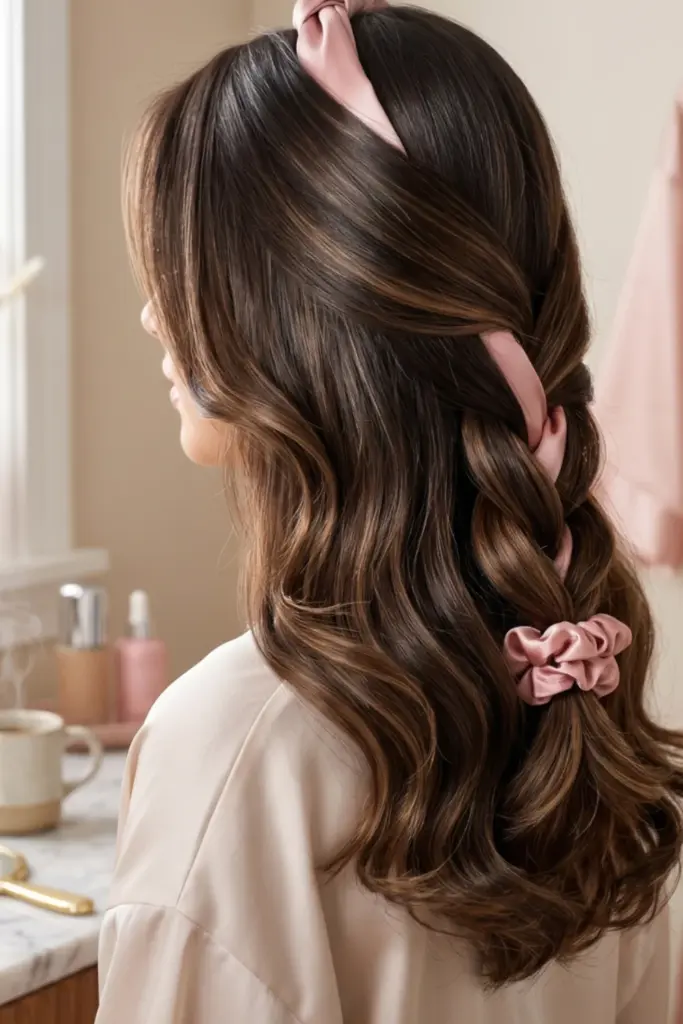
Achieve perfect blowout-style volume during the night.
This wildly popular method uses a soft, plush robe tie to gently shape the lengths.
It avoids friction and prevents breakage effortlessly.
- What You Need: A silk or microfiber robe tie, two silk scrunchies, and a claw clip.
- Step-by-Step Instructions:
- Part slightly damp, locks down the middle.
- Clip the tie at the top of the crown.
- Wrap sections away from the face around the fabric, picking up more hair as you descend.
- Secure ends with scrunchies. Sleep on it!
- Enhancements: Add a lightweight hair oil to the ends the next morning for extra shine.
Tip: Cross the two ends of the tie behind the head before sleeping for a tighter curl.
2. Cozy Knotted Headband Curls
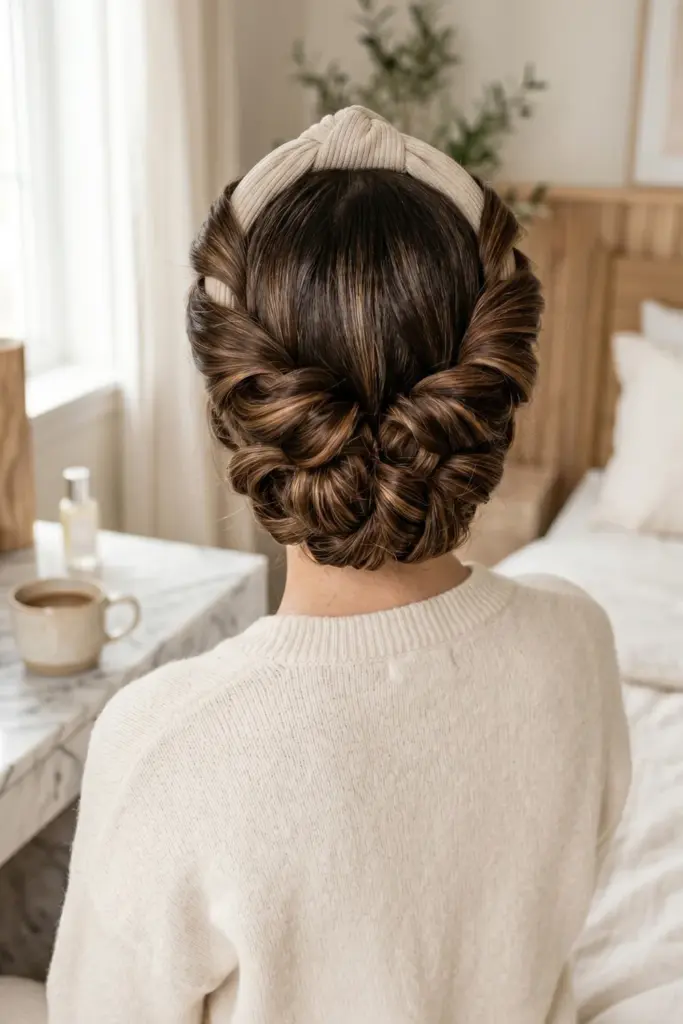
A soft, knotted headband isn’t just for washing faces.
It creates bouncy, lively ringlets.
The structure of the knot gives a beautiful lift at the root.
- What You Need: Thick fabric headband, texturizing spray.
- Step-by-Step Instructions:
- Place the headband over the crown of the head, halo-style.
- Take one-inch sections of damp hair.
- Loop them over and under the headband band until all hair is tucked up.
- Leave in until completely dry.
- Enhancements: Pin any loose flyaways up with bobby pins to keep the wrap secure.
Tip: Mist the wrapped hair with sea salt spray before letting it set.
3. Sock Bun Heatless Voluminous Wrap
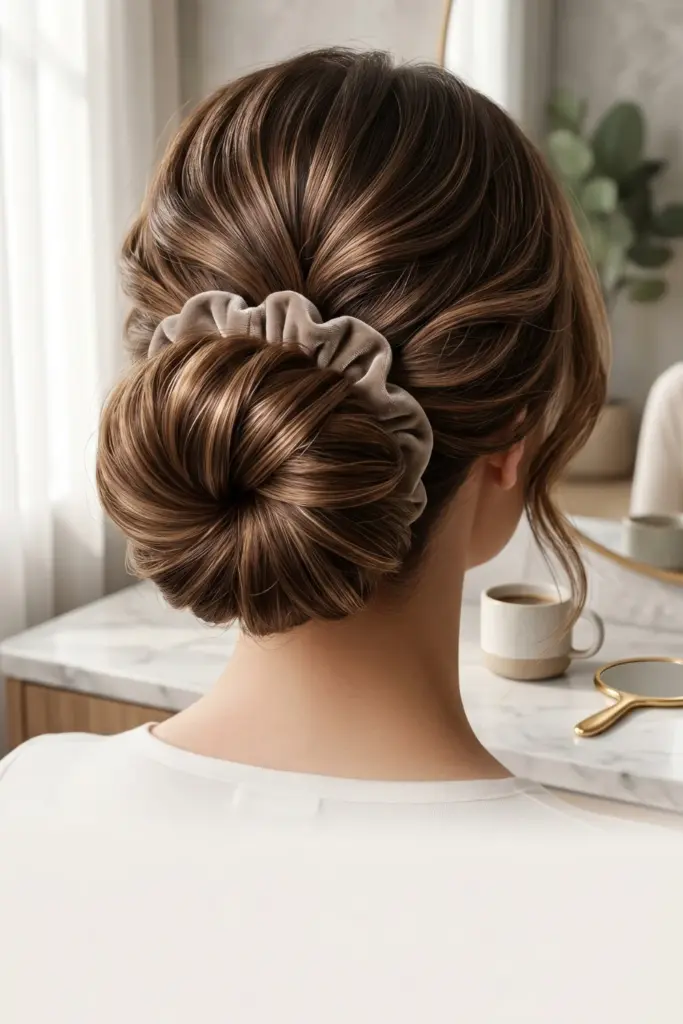
Grab a clean sock for this vintage-inspired trick.
It delivers massive, voluminous waves without any hot rollers.
It works incredibly well on long, layered cuts.
- What You Need: One clean, rolled crew sock (toe cut off) and a hair tie.
- Step-by-Step Instructions:
- Pull hair into a high ponytail.
- Pull the ends through the center of the rolled sock donut.
- Roll the sock down toward the base of the ponytail, tucking the hair as it rolls.
- Secure at the base and unravel in the morning.
- Enhancements: Try a velvet scrunchie instead of a standard hair tie for zero creasing.
Tip: The higher the ponytail, the more root volume achieved!
4. Braided Sleep-in Waves (Three-Strand)
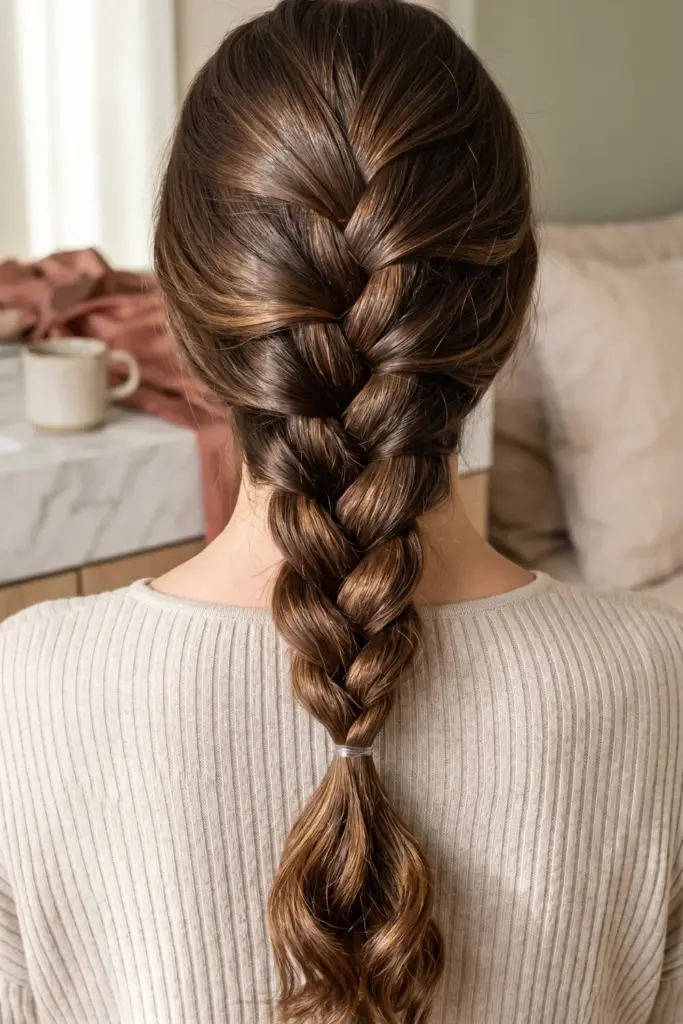
Sometimes the classics remain top-tier.
A traditional three-strand braid yields soft, effortless mermaid crimps.
It takes roughly two minutes to prepare.
- What You Need: Small elastics and leave-in conditioner.
- Step-by-Step Instructions:
- Apply leave-in conditioner evenly to damp strands.
- Divide hair into two equal sections.
- Braid each section tightly down to the very ends.
- Secure with an elastic and shake out the next day.
- Enhancements: Braid four sections instead of two for a tighter crimp.
Tip: Gently pull apart the braid slightly before sleeping to soften the final wave pattern.
5. Twisted Pineapple Updo for Curly Hair
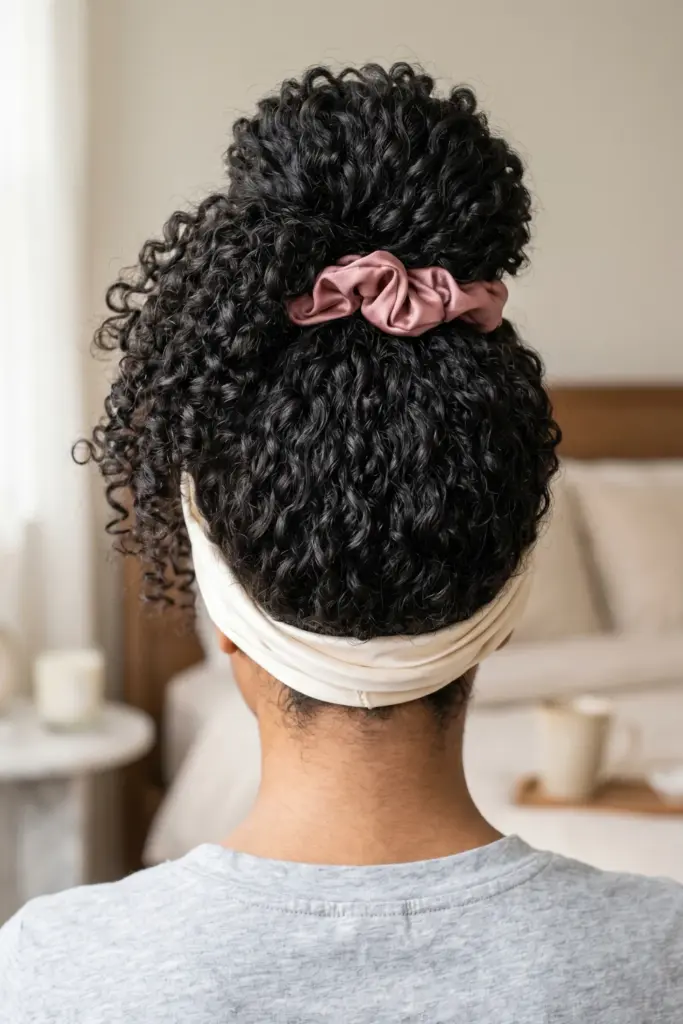
Preserving natural texture is essential.
The pineapple method keeps curls intact and prevents flattening while tossing and turning.
- What You Need: a satin scrunchie and a silk pillowcase.
- Step-by-Step Instructions:
- Flip the head completely upside down.
- Gather all curls at the highest point of the head.
- Slip a satin scrunchie over the gathered hair only once or twice.
- Let the curls spill over the front like a pineapple.
- Enhancements: Wrap the sides with a silk scarf to protect the edges.
Tip: Never pull the scrunchie too tight; it should sit very loosely.
6. Half-Up Bubble Ponytail with Scrunchies
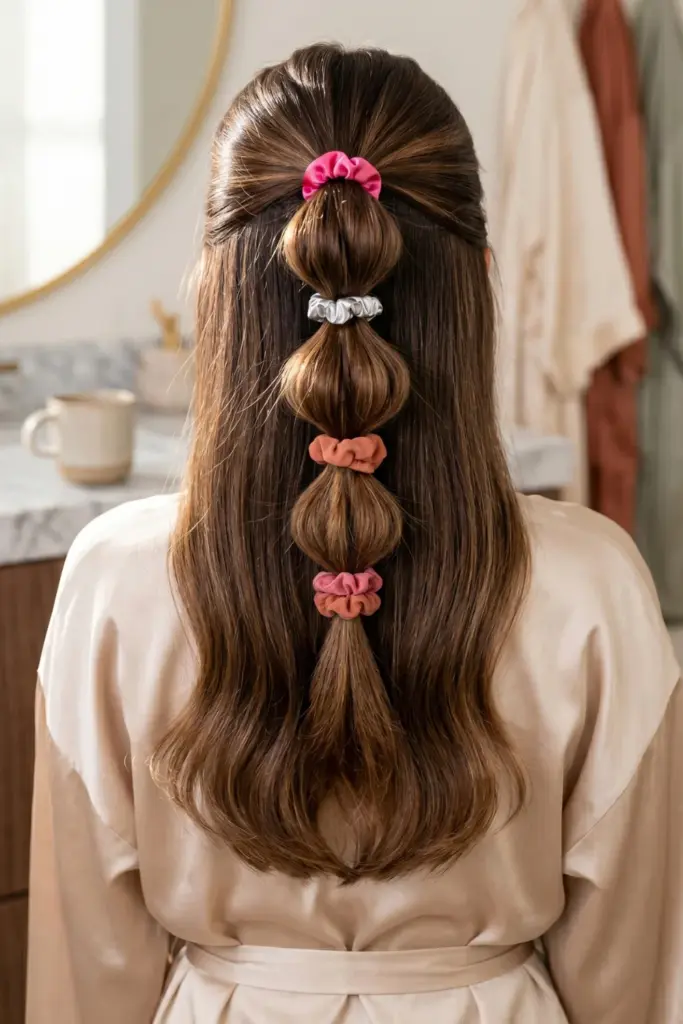
Fun, playful, and incredibly fast.
Bubble braids add visual interest to a basic half-up style.
It keeps hair out of the face during long study sessions.
- What You Need: 4-5 mini elastics or small scrunchies and a smoothing brush.
- Step-by-Step Instructions:
- Pull the top half of the hair into a ponytail at the crown.
- Place another elastic two inches down the tail.
- Gently tug the hair between the elastics to create a “bubble.”
- Repeat down the length of the tail.
- Enhancements: Use brightly colored scrunchies to match the day’s outfit.
Tip: Tease the ponytail slightly before adding the elastics for larger bubbles.
7. Low Tucked French Braid (Heatless)
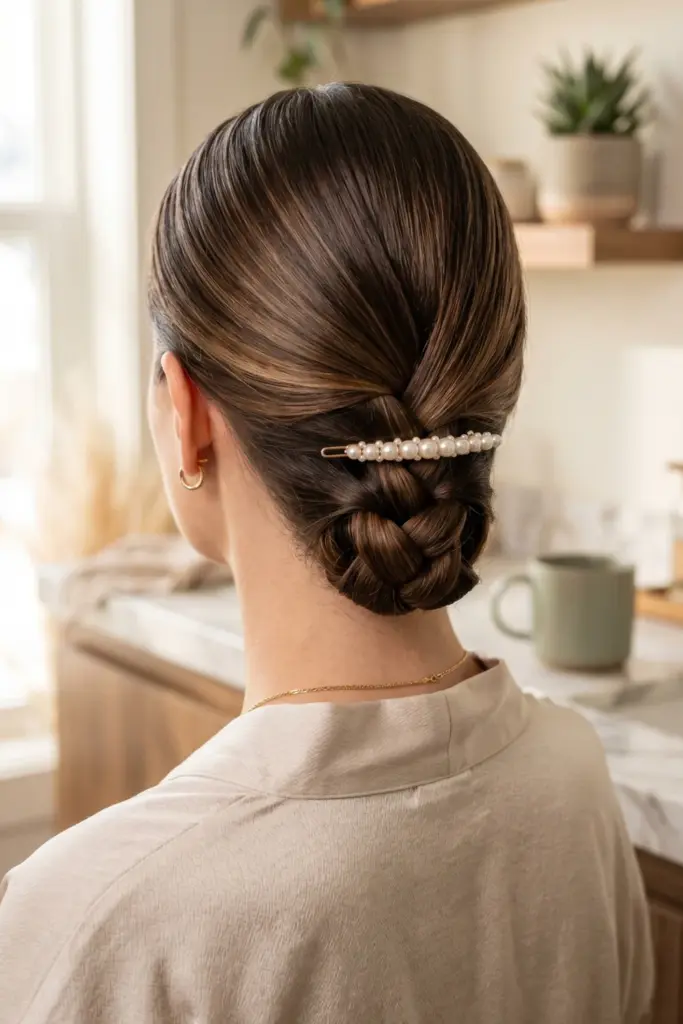
A sophisticated option for a polished look.
Tucking the tail of a French braid creates a neat, professional finish that lasts all day.
- What You Need: Clear elastic, bobby pins, and edge control gel.
- Step-by-Step Instructions:
- French braid the hair starting from the nape of the neck down.
- Secure the end with a clear elastic.
- Roll the tail upward and tuck it underneath the base of the braid.
- Secure firmly with bobby pins.
- Enhancements: Add a pearl hair clip right above the tuck.
Tip: Smooth edge control around the hairline to minimize frizz.
8. Space Buns with Soft Fabric Ribbons
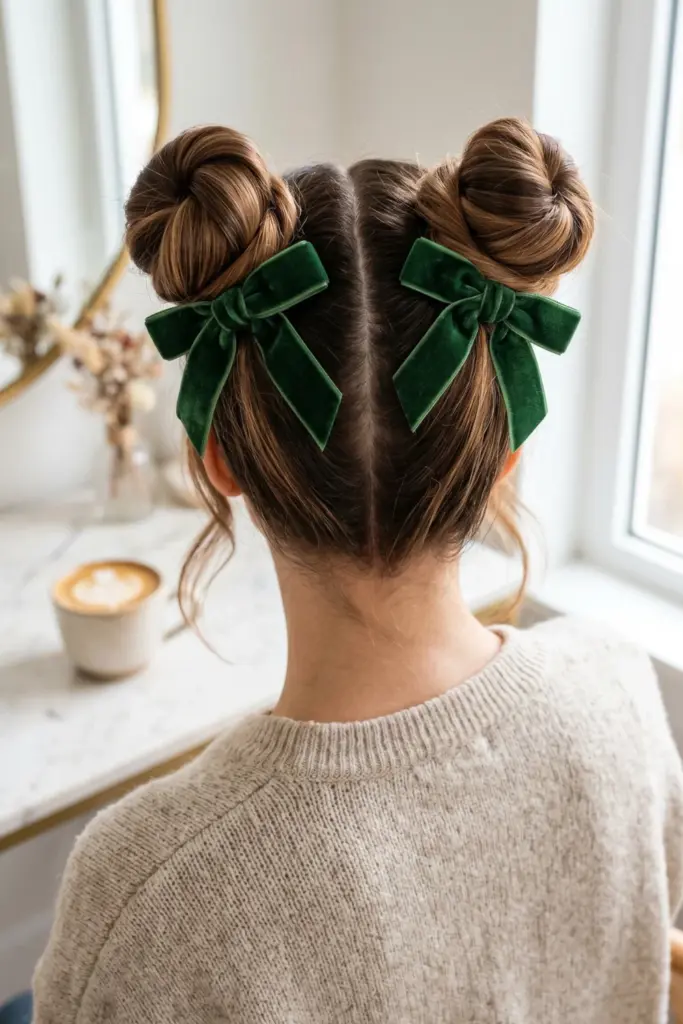
Quirky and comfortable.
Space buns are excellent for distributing hair weight evenly, and ribbons elevate the entire aesthetic instantly.
- What You Need: Hair ties, two fabric ribbons, and a brush.
- Step-by-Step Instructions:
- Part hair cleanly down the center.
- Create two high pigtails.
- Twist each pigtail around its base to form a bun.
- Tie a ribbon around the base of each bun.
- Enhancements: Leave out two face-framing pieces at the front.
Tip: Tie the ribbons in bows that face forward for maximum visibility.
9. Dutch Braided Crown for Second Day Hair
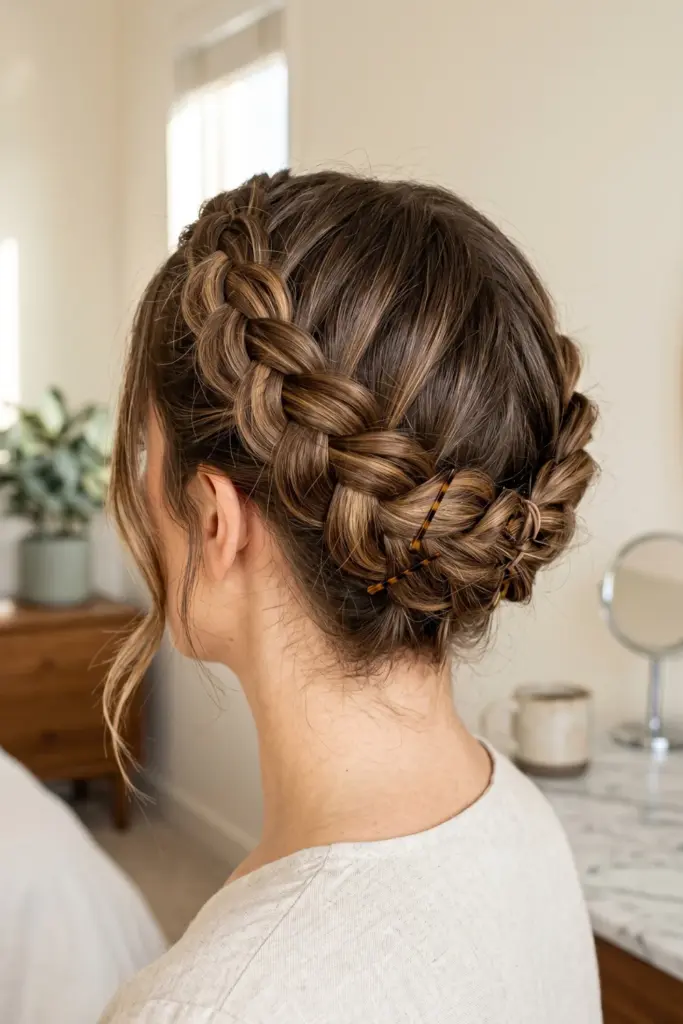
Conceal greasy roots masterfully.
A Dutch braid crown pulls everything up and looks incredibly intricate.
- What You Need: Dry shampoo, small elastics, and bobby pins.
- Step-by-Step Instructions:
- Apply dry shampoo to the roots and massage in.
- Start a Dutch braid (crossing under instead of over) above one ear.
- Continue braiding around the head like a halo.
- Pin the end of the braid neatly behind the start.
- Enhancements: Pancake the braid by gently pulling the edges to make it look thicker.
Tip: Rough up the texture with texturizing powder before braiding for better grip.
10. Heatless Flexi Rod Soft Ringlets
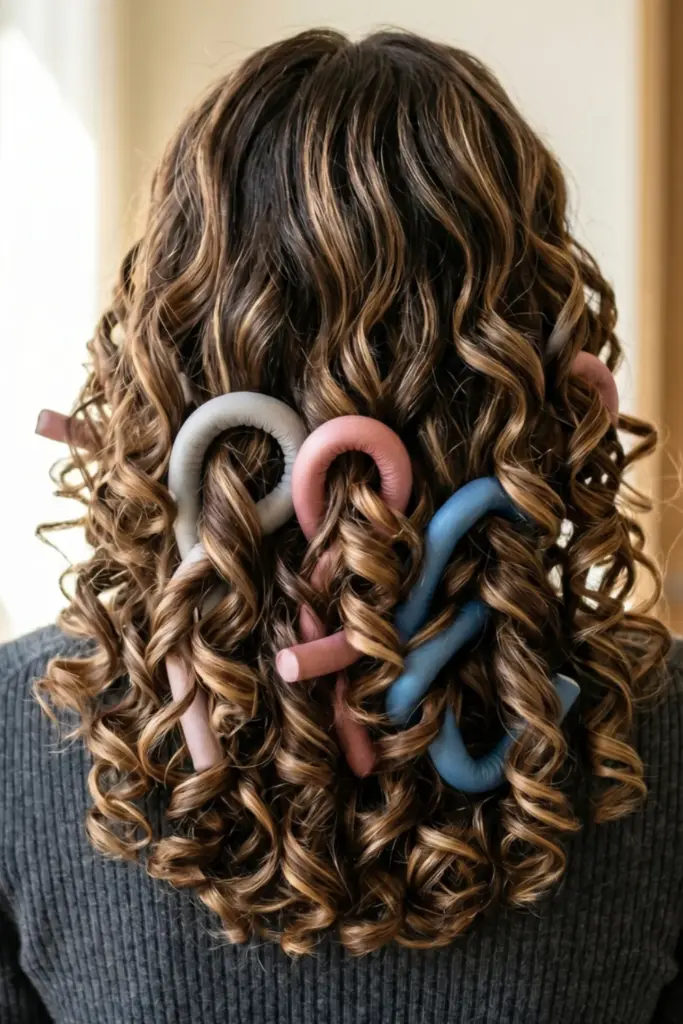
Flexi rods bend into any shape.
They are fantastic for creating highly defined, long-lasting spiral curls without touching a curling wand.
- What You Need: Foam flexi-rods, setting lotion.
- Step-by-Step Instructions:
- Distribute setting lotion through damp hair.
- Take small sections and wrap them tightly around a rod.
- Bend the ends of the rod inward to lock the hair in place.
- Remove carefully once totally dry.
- Enhancements: Use varying sizes of rods for a more natural, randomized curl pattern.
Tip: Always wrap the hair flat against the rod to avoid funky crimps at the ends.
11. Cozy Coil Twists (Two-Strand)
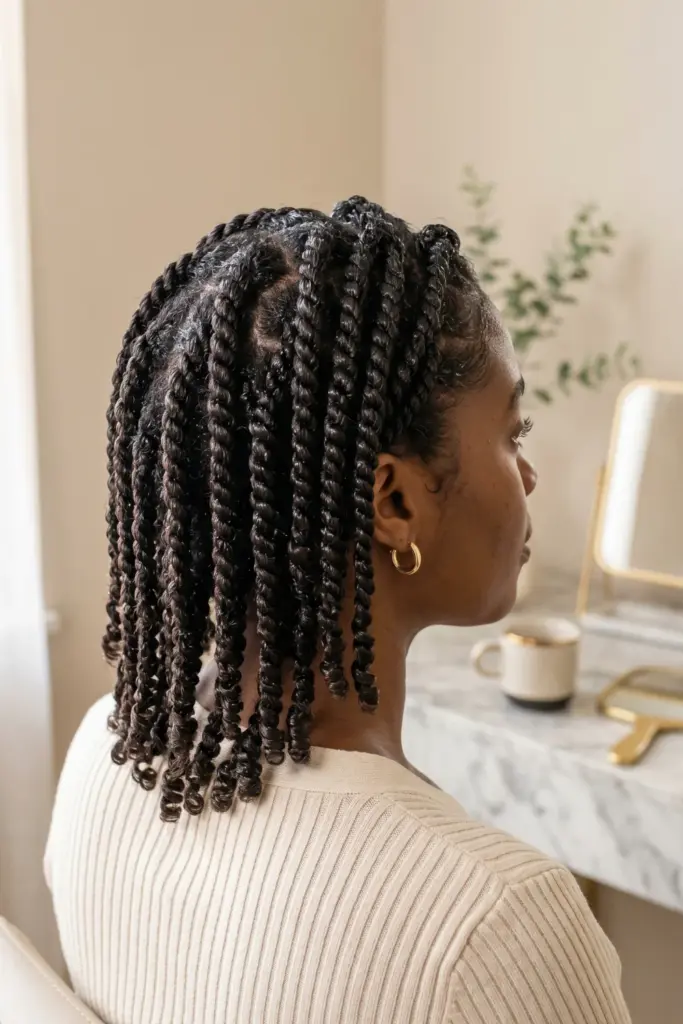
Perfect for natural hair textures.
Two-strand twists lock in moisture and create a beautiful, uniform coil pattern that can be worn as is or untwisted later.
- What You Need: Curl cream, wide-tooth comb.
- Step-by-Step Instructions:
- Detangle thoroughly with a wide-tooth comb.
- Section hair and apply generous amounts of curl cream.
- Divide a section into two pieces and twist them around one another to the bottom.
- Twirl the very end around a finger to seal the twist.
- Enhancements: Unravel them the next day for a stunning “twist-out” style.
Tip: Make sure the hair is damp, not soaking wet, before twisting.
12. Silk Scarf Rolled Half-Up Style
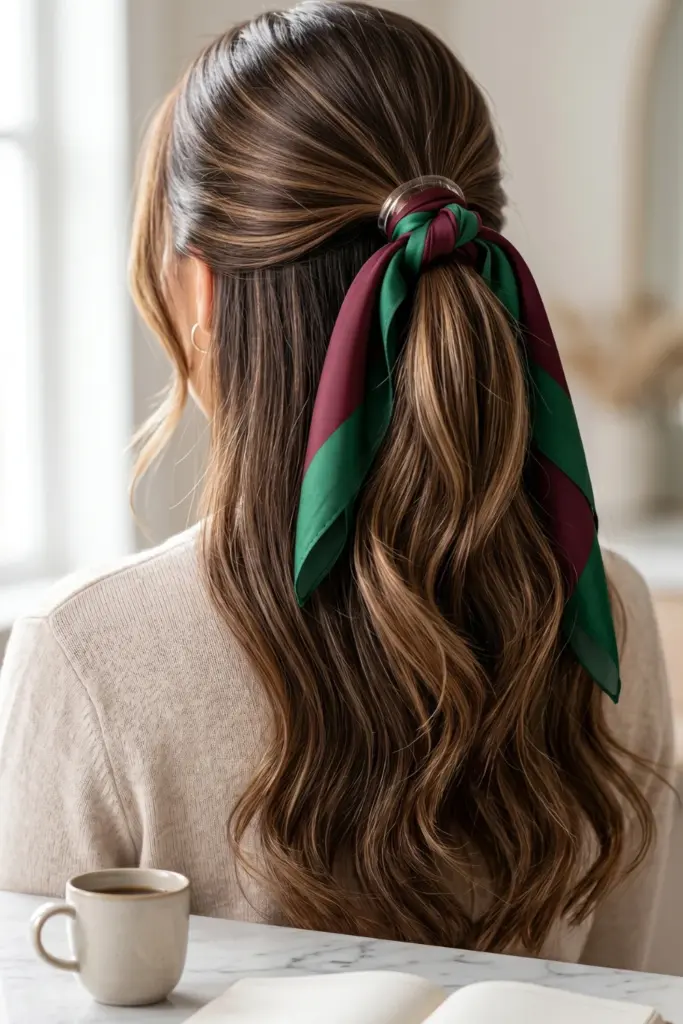
Infuse a touch of vintage glamour.
A rolled silk scarf adds vibrant color and gentle support to a simple half-up look.
- What You Need: Square silk scarf, clear elastic, bobby pins.
- Step-by-Step Instructions:
- Secure the top half of the hair with a clear elastic.
- Fold the silk scarf into a long, thin band.
- Place the scarf under the ponytail and tie it into a knot on top.
- Let the scarf tails drape down into the loose hair.
- Enhancements: Wrap the scarf completely over the elastic to hide it.
Tip: Choose a scarf with contrasting colors to make the style pop against the hair color.
13. Pigtail Braids with Ribbon Weave
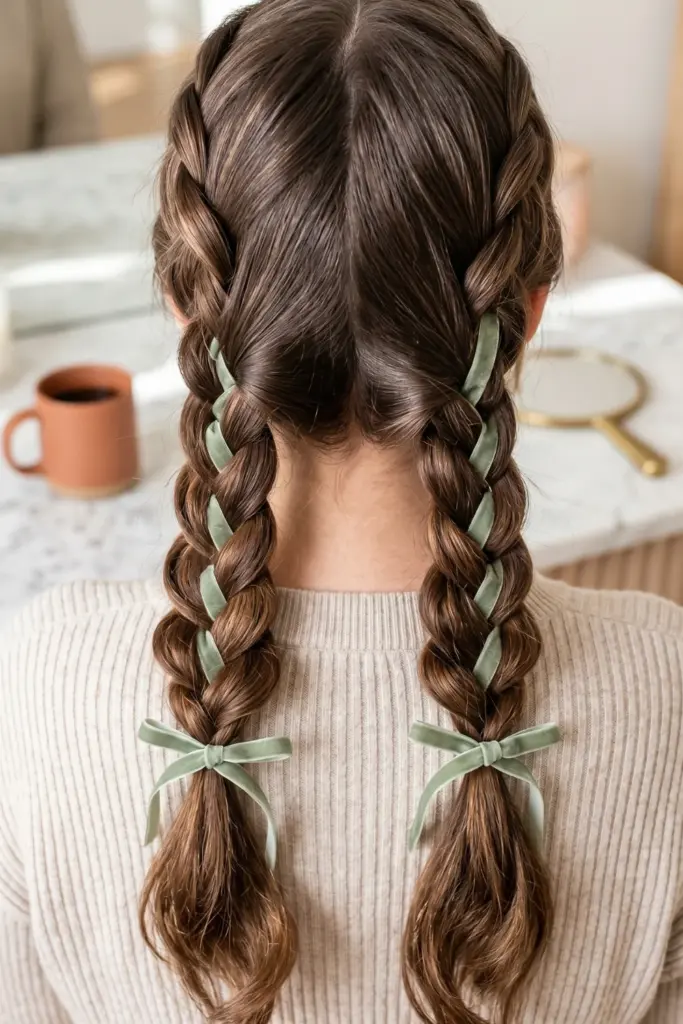
A whimsical take on basic pigtails.
Weaving a ribbon directly into the braid adds texture, color, and a cottagecore vibe.
- What You Need: Elastics, two long ribbons.
- Step-by-Step Instructions:
- Divide hair into two low sections.
- Tie a ribbon to the base of one section.
- Treat the ribbon as the third strand of hair and begin braiding down.
- Secure the bottom with an elastic and repeat on the other side.
- Enhancements: Pull the braided loops slightly to puff them out.
Tip: Velvet ribbons stay in the hair much easier than satin ones!
14. Messy Low Bun with Satin Scrunchies
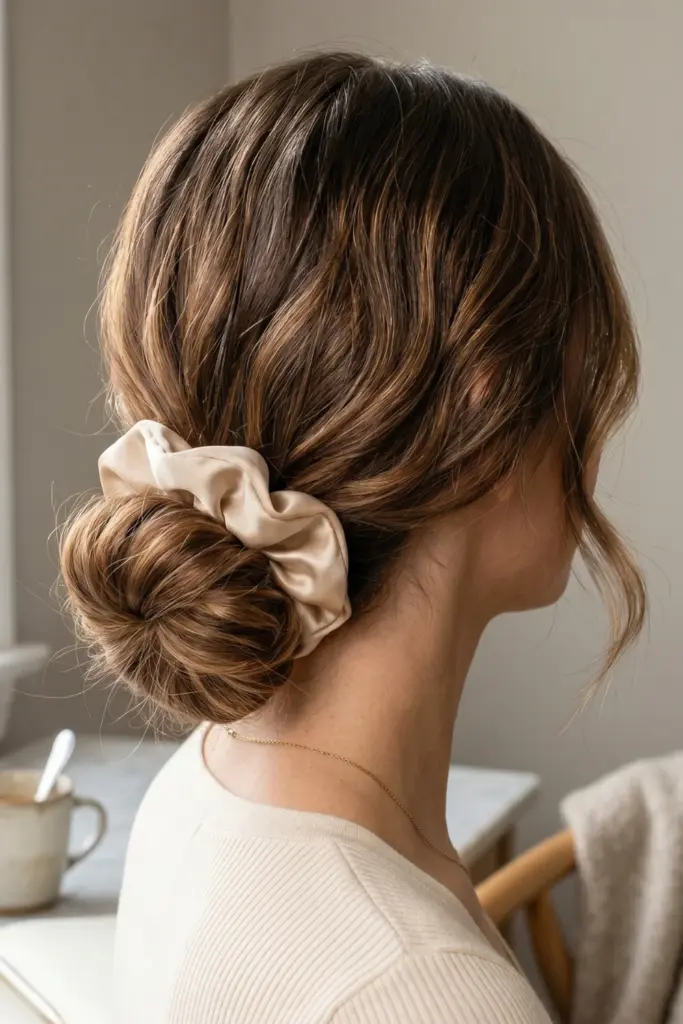
The ultimate “I woke up like this” look.
A messy low bun is chic, effortless, and protects the ends of the hair from rubbing against heavy backpacks.
- What You Need: Oversized satin scrunchie, dry texturizing spray.
- Step-by-Step Instructions:
- Gather hair at the nape of the neck loosely.
- Twist the hair around itself to form a loose bun.
- Wrap the satin scrunchie around it twice.
- Pull a few wispy pieces out around the ears.
- Enhancements: Spray texturizing spray into the roots for a slightly undone finish.
Tip: Don’t use a brush; use fingers to gather the hair for a more organic look.
15. Heatless Rag Curls Vintage Style
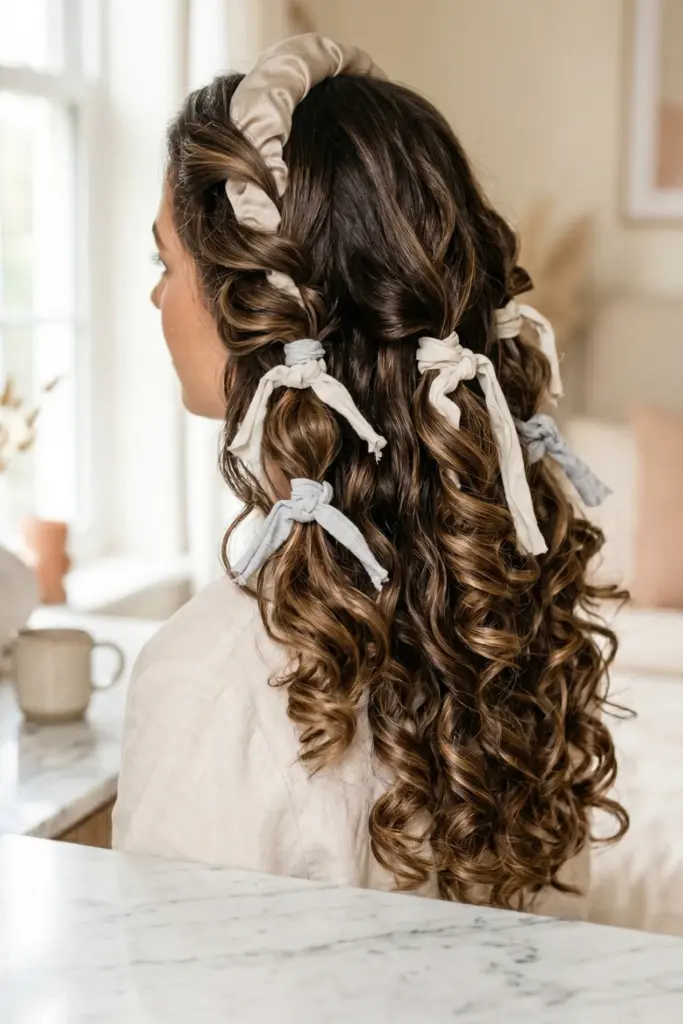
Old-fashioned but highly effective.
Using strips of fabric to curl hair is incredibly comfortable to sleep on and yields tight, bouncy curls.
- What You Need: 10-15 cotton fabric strips, water spray bottle.
- Step-by-Step Instructions:
- Lightly mist a section of hair.
- Place the end of the hair against the center of a fabric strip.
- Roll the hair upward toward the scalp.
- Tie the two ends of the fabric strip together to secure.
- Enhancements: Sleep in a silk bonnet to keep the rags from shifting.
Tip: Old t-shirts cut into strips make the absolute best, softest rags.
16. Triple Twisted Headband Wrap
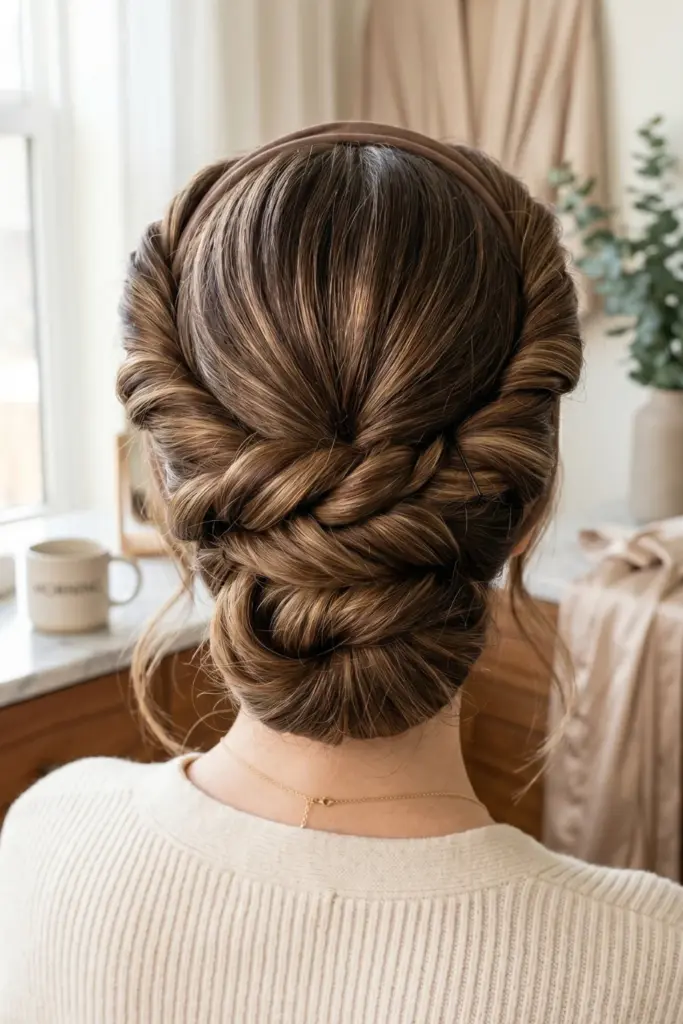
A sleek and unique updo.
This involves twisting three sections of hair around a soft headband for a structured but comfortable style.
- What You Need: Soft elastic headband, bobby pins.
- Step-by-Step Instructions:
- Slide the elastic headband over the head.
- Take the front side sections and tuck them backward around the band.
- Take the remaining back section, roll it up, and tuck it into the band.
- Pin any loose pieces flat.
- Enhancements: Pull down face-framing layers before tucking the rest of the hair.
Tip: Use a headband that matches the hair color for a seamless illusion.
17. Side-Swept Heatless Hollywood Waves
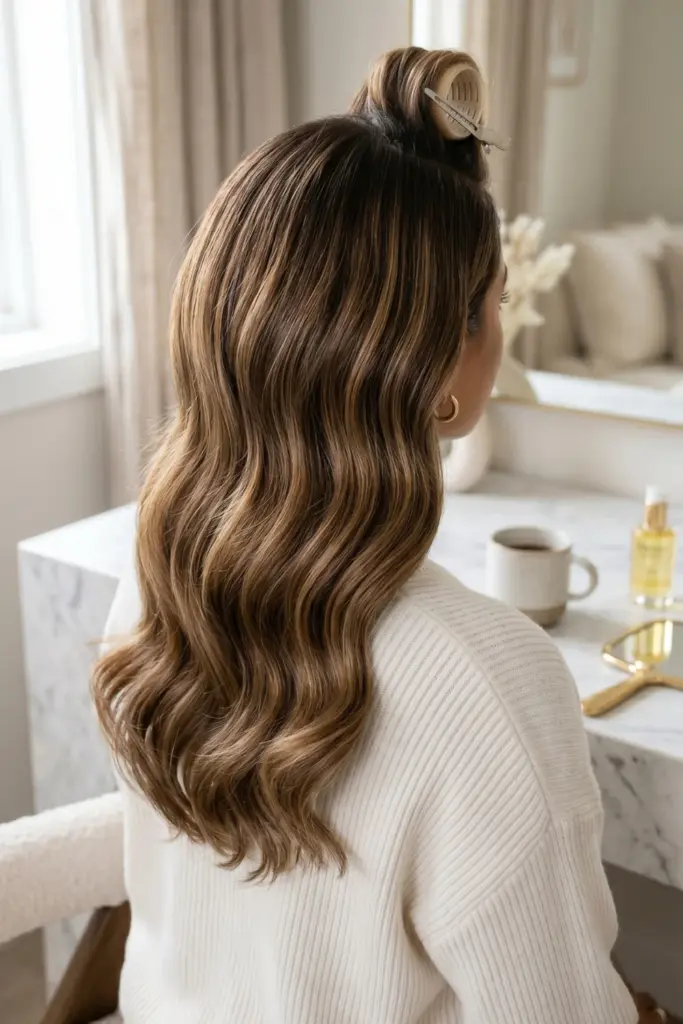
Glamorous waves achieved completely cold.
By setting the hair carefully, old Hollywood elegance is possible for a Tuesday morning class.
- What You Need: Large Velcro rollers (optional for top), duckbill clips, mousse.
- Step-by-Step Instructions:
- Create a deep side part.
- Apply a strong-hold mousse to damp hair.
- Create flat pin curls: roll sections up flat against the scalp and secure with duckbill clips.
- Once dry, brush out vigorously to reveal uniform waves.
- Enhancements: Spray with a high-gloss finishing spray.
Tip: Brush the curls out with a boar bristle brush to merge the waves together perfectly.
18. Protective Mini Braids (No Heat)
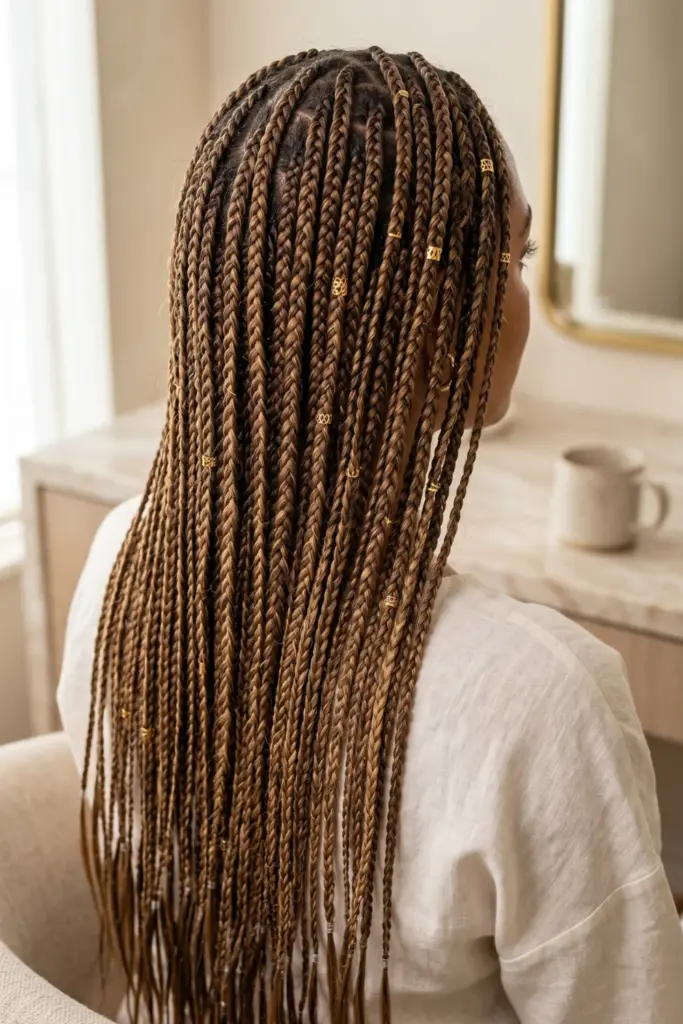
Low maintenance and high protection.
Tiny braids scattered throughout the hair or worn all over keep strands safe from weather and friction.
- What You Need: Tiny clear elastics, nourishing hair oil.
- Step-by-Step Instructions:
- Work a few drops of oil through the mid-lengths.
- Section out small, random half-inch pieces of hair.
- Braid them tightly to the bottom.
- Secure with tiny elastics.
- Enhancements: Add small hair cuffs or rings to the braids.
Tip: Focus the braids near the front to act as built-in accessories.
19. Fluffy Ponytail with Braided Accent
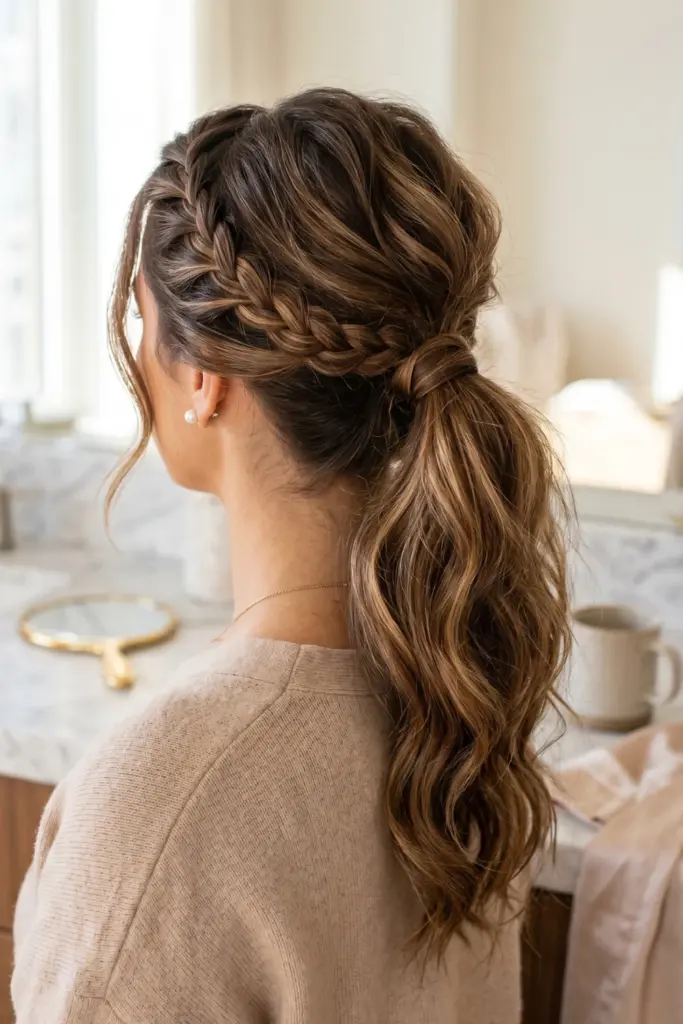
Elevate the standard ponytail.
Adding a quick side braid brings volume and detail without needing any heat styling to make it look “done.”
- What You Need: A hair tie, one small elastic band.
- Step-by-Step Instructions:
- Braid a small section of hair near the temple and tie it off.
- Gather all hair, including the braid, into a mid-height ponytail.
- Secure tightly.
- Gently tug the hair above the hair tie to create a fluffy crown.
- Enhancements: Wrap a small piece of hair from the ponytail around the hair tie to conceal it.
Tip: Use a firm-hold hairspray on a toothbrush to tame flyaways at the hairline.
20. Tucked Under Sleek Low Ponytail (Heatless)
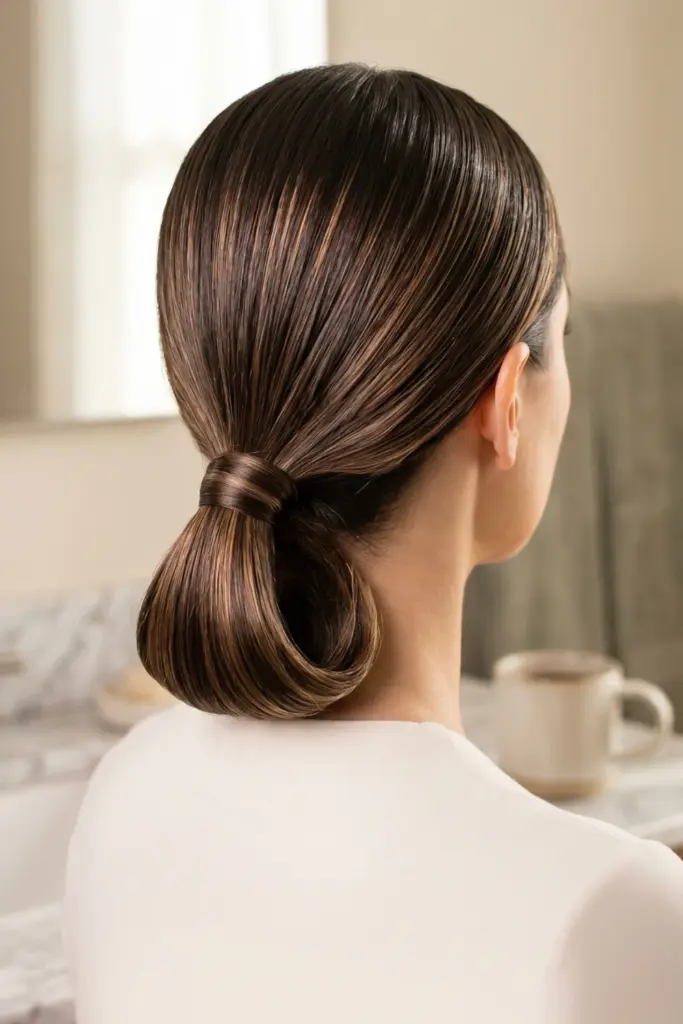
A futuristic, incredibly sleek shape.
This folded ponytail looks incredibly modern and protects the delicate ends from splitting.
- What You Need: Two strong hair ties and smoothing serum.
- Step-by-Step Instructions:
- Apply smoothing serum to create a sleek surface.
- Tie hair into a low, tight ponytail.
- Loop the ponytail up and fold the ends underneath.
- Secure the looped bundle with the second hair tie.
- Enhancements: Finish with a shine spray for a glassy look.
Tip: A middle part pairs beautifully with the sleekness of this folded style.
Final Thoughts
Transitioning to heat-free routines doesn’t mean sacrificing style or volume.
As the semester ramps up, having an arsenal of protective, low-maintenance looks keeps your mornings relaxed and your strands incredibly healthy!
Head over to our site to discover more visual breakdowns, full product reviews, and step-by-step video guides.
Pin this article to your favorite aesthetic board, and never struggle with a rushed morning routine again.
Have an amazing, cozy semester!