Looking for intricate full-hand mehndi designs that feel traditional yet beautifully modern?
Mandala patterns bring together delicate florals, geometric details, and elegant symmetry for a design that stands out.
Whether you’re preparing for a wedding, Eid, a festival, or a special family celebration, these 10 full-hand mehndi ideas offer inspiration, practical application tips, and styling details to help you find a pattern worth saving.
1. Intricate circular mandala full-hand mehndi
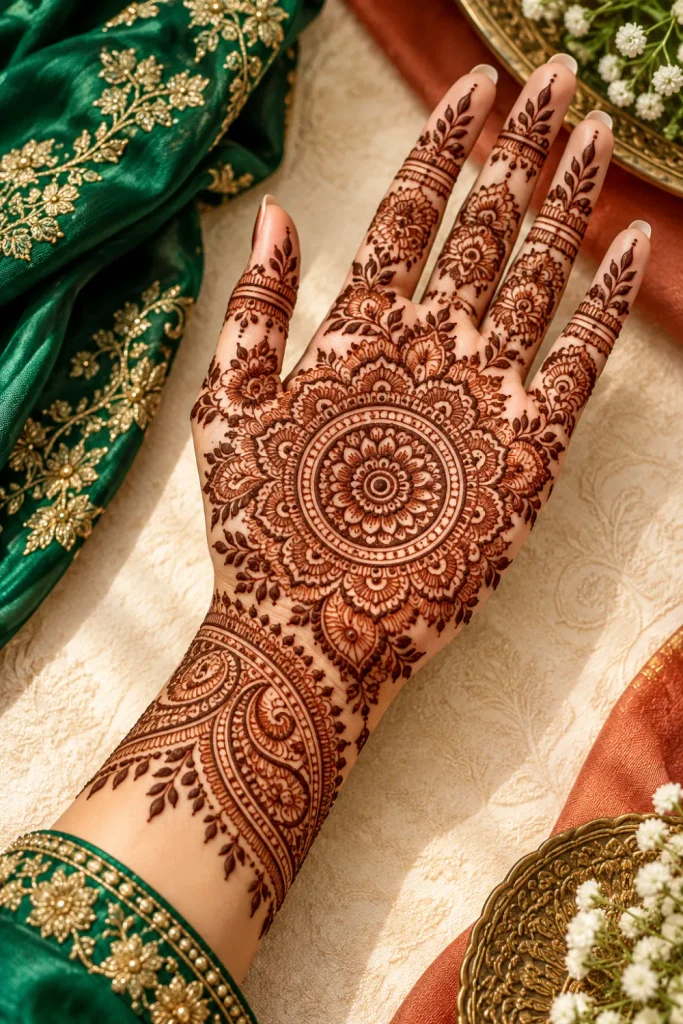
A circular mandala creates a stunning focal point, especially when surrounded by delicate petals, curved vines, and detailed finger patterns.
This design works beautifully for anyone who loves traditional mehndi with a polished, balanced finish.
Simple steps:
- Draw a small circle in the center of the palm.
- Build outward with concentric rings, scalloped petals, and fine dots.
- Extend leafy trails toward the wrist and fingers.
- Add miniature floral fillers to connect the entire composition.
One tip: Keep the mandala’s center symmetrical and leave narrow gaps between selected rings to make the intricate details more visible.
2. Arabic full-hand mandala mehndi
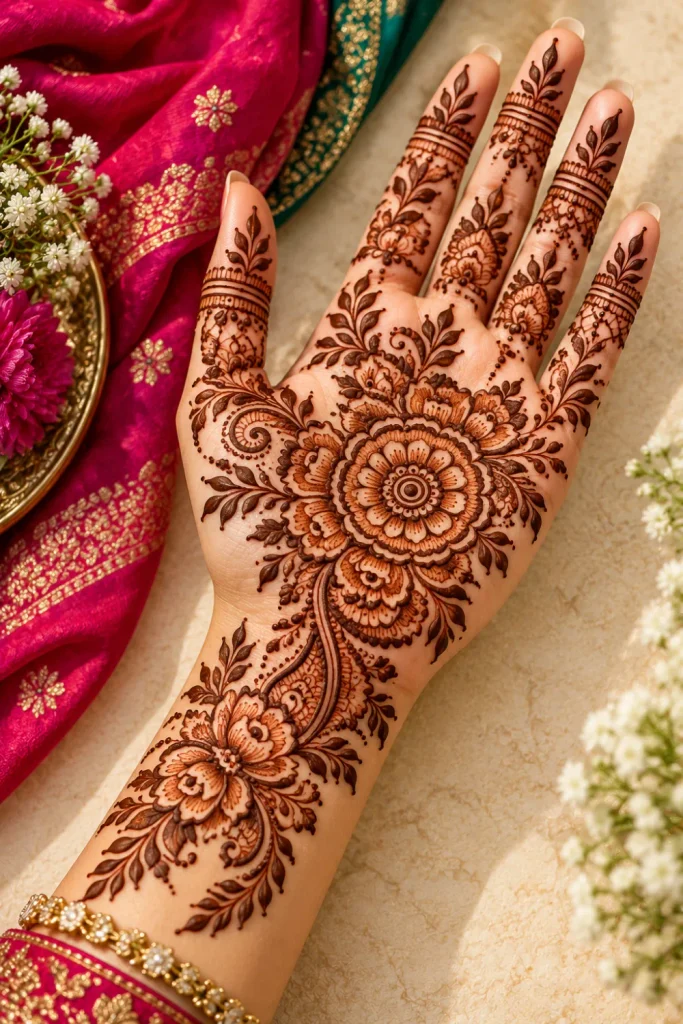
Arabic full-hand mandala mehndi combines bold floral shapes with flowing diagonal trails.
The contrast between fuller petals and open skin creates a graceful appearance without making every part of the hand look crowded.
Simple steps:
- Position a medium-sized mandala near the palm or slightly toward one side.
- Draw bold roses, paisleys, and leafy vines extending toward the fingertips.
- Decorate the fingers with curved bands and tiny dots.
- Leave a few open spaces between major motifs.
One tip: Use thicker outlines for the main flowers and finer strokes for the leaves. This gives your Arabic mandala design a more defined, contemporary finish.
3. Bridal mandala with jaali details
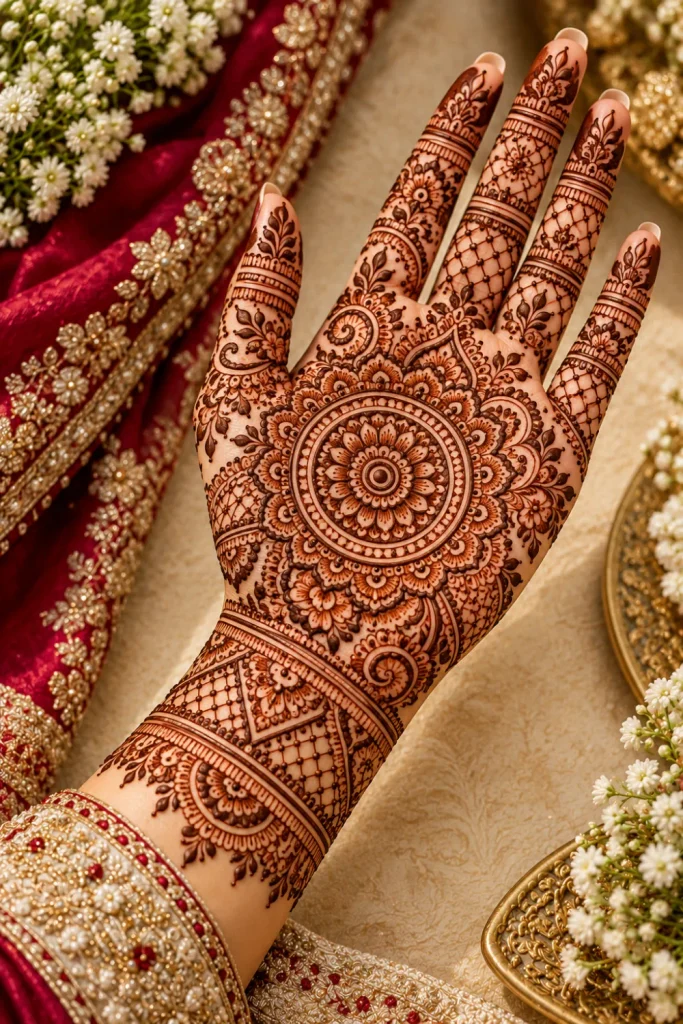
For brides who love elaborate henna, this design combines a prominent mandala with delicate jaali, or net-like, patterns.
Fine latticework, paisleys, and detailed borders create a rich bridal look that photographs beautifully from multiple angles.
Simple steps:
- Create a large circular or lotus-shaped mandala on the palm.
- Fill selected surrounding areas with fine diamond-shaped jaali.
- Add paisleys, tiny blossoms, and ornamental wrist bands.
- Finish with detailed fingertip patterns that complement the main design.
One tip: Alternate dense jaali sections with simpler floral panels. This keeps the bridal pattern readable rather than turning it into one solid mass of henna.
4. Back-hand mandala mehndi
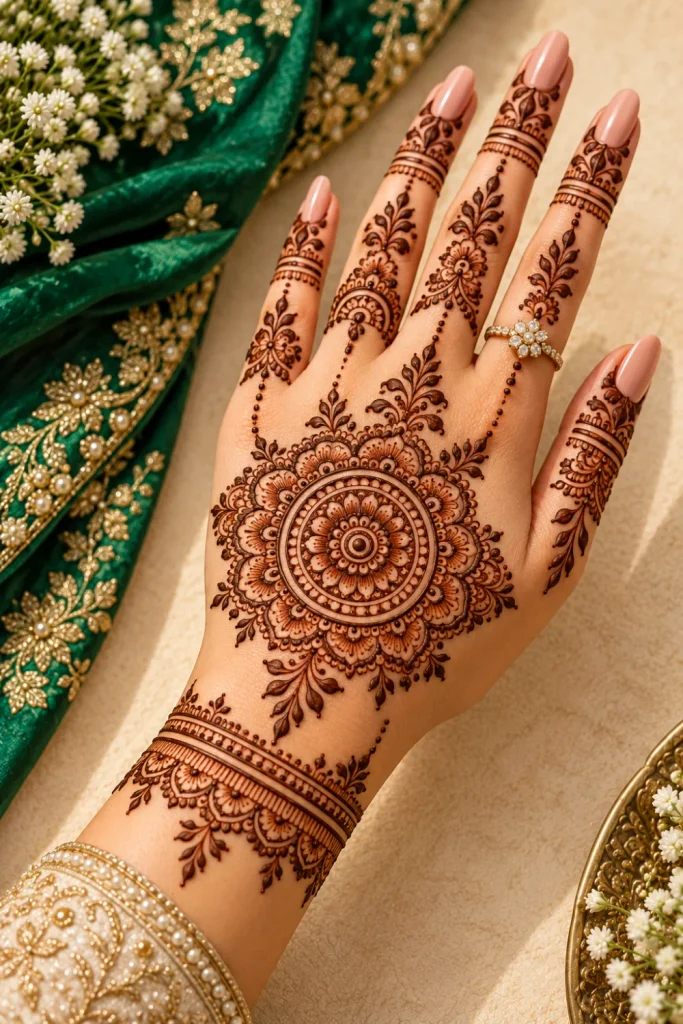
A back-hand mandala looks elegant when centered over the hand and connected to the fingers with delicate ornamental lines.
It is an excellent choice for showcasing rings, bracelets, and festive outfits while maintaining a decorative, jewelry-inspired appearance.
Simple steps:
- Place a circular mandala between the knuckles and wrist.
- Add curved petals and a delicate outer border.
- Draw fine trails connecting the circle to selected fingers.
- Finish with ring-like bands and a bracelet-style wrist detail.
One tip: Keep the central motif clear and avoid overcrowding the knuckles. The design will look more balanced in close-up Pinterest photographs.
5. Front-palm floral mandala mehndi
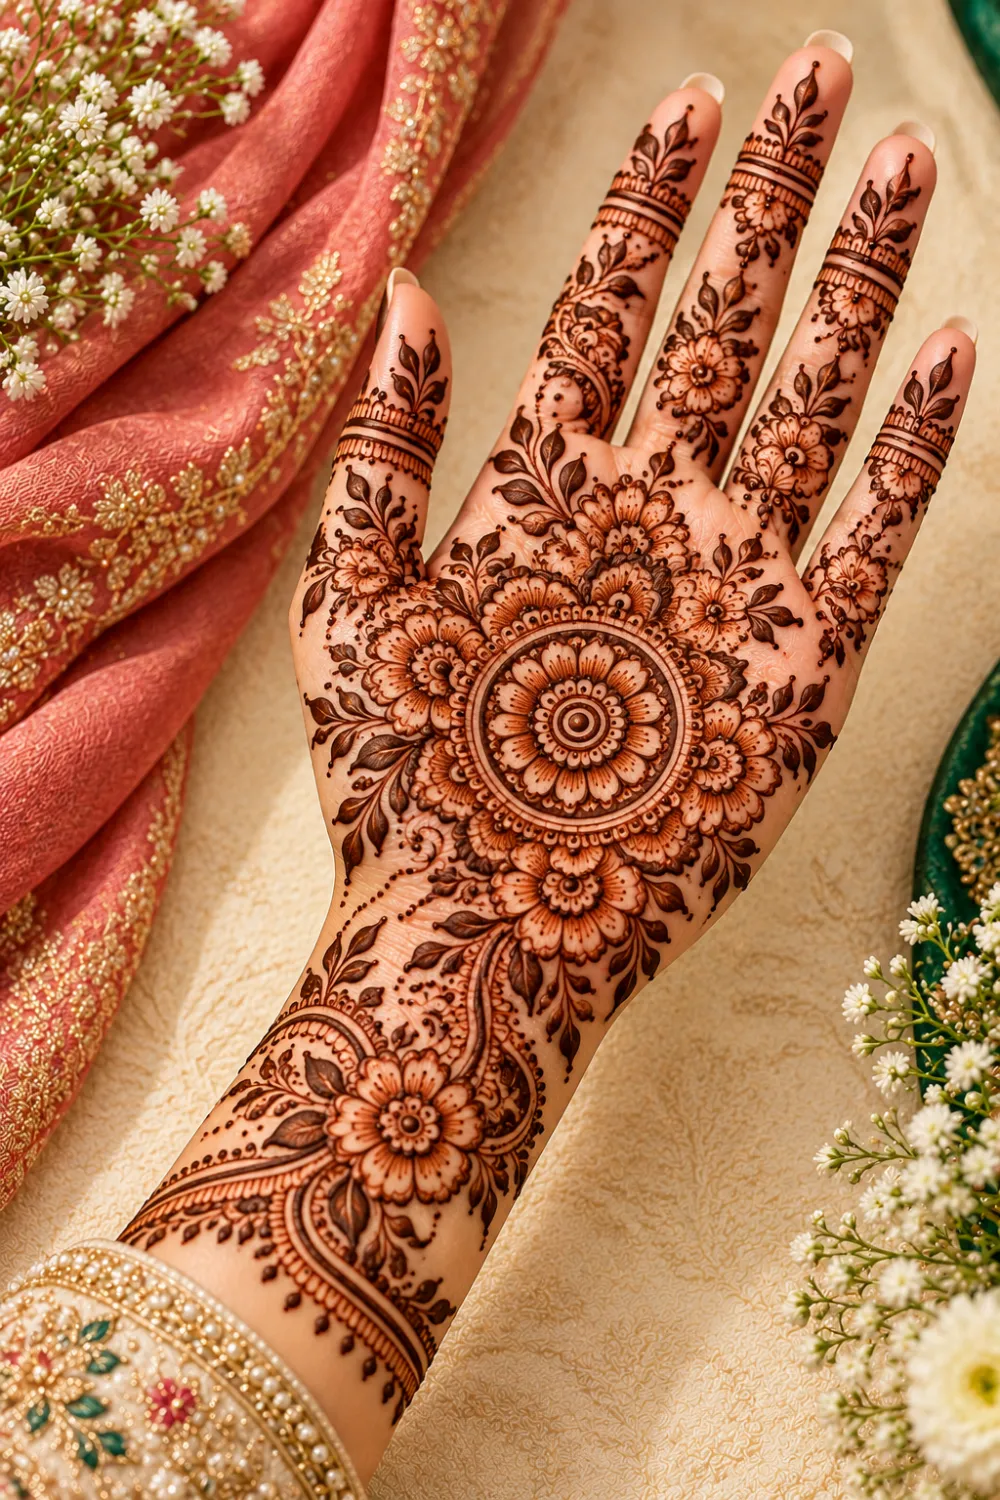
This style pairs a traditional palm mandala with soft floral details that extend toward the wrist and fingertips.
It suits festive occasions, family celebrations, and bridal events where detailed palm artwork is part of the overall look.
Simple steps:
- Draw a circular floral center with layered petals.
- Add small leaves, buds, and curved floral borders around it.
- Connect the mandala to the wrist using a leafy trail.
- Decorate each finger with coordinated floral or geometric elements.
One tip: Choose one dominant flower shape and repeat it throughout the palm. Repeating a motif creates visual harmony without making the design look predictable.
6. Fine-line mandala with negative space
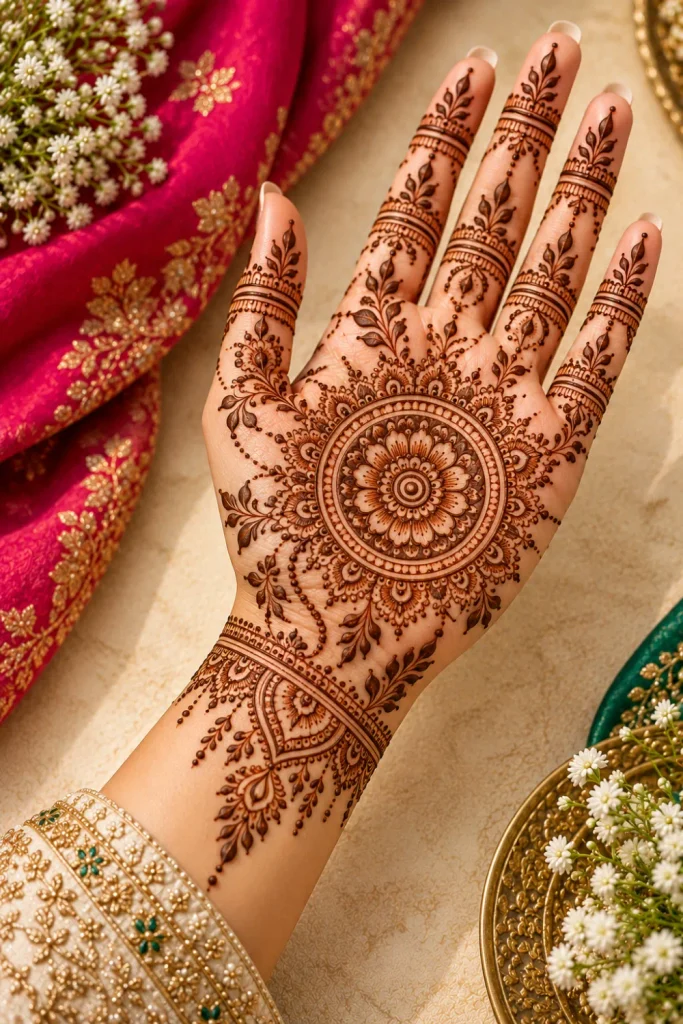
Love detailed patterns but prefer a lighter aesthetic?
A fine-line mandala with negative space uses deliberate gaps, thin outlines, and carefully placed dots to create a refined design.
It offers intricate artistry without covering every available patch of skin.
Simple steps:
- Outline a compact mandala using thin, even strokes.
- Build delicate petal rings around the central circle.
- Add tiny dots, fine leaves, and short finger trails.
- Leave selected areas of skin uncovered to frame the motifs.
One tip: Practice the circles and spacing on paper first. In a fine-line design, consistent proportions matter more than adding lots of extra detail.
7. Traditional Rajasthani mandala mehndi
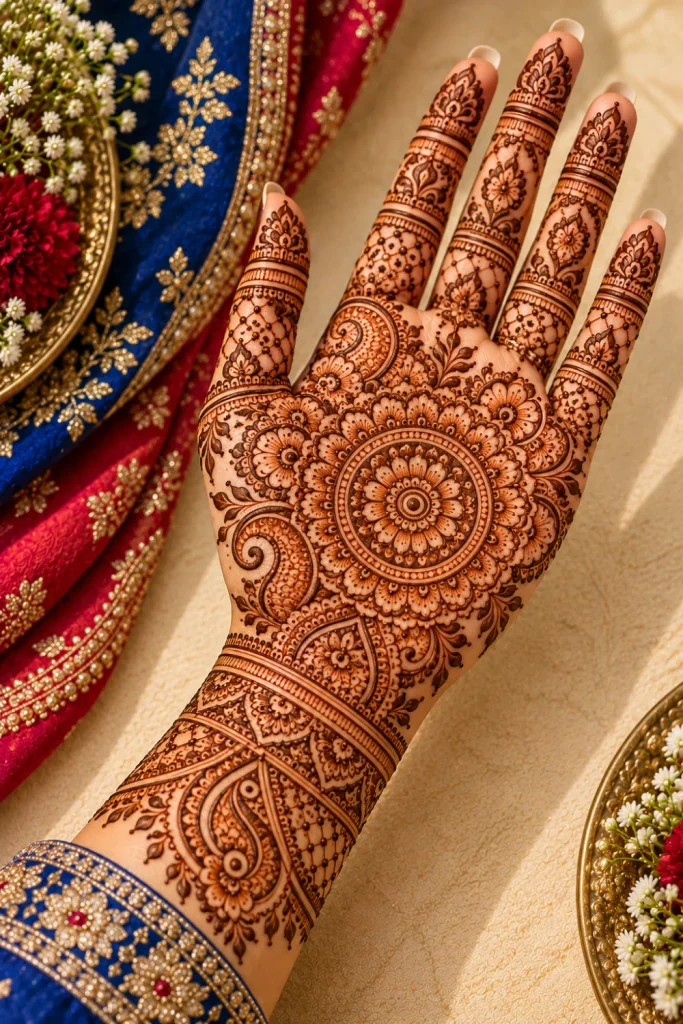
Rajasthani mandala mehndi celebrates intricate Indian henna artistry through ornate flowers, paisleys, fine latticework, and traditional detailing.
Its richly decorated appearance makes it especially appealing for brides and anyone who loves classic full-hand patterns.
Simple steps:
- Begin with a bold central mandala on the palm.
- Surround it with paisleys, floral arches, and curved borders.
- Fill connecting areas with jaali, curls, and miniature motifs.
- Complete the fingers with coordinated bands and patterned tips.
One tip: Keep the line weight consistent within each motif, but combine dense and open sections to create depth. Allow plenty of time for this detailed design.
8. Mandala with intricate finger patterns
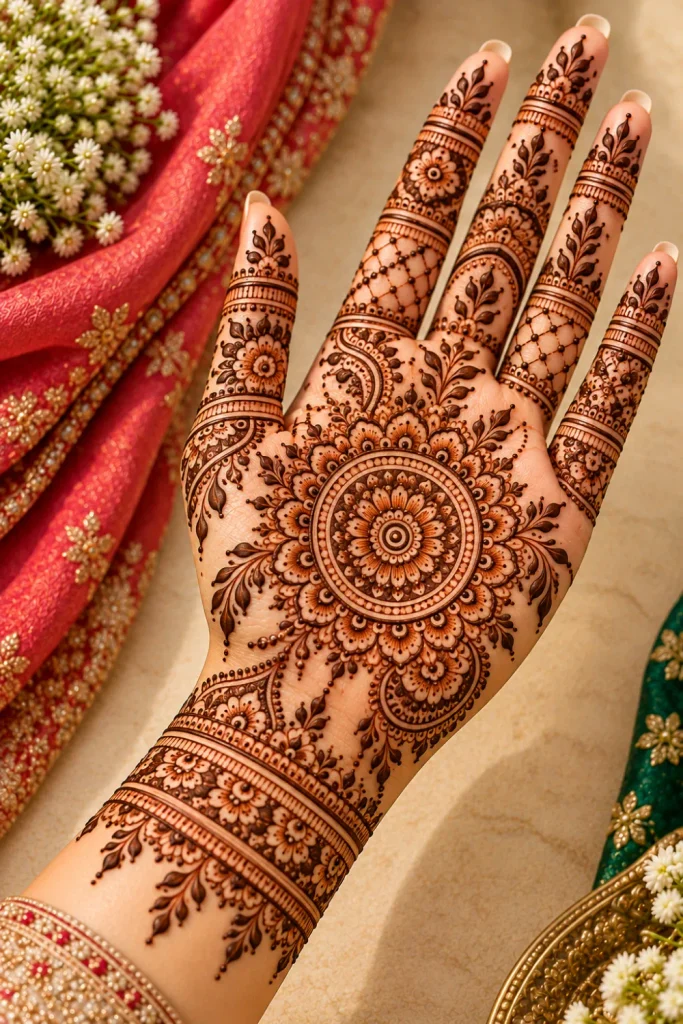
Sometimes, the smallest details make the strongest impression.
This design gives the mandala a central role while decorating each finger with individual bands, geometric shapes, miniature petals, and delicate dot chains.
Simple steps:
- Draw a medium-sized mandala in the center of the palm.
- Add thin lines or tiny floral trails leading toward the fingers.
- Decorate individual fingers with rings, diamonds, arches, and dots.
- Connect the composition with small wrist accents.
One tip: Vary the finger patterns while repeating one or two motifs across the hand. This creates an intentional, coordinated look without making every finger identical.
9. Festive floral mandala mehndi
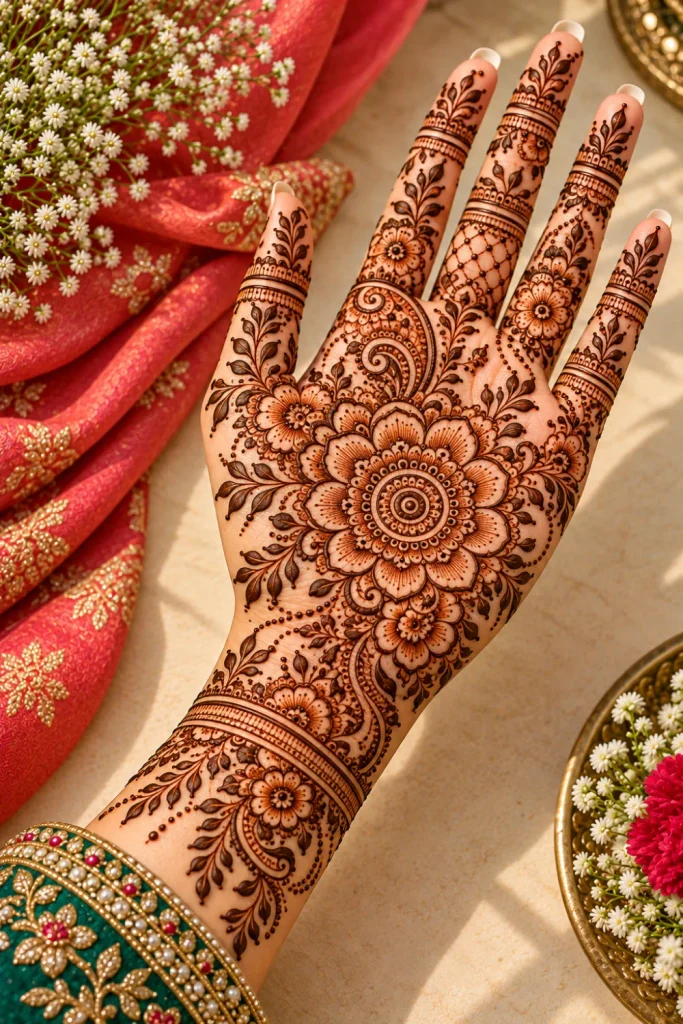
Festive floral mandala mehndi brings cheerful flower shapes together with curved vines and decorative accents.
It is a lovely option for celebrations such as Eid, Diwali, engagement parties, and family gatherings where you want your mehndi to feel special.
Simple steps:
- Create a flower-shaped mandala with rounded, clearly defined petals.
- Add rosebuds, leafy branches, and small paisleys around it.
- Extend the vines toward the fingers and wrist.
- Include delicate dots and ornamental bands for a festive finish.
One tip: Match the size of the main flowers to the amount of space available on the hand. Larger blooms create a statement, while smaller florals give the design a delicate finish.
10. Matching two-hand mandala mehndi
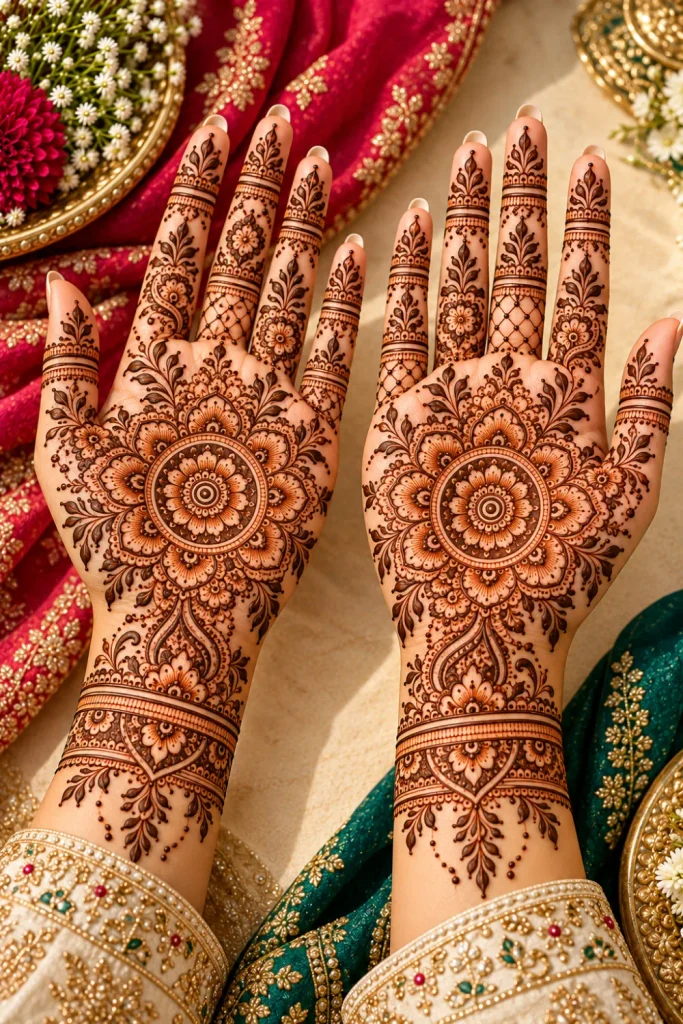
Matching two-hand mandala mehndi creates a coordinated look across both palms or the backs of both hands.
Perfect for weddings and special occasions, this style can be symmetrical without requiring every tiny detail to be identical.
Simple steps:
- Choose the same central mandala shape for both hands.
- Repeat the principal petals, borders, and finger motifs.
- Mirror the main floral trails to create visual balance.
- Compare both hands before completing the smallest details.
One tip: Plan both designs together before applying the henna. Matching the motif sizes and spacing makes the finished pair look cohesive in hand poses and photographs.
Final Thoughts: How to Choose and Care for Your Mandala Mehndi
The best intricate full-hand mehndi design is one that suits your occasion, available application time, and preferred level of detail.
A circular mandala offers timeless symmetry, Arabic florals feel flowing and modern, and bridal jaali patterns create a richly traditional finish.
Fine-line designs are ideal for anyone who prefers more breathing room.
Before applying your mehndi, follow these practical tips:
- Choose your design early. Save reference pictures of the palm, backhand, and finger details so the overall composition is clear.
- Prepare your hands. Wash and dry your skin before application. Avoid applying heavy creams or oils immediately beforehand.
- Use suitable henna. Choose a reputable product intended for skin application. Avoid so-called black henna products that may contain dangerous additives such as PPD.
- Allow enough time. Detailed bridal and Rajasthani patterns require more patience than simpler floral designs. Schedule your appointment with a comfortable time buffer.
- Protect the stain. Follow your henna artist’s aftercare instructions. Once the paste is ready to remove, scrape it off gently rather than washing it away immediately. The color typically deepens over the following 24–48 hours.
- Plan your photographs. Photograph the finished design in natural light, with relaxed hands and a simple background, to show off the mandala’s finer details.
For more inspiration, explore related guides to Arabic mehndi designs, simple finger mehndi patterns, bridal henna ideas, and back-hand floral designs.
These complementary styles can help you compare layouts and choose details that suit your celebration.
A beautiful mandala does not need every space filled.
The strongest designs balance intricate details with clear shapes, thoughtful spacing, and a central motif that draws the eye.
Save your favorite idea, personalize the details, and choose a pattern that feels right for your next special occasion.