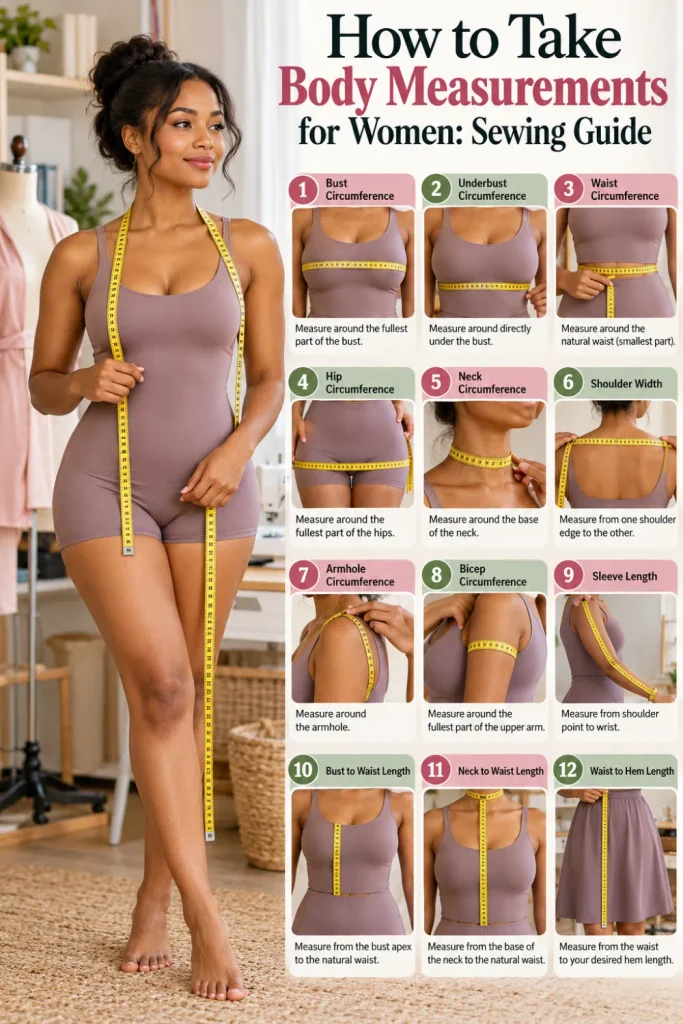
Finding the right fit starts long before you cut your fabric.
Learning how to take body measurements for women makes sewing easier, helps you choose the correct pattern size, and reduces frustrating fitting mistakes.
Whether you’re sewing a beautiful dress, tailored trousers, or a simple everyday top, this guide walks you through 10 essential measurements, practical sewing tips, and easy ways to record your numbers for a better fit.
Why Accurate Body Measurements Matter for Sewing
Ready-made clothing sizes aren’t always consistent, and sewing patterns can fit differently from one brand to another.
That’s why taking your measurements before choosing a size is such an important step.
Accurate measurements help you:
- Select a suitable sewing pattern size.
- Adjust patterns for your unique proportions.
- Improve the fit of dresses, skirts, blouses, and trousers.
- Reduce fabric waste and avoid unnecessary alterations.
- Create a reusable body measurement chart for future projects.
What you’ll need: A flexible measuring tape, a full-length mirror, a notebook or measurement chart, a pencil, and a helper if possible.
1. Prepare for accurate body measurements.
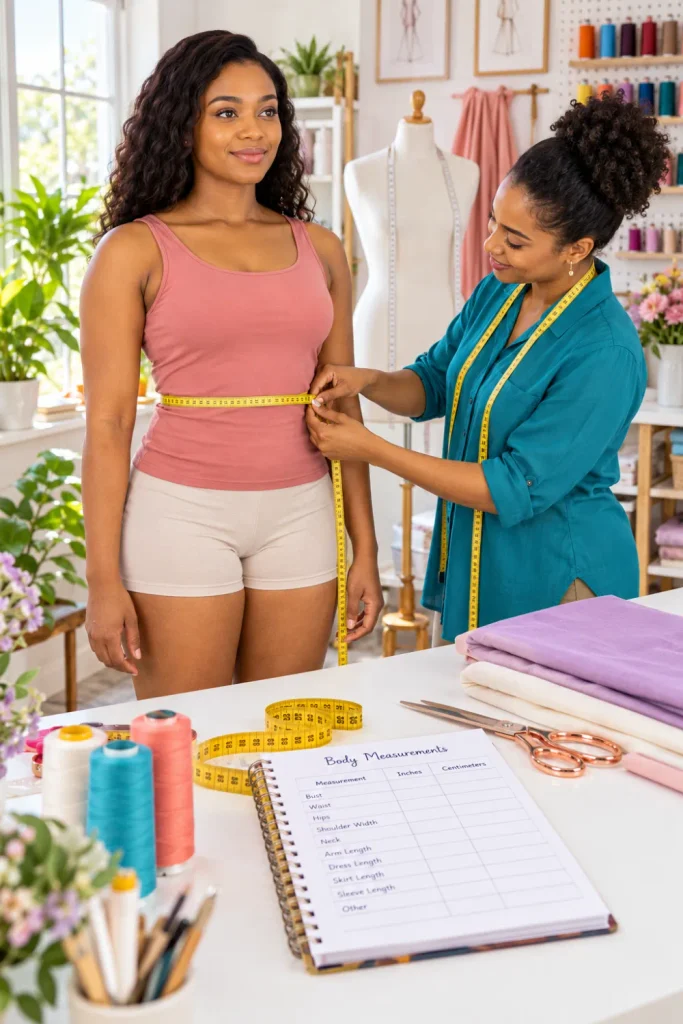
Before measuring, prepare your space and clothing.
Small details, such as a twisted measuring tape or bulky sweater, can affect your results.
Step-by-step instructions
- Wear lightweight, close-fitting clothing or suitable undergarments.
- Stand naturally with your weight balanced on both feet.
- Keep your measuring tape flexible, straight, and level.
- Hold the tape snugly against your body without compressing your skin.
- Write down each measurement immediately.
If possible, ask someone to help with measurements across your back or around areas that are difficult to reach.
Pro tip: Take measurements in front of a full-length mirror to check that the tape stays horizontal. Avoid pulling your stomach in or forcing yourself into an unnatural posture.
2. Measure high bust and full bust.
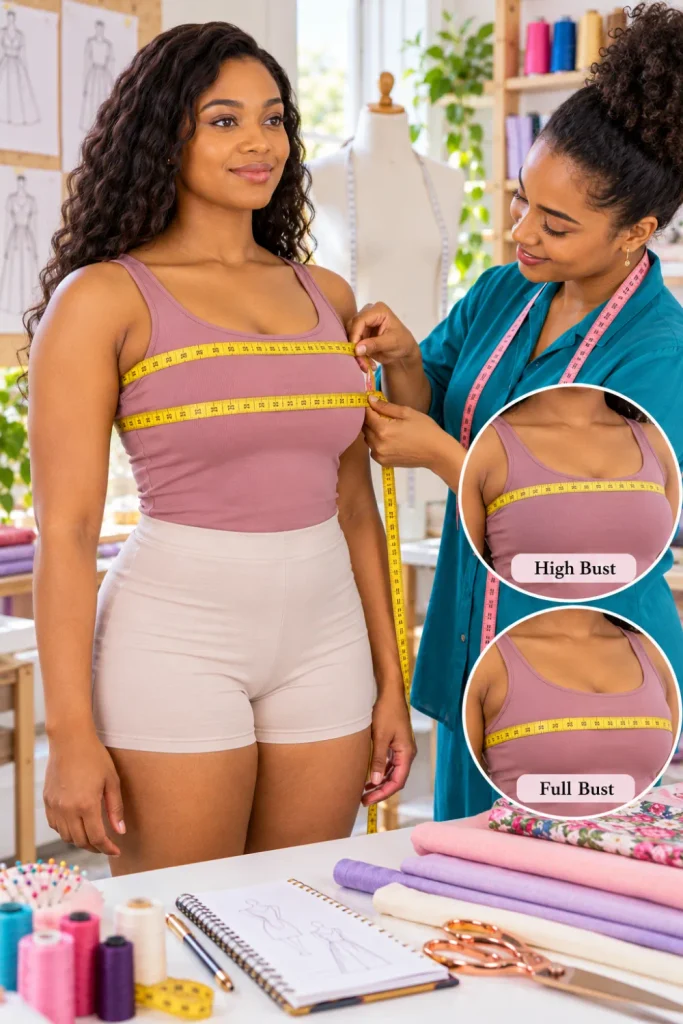
Bust measurements are essential when choosing patterns for dresses, tops, blouses, and fitted bodices.
Understanding the difference between high bust and full bust can also help you identify adjustments a pattern may require.
Step-by-step instructions
- For the full bust, wrap the tape around the fullest part of your bust.
- Keep the tape level across your back.
- Let your arms rest naturally while checking the measurement.
- For the high bust, position the tape above the fullest part of your bust, following the pattern’s measurement instructions.
- Record both measurements separately.
Pro tip: Wear the bra or undergarment you expect to wear with the finished garment. For patterns with bust cups or specialized fitting instructions, follow the pattern maker’s guidance.
3. Measure the underbust.
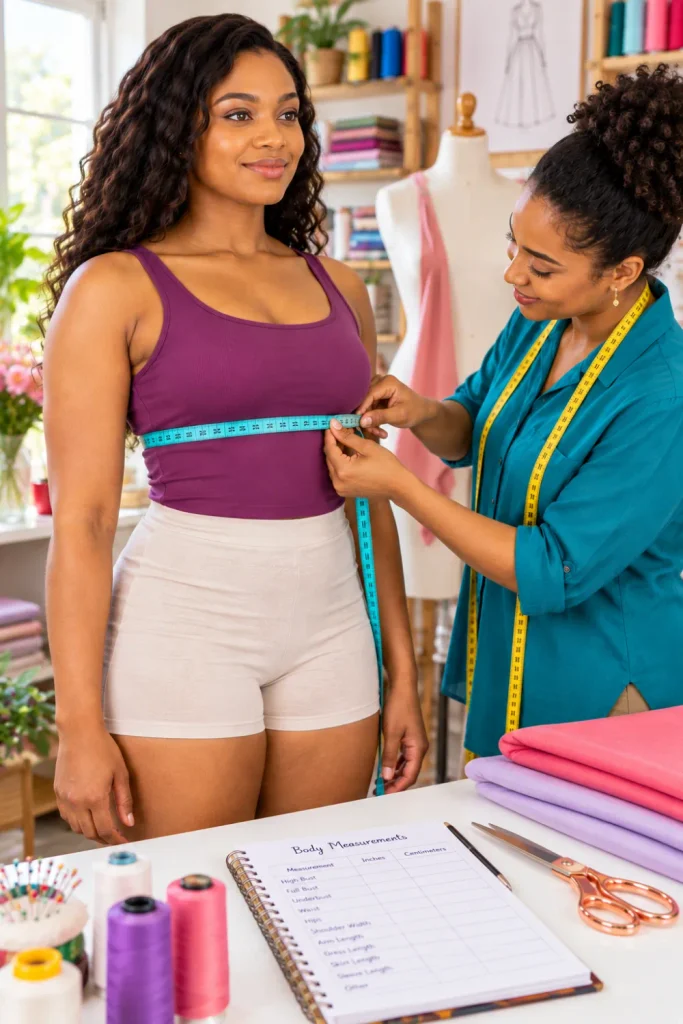
The underbust measurement is taken directly beneath the bust, around the ribcage.
It can be especially useful for fitted bodices, certain dresses, supportive garments, and patterns that specifically request it.
Step-by-step instructions
- Position the tape immediately below the bust.
- Wrap it evenly around your ribcage.
- Keep the tape comfortably snug without digging into your skin.
- Breathe normally rather than holding your breath.
- Record the result in your measurement chart.
Pro tip: Don’t confuse the underbust measurement with the waist measurement. They refer to different areas of the torso and serve different fitting purposes.
4. Measure the natural waist.
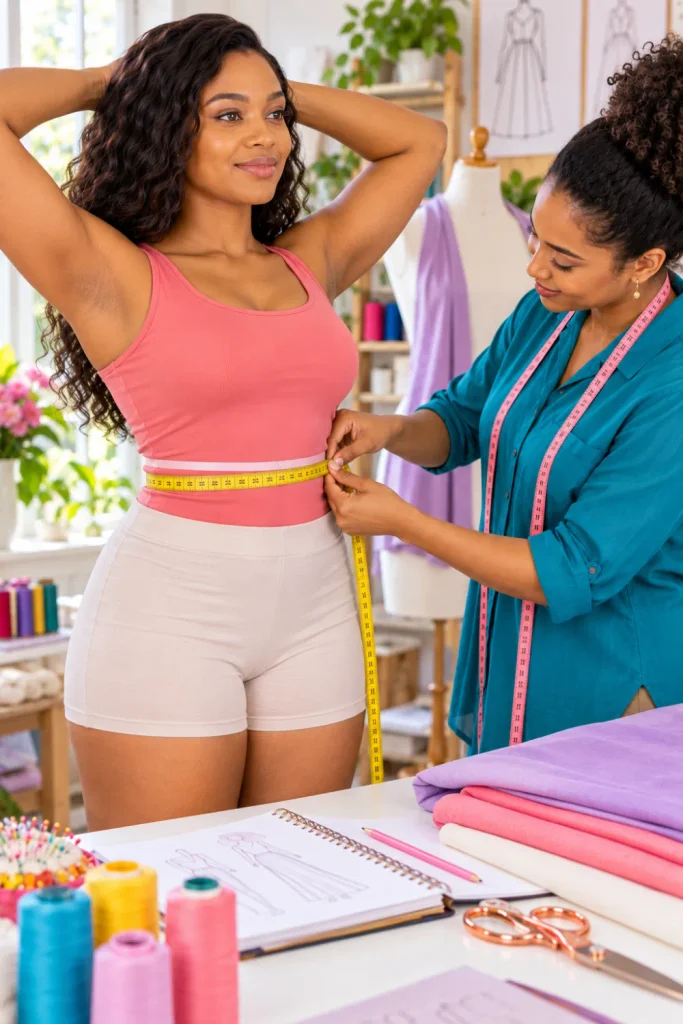
Your natural waist is generally the narrowest part of your torso, although its position varies from person to person.
Getting this measurement right is important for fitted skirts, high-waisted trousers, dresses, and tailored tops.
Step-by-step instructions
- Stand comfortably and bend gently to one side.
- Identify the crease that forms around your torso.
- Tie a narrow piece of elastic around that point if you need a visual reference.
- Wrap the tape around your natural waist.
- Keep the tape level and avoid pulling it too tightly.
Pro tip: Keep the elastic in place while taking your front and back waist-length measurements. This creates a consistent reference point for later pattern adjustments.
5. Measure the high hip and full hip.
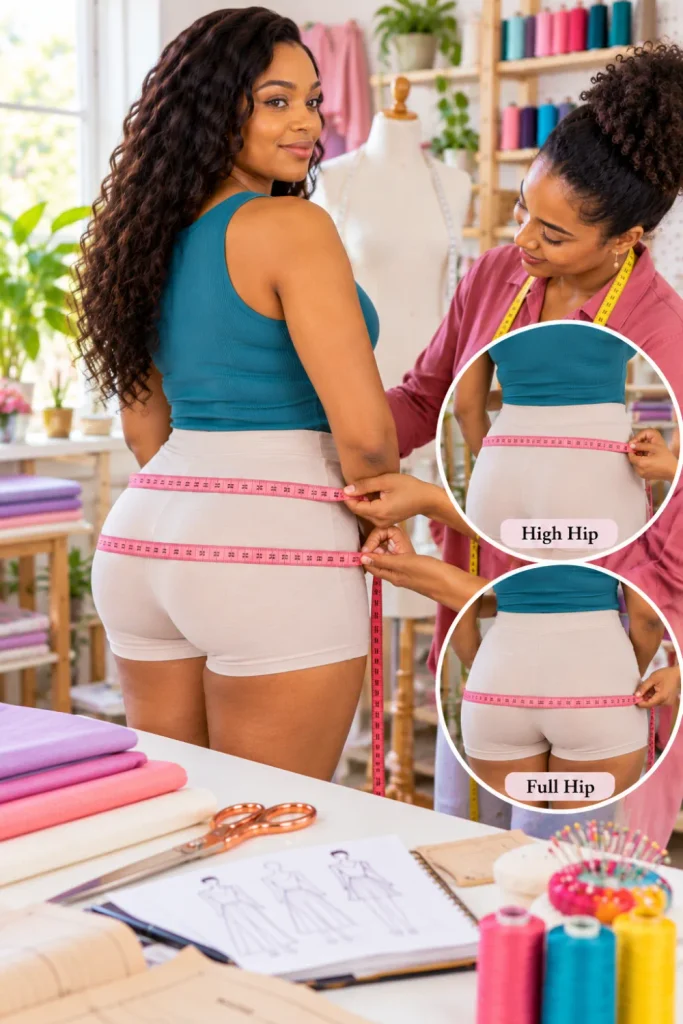
Hip measurements help determine how a garment fits around your lower torso, seat, and upper thighs.
For trousers and fitted skirts, using the correct hip measurement can make a noticeable difference.
Step-by-step instructions
- Measure the high hip at the location specified by your sewing pattern.
- Position the tape around the fullest part of your hips and seat for the full hip measurement.
- Stand with your feet together and your posture relaxed.
- Check that the tape remains horizontal all the way around.
- Record the high hip and full hip measurements separately.
Pro tip: Use a mirror or ask someone to check the back of the tape. A slight upward or downward tilt can produce an inaccurate reading.
6. Measure shoulder width and neck circumference.
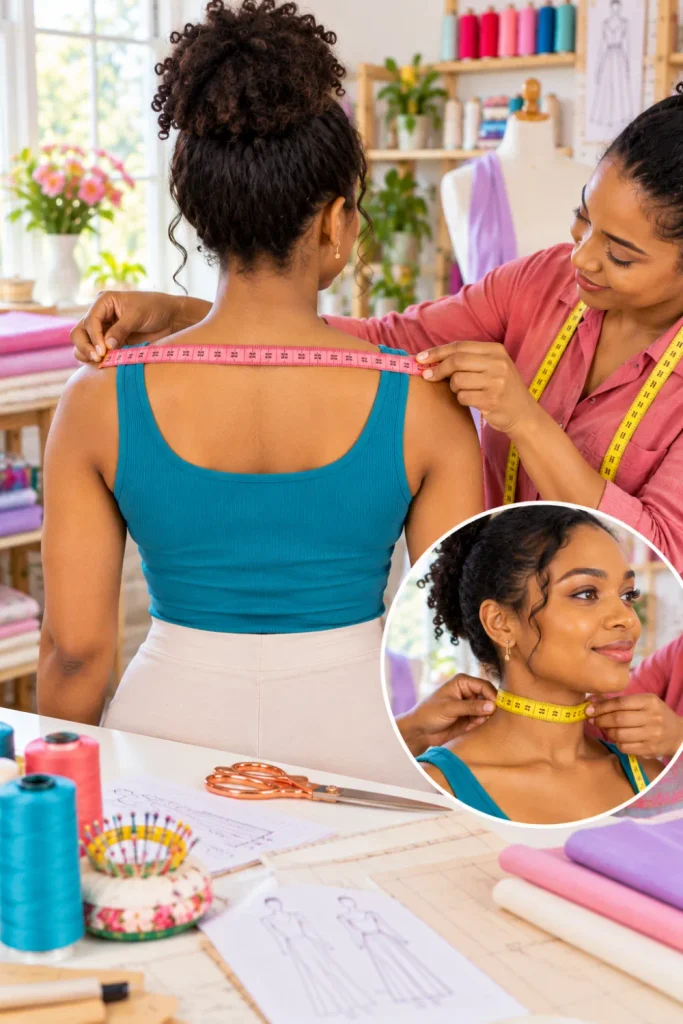
Shoulder width influences how a garment sits across your upper body, while neck circumference can help with patterns that specify a neckline measurement.
These details are particularly useful for fitted shirts, jackets, dresses, and structured bodices.
Step-by-step instructions
- Locate the shoulder points where your shoulders meet your arms.
- Measure across the back from one shoulder point to the other, following the pattern’s instructions.
- Position the tape around your neck at the specified neckline reference.
- Keep the tape comfortable rather than tight.
- Record each measurement separately.
Pro tip: Ask a helper to take these measurements. Reaching across your own back can shift your shoulders and make the reading less reliable.
Remember that shoulder width and neckline circumference are not interchangeable with garment shoulder seams or finished neckline measurements.
7. Measure sleeve length, upper arm, and wrist.
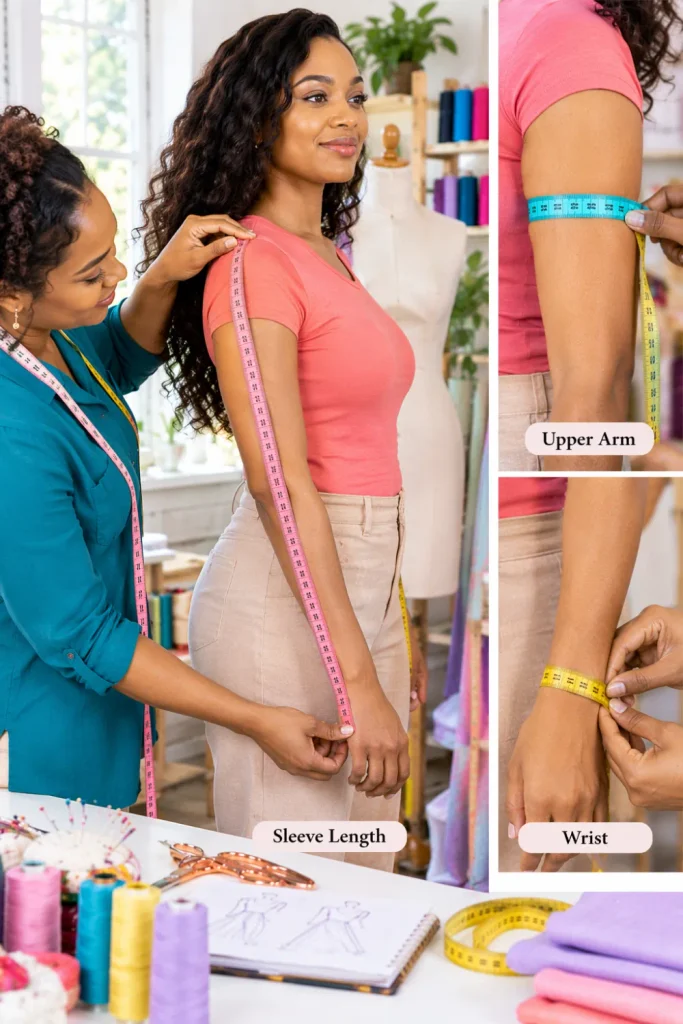
Sleeve measurements help you create garments that feel comfortable when moving your arms.
They’re especially important for fitted sleeves, long-sleeved blouses, jackets, and garments with cuffs.
Step-by-step instructions
- Start at the shoulder point identified by your pattern.
- Measure along the arm toward the wrist, following the pattern’s instructions for arm position.
- Measure around the fullest part of your upper arm.
- Measure around your wrist where the sleeve or cuff is intended to finish.
- Record all three measurements.
Pro tip: Check whether your pattern expects the arm to be straight, slightly bent, or measured along a particular line. Sleeve length can change depending on how your arm is positioned.
For fitted sleeves, compare your upper-arm measurement with the pattern’s finished sleeve dimensions and recommended ease.
8. Measure front and back waist length.
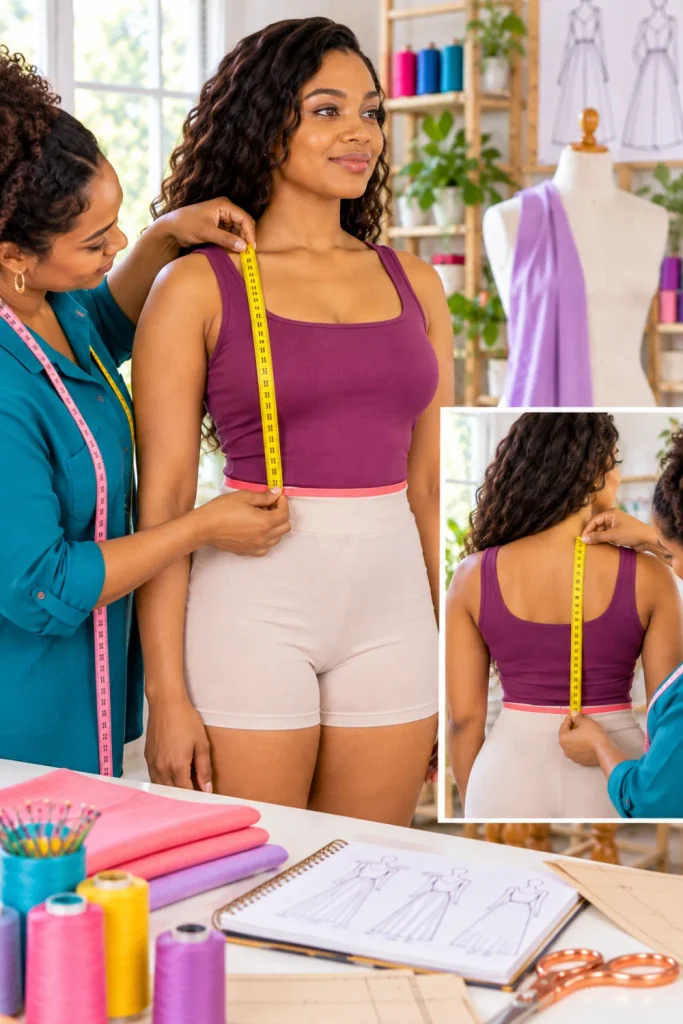
Front and back waist length measurements help determine where the waistline sits on your body.
They’re useful when adjusting bodice length, correcting waist placement, or improving the fit of fitted dresses and tops.
Step-by-step instructions
- Identify the shoulder or neckline starting point specified by your pattern.
- Measure down the front torso to your natural waist.
- Measure down the back torso from the appropriate reference point to the same waistline.
- Keep your posture natural throughout the process.
- Record front and back waist lengths separately.
Pro tip: Use the elastic marking your natural waist as your endpoint. If a pattern’s waistline sits too high or too low, these measurements can help guide adjustments.
Avoid assuming your front and back measurements will be identical. Differences in torso proportions and body shape can affect the fit of a garment.
9. Measure inseam and crotch depth.
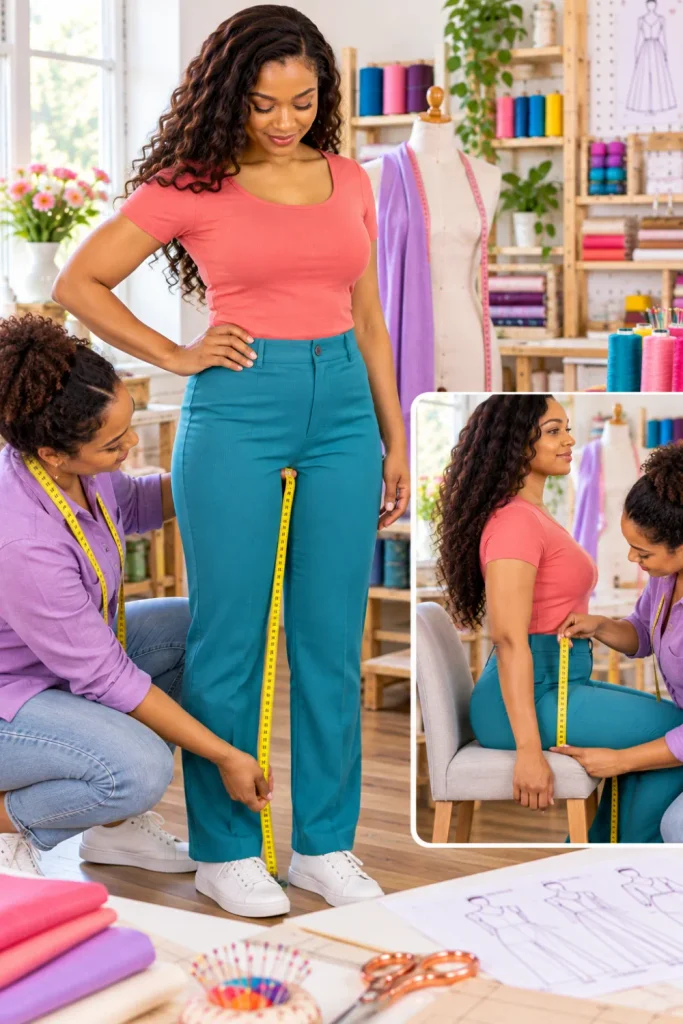
When sewing trousers, jeans, shorts, or jumpsuits, leg and rise measurements are essential for comfort.
Incorrect measurements may result in trousers that feel too short, too long, or uncomfortable when sitting.
Step-by-step instructions
- For the inseam, measure from the inner-leg starting point specified by the pattern down to the desired hem.
- For crotch depth, follow the pattern’s reference points and measuring method.
- Keep your stance natural and avoid spreading your feet excessively.
- Ask a helper to assist with crotch-depth measurements if necessary.
- Record the inseam and crotch-depth measurements separately.
Pro tip: Don’t automatically use your favorite trousers as the exact measurement standard. Their fit, rise, and intended ease may differ from the garment you’re planning to sew.
For a more reliable result, compare your measurements with the pattern’s instructions and finished garment dimensions.
10. Record height and garment-specific lengths
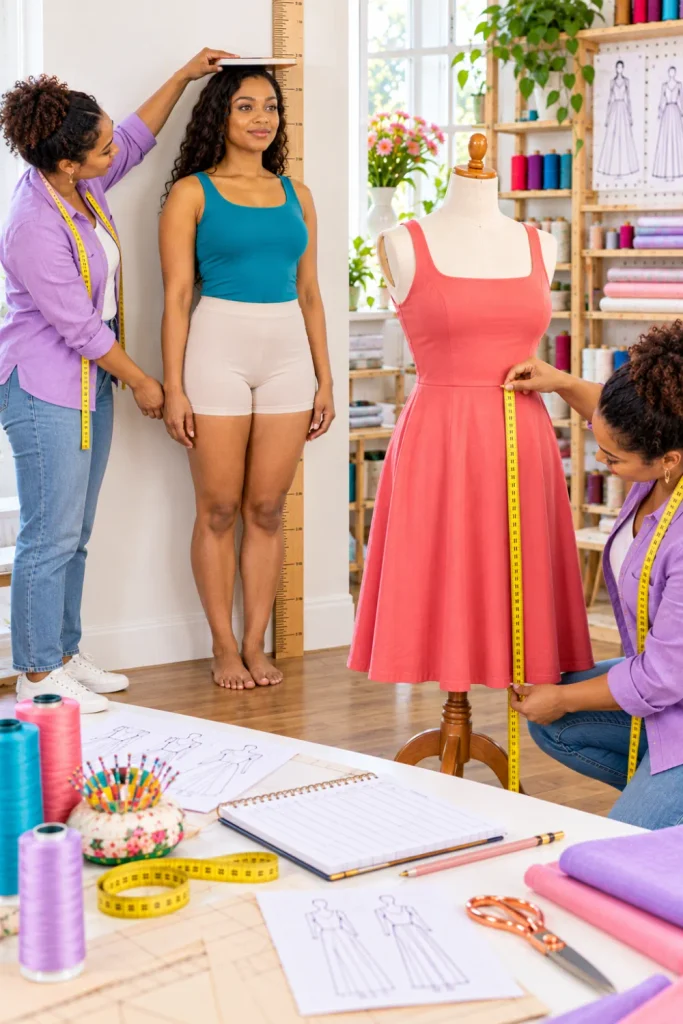
Height and garment-specific lengths help you determine whether a pattern needs adjustments before you begin cutting fabric.
They’re especially useful for dresses, skirts, trousers, coats, and other garments where length affects the final look.
Step-by-step instructions
- Measure your height without shoes while standing upright against a wall.
- Record any additional lengths requested by your pattern.
- Measure dress or skirt length from the specified waist, hip, or other reference point.
- For the trouser outseam, measure along the outside of the leg according to the pattern’s instructions.
- Review every measurement and compare it with the exact pattern’s size chart before cutting fabric.
Pro tip: Keep a master measurement chart and update it when needed. You won’t have to start from scratch for every new sewing project.
Remember that your body measurements describe your body, while finished garment measurements describe the garment after construction. The difference between them includes the pattern’s intended wearing and design ease.
Extra Sewing Tips for Better-Fitting Clothes
Once you’ve recorded your measurements, a few additional checks can make the sewing process smoother.
- Check the size chart every time. Don’t assume your size is identical across different pattern brands.
- Use the pattern’s measurement instructions. Some patterns use different reference points or require additional measurements.
- Understand wearing ease. A close-fitting garment and a loose-fitting garment need different amounts of room.
- Make a toile or muslin when appropriate. Testing a pattern with inexpensive fabric can reveal fitting issues before you cut your main fabric.
- Measure consistently. Use the same units, posture, and reference points each time.
- Mark adjustments on your pattern. Keep notes about changes to bust, waist, hips, sleeve length, or torso length.
Quick Body Measurement Checklist
Before choosing your pattern size, confirm that you’ve recorded:
- High bust and full bust
- Underbust
- Natural waist
- High hip and full hip
- Shoulder width and neck circumference
- Sleeve length, upper arm, and wrist
- Front and back waist length
- Inseam and crotch depth
- Height and garment-specific lengths
Keep this checklist with your sewing supplies so it’s ready for your next project.
Final Thoughts
Learning how to take body measurements for women is one of the most useful skills for anyone who wants to sew clothes that fit comfortably and look polished.
With a flexible measuring tape, a clear measurement chart, and a little patience, you can make more informed pattern choices and avoid many common fitting mistakes.
Start by recording your essential measurements, then check the size chart and fitting instructions for each new pattern.
If you’re making a structured dress, tailored trousers, or another close-fitting garment, consider testing the pattern before cutting your final fabric.
Ready for your next sewing project?
Save this guide to your Pinterest sewing board, create a personal body measurement chart, and explore sewing pattern fitting guides to learn how to adjust bust, waist, hip, and garment lengths for a more customized fit.