Forget the standard bouquet of flowers this year.
Why not try something she can actually eat?
Making treats at home is a classic way to show some love and these Mother’s Day Cake Pops Decorations ideas, are about to level up your dessert game.
They’re bite-sized, totally customizable and surprisingly easy to make look professional.
Let’s get into some sweet inspiration for Mom.
1. The Blooming Rosebud
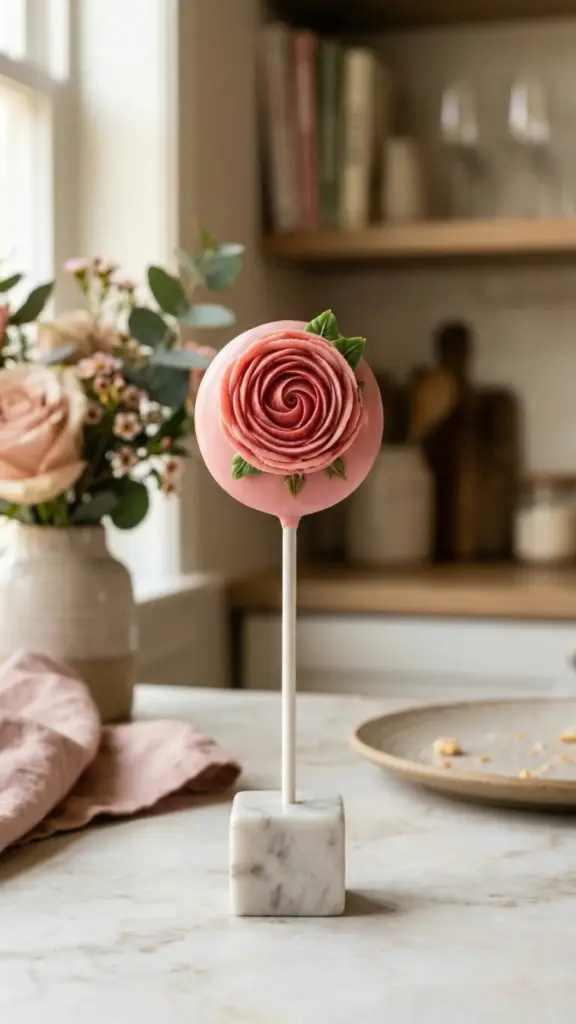
Is there anything more iconic than a rose? Probably not.
These look high-end but just require a bit of patience with a piping bag.
It’s a solid way to use simple techniques to create edible “petals” out of candy melts or buttercream.
Steps:
- Dip the pop in red or pink coating.
- Use a petal tip with frosting to pipe a spiral on top.
- Add a small green leaf at the base.
Tip: Freeze the pops for ten minutes before piping to help the petals set instantly.
2. Ombre Pink Gradient
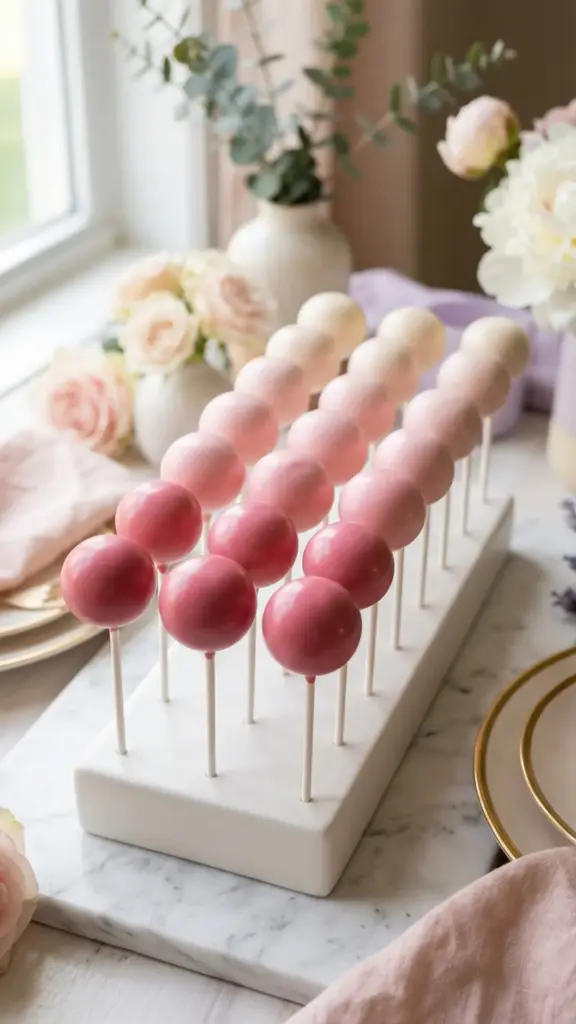
A set of pops that transition from dark to light pink looks incredible on a dessert table.
It’s a subtle look that feels very intentional and modern.
You just need one color of candy melt and some white to dilute it.
Steps:
- Divide your melted candy into three bowls.
- Add different amounts of white to create three shades.
- Dip an equal number of pops in each shade.
Tip: Line them up from darkest to lightest for the best visual impact.
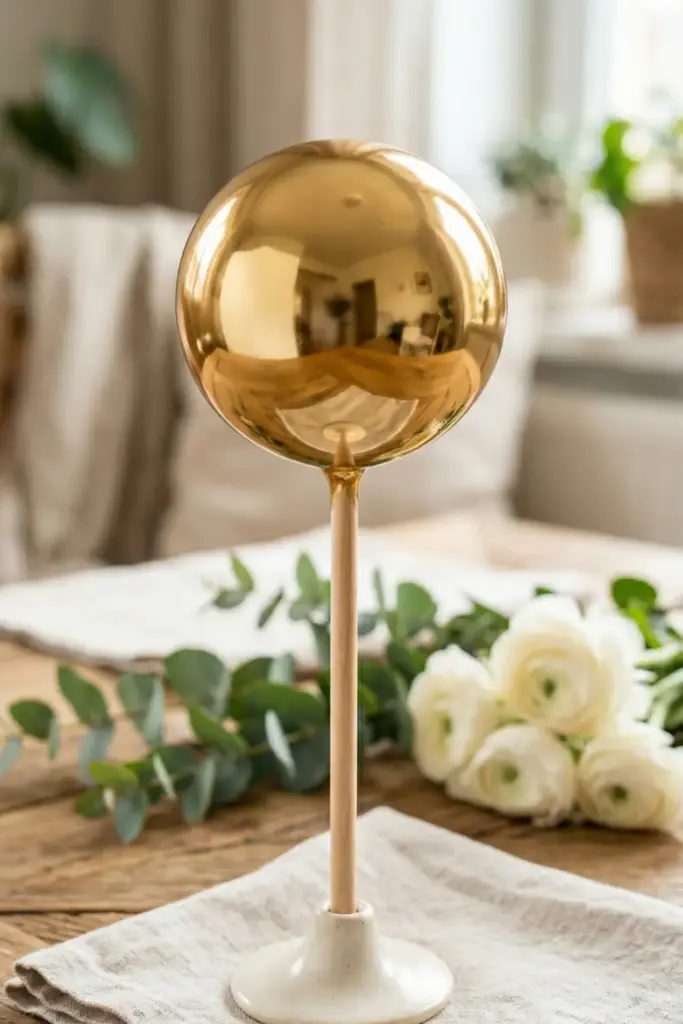
3. Golden Leaf Elegance
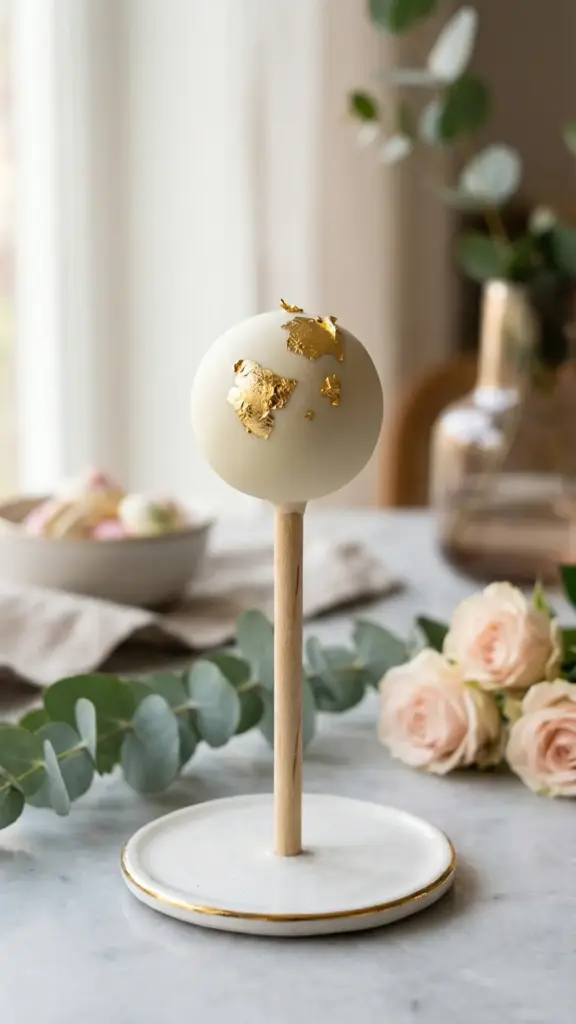
If Mom likes the finer things, these are for you.
Edible gold leaf adds a metallic pop that makes a basic cake ball look like it came from a high-end boutique.
It’s messy but the result is worth the glittery fingers.
Steps:
- Dip pops in a matte white or black coating.
- Wait for them to dry completely.
- Apply small flakes of gold leaf using a dry paintbrush.
Tip: Use tweezers to handle the gold leaf, it’s so thin it will disappear if you touch it.
4. Pressed Edible Flowers
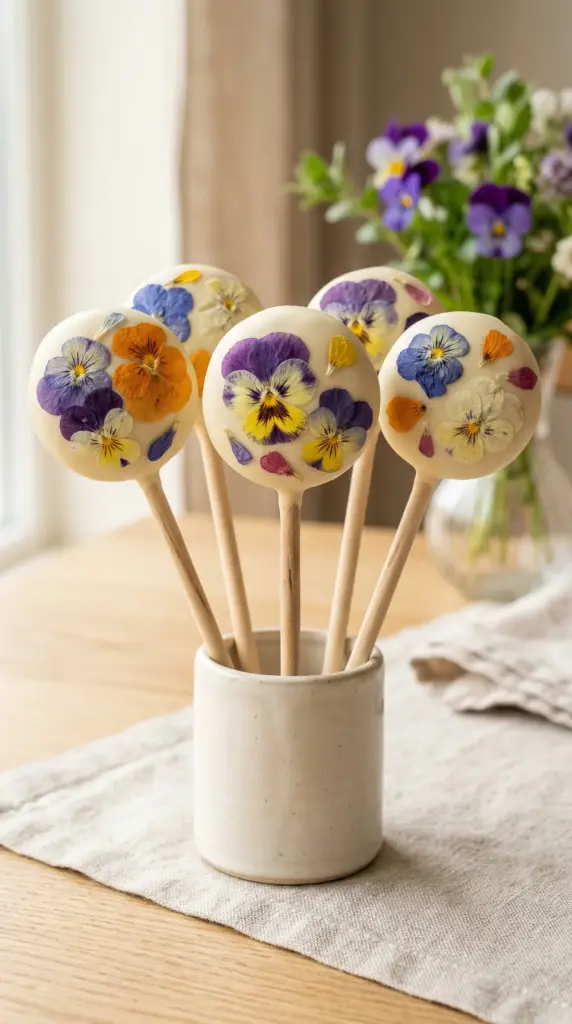
Using real flowers is a total showstopper.
This isn’t about piping skills, it’s about nature doing the work.
Just make sure you are using flowers that are actually safe to consume, like pansies or violas.
Steps:
- Dip pops in a neutral cream or white.
- While the coating is wet, gently press a dried edible flower onto the surface.
- Let it set.
Tip: Use a tiny bit of clear corn syrup if the flower won’t stay put once the coating dries.
5. Tiny Teacup Shapes
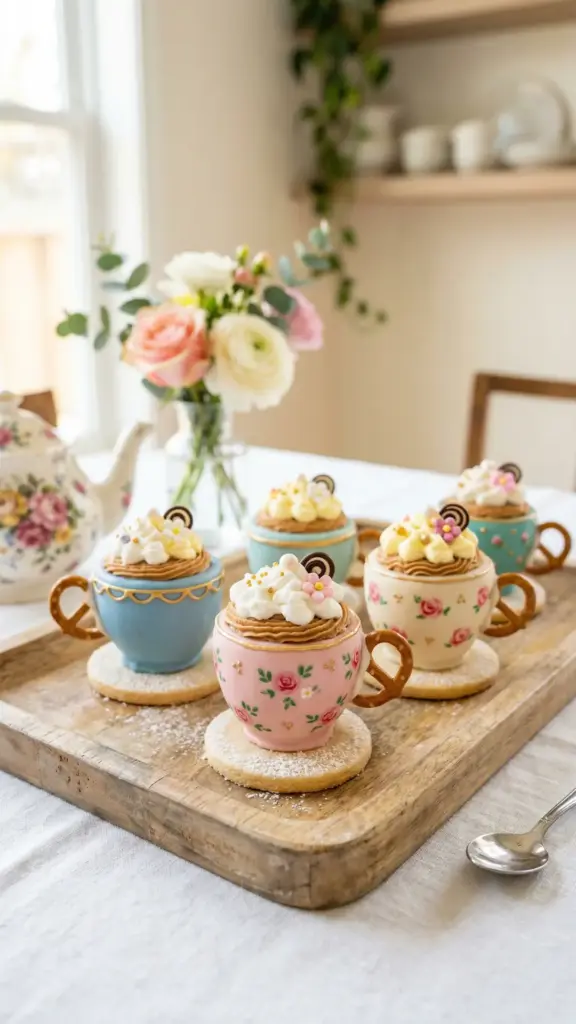
This is a bit more “crafty” but adorable for a Mother’s Day tea party.
You’re basically turning the cake pop upside down to create a base.
It’s a whimsical look that usually gets a lot of “how did you do that?” questions.
Steps:
- Place the dipped pop on a small circular cracker or cookie (the “saucer”).
- Attach a small pretzel loop to the side with melted chocolate (the “handle”).
- Pipe a little “tea” or “foam” on the top surface.
Tip: Use white chocolate to “glue” the handle on and hold it for 30 seconds.
6. Polka Dot Pastels
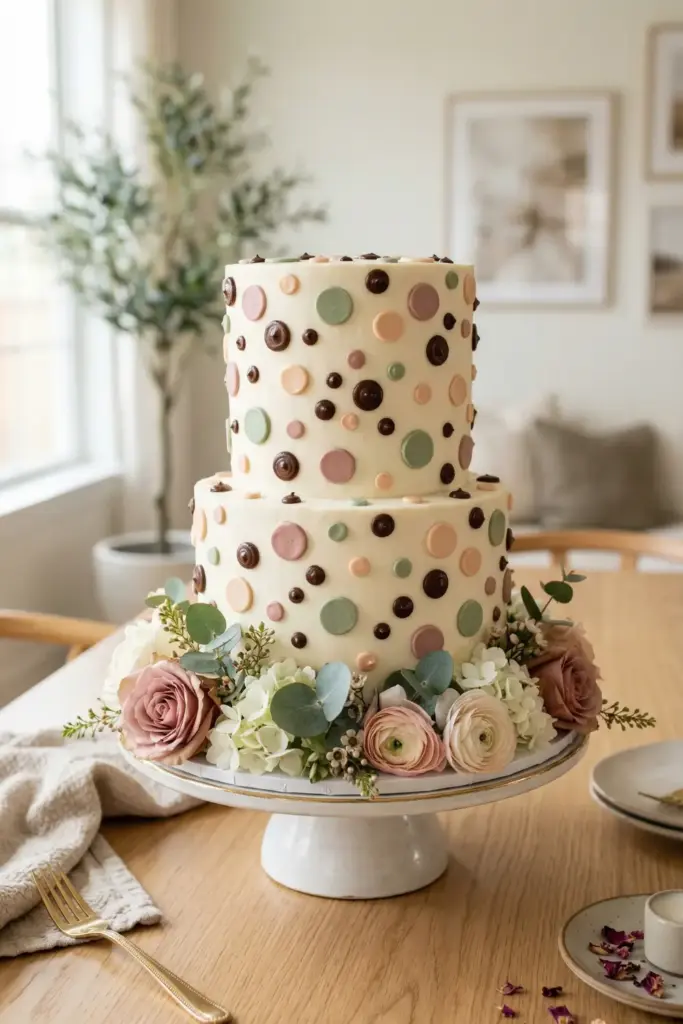
Simple, clean and classic.
Polka dots never really go out of style and they are very forgiving if you don’t have a steady hand.
You can go for a “shabby chic” look by using muted colors like sage and dusty rose.
Steps:
- Dip your pop in a solid pastel color.
- Use a toothpick or a small round piping tip to add dots in a contrasting color.
- Space them out evenly or go for a clustered look.
Tip: Dip the toothpick in warm water between dots to keep the chocolate from clumping.
7. Lavender Spring Design
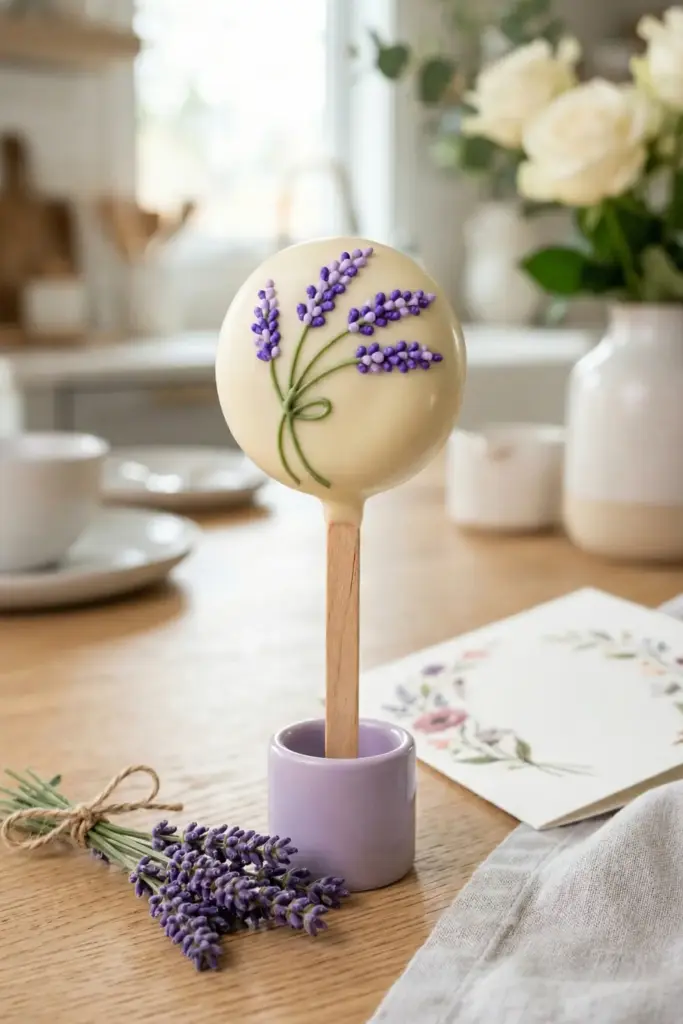
Lavender is synonymous with relaxation, something every mom needs.
This design is minimalist and smells, well, it doesn’t smell like lavender unless you add extract but it looks like it!
Steps:
- Dip the pop in white chocolate.
- Pipe a thin green line for the stem.
- Add tiny purple dots along the top of the stem to mimic the flower.
Tip: Adding a tiny drop of lavender oil to the cake mix can tie the whole theme together.
8. Watercolor Brushstrokes
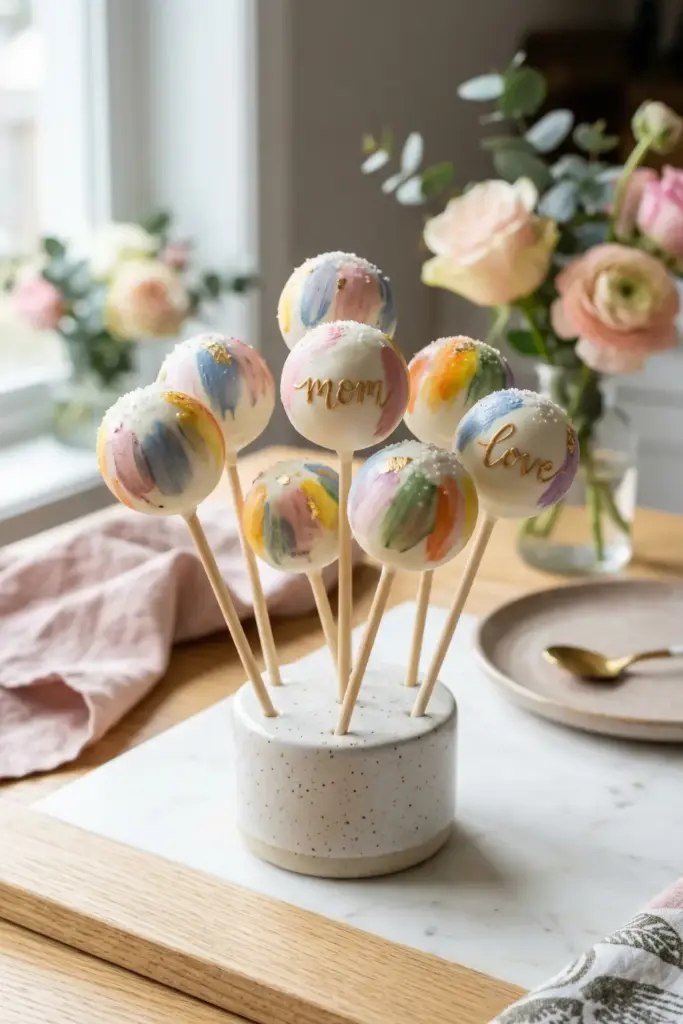
You don’t need to be an artist for this one.
It’s supposed to look a bit messy and “painterly”.
It’s a very sophisticated look that works best on a white background.
Steps:
- Dip pops in white candy melts and let them dry.
- Mix food coloring with a tiny bit of almond extract or vodka.
- Brush “streaks” of color across the pop with a food-safe brush.
Tip: The alcohol evaporates quickly, leaving the color behind without making the chocolate soggy.
9. Edible Pearl Clusters
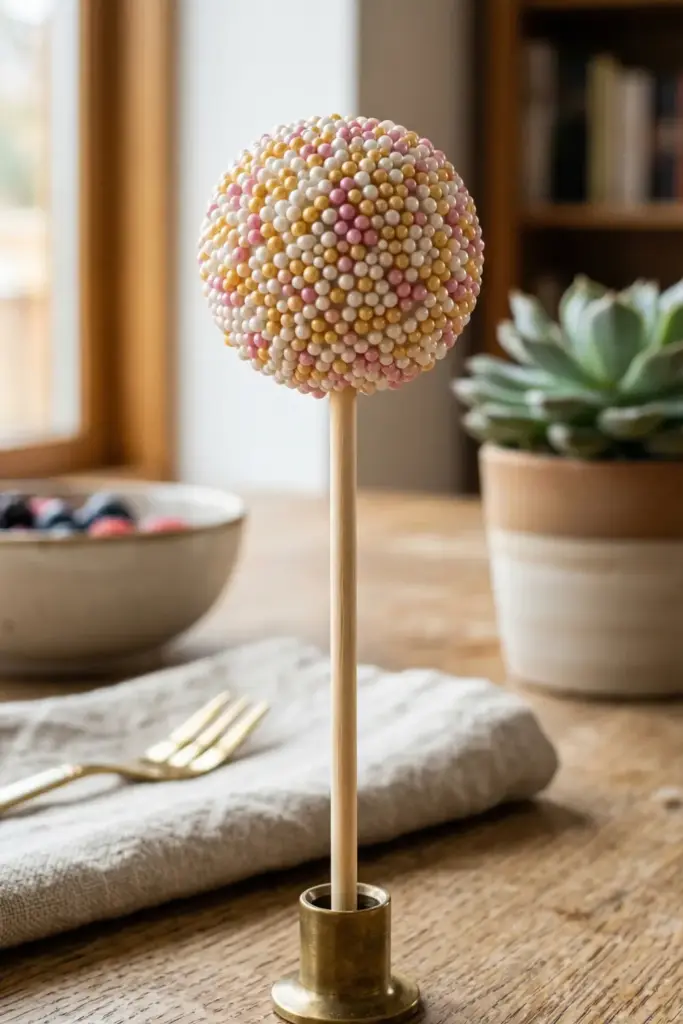
For the mom who loves her jewelry.
Covering a cake pop in tiny sugar pearls gives it a great crunch and a very expensive look.
It’s also the easiest way to hide any lumps or bumps in your cake ball.
Steps:
- Dip the pop in white or champagne-colored coating.
- Immediately roll the pop in a bowl of tiny edible pearls.
- Gently press them in to ensure they stick.
Tip: Use a deep bowl for the pearls so you can submerge the pop completely.
10. The “MOM” Lettering
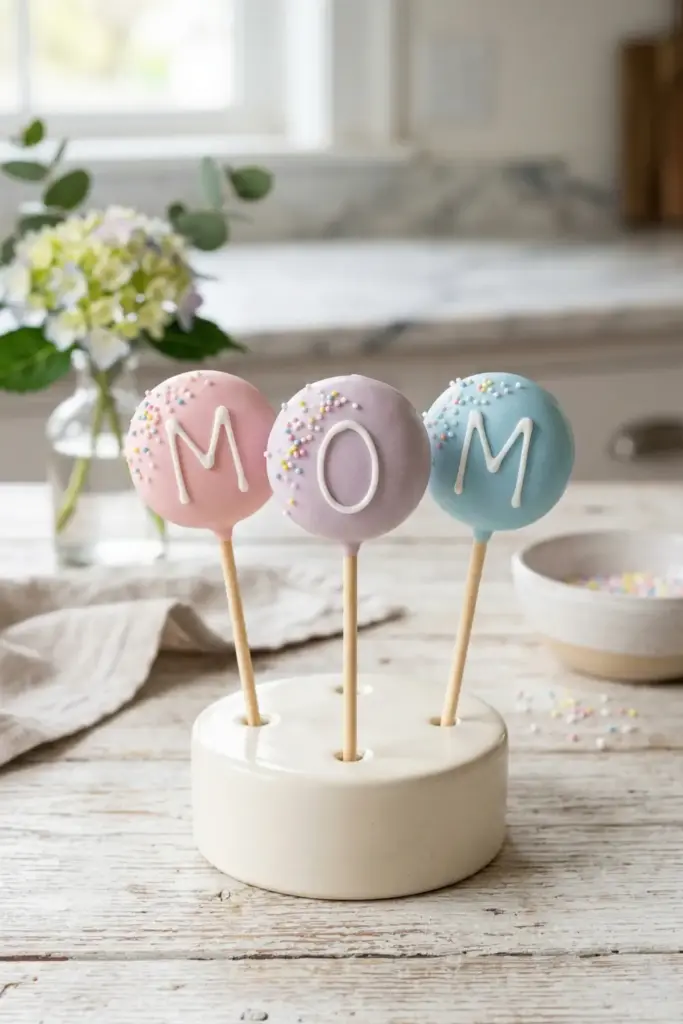
Direct and sweet. Sometimes you just need to say it.
This works best if you have a few pops with letters and the rest with simple designs like sprinkles to balance it out.
Steps:
- Dip pops in a solid color.
- Wait for them to dry completely.
- Use a fine-tip edible ink marker or a very thin piping bag to write one letter per pop.
Tip: If your handwriting is shaky, try “printing” the letters in block style rather than cursive.
11. Butterfly Wings
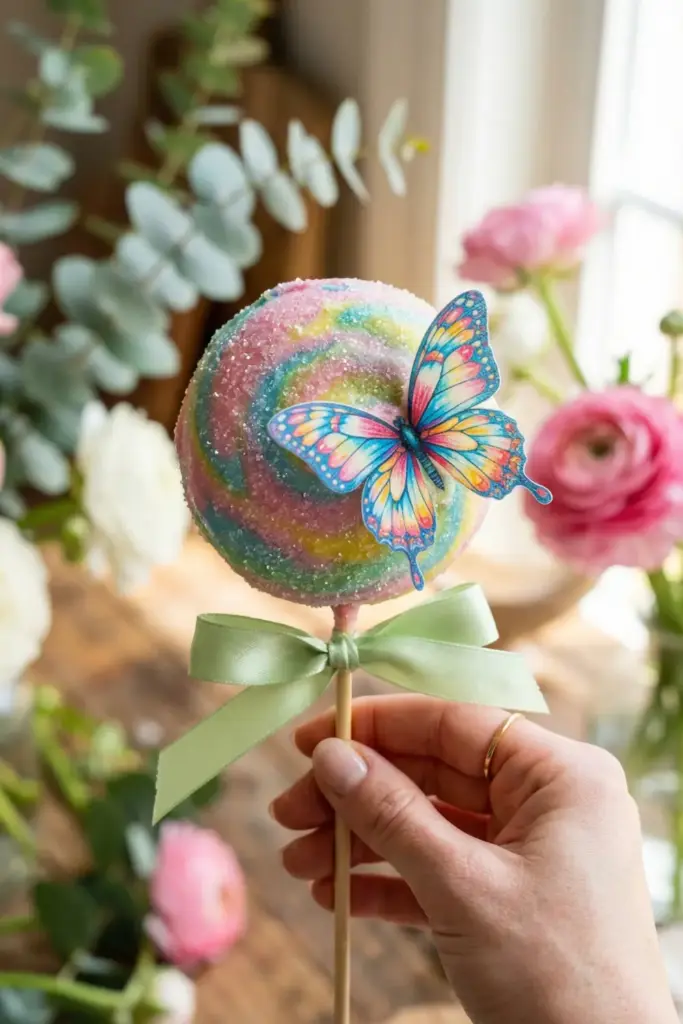
Symbolizing growth and beauty, butterflies are a lovely touch.
You can find pre-made edible wafer butterflies or you can get brave and pipe them yourself onto parchment paper first.
Steps:
- Dip the pop in a bright, spring color.
- Attach a wafer paper butterfly to the side using a dot of melted chocolate.
- Add a bit of edible glitter for extra flair.
Tip: Place the butterfly at an angle so it looks like it just landed.
12. Marbled Stone Look
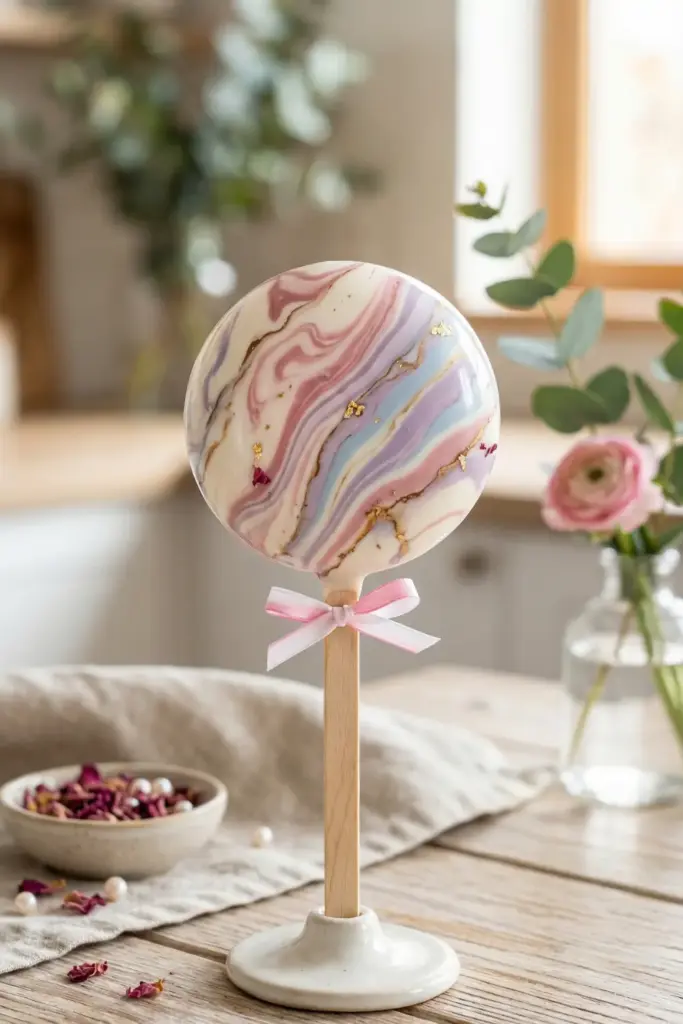
This looks like expensive marble or quartz.
It’s a “pro” technique that is actually surprisingly easy once you get the hang of the swirl.
No two pops will look the same, which is part of the charm.
Steps:
- Melt white chocolate in a bowl.
- Drip a few drops of colored chocolate on top but do not mix it in.
- Dip the pop and twist it as you pull it out to catch the swirls.
Tip: Add more color drops after every 2-3 pops to keep the marble effect strong.
13. Garden Trellis Piping
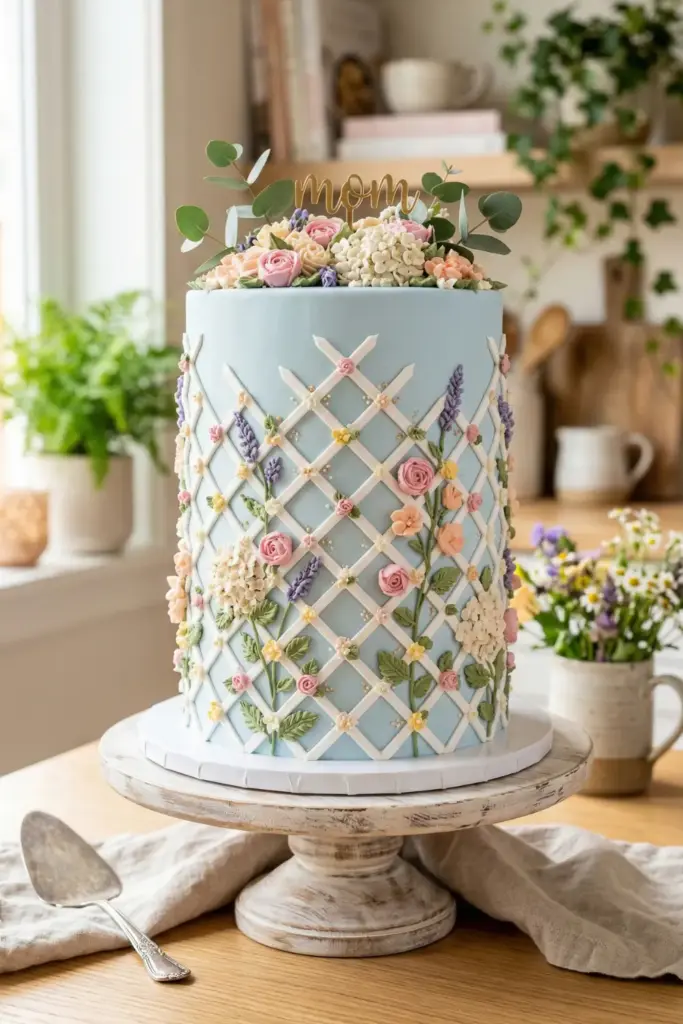
This mimics a garden fence with flowers growing up it.
It’s a bit more technical but very impressive.
It gives the pop a nice texture and a 3D feel.
Steps:
- Dip the pop in a light blue or white.
- Pipe a “grid” or crisscross pattern in white or brown.
- Add tiny piped flowers or leaf sprinkles at the intersections.
Tip: Use a very stiff icing for the trellis lines so they don’t sag.
14. Mini Sunflowers
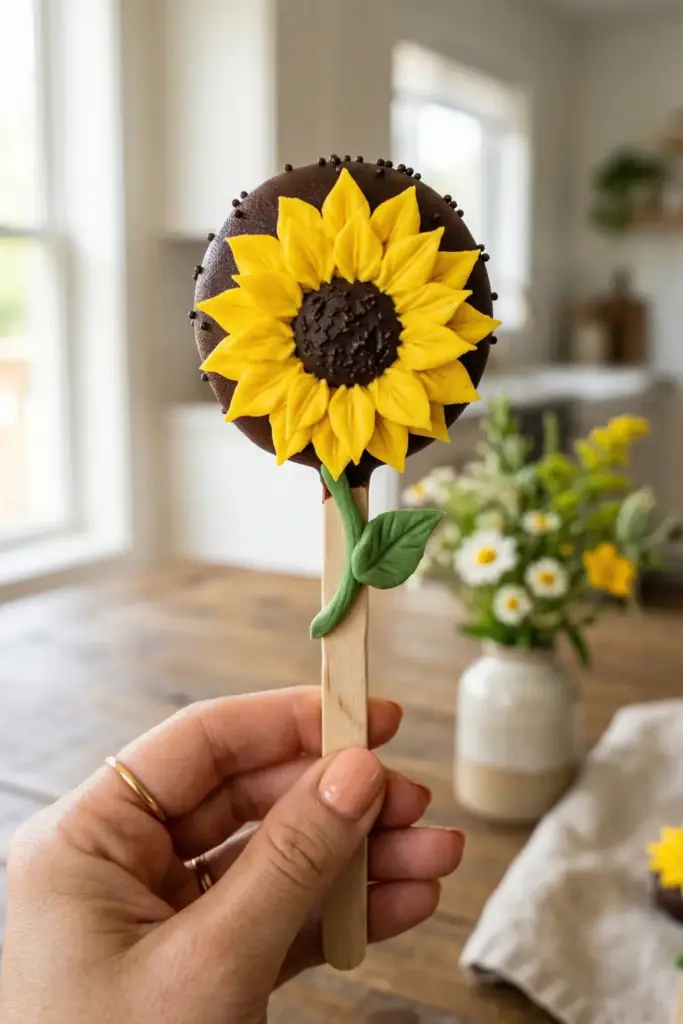
Sunflowers are the ultimate “happy” flower.
They are bright, bold and perfect for a mom who is the sunshine of the family.
The yellow petals really pop against a dark chocolate center.
Steps:
- Dip the pop in dark chocolate or cover it in chocolate sprinkles.
- Pipe yellow pointed petals around the edge using a leaf tip.
- Add a small green “stem” on the stick.
Tip: If you don’t have a leaf tip, you can use a small plastic bag with a “V” cut into the corner.
15. Classic Sprinkles Galore
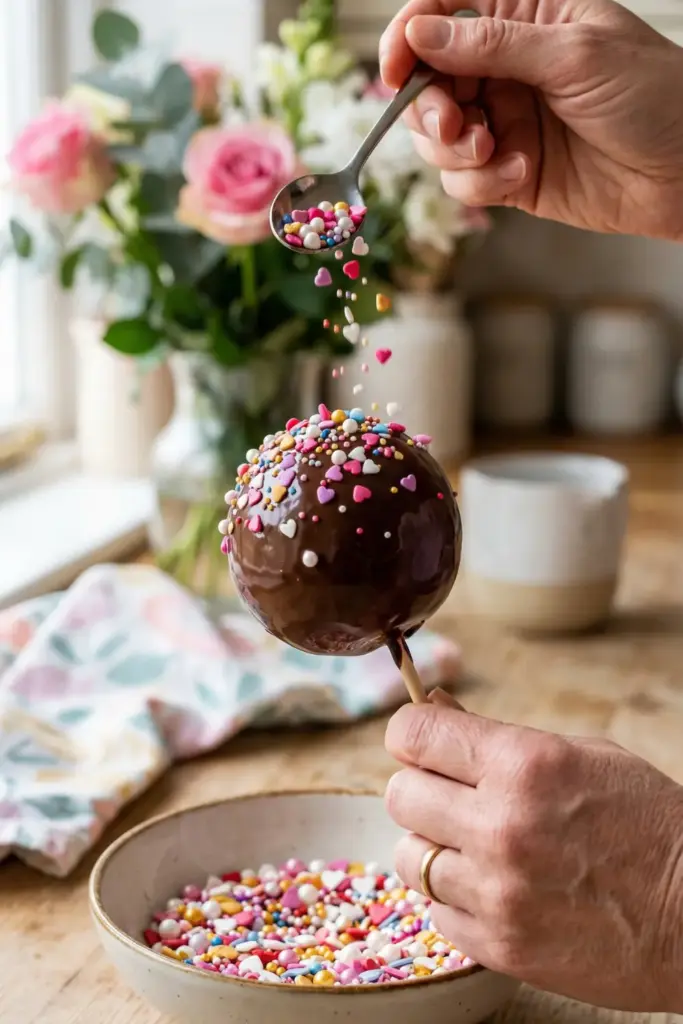
You can’t go wrong with the classics.
If you’re short on time, a high-quality sprinkle mix can do all the heavy lifting.
Look for “Mother’s Day” specific mixes with hearts and pearls.
Steps:
- Dip the pop in your favorite color.
- While wet, dump the sprinkles over the pop (holding it over a bowl).
- Tap off the excess.
Tip: Chilling the sprinkles beforehand can help them “freeze” into the chocolate faster.
16. Chalkboard Style
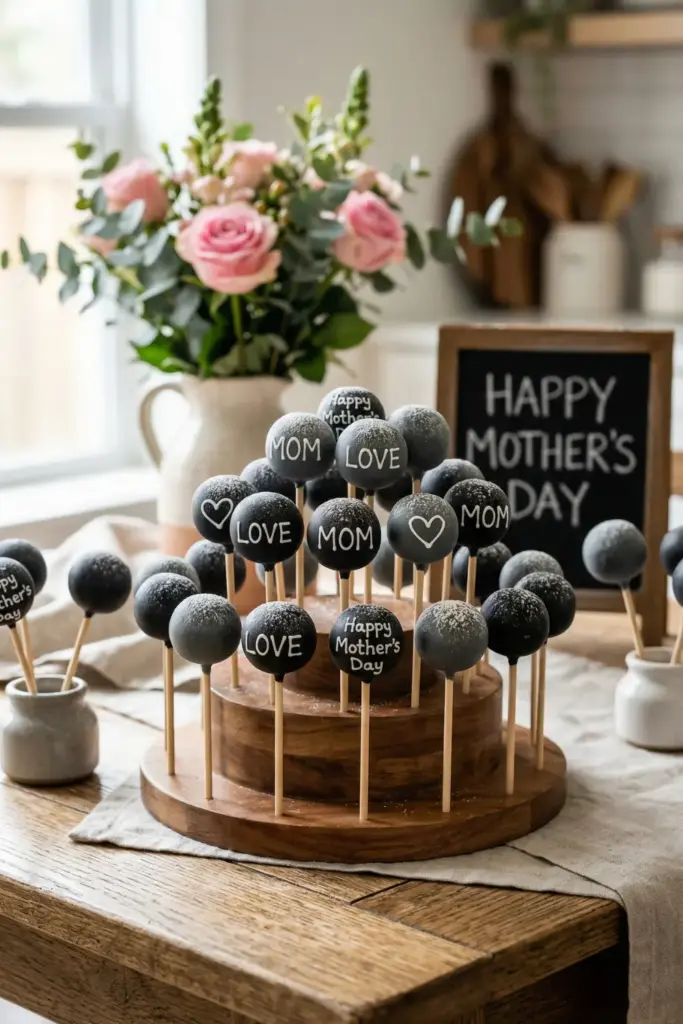
This is a unique, matte look that allows you to write “hidden” messages.
It looks very modern and a little bit rustic.
It’s a great conversation starter at a party.
- Dip the pop in black or dark grey candy melts.
- Once dry, use white edible ink or white chocolate to write “Love” or “Mom.”
- Dust with a tiny bit of powdered sugar for that “dusty” chalkboard effect.
Tip: Make sure the black coating is completely matte for the best effect.
17. Basket Weave Pattern
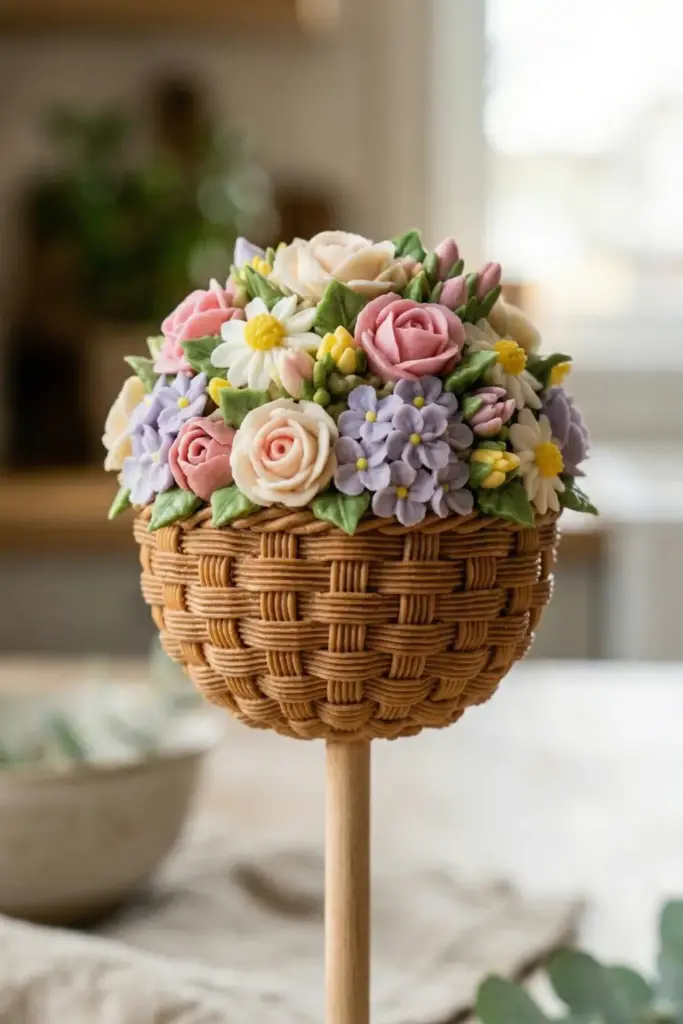
This makes the cake pop look like a little basket of flowers.
It’s a classic pastry technique shrunk down to bite-size.
It takes a little practice to get the rhythm of the weave.
Steps:
- Dip the pop in a tan or light brown color.
- Use a basketweave tip to pipe a texture on the bottom half.
- Pipe small “flowers” on the top half.
Tip: Practice the weave on a piece of parchment paper before moving to the pop.
18. Disco Ball Glitter
For the mom who loves to dance or just likes a bit of “extra”.
These are blindingly shiny and look great under bright lights.
You’ll want to use 100% edible luster dust.
Steps:
- Dip the pop in a color that matches your dust (e.g. yellow for gold).
- Let it dry.
- Apply dry luster dust with a large, fluffy food-safe brush until it shines.
Tip: To get a “liquid metal” look, mix the dust with a drop of lemon extract and paint it on.
19. Strawberry Shaped Pops
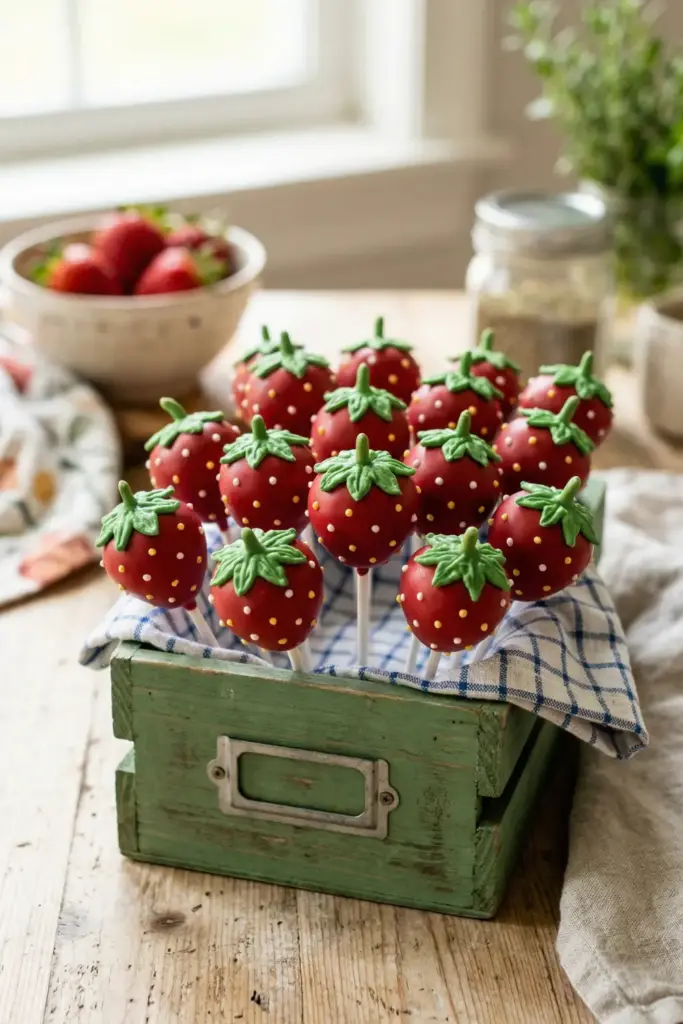
Since Mother’s Day falls in spring, berries are a perfect theme.
You can even use strawberry-flavored cake inside to really commit to the bit.
They look adorable in a little green berry crate.
Steps:
- Shape your cake balls into slight cones rather than perfect circles.
- Dip in red chocolate.
- Add tiny white or yellow dots for seeds and a piped green “leaf” top.
Tip: Use a toothpick to “poke” small indentations for the seeds before the chocolate sets.
20. Delicate Lace Patterning
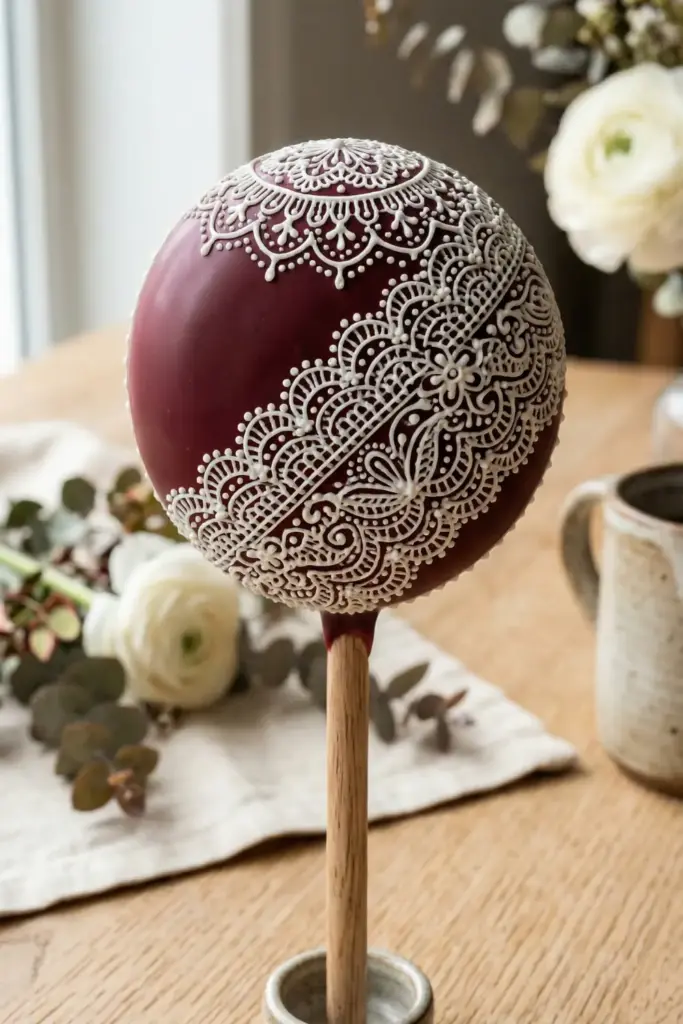
Lace is sophisticated and timeless.
This design looks incredibly intricate but can be done with a very steady hand and a fine-tip piping bag.
It’s the ultimate “elegant” Mother’s Day treat.
Steps:
- Dip the pop in a deep color like navy or burgundy.
- Use white chocolate to pipe tiny loops, dots and lines to mimic lace fabric.
- Focus the pattern on just the top or one side of the pop.
Tip: Keep the white chocolate warm. If it gets too cool, it won’t flow smoothly through the fine tip.
Final Thoughts
Decorating cake pops doesn’t have to be a stressful kitchen nightmare.
The trick is to pick one or two techniques and stick with them.
Even if they don’t come out “Pinterest-perfect”, the effort counts for a lot more than a store-bought card.
Just remember to keep your cake balls chilled and your chocolate warm.
That’s the secret to a smooth finish every time.
Would you like me to generate a specific shopping list for the tools needed for these designs?