Summer is basically the official season of “look at my hands” thanks to all those iced coffee Boomerangs and poolside selfies.
If you’re tired of the same old neon pinks and basic florals, it is time to let the ancients do the talking.
We are diving deep into the world of evil eye summer nail designs—the ultimate blend of mystical protection and high-fashion aesthetics.
This guide is your one-stop shop for refreshing your nail game with designs that look like they cost a week’s salary but are actually easy enough to DIY at home.
You’ll get fifteen distinct looks ranging from bold neons to “clean girl” minimalists.
Whether you’re a pro with a dotting tool or a total beginner who usually ends up with polish on your cuticles, these ideas will give you the perfect summer edge.
Let’s get your nails vacation-ready!
1. Blue & White Evil Eye Accent Nail
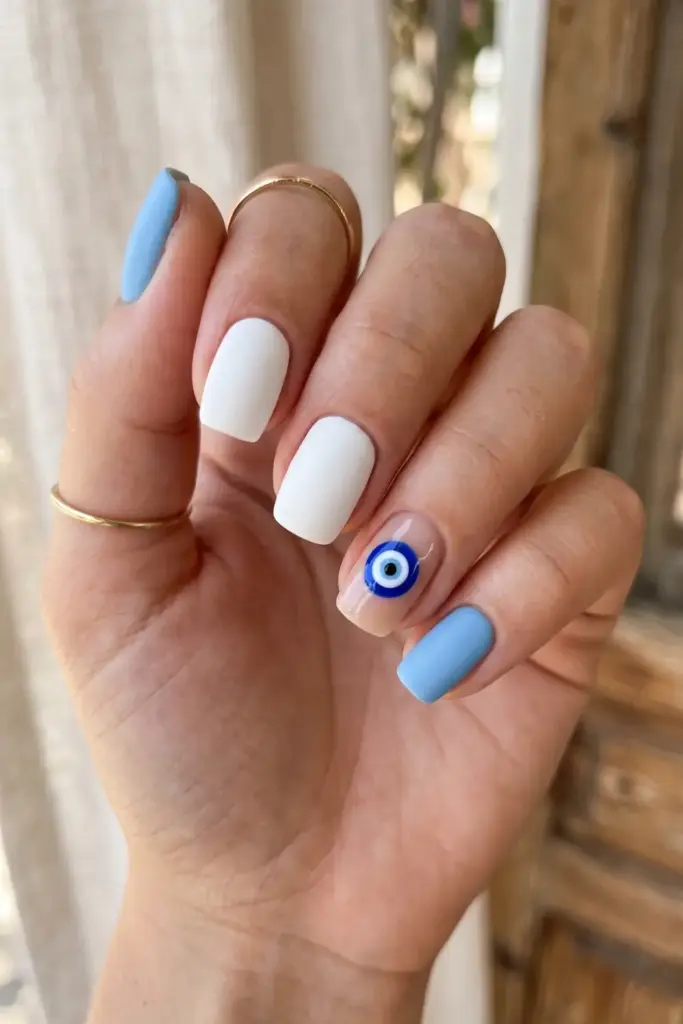
Occasionally, a single statement speaks louder than a full set.
This design focuses on a clean, crisp aesthetic that feels like a Mediterranean getaway.
By keeping most of your nails a solid, high-gloss color, the one detailed eye really pops.
It’s sophisticated, timeless, and looks incredibly expensive against a summer tan.
- Steps:
- Paint all nails except your ring finger in a glossy white or sky blue.
- Apply a neutral nude or clear base to the ring finger.
- Using a large dotting tool, place a bright blue circle in the center.
- Layer a smaller white dot, then a tiny black dot for the pupil.
Tip: Use a matte top coat on the solid nails to make the glossy evil eye on the accent nail stand out even more
2. Pastel Gradient with Evil Eye
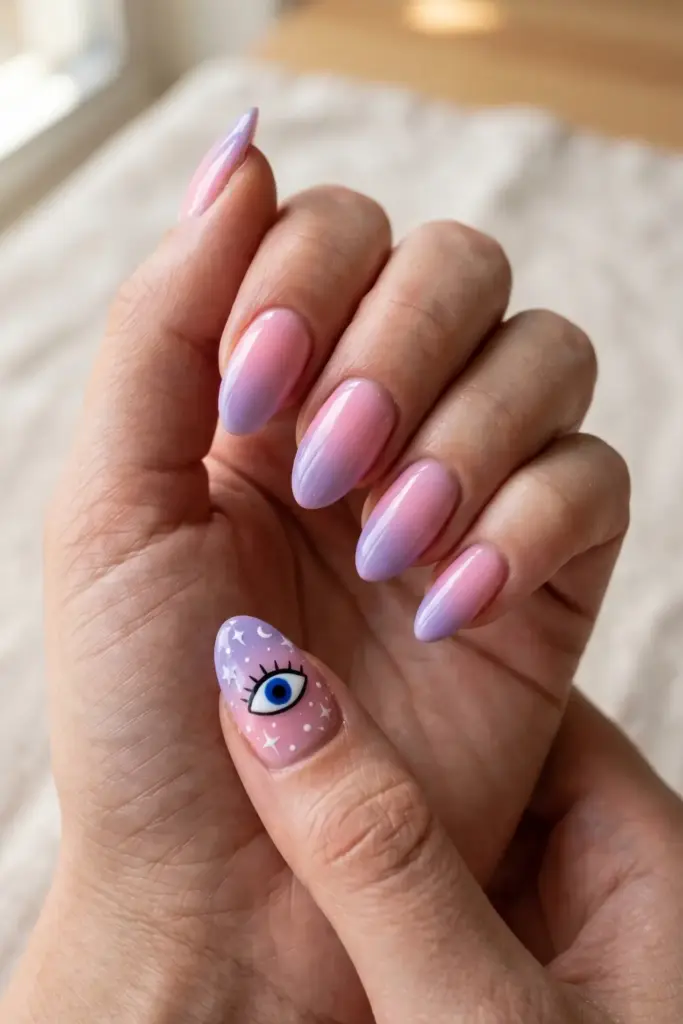
Why choose one color when you can have a whole sunset?
This look combines the softness of spring with the protective power of the eye.
The pink-to-lavender fade creates a dreamy, ethereal background that makes the tiny evil eye on the thumb feel like a hidden gem.
It’s a very “soft girl” aesthetic.
- Steps:
- Sponge a mix of light pink and lavender polish onto your nails for a gradient effect.
- Once dry, use a toothpick to place a miniature evil eye on your thumb.
- Add a few tiny white stars or dots around the eye for a celestial vibe.
- Seal with a high-shine gel top coat.
Tip: If your gradient looks streaky, apply a thin layer of iridescent glitter over it before adding the eye to hide any imperfections.
3. Neon Evil Eye Dots
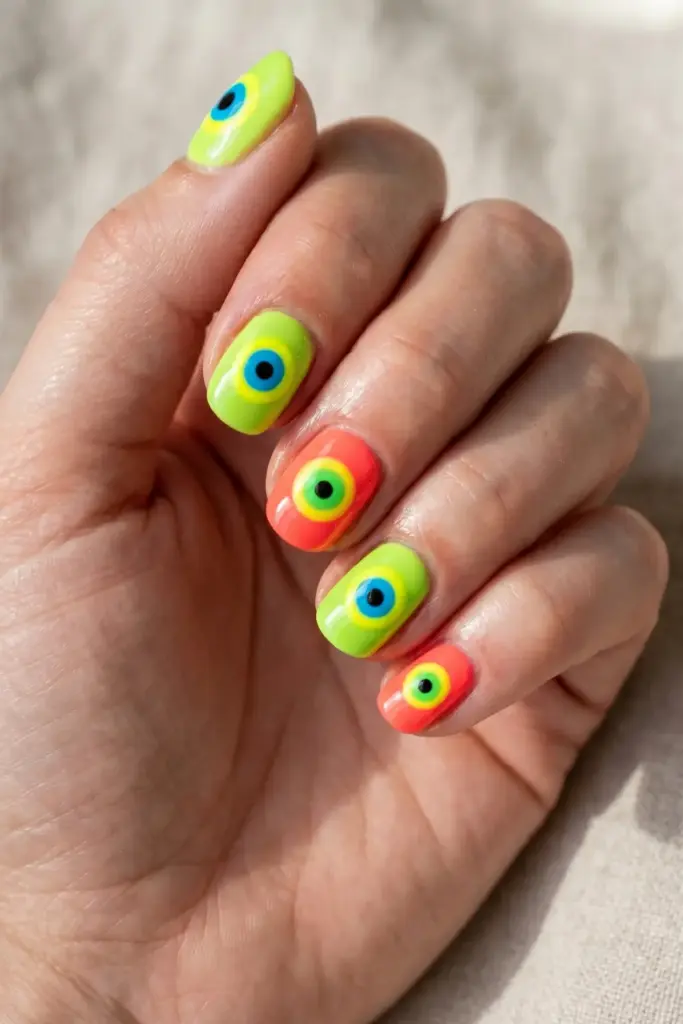
Summer and neons go together like beach days and SPF.
This design is high-energy and perfect for music festivals or tropical vacations.
Instead of the traditional blues, we’re using lime and coral to create a vibrant, electric version of the protective symbol.
It’s loud, fun, and totally scroll-stopping.
- Steps:
- Apply two coats of neon lime or coral as your base.
- Use a neon yellow polish to create the outer “white” of the eye.
- Add a contrasting neon blue or green for the iris.
- Finish with a crisp black dot in the center of each yellow circle.
Tip: Neon polishes can be sheer; apply a coat of white polish first to make the neon colors truly “glow.”
4. Minimalist Black Outline Evil Eye
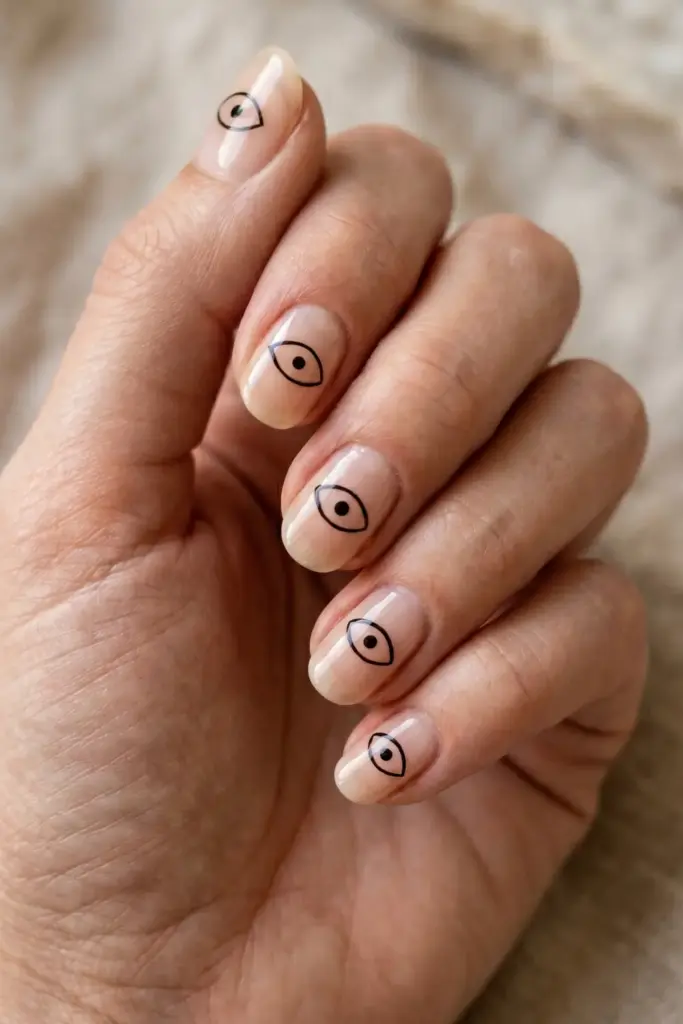
For the “less is more” crowd, this design is a total winner.
It’s edgy, modern, and looks incredible on shorter, natural nails.
By using clear or nude polish, the focus remains entirely on the delicate line art.
It’s subtle enough for the office but cool enough for a gallery opening.
- Steps:
- Start with a clean, buffed nail and a coat of sheer nude polish.
- Using a very fine detail brush, draw a thin almond shape (the eye) in black.
- Place a single black dot in the center of the almond.
- Repeat on each nail, varying the placement slightly for an organic feel.
Tip: If your hand is shaky, try using a black nail art pen instead of a brush for better control.
5. Tropical Fruit + Evil Eye Combo
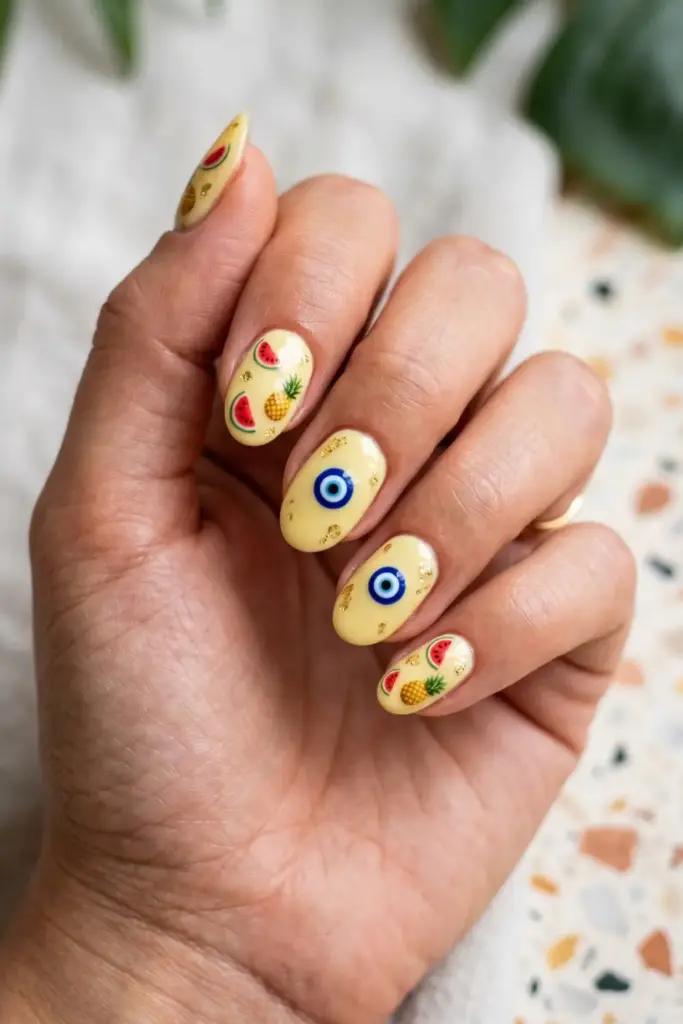
This is the ultimate “vacation mode” manicure.
Combining the playfulness of fruit decals with the spiritual evil eye creates a unique, kitschy look that is pure summer joy.
It’s a maximalist’s dream that doesn’t feel too heavy because the designs are small and dainty.
- Steps:
- Apply a clear or pale yellow base coat.
- Apply watermelon or pineapple nail stickers to three of your fingers.
- On the remaining fingers, hand-paint a small, classic evil eye.
- Add tiny gold flakes around the designs for a little extra sparkle.
Tip: Use tweezers to place your decals to ensure they lay perfectly flat without air bubbles.
6. Sheer Nude with Small Evil Eyes
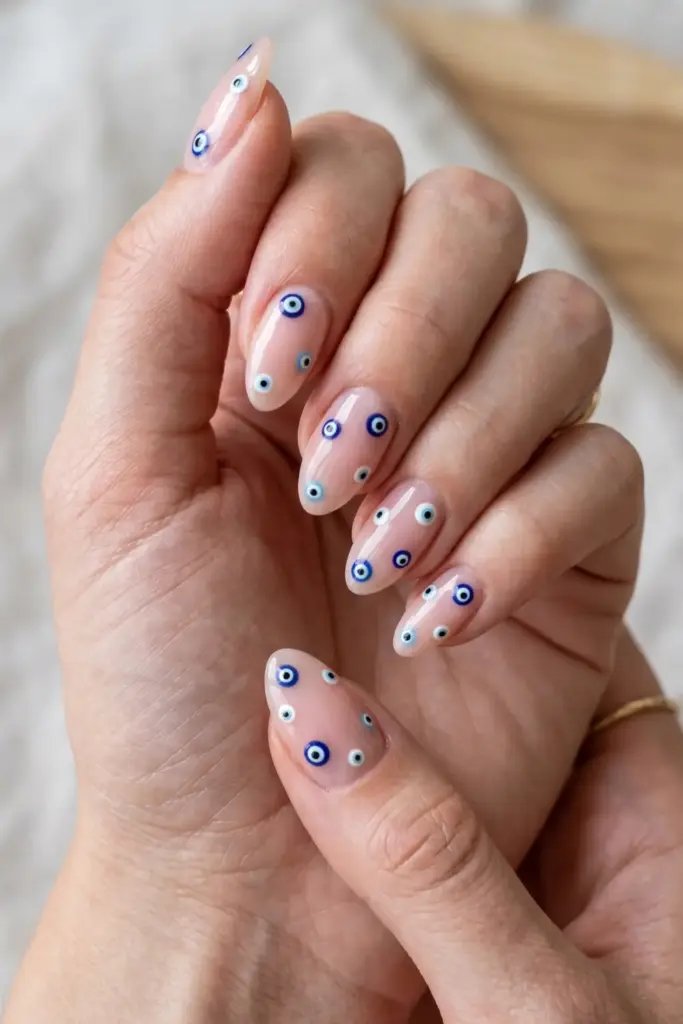
Think of this as the “constellation” version of the evil eye.
Using a translucent pinkish-nude base makes your nails look healthy and polished, while the scattered mini eyes add a touch of whimsy.
It’s a great way to wear the trend without it feeling overwhelming or childish.
- Steps:
- Apply two coats of a sheer, “your nails but better” nude polish.
- Use a small dotting tool to scatter 3-4 tiny eyes across each nail.
- Keep the eyes in the traditional navy, light blue, and white colors.
- Ensure the eyes are different sizes for a more artistic look.
Tip: Don’t worry about making the eyes perfectly symmetrical—the “scattered” look actually looks better when it’s slightly imperfect.
7. Ocean Wave & Evil Eye
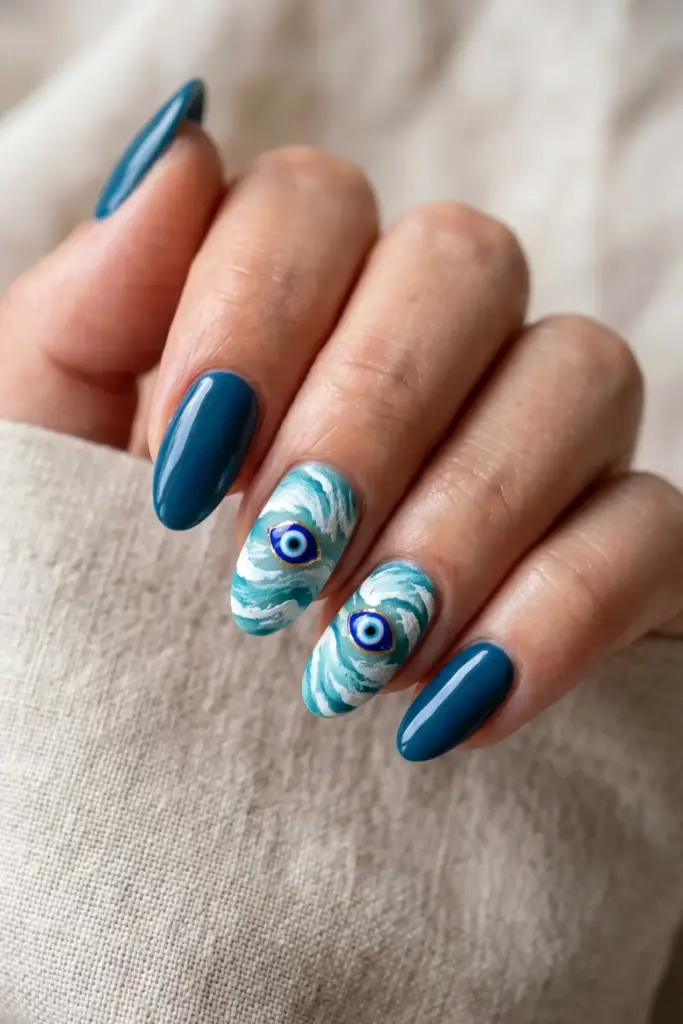
This design is basically a beach vacation in a bottle.
The combination of deep blue “waves” and the protective eye feels very oceanic and calming.
It’s a more literal interpretation of the Greek origins of the evil eye, perfect for anyone heading to the coast this summer.
- Steps:
- Paint your index and pinky nails a solid deep sea blue.
- On the middle and ring fingers, use a dry brush technique to create “waves” with white and teal.
- Add a medium-sized evil eye in the center of the wave pattern.
- Finish with a matte top coat on the waves and a glossy one on the eye.
Tip: To get the wave effect, wipe most of the polish off the brush before streaking it across the nail.
8. Bright Orange & Turquoise Evil Eye
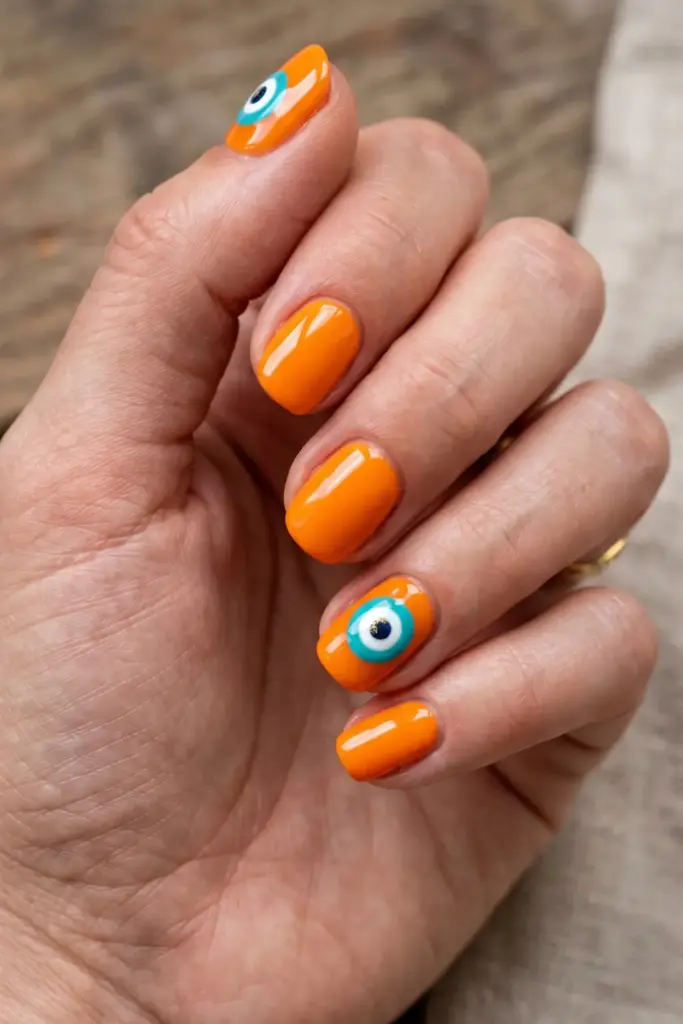
Orange and turquoise are a match made in color theory heaven.
This color palette is reminiscent of desert sunsets and turquoise jewelry.
It’s a bold, high-contrast look that feels very boho-chic and pairs perfectly with gold rings and denim shorts.
- Steps:
- Paint all nails a vibrant, solid orange.
- On the thumb and ring finger, use turquoise polish to create a large circle.
- Layer white and then navy-blue dots on top of the turquoise.
- Add a tiny bit of gold shimmer to the center of the eye.
Tip: Turquoise polish can sometimes stain; always use a strong base coat when working with these pigments.
9. Evil Eye French Tips
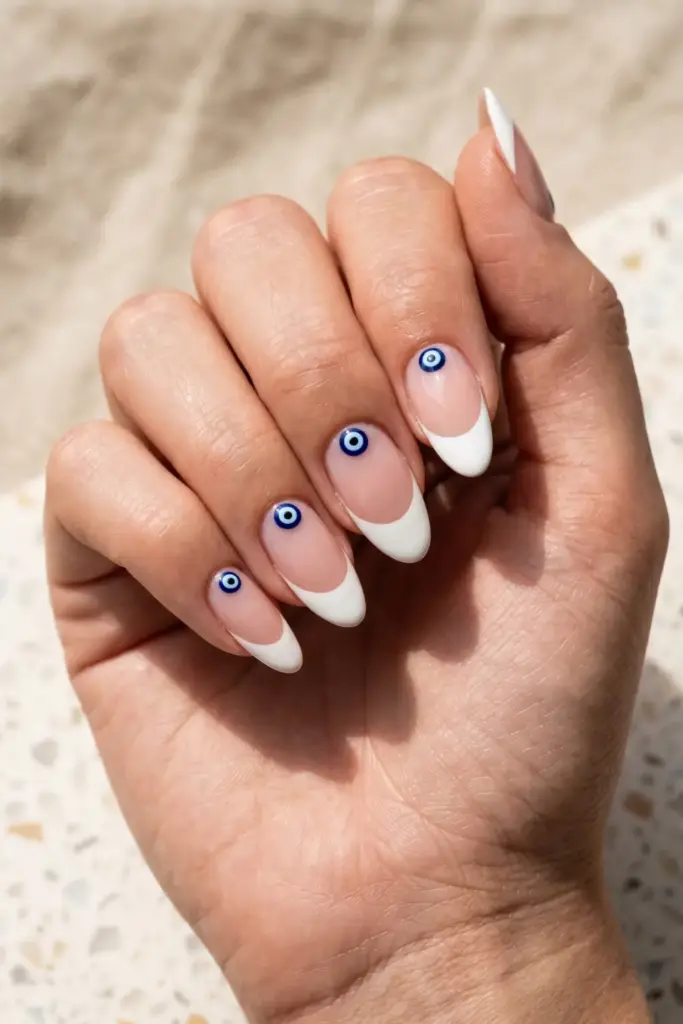
The French manicure is back, but it’s had a serious glow-up.
By placing the evil eye at the “smile line” (where the white tip meets the pink nail bed), you’re adding a hidden detail that people will only notice when they look closely.
It’s a “if you know, you know” kind of design.
- Steps:
- Apply a classic French manicure with crisp white tips.
- At the center of the white tip, use a tiny dotting tool to create a small eye.
- Keep the eye small so it doesn’t distort the shape of the French tip.
- Seal everything with a thick layer of top coat to level the surface.
Tip: Use French tip guides or stickers to get that perfect curve if you aren’t confident free-handing.
10. Glitter Evil Eye on Clear Base
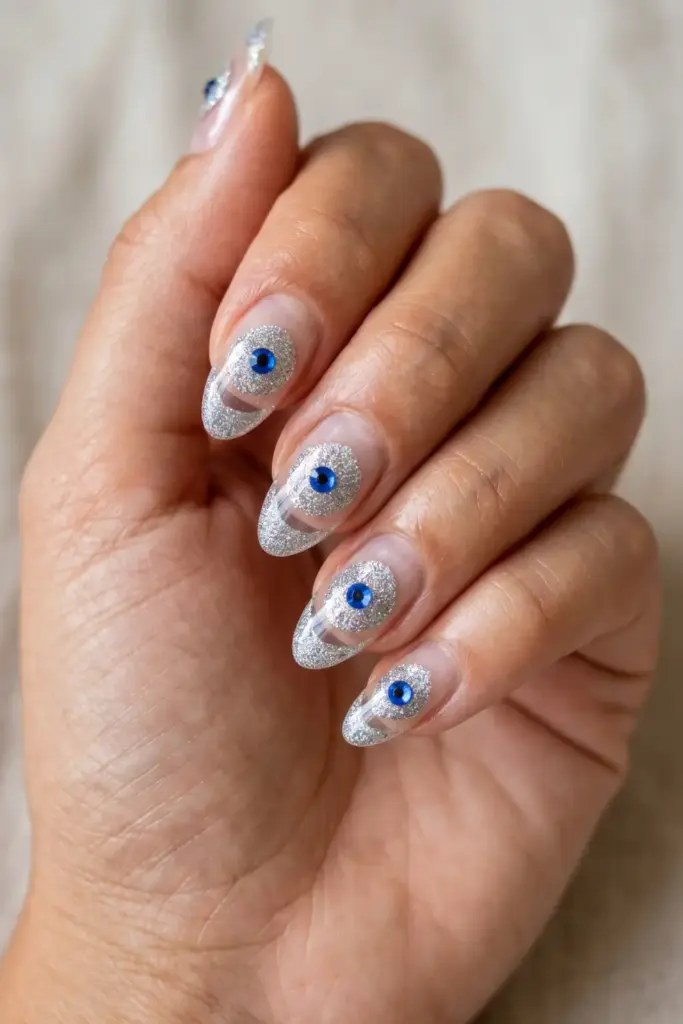
If you love a bit of sparkle, this is the one for you.
This design uses holographic silver glitter to form the shape of the eye rather than flat polish.
On a clear gel base, it looks like jewelry for your fingertips.
It catches the light beautifully, especially under the summer sun.
- Steps:
- Start with a clear gel base or a very light holographic shimmer base.
- Apply a chunky silver glitter in an oval shape in the center of the nail.
- Once set, place a blue rhinestone or a dot of blue polish in the center of the glitter.
- Add a black dot for the pupil.
Tip: Use a “glitter placement” method (picking up individual glitters) for a cleaner shape rather than just painting it on.
11. Sunset Ombre with Evil Eye
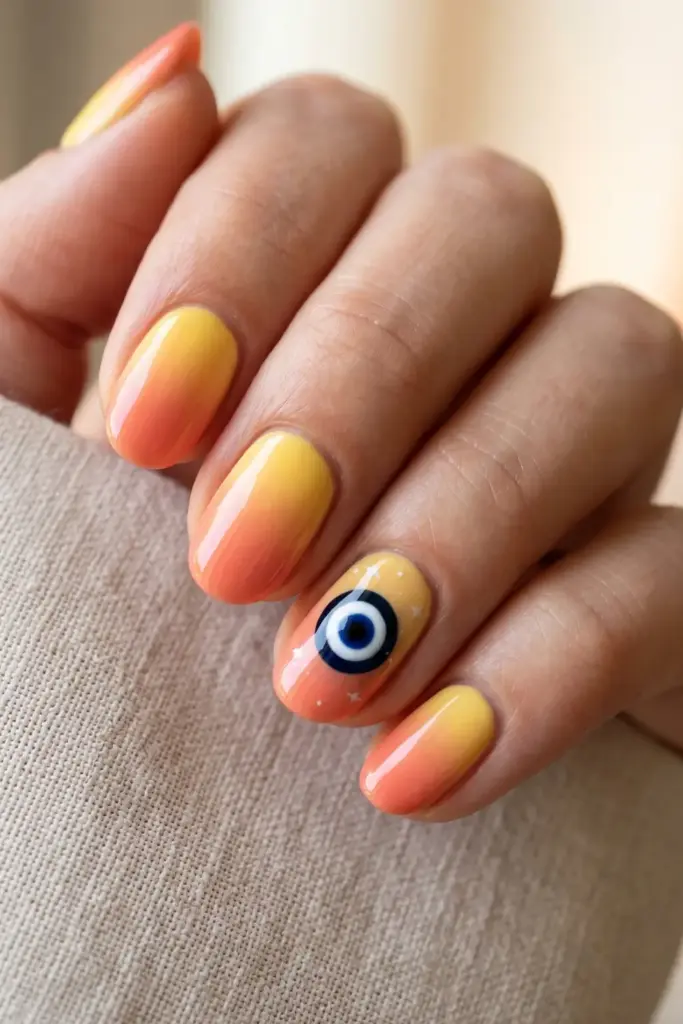
There is nothing quite like a summer sunset, and now you can wear one.
The yellow-to-coral fade is warm and inviting, providing the perfect backdrop for a stark black and white evil eye.
The contrast between the warm background and the cool sky is visually stunning.
- Steps:
- Create an ombre using bright yellow at the cuticle and coral at the tip.
- On your accent nail, paint a large, traditional evil eye.
- Add a few tiny white “shimmers” or dots around the eye to mimic stars in the evening sky.
- Finish with a high-gloss top coat.
Tip: Use a makeup sponge to blend the ombre colors while they are still wet for a seamless transition.
12. Dotted Evil Eye Pattern (Boho)
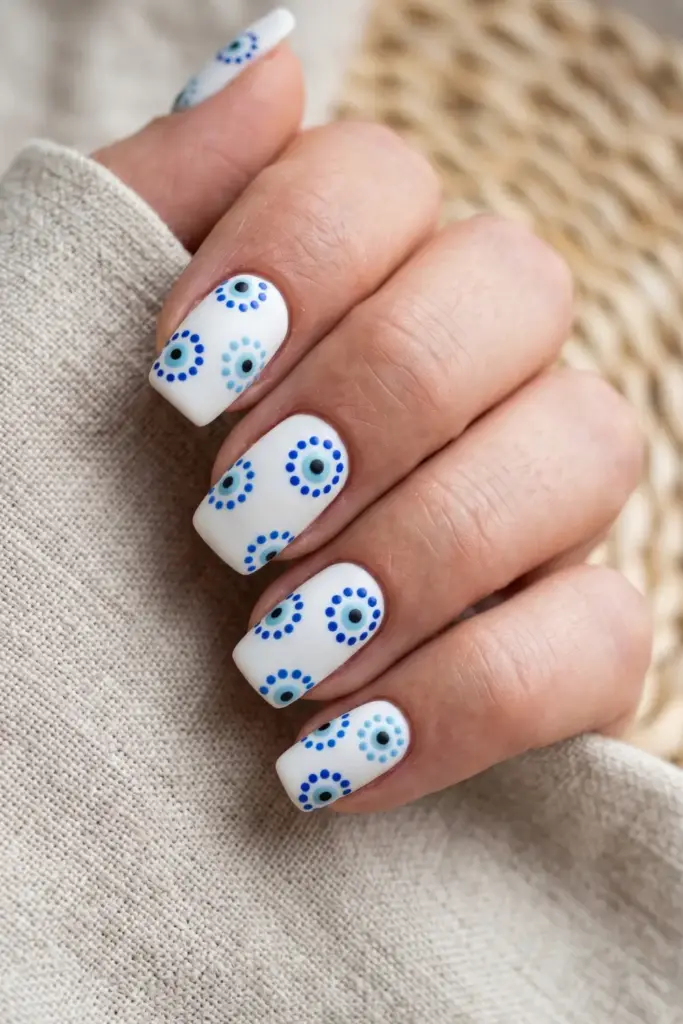
This design is for the Pinterest girlies who love a bohemian, hand-crafted look.
Instead of painting a solid eye, you’re building the shape out of tiny dots.
It’s a softer, more textured approach to the trend that looks great with linen outfits and woven bags.
- Steps:
- Apply a solid white base to all nails.
- Using different sizes of dotting tools, arrange blue, light blue, and black dots in a circular “eye” pattern.
- Leave plenty of white space between the eyes for a clean, patterned look.
- Top with a matte finish for a “ceramic” look.
Tip: Practice your dotting on a piece of paper first to ensure you’re getting the right amount of polish on the tool.
13. Lemon-Yellow Evil Eye
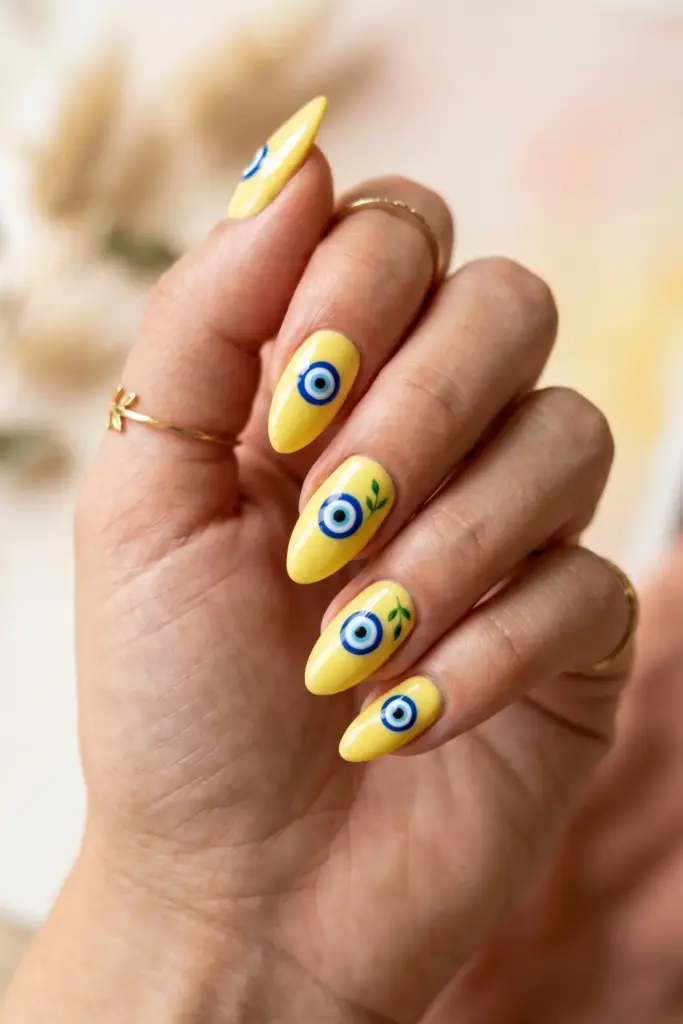
Yellow is the color of happiness, and it makes the blue of an evil eye look incredibly vivid.
This design is zesty and fresh—perfect for a brunch date or a summer wedding.
It’s a cheerful take on a symbol that is usually considered serious.
- Steps:
- Paint all nails a bright, creamy lemon yellow.
- In the center of each nail, use cobalt blue to create the iris of the eye.
- Add the white and black layers as usual.
- Optional: Add a tiny leaf detail in green next to the eye to give it a “lemon” vibe.
Tip: Yellow polish can be streaky; try doing three very thin coats instead of two thick ones for a smoother finish.
14. Metallic Silver Evil Eye
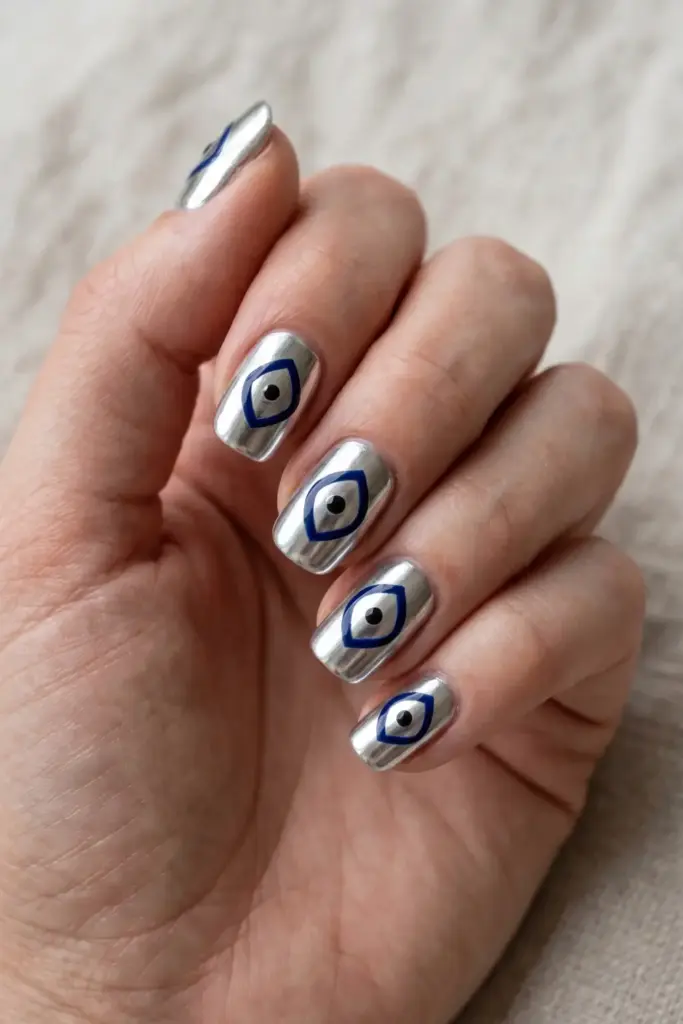
Chrome and metallics are huge right now, and they add a futuristic twist to this ancient symbol.
The silver base acts like a mirror, making the navy-blue eye outline look sleek and modern.
It’s perfect for anyone who wants more “edge” to their summer look.
- Steps:
- Apply a silver chrome powder or a high-shine metallic silver polish.
- Using navy-blue polish, draw a stylized, almond-shaped outline for the eye.
- Keep the center of the eye the original silver color, adding only a black dot for the pupil.
- Seal with a specialized chrome top coat to maintain the mirror finish.
Tip: If using chrome powder, make sure your base gel is completely smooth, as any bump will be magnified by the silver.
15. Abstract Evil Eye Swirls
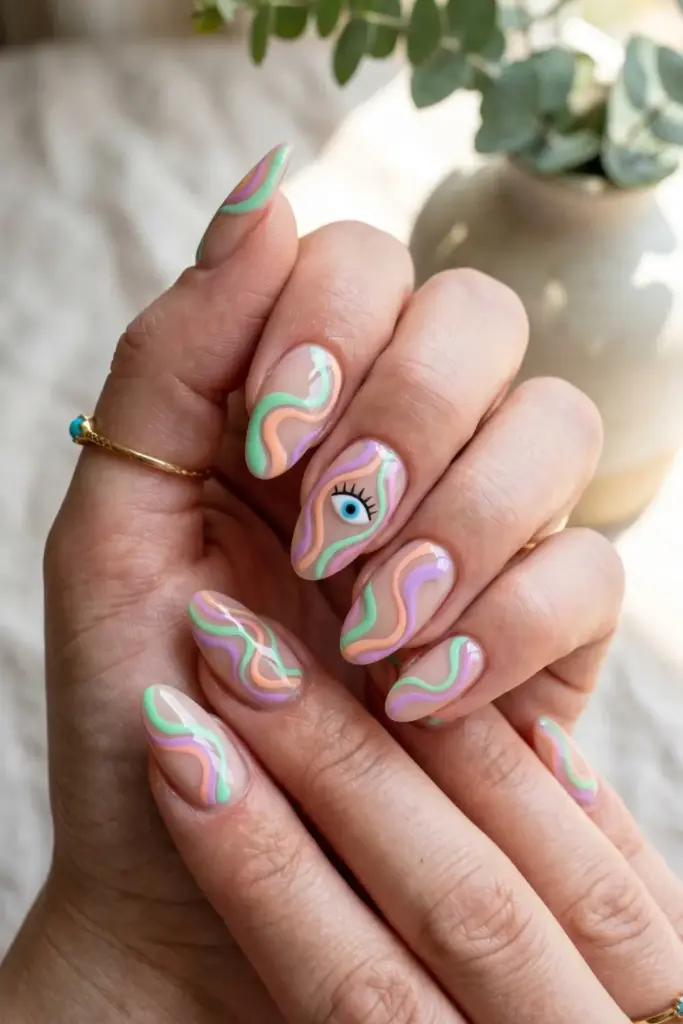
Swirl nails are everywhere on Instagram, and for good reason—they’re flattering on every nail shape.
By mixing pastel swirls with a stylized evil eye, you get a look that is artistic and movement-filled.
It’s a fun, retro-inspired design that feels very 70s-meets-2024.
- Steps:
- Paint a nude base.
- Use mint, peach, and lilac to draw wavy, abstract lines across each nail.
- In one of the loops of the swirls, “hide” a small evil eye.
- Finish with a thick, plush top coat for a gel-like finish.
Tip: Use a long-haired striper brush to get those long, flowing swirls without having to lift the brush.
Final Thoughts
Choosing an evil eye design isn’t just about the aesthetics; it’s about carrying a bit of positive energy (and a lot of style) with you all summer long.
The best part about these fifteen ideas is that they are totally customizable.
Don’t be afraid to swap out the colors or mix and match different styles to fit your personality.
If you’re trying this at home, remember that patience is your best friend—let those layers dry before adding the next dot!
Whether you’re lounging by the pool or just dreaming of your next trip, these nails are guaranteed to keep the good vibes flowing.
Which one are you heading to the salon with first?
Tag us in your recreations!
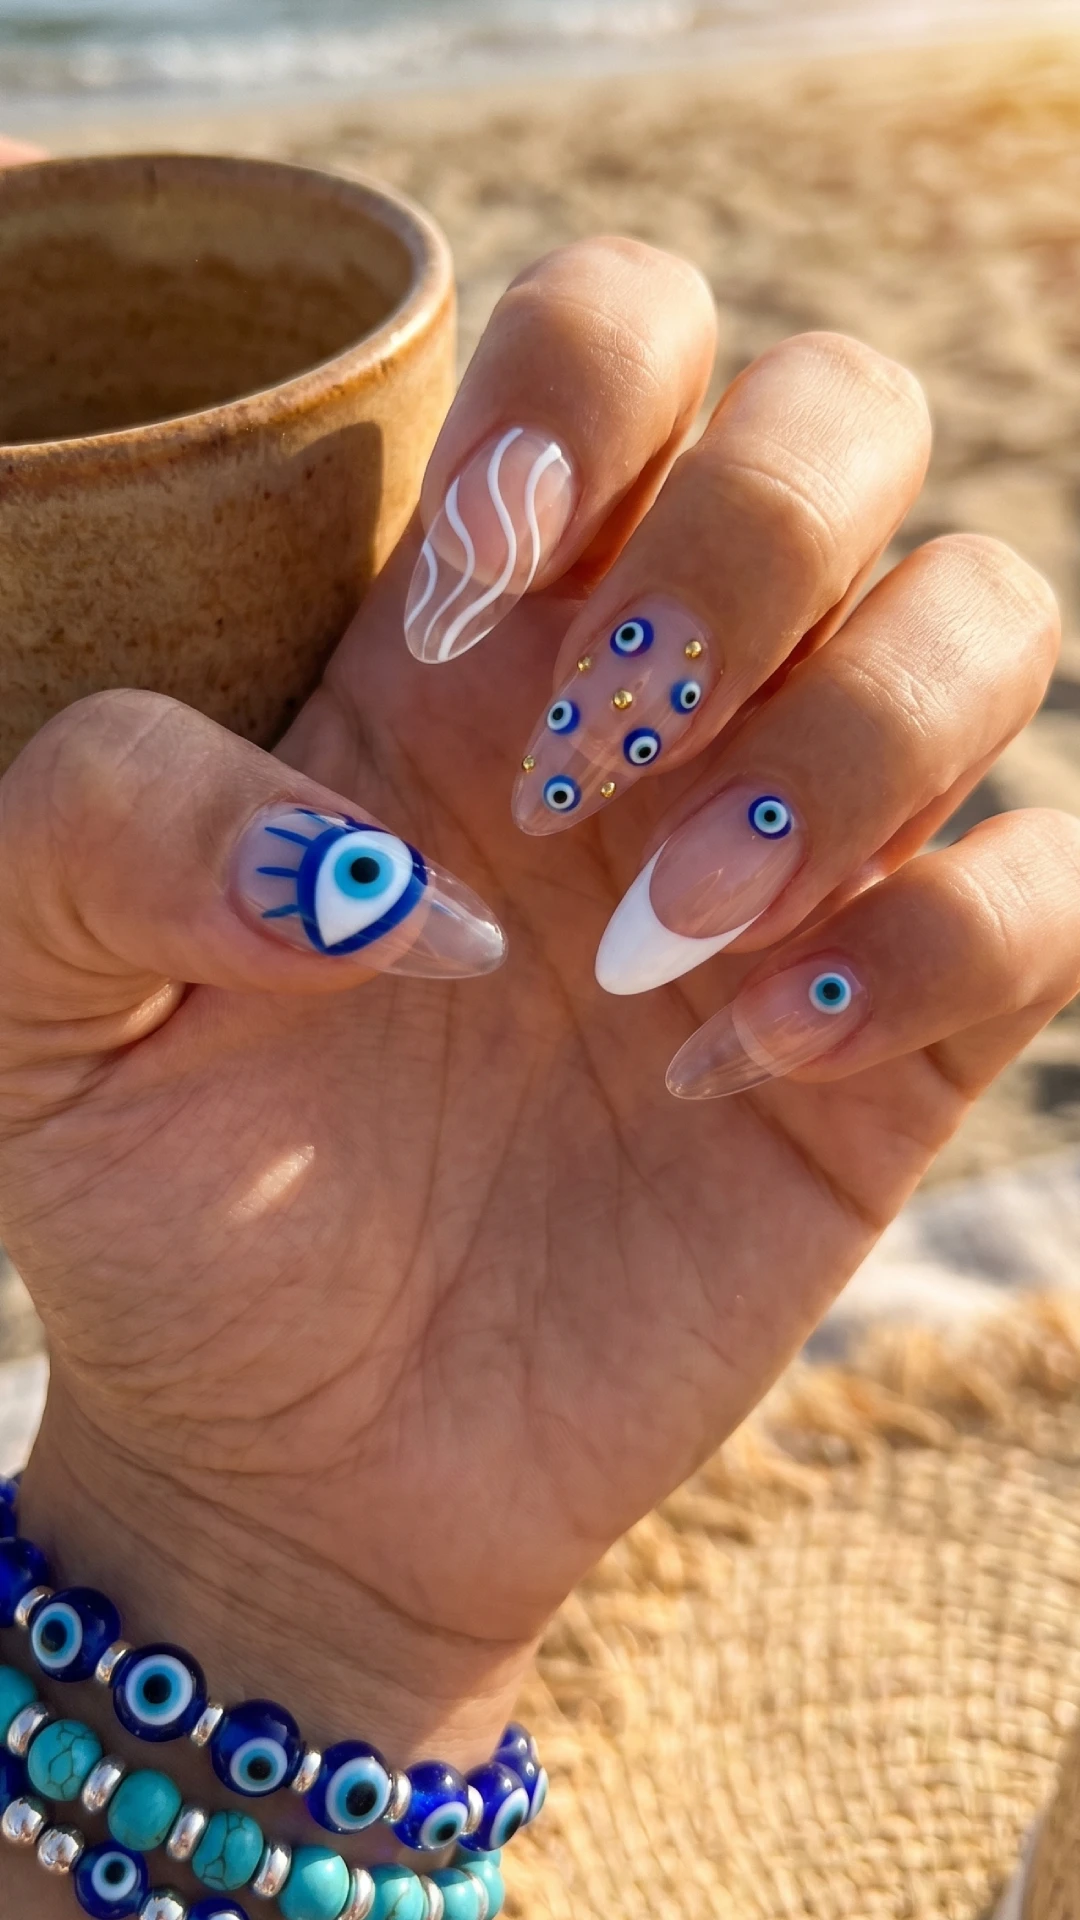
Simple Evil Eye Summer Nail Design Ideas for Trendy Protection
Add a touch of style and symbolism with these simple evil eye summer nail design ideas. Perfect for warm weather, these chic nail looks combine trendy colors with protective accents for a unique seasonal vibe. #SummerNails #EvilEyeDesigns #NailArtIdeas
Pin it on Pinterest