Let’s be honest—finding the perfect gift for Mom is basically an extreme sport.
You want something thoughtful, beautiful, and most importantly, delicious.
Skip the overpriced, generic store-bought hampers this year.
Creating a gift with your own two hands hits entirely different. That’s precisely why DIY gifting is having such a massive moment right now!
It saves you serious money and guarantees happy tears. Plus, it’s just fun to curate!
If you’re stuck on how to make homemade treats look like they came from a luxury bakery, you are in the exact right place.
This guide is packed with the most gorgeous Mother’s Day dessert box design ideas.
You’ll get 15 stunning, easy-to-pull-off aesthetic concepts to elevate your baked goods instantly.
Grab your ribbons, gather your treats, and let’s build something unforgettable.
1. Floral Explosion Box – Fill with edible flowers and rose petals.
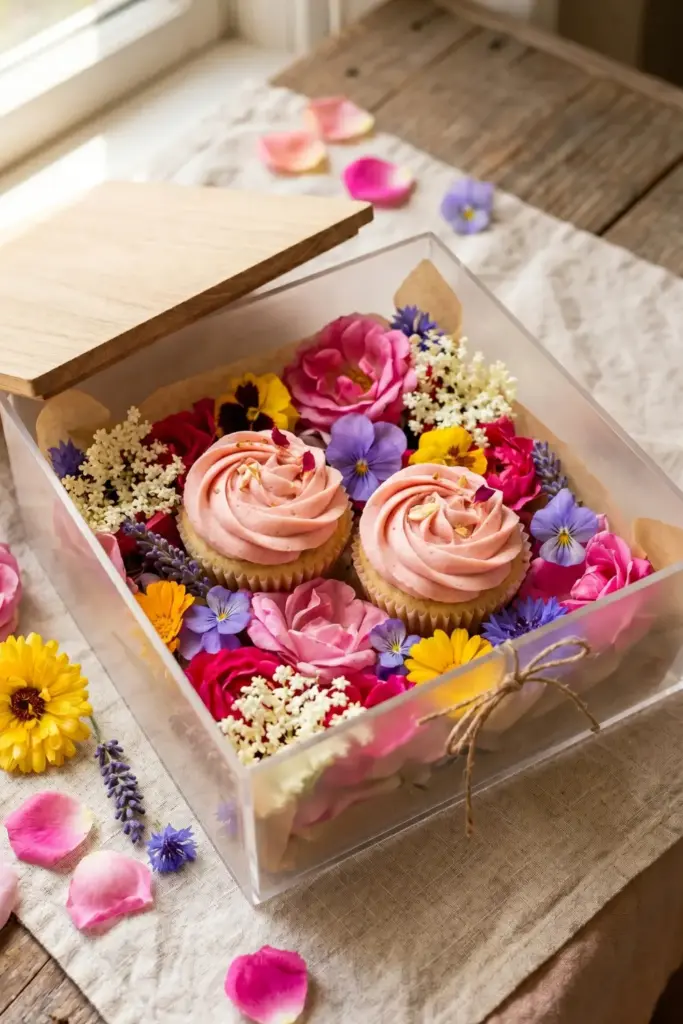
Nothing says “I love you” quite like a box literally bursting with blooms.
Dramatic in the best way possible.
Combining fresh florals with sweet treats creates an instant wow factor moms go crazy for.
Steps:
- Line a sturdy square box with food-safe parchment paper.
- Nestle beautifully frosted cupcakes right in the center.
- Fill every empty gap with organic, edible rose petals.
Tip: Ensure any flowers used are completely pesticide-free before they touch the food!
2. Minimalist Pink & Gold Macaron Box – Elegant, modern, and chic.
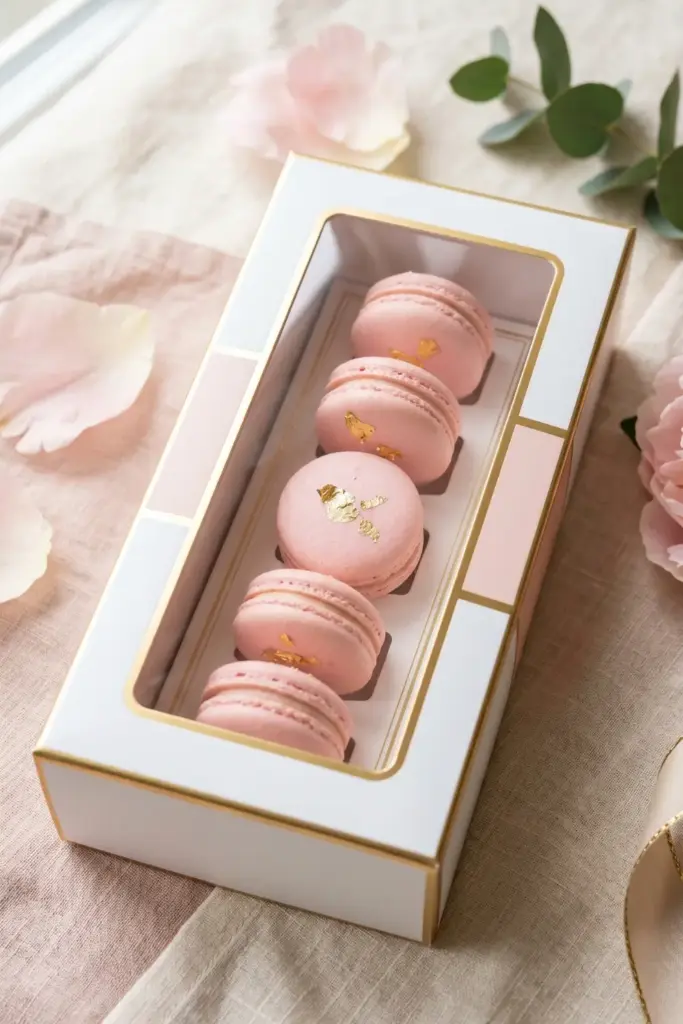
Sometimes less really is more.
A sleek, uncluttered presentation screams high-end boutique.
This design relies heavily on color blocking and subtle metallic accents.
Super chic—and surprisingly easy to execute.
Steps:
- Choose a sleek white window-display box.
- Arrange pale pink macarons in a single, neat row.
- Flick tiny pieces of edible gold leaf onto the shells.
Tip: Use a clear acrylic lid so the elegant design speaks for itself immediately.
3. Rustic Kraft Box with Lace & Twine – Vintage farmhouse charm.
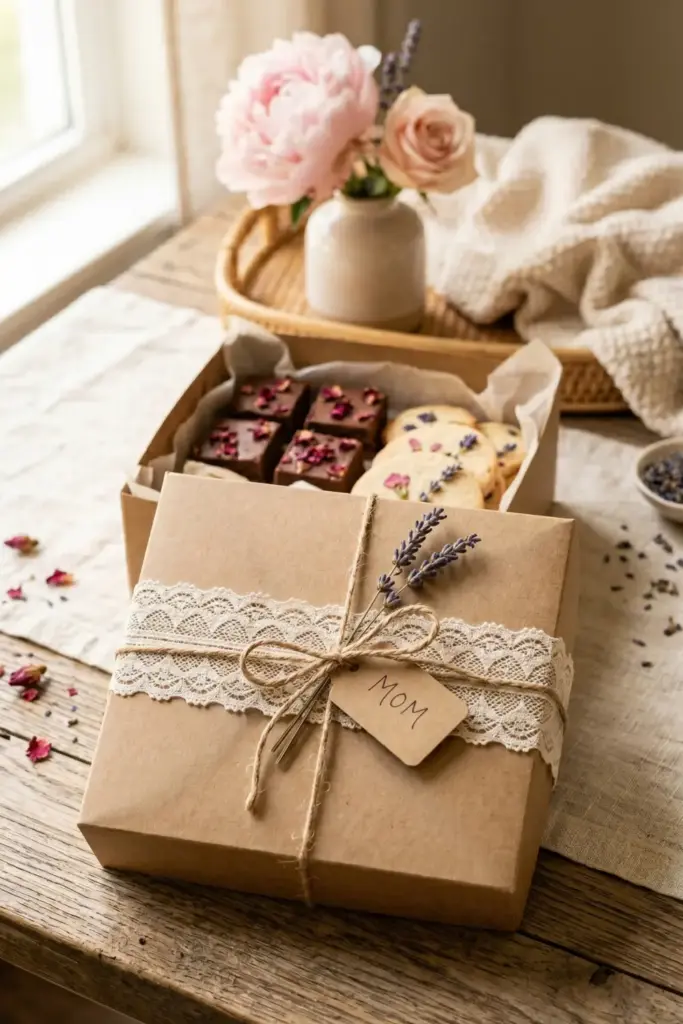
Calling all cozy, cottagecore lovers!
This aesthetic is warm, inviting, and wonderfully unpretentious.
It feels just like a hug in a box—perfect for showcasing artisan cookies or homemade fudge.
Steps:
- Start with a natural brown kraft paper box.
- Wrap a thick strip of vintage-style white lace around it.
- Tie it off tightly with natural jute twine.
Tip: Tuck a small sprig of dried lavender under the twine for a gorgeous scent.
4. Cupcake Tower Box with Heart Toppers—Stackable and adorable.
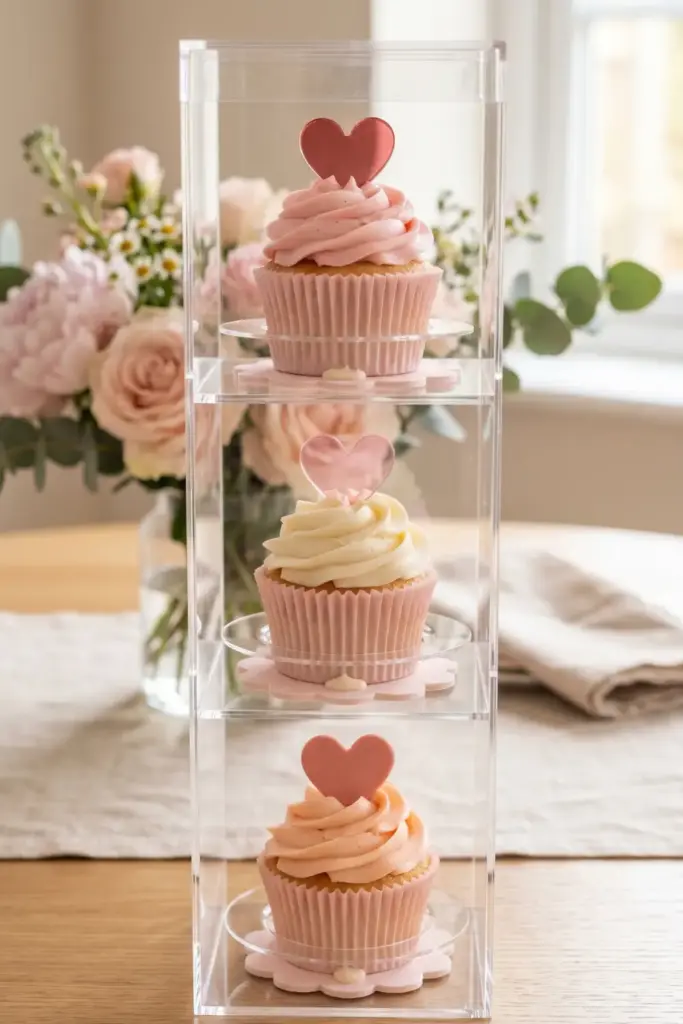
Why give a flat box when you can build up?
Adding height makes the gift feel like a major event.
It’s playful, visually striking, and completely adorable for her special day.
Steps:
- Use a tall, clear tiered acrylic container.
- Place one perfectly frosted cupcake securely on each level.
- Insert acrylic or fondant heart toppers into the icing.
Tip: Secure the bottom of each cupcake with a dab of royal icing so it doesn’t slide.
5. Chocolate Truffle Box with Velvet Ribbon – Luxurious and rich.
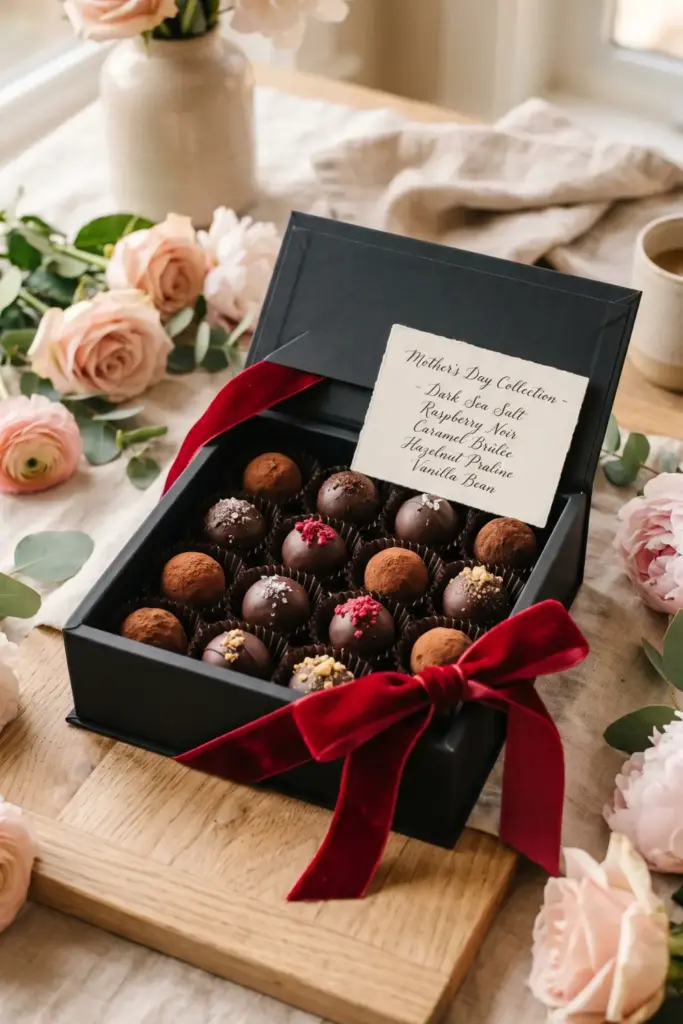
Dark, decadent, and utterly luxurious.
When dealing with rich chocolates, the packaging needs to match that exact energy.
Velvet brings a tactile, premium feel that elevates the whole tasting experience.
Steps:
- Place artisan truffles into mini fluted paper cups.
- Arrange them tightly inside a matte black presentation box.
- Wrap the outside with a thick, deep red velvet ribbon.
Tip: Add a tiny, handwritten menu card inside detailing all the truffle flavors.
6. Fruit Tartlet Box with Berry Arrangement – Fresh and colorful.
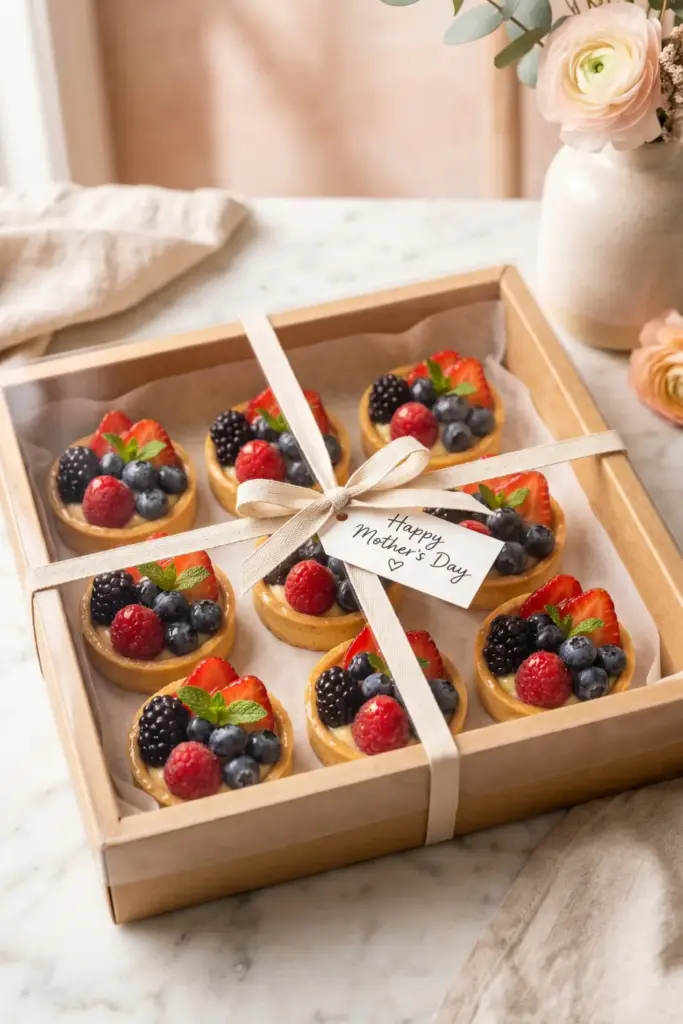
Bright, zingy, and fresh!
A box full of fruit tarts is a visual feast before it even hits the tastebuds.
The trick here is playing up the natural rainbow of the berries.
Steps:
- Place mini tartlets securely into a shallow white box.
- Scatter loose blueberries and raspberries between the tarts.
- Add a few fresh mint leaves for a vibrant pop of green.
Tip: Brush the fruit lightly with a clear apricot glaze to give them that professional bakery shine.
7. Cookie Bouquet Box with “MOM” Letters – Personalized and sweet.
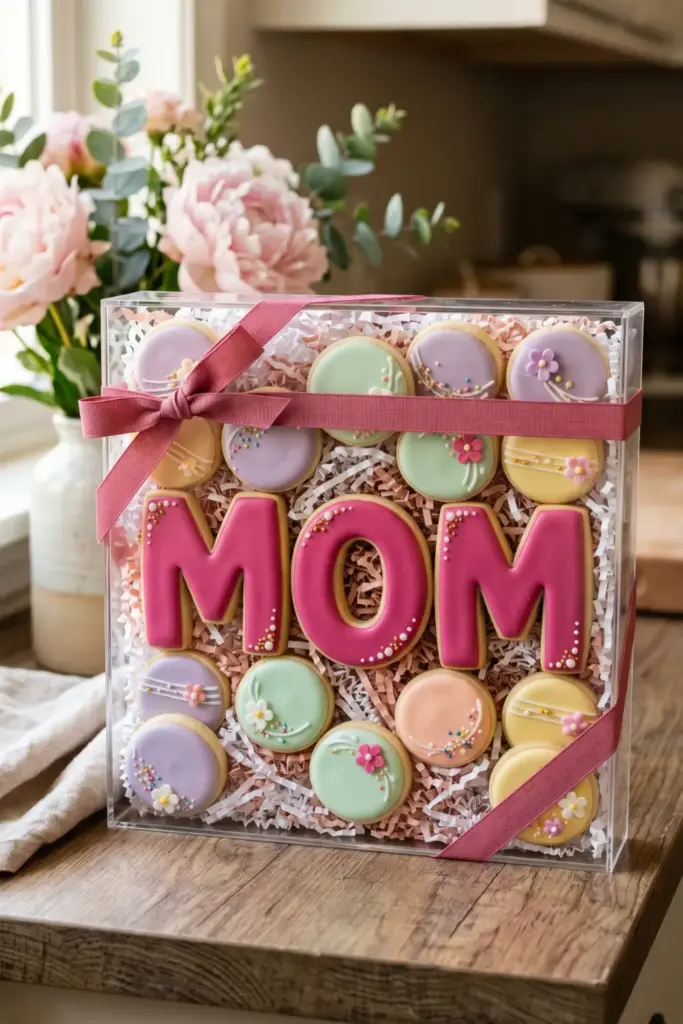
Personalized gifts just hit different, don’t they?
Spelling it out shows that extra bit of effort.
It’s straightforward, undeniably sweet, and totally photogenic for her Sunday morning social media post.
Steps:
- Bake large sugar cookies shaped perfectly like the letters M-O-M.
- Arrange them prominently on a thick bed of crinkle-cut paper.
- Surround the letters with smaller, round frosted cookies.
Tip: Use a highly contrasting icing color for the letters so they instantly pop against the background.
8. Mason Jar Dessert Box (Layered Parfaits) – Rustic and practical.
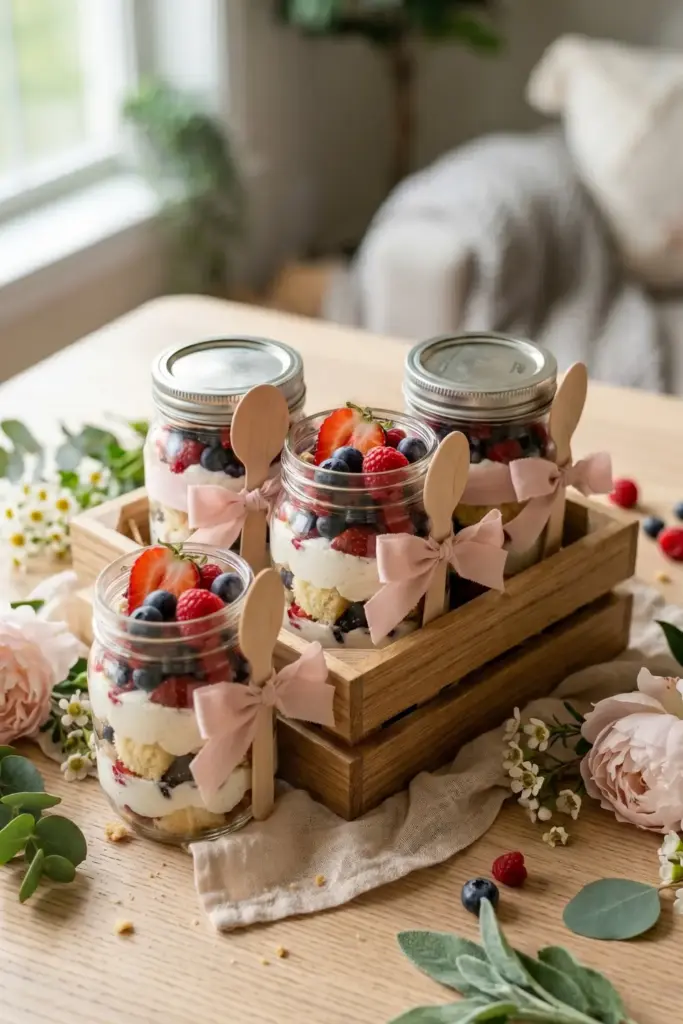
Jars are incredibly trendy right now and surprisingly practical.
They keep messy desserts perfectly contained while showing off beautiful, distinct layers.
It brings a very laid-back, picnic-ready aesthetic.
Steps:
- Layer soft cake scraps, whipped cream, and fruit inside half-pint mason jars.
- Screw on the rustic metal lids tightly.
- Place the jars securely inside a mini wooden crate-style box.
Tip: Tie a tiny wooden spoon to the side of each jar with a bit of ribbon.
9. Donut Box with Sprinkles & Mini Signs – Fun and playful.
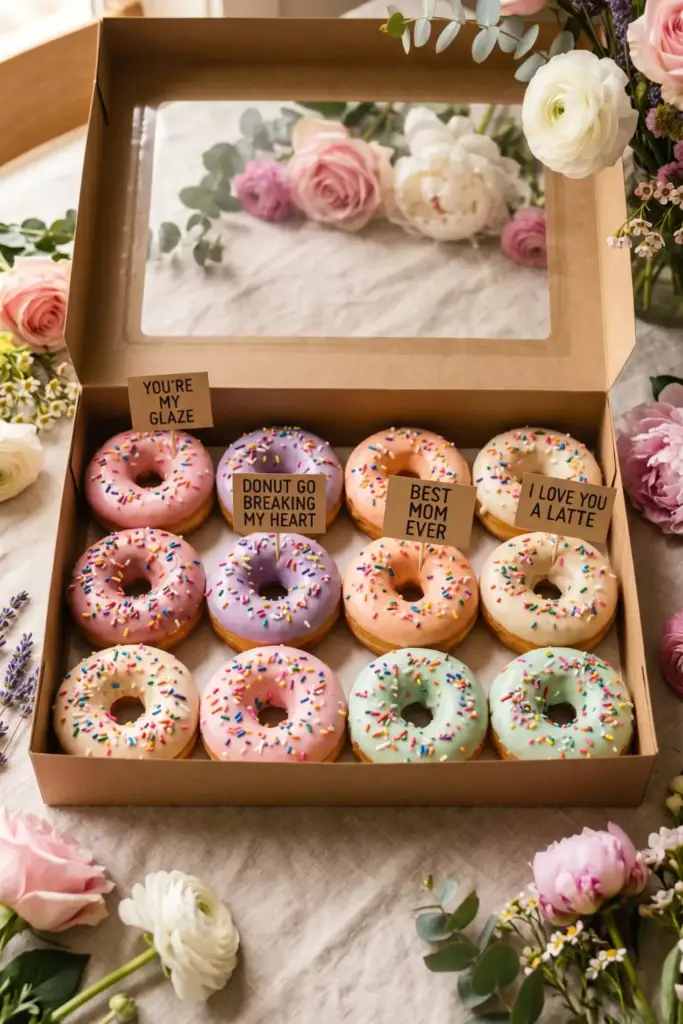
Not every gift needs to be incredibly serious!
Bright colors and bold sprinkles bring out the inner child.
This setup is high-energy, totally fun, and guaranteed to cause a massive smile.
Steps:
- Pack a colorful assortment of iced donuts into a wide bakery box.
- Scatter extra rainbow sprinkles loosely over the entire top.
- Stick tiny toothpick signs with cute puns into the pastries.
Tip: Alternate the colors of the icing in the box so it looks like a carefully curated palette.
10. Cheesecake Sampler Box with Fruit Coulis—Decadent variety.
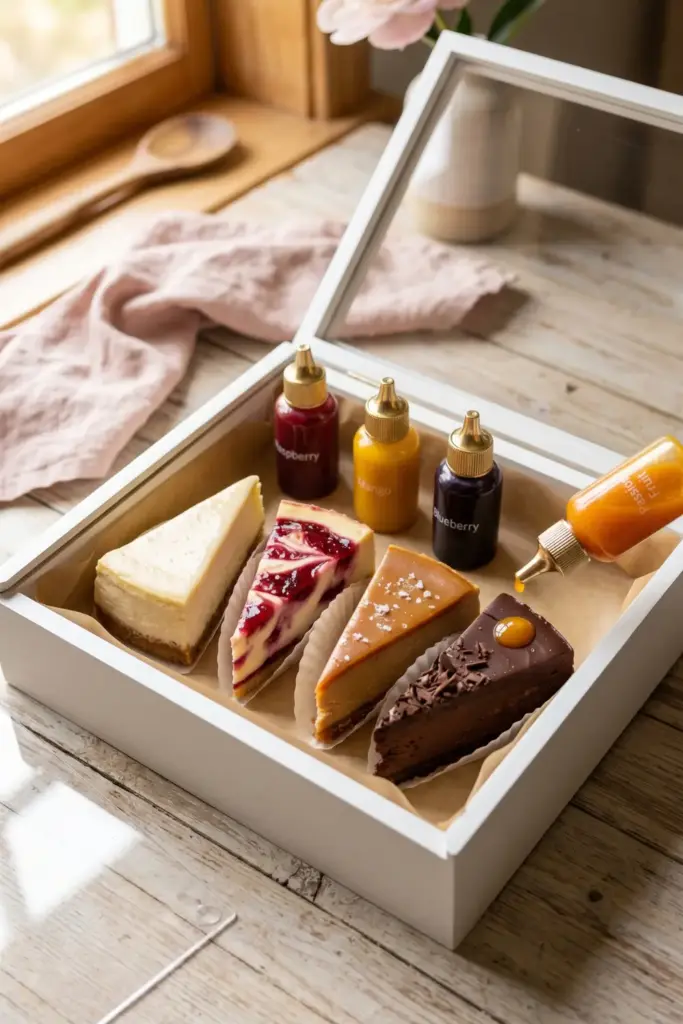
Can’t decide on just one flavor? Don’t!
A sampler box feels incredibly indulgent simply because it offers so many choices.
It’s exactly like bringing a fancy restaurant dessert menu home.
Steps:
- Slice a whole, chilled cheesecake into neat, even triangles.
- Separate the slices with small pieces of parchment paper.
- Include tiny squeeze bottles of different fruit coulis on the side.
Tip: Freeze the cheesecake slightly before slicing to get those razor-sharp, professional edges.
11. Brownie Bliss Box with Drizzle Art – Fudgy and artistic.
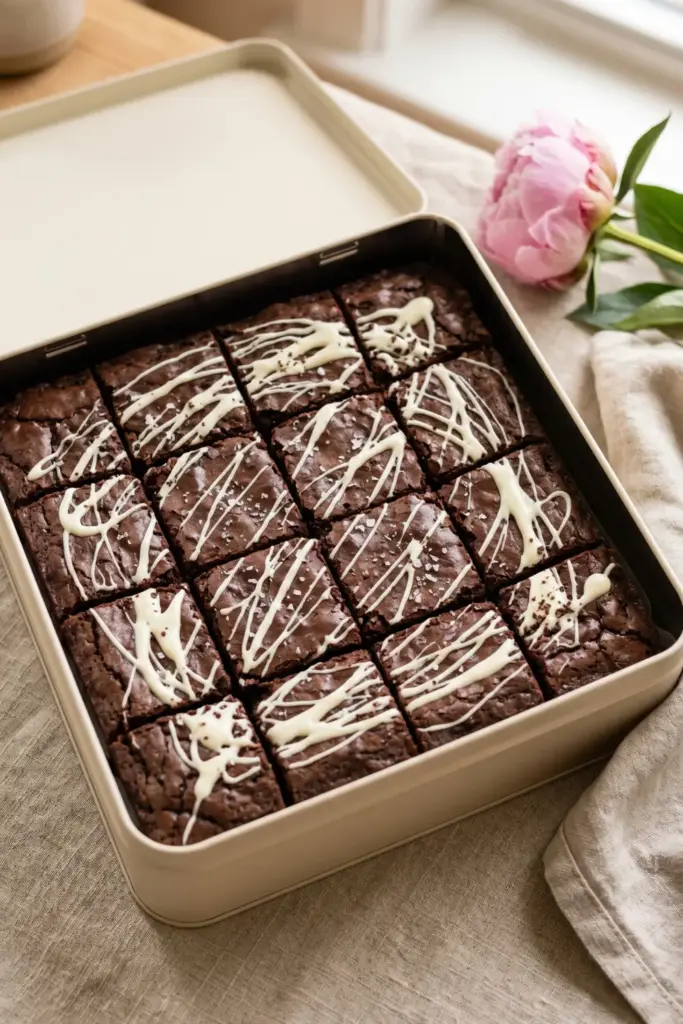
Fudgy brownies are a universal love language… but plain squares can look a bit dull.
A bit of intentional drizzle completely transforms them into modern, edible works of art.
Steps:
- Cut dense brownies into perfectly uniform squares.
- Arrange them in a tight grid pattern inside a tin box.
- Vigorously flick melted white chocolate over the grid for an abstract look.
Tip: Sprinkle a tiny pinch of flaky sea salt over the wet drizzle before it sets.
12. Lemon Dessert Box with Bright Yellow Theme – Zesty and cheerful.
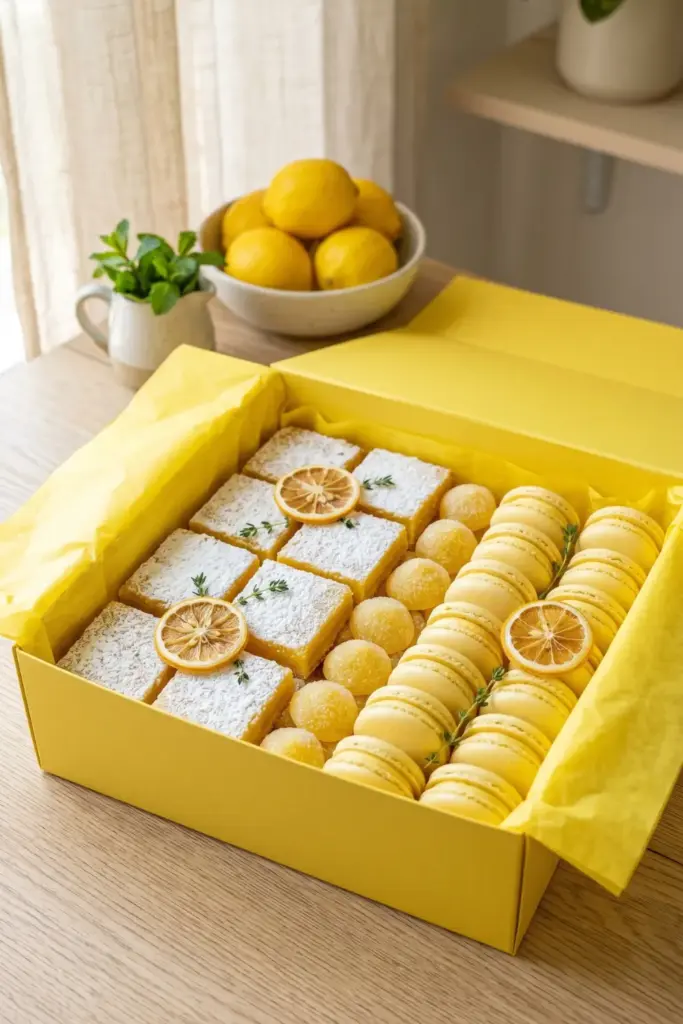
Yellow is pure, unfiltered happiness.
Creating a monochromatic color scheme is a major Pinterest hack for making things look cohesive.
A zesty, sunshine-themed box is refreshing and impossible to ignore.
Steps:
- Gather lemon bars, lemon drops, and pale yellow macarons.
- Line a box entirely with bright yellow tissue paper.
- Arrange the treats tightly so absolutely no empty space shows.
Tip: Add a few slices of dehydrated lemon wheels as a rustic, fragrant garnish.
13. S’mores DIY Kit Box – Interactive and nostalgic.
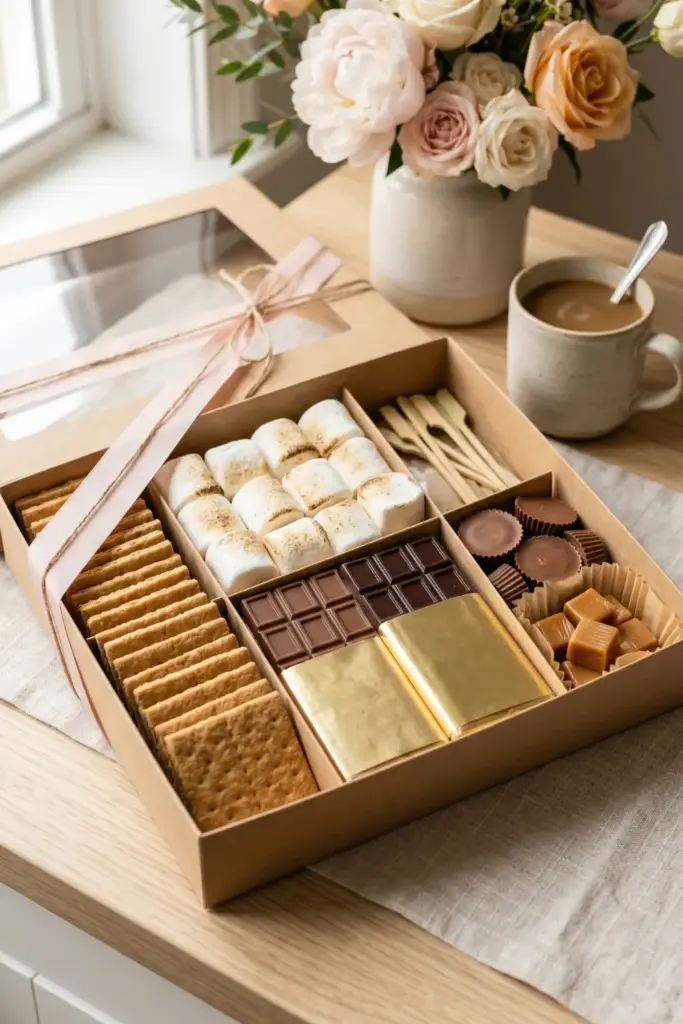
Gifting an experience is always a brilliant idea.
A DIY kit taps into sweet nostalgia and encourages making memories together.
It’s casual, interactive, and incredibly cozy for a Sunday afternoon.
Steps:
- Stack graham crackers neatly in one corner of a compartmentalized box.
- Fill another section entirely with giant gourmet marshmallows.
- Add high-quality chocolate bars in the direct center.
Tip: Swap standard chocolate for peanut butter cups or caramel squares to upgrade the s’mores game.
14. Petite Fours Box with Pastel Watercolor – Dainty and dreamy.
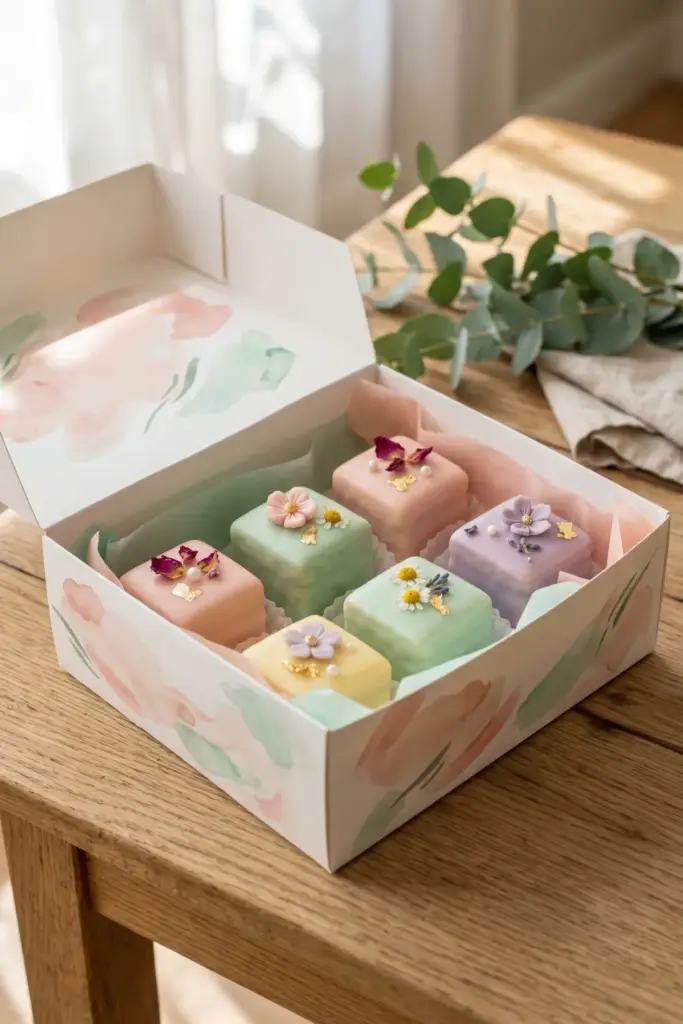
Soft, dreamy, and perfectly bite-sized.
Petit fours have an inherently vintage, high-tea vibe to them.
Pairing them with watercolor elements creates a soft, romantic aesthetic that is visually stunning.
Steps:
- Place beautifully pastel-glazed petit fours into a classic white box.
- Use a food-safe brush to paint gentle watercolor-style strokes on the box exterior.
- Line the inside with perfectly matching pastel tissue paper.
Tip: Keep the watercolor palette to just two soft colors (like blush and mint) to avoid muddiness.
15. Cake Pop Bouquet Box with Floral Foam – Portable and pretty.
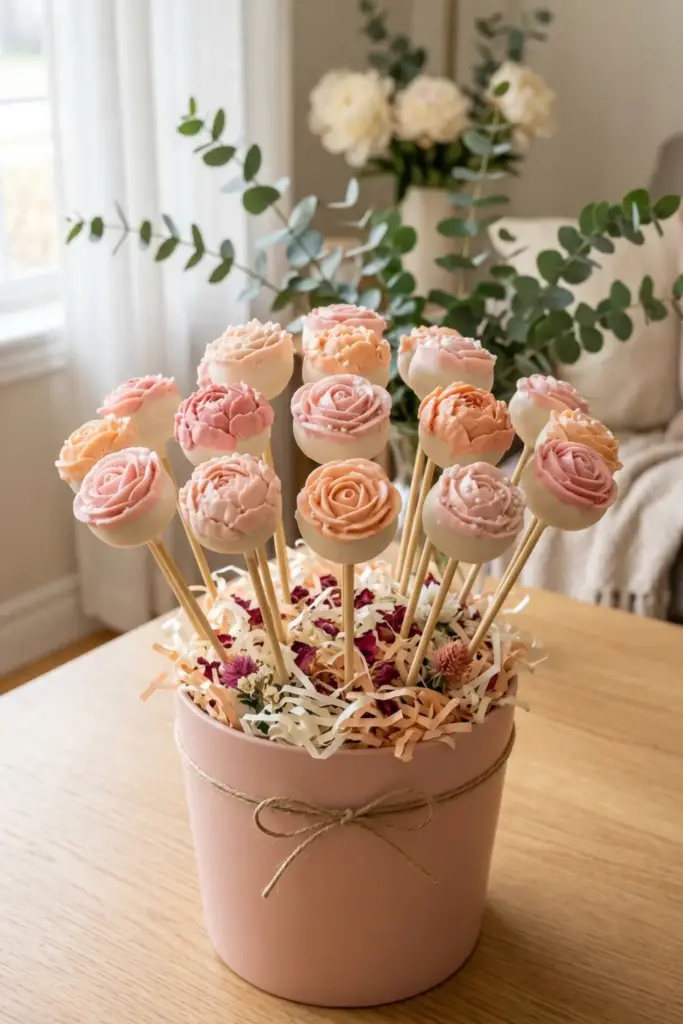
Cake pops aren’t just for kids’ birthday parties!
When styled correctly, they mimic a gorgeous bouquet of flowers—but one you can actually eat.
It’s a clever, structural design that stands out.
Steps:
- Place a dense block of dry floral foam at the bottom of a decorative bucket.
- Push the sticks of the cake pops firmly into the foam base.
- Cover the exposed foam entirely with decorative shredded paper or faux moss.
Tip: Vary the heights of the cake pop sticks to give the arrangement a natural, domed shape.
Final Thoughts
Let’s wrap this up! Presentation truly is half the magic when it comes to gifting food.
You absolutely do not need to be a professional pastry chef to make a massive impact—you just need a little creativity, some good lighting, and a beautiful box.
Don’t be afraid to mix and match elements from these ideas.
Maybe use the velvet ribbon from the truffles on the rustic kraft box!
The ultimate goal is just to make Mom feel pampered and seen.
Take your time, enjoy the creative process of putting it together, and don’t stress over absolute perfection.
Occasionally those little handmade quirks are precisely what make the gift so incredibly special.
Happy crafting!
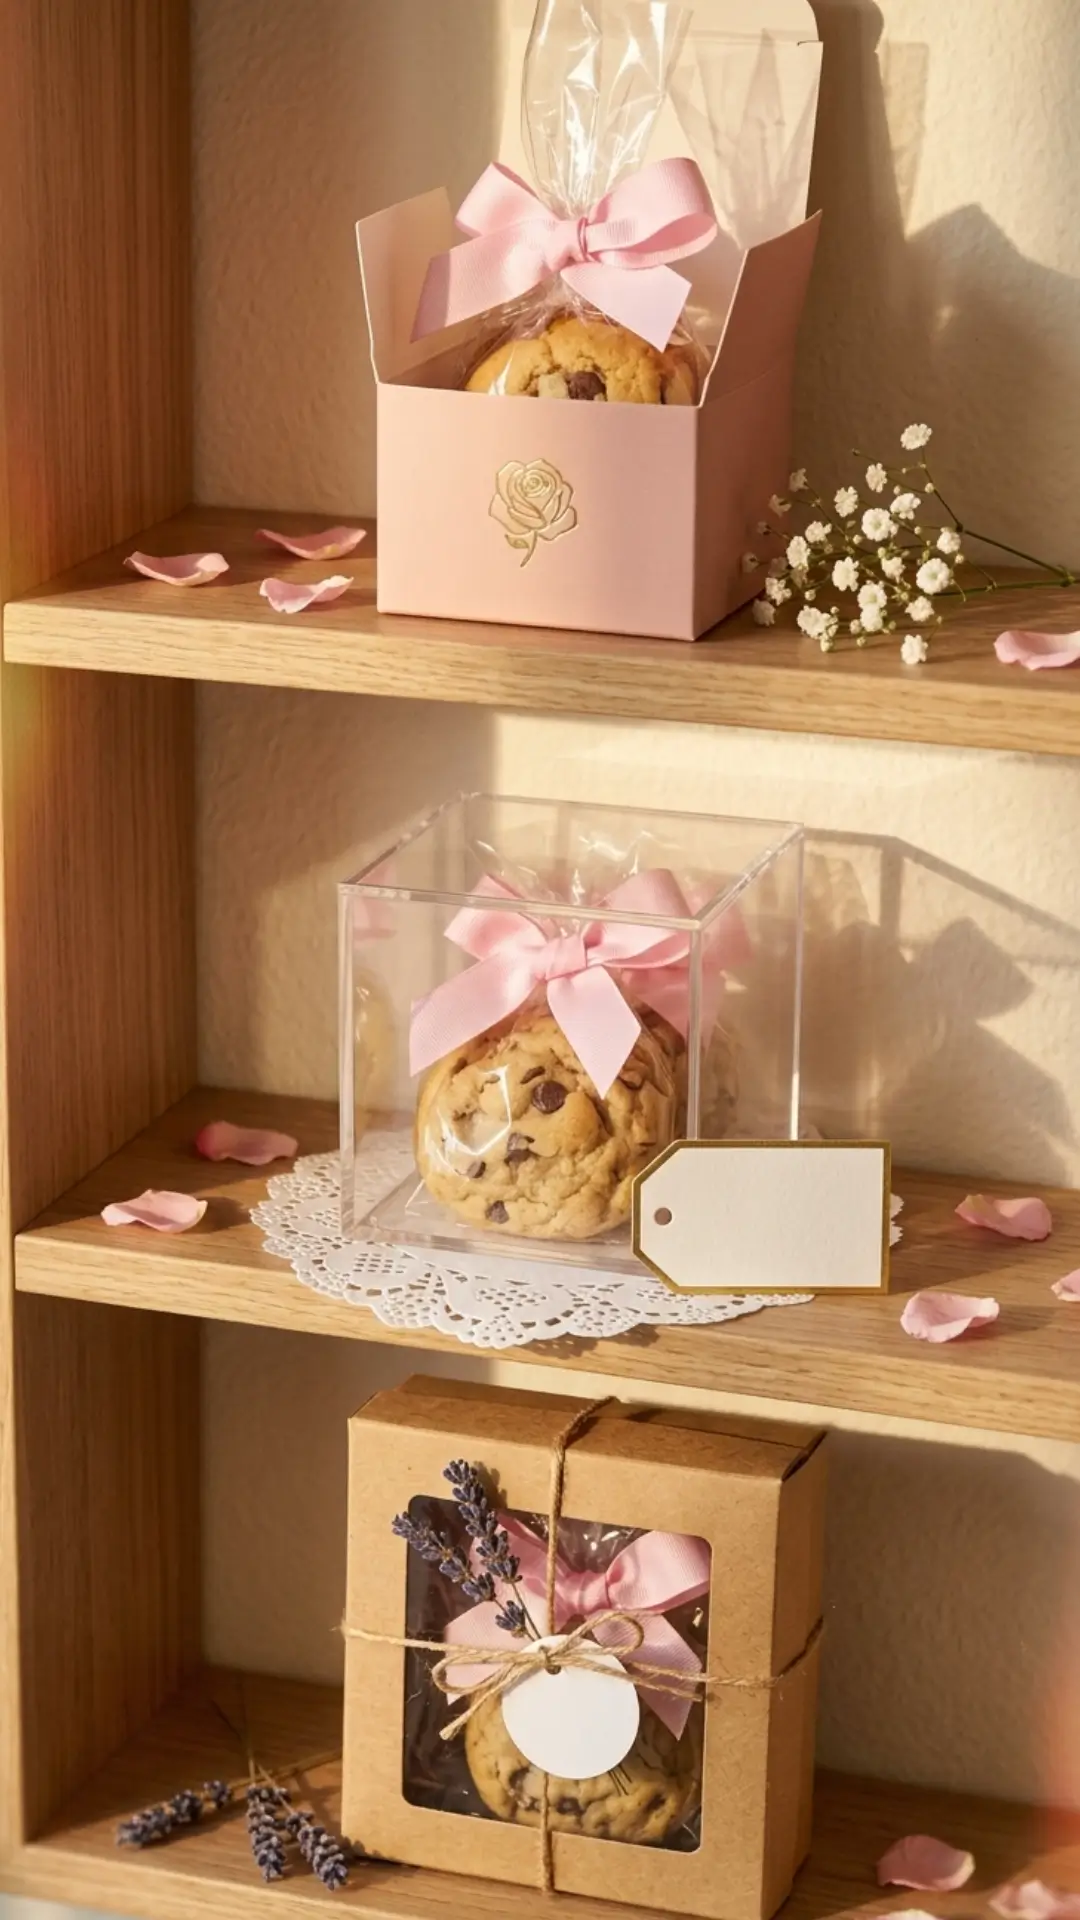
Simple Mother's Day Dessert Boxes – 5 Easy DIY Design Ideas
Celebrate mom with these simple Mother's Day dessert boxes design ideas. From pastel packaging to mini treats like macarons, cookies, and cupcakes, these DIY boxes are perfect for gifting or brunch. Easy, budget-friendly, and heartfelt. #MothersDayDessert #DIYDessertBoxes #EasyGiftIdeas
Pin it on Pinterest