Halloween parties do not need a giant budget to look unforgettable.
These easy Halloween party decoration design ideas turn simple supplies into spooky,
Pinterest-worthy details that instantly set the mood.
From floating witch hats to glowing “potions,” you’ll get quick DIY projects, simple styling steps, and practical tips you can use to make your party feel festive, creative, and wonderfully creepy.
1. Spooky Balloon Arch (Black, Orange, and White)
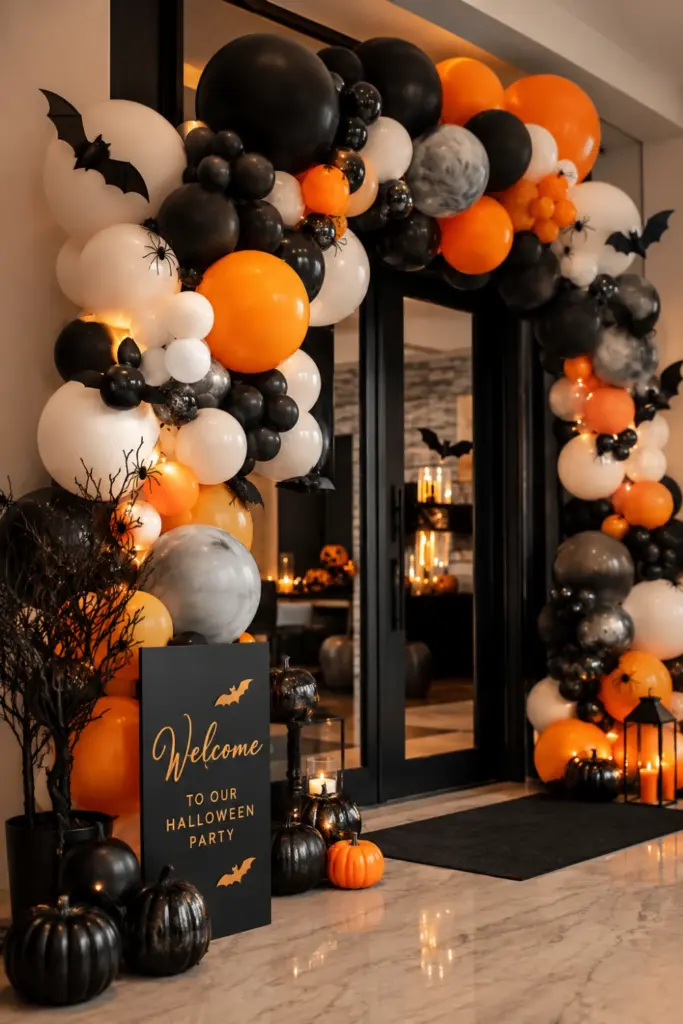
A balloon arch is one of the fastest ways to make a Halloween party entrance pop.
The mix of black, orange, and white gives it a classic spooky look without feeling too dark.
How to make it
- Inflate balloons in different sizes.
- Group two or three colors together.
- Attach balloons to a balloon arch strip.
- Fill small gaps with mini balloons.
- Add faux spiders or small bats for extra drama.
- Secure the finished arch over a doorway, dessert table, or photo area.
Tip: Use mostly matte balloons and add a few metallic ones for texture.
Extra value: Place a small Halloween sign underneath the arch so guests immediately know where the party action is.
2. Floating Witch Hats (Suspended From the Ceiling)
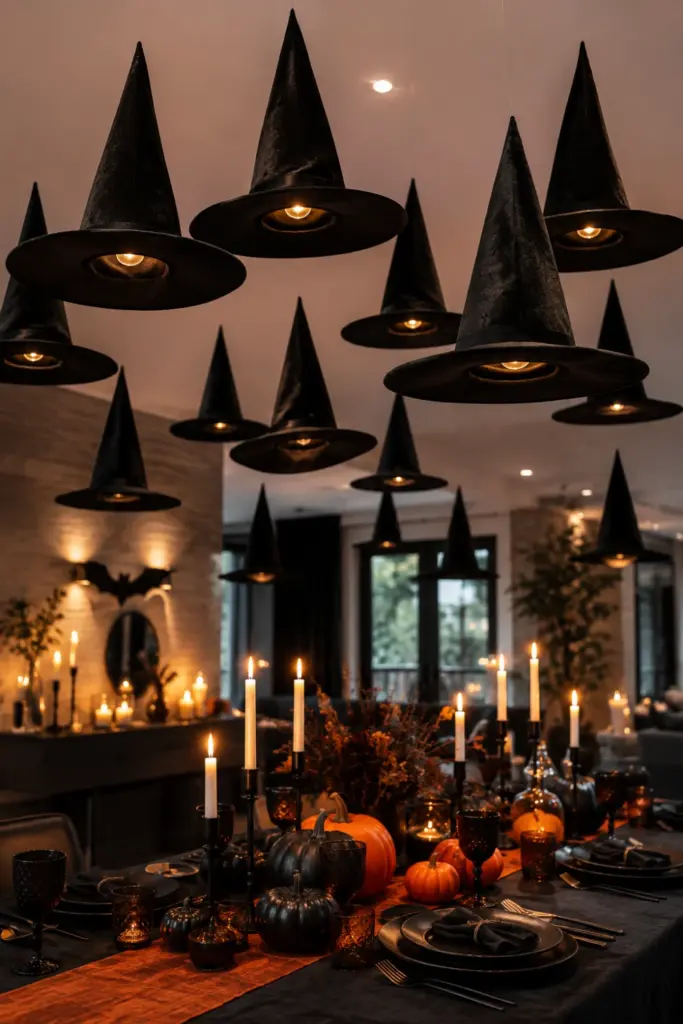
Floating witch hats create a magical illusion with almost no effort.
They work especially well over dining tables, entryways, or dance areas.
How to make it
- Buy lightweight black witch hats.
- Cut clear fishing line into different lengths.
- Tie the line securely to each hat.
- Attach the other end to ceiling hooks.
- Hang the hats at varied heights.
- Add tiny battery-powered lights inside a few hats.
Tip: Uneven spacing makes the display look more natural and dramatic.
Extra value: Keep hats higher in areas where guests walk to prevent accidental bumps.
3. Glowing Apothecary Jars (Filled With “Potions”)
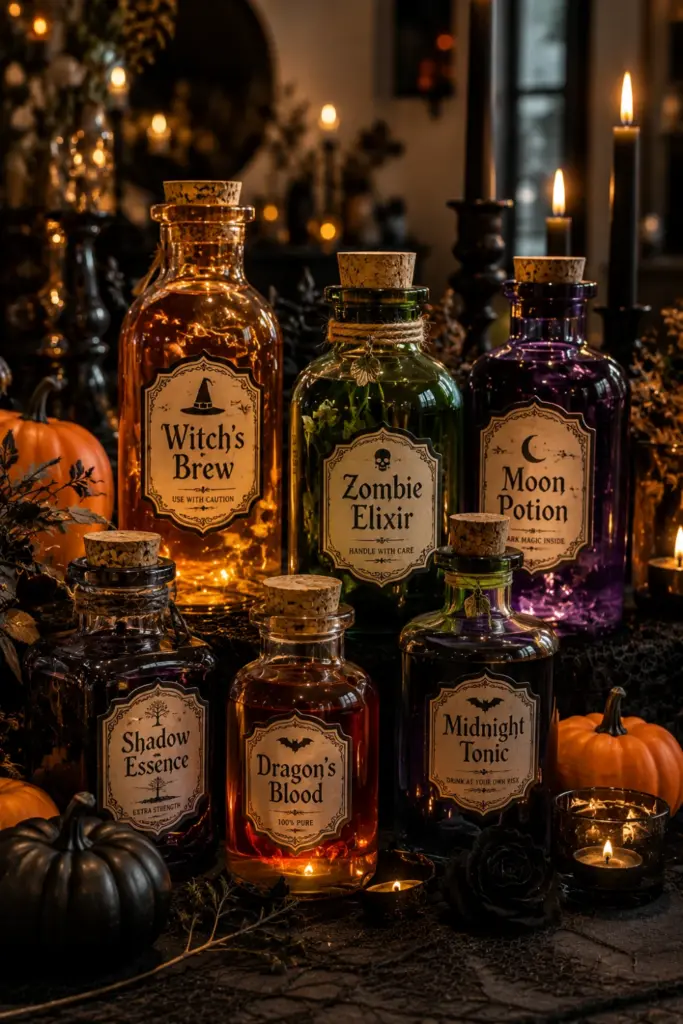
Turn ordinary glass jars into spooky potion bottles using colored water, labels, and soft lighting.
They look fantastic on shelves or buffet tables.
How to make it
- Collect clean glass jars or bottles.
- Fill each with water.
- Add a few drops of food coloring.
- Create labels such as “Witch’s Brew” or “Zombie Elixir.”
- Wrap twine around the bottle necks.
- Place battery tea lights behind or beneath them.
Tip: Use different bottle shapes to create a collected-over-time apothecary effect.
Extra value: Add corks and handwritten labels for a more authentic vintage Halloween display.
4. DIY Yarn Spider Webs (Corner Decorations)
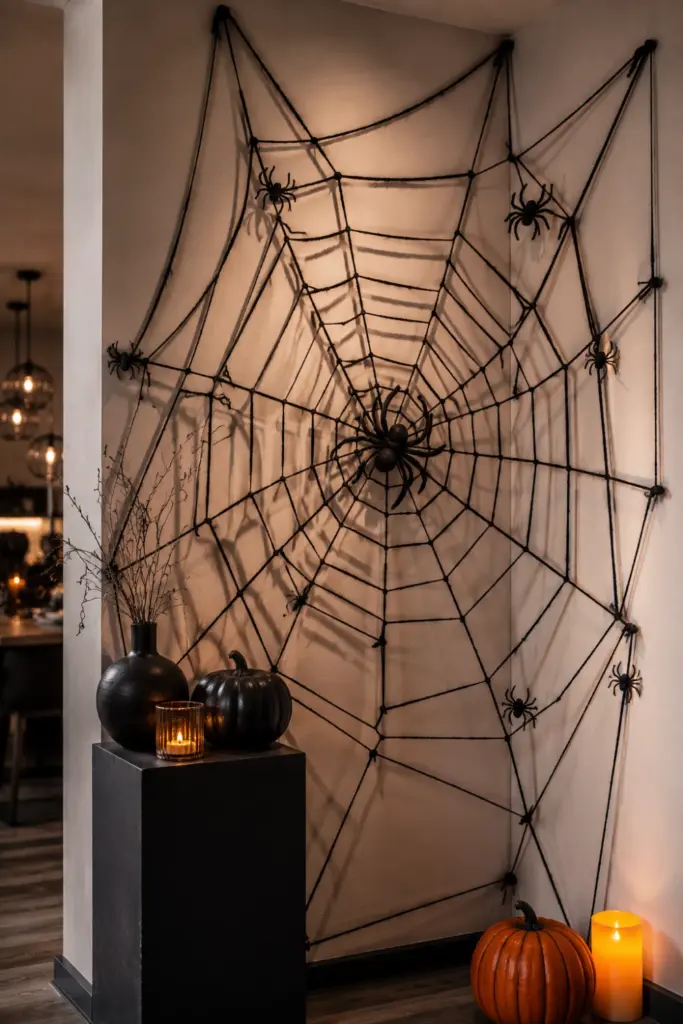
Skip expensive store-bought webbing and make oversized spider webs from yarn.
They are especially effective in empty wall corners.
How to make it
- Stretch three or four yarn strands across the corner.
- Tie them together at the center.
- Weave additional yarn around the strands.
- Keep some loops loose and uneven.
- Add plastic spiders in different sizes.
- Layer several webs around the room.
Tip: Pull the yarn thin in places so the web looks more delicate.
Extra value: Combine yarn webs with dim lighting to make corners feel intentionally spooky rather than simply empty.
5. Haunted Mirror (With Scary Silhouettes)
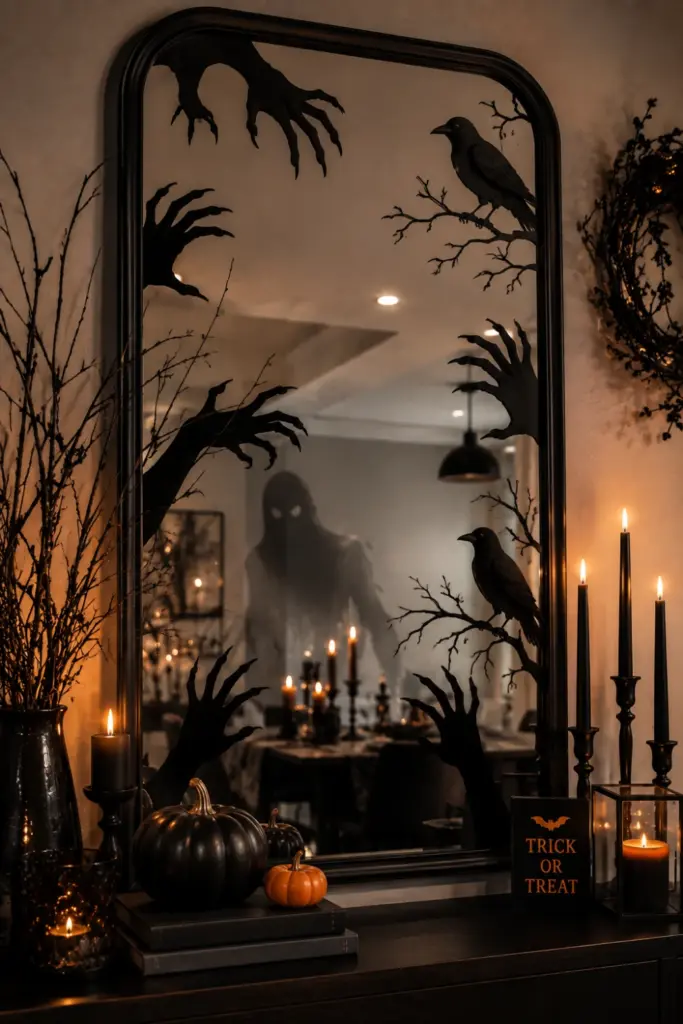
A haunted mirror can become one of the most photographed decorations at your party.
Black silhouette shapes create an eerie reflection effect.
How to make it
- Clean the mirror thoroughly.
- Cut ghostly shapes from removable black vinyl.
- Add silhouettes of hands, ravens, or spooky faces.
- Position the shapes around the edges.
- Add a battery candle nearby.
- Place the mirror where guests naturally gather.
Tip: Leave plenty of reflective space so the design does not overwhelm the mirror.
Extra value: Position it near your entryway for an instant “haunted house” moment.
6. Candy Corn Table Runner (DIY Paper Craft)
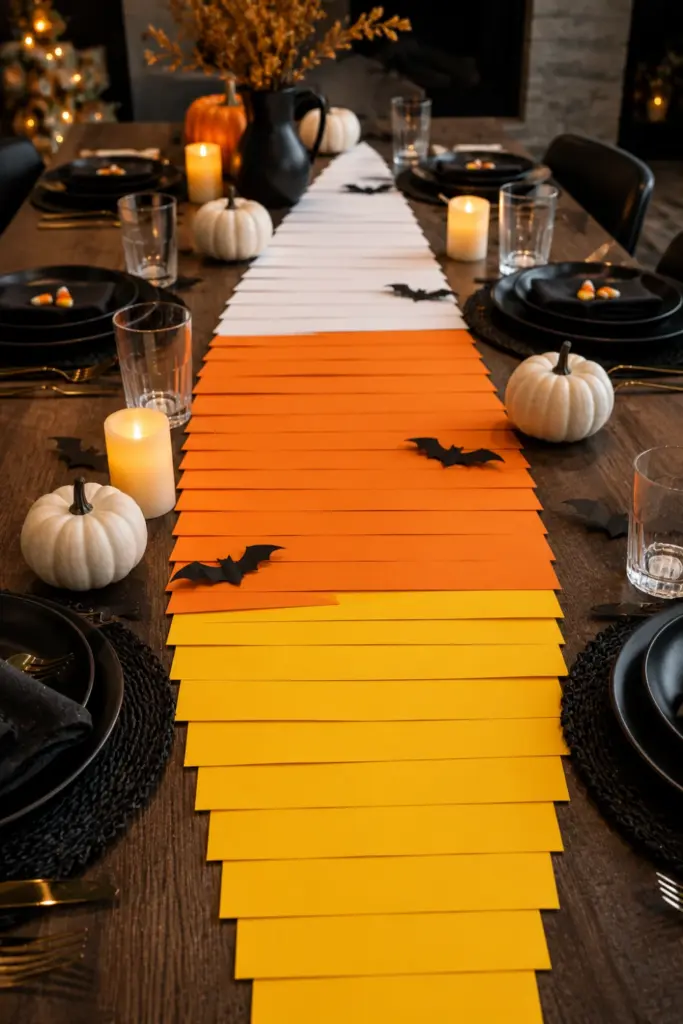
A candy corn-inspired runner adds cheerful Halloween color without requiring sewing skills.
It is perfect for dessert tables or casual dinner setups.
How to make it
- Cut long strips of white, orange, and yellow paper.
- Arrange them in candy-corn color bands.
- Glue the strips together.
- Trim the edges neatly.
- Add tiny paper bats along the border.
- Lay it beneath your serving dishes.
Tip: Use cardstock instead of thin paper for a sturdier runner.
Extra value: Pair it with clear plates or white dishes so the bright colors become the focal point.
7. Eyeball Ice Bucket (For Drinks)
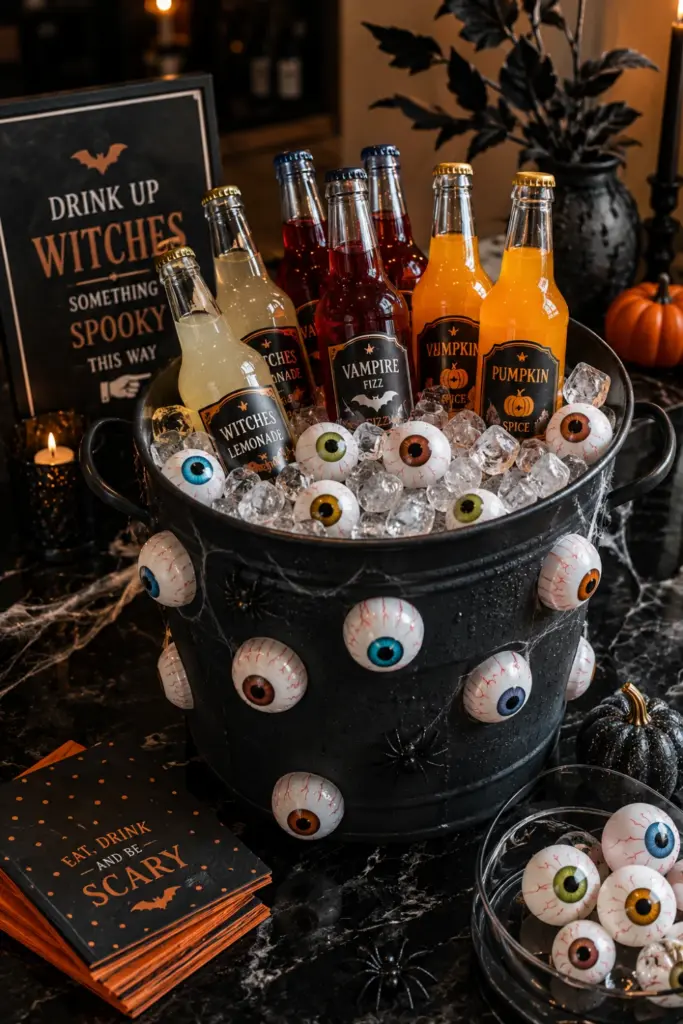
Give your drink station a silly-creepy upgrade with an eyeball ice bucket.
It is simple, playful, and guaranteed to attract attention.
How to make it
- Choose a clean plastic or metal bucket.
- Fill it with ice.
- Add reusable plastic eyeballs around the sides.
- Place bottled drinks inside.
- Add a spooky drink label.
- Surround the bucket with faux cobwebs.
Tip: Keep decorative eyeballs above the actual food-contact area.
Extra value: Create a separate beverage station so guests can serve themselves easily.
8. Mummy Mason Jars (Vases or Candle Holders)
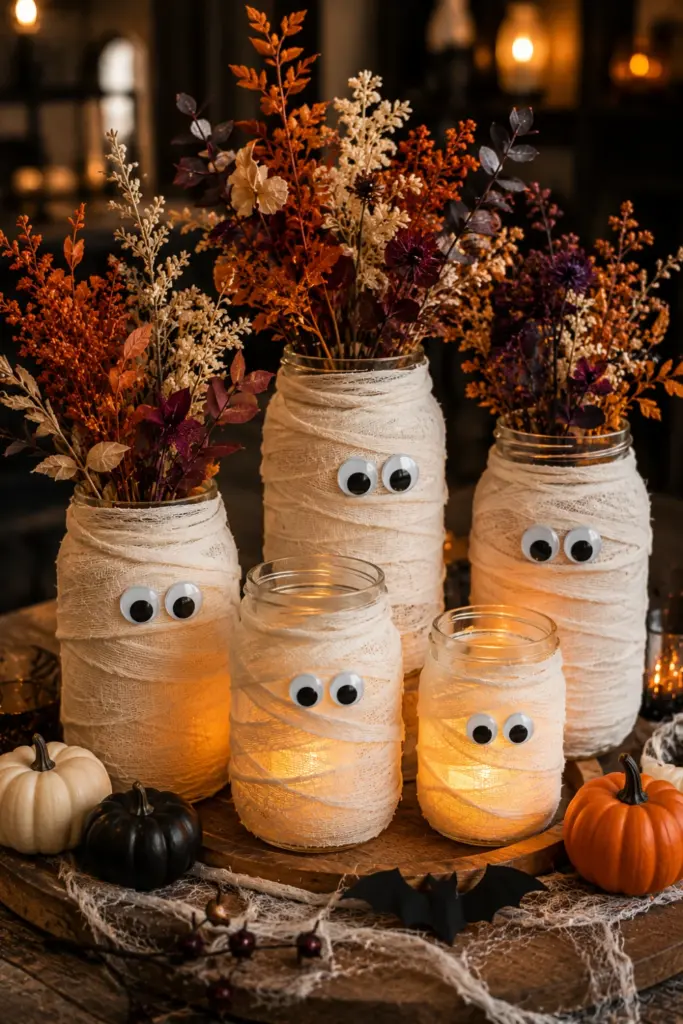
Mummy jars are inexpensive, cute, and surprisingly versatile.
Use them for flowers, utensils, glow sticks, or battery candles.
How to make it
- Clean and dry mason jars.
- Wrap them loosely with gauze.
- Secure the fabric with glue.
- Attach adhesive googly eyes.
- Add flowers or battery candles.
- Arrange several jars together.
Tip: Keep the gauze slightly uneven for a more authentic mummy look.
Extra value: Group jars in odd numbers for a fuller centerpiece arrangement.
9. Paper Bat Garland (Hanging Wall Decor)
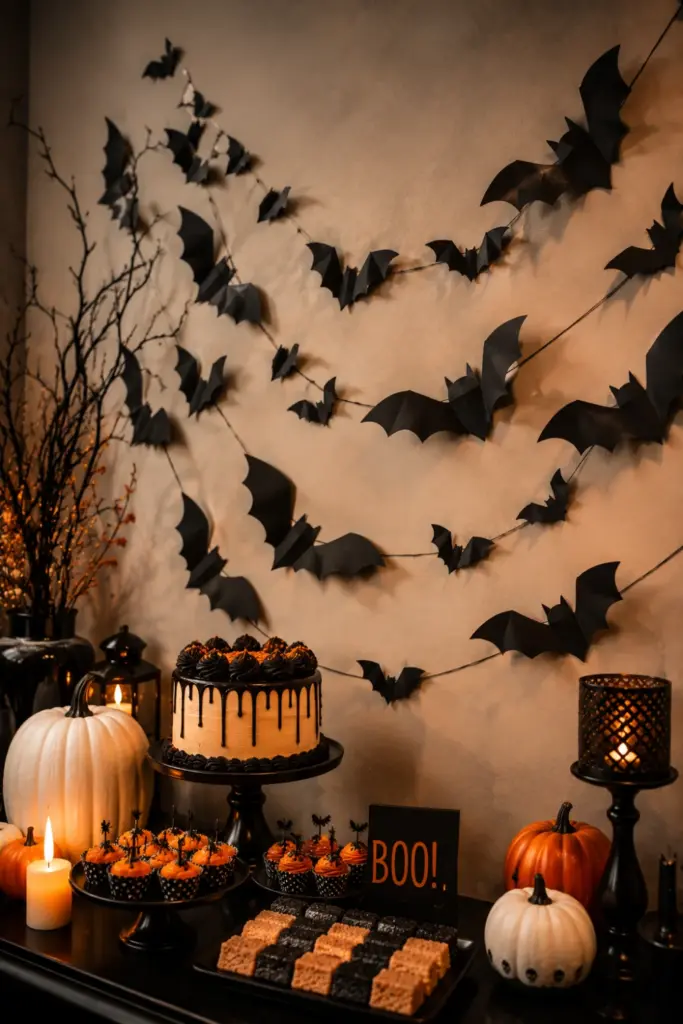
A paper bat garland can transform a plain wall into a dramatic Halloween backdrop in minutes.
How to make it
- Trace bat shapes onto black cardstock.
- Cut out multiple bats.
- Fold the wings slightly upward.
- Thread them onto black string.
- Space them evenly or randomly.
- Hang the garland across a wall or doorway.
Tip: Make bats in several sizes for extra dimension.
Extra value: Use the garland behind a dessert table to create an inexpensive photo backdrop.
10. Floating Candle Chandelier (Harry Potter Style)
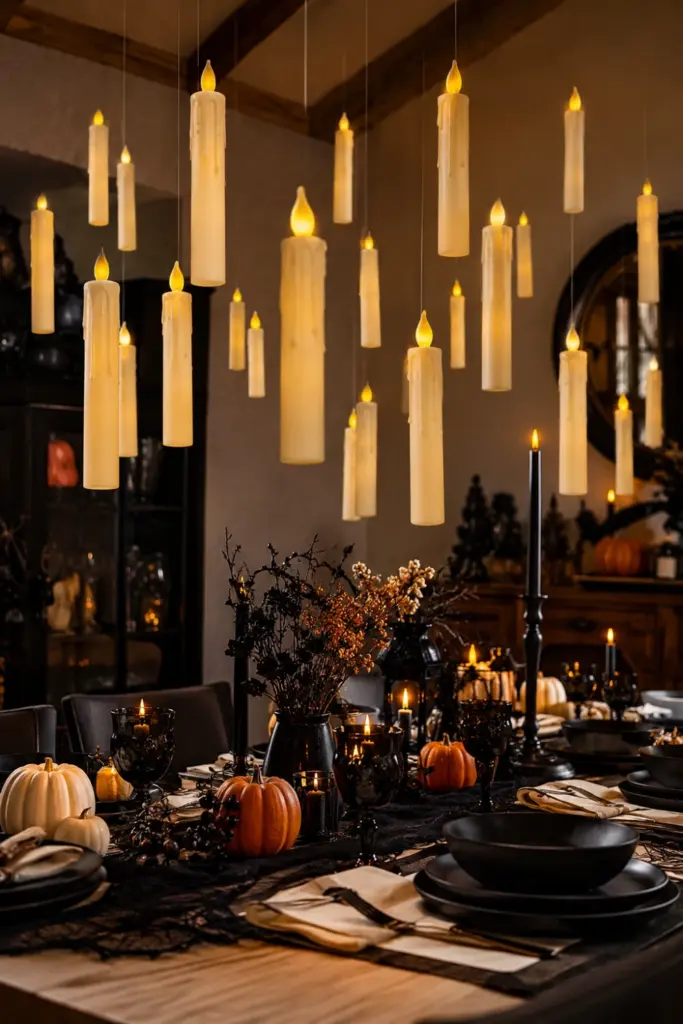
Floating candles create an enchanting, spellbook-inspired atmosphere.
Battery-operated candles make this idea much easier and safer.
How to make it
- Choose lightweight LED taper candles.
- Attach clear fishing line around each candle.
- Hang them from the ceiling at different lengths.
- Arrange them over your main table.
- Dim surrounding lights.
- Add a few faux cobwebs between selected candles.
Tip: Use warm-white LEDs for the most realistic candle glow.
Extra value: Keep the chandelier high enough to stay safely out of reach.
11. Poison Apple Centerpieces (Fruit and Styrofoam)
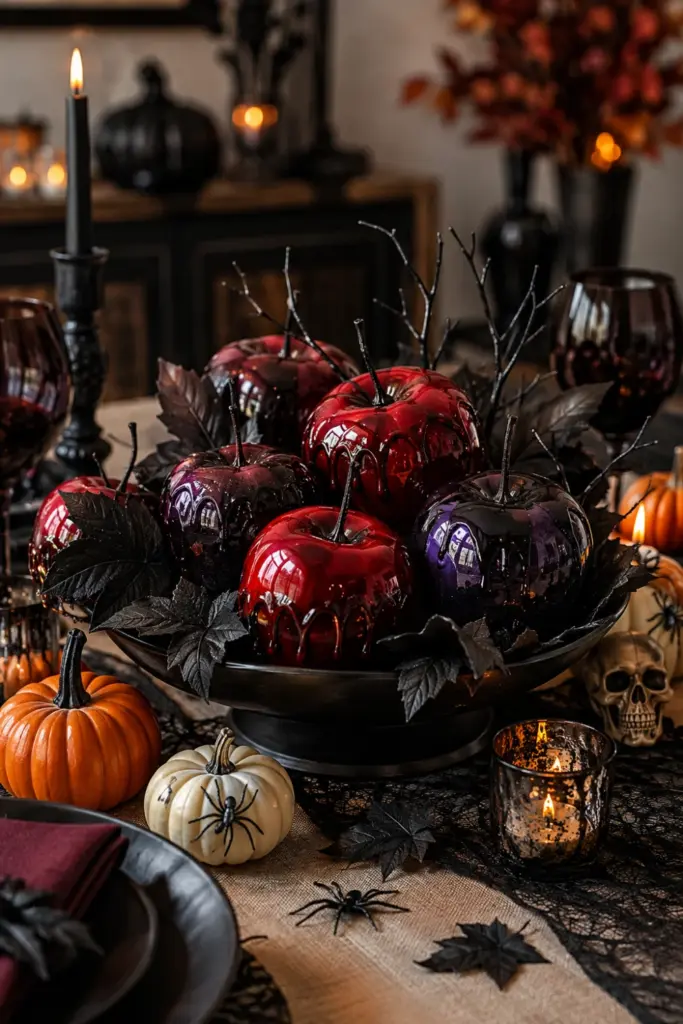
Inspired by classic fairy tales, poison apples make an elegant yet creepy centerpiece.
They are ideal for a more dramatic Halloween tablescape.
How to make it
- Use artificial apples or lightweight foam apples.
- Paint them deep red, black, or purple.
- Add glossy highlights for a poisoned effect.
- Place them in a decorative bowl.
- Surround them with faux leaves.
- Add small plastic spiders or skulls.
Tip: Use varying shades instead of making every apple identical.
Extra value: Place one centerpiece at the center of the table and smaller versions on side tables.
12. Spooky Silhouette Window Clings (DIY Contact Paper)
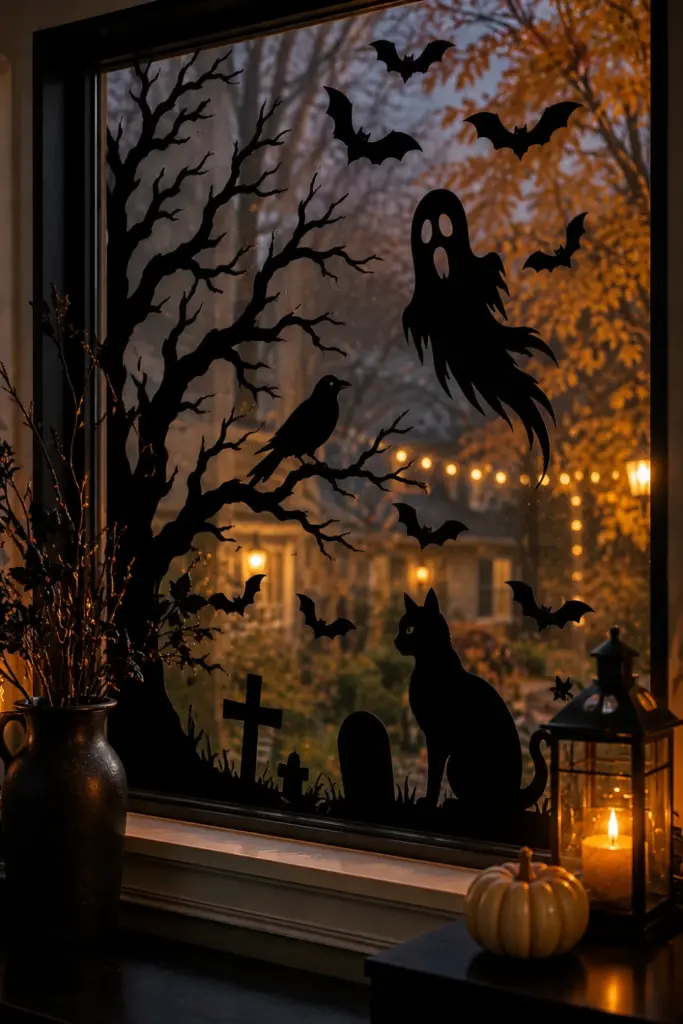
Window silhouettes make your home look haunted from both inside and outside.
They are inexpensive and easy to customize.
How to make it
- Sketch bats, ghosts, cats, or creepy branches.
- Trace the designs onto black contact paper.
- Carefully cut out each shape.
- Peel and apply them to clean windows.
- Add more silhouettes around the corners.
- Turn on indoor lights after dark.
Tip: Keep the edges smooth so the silhouettes look crisp.
Extra value: Use larger figures near the bottom and smaller shapes higher up for a layered scene.
13. Black Rose & Skull Arrangements (Floral Goth)
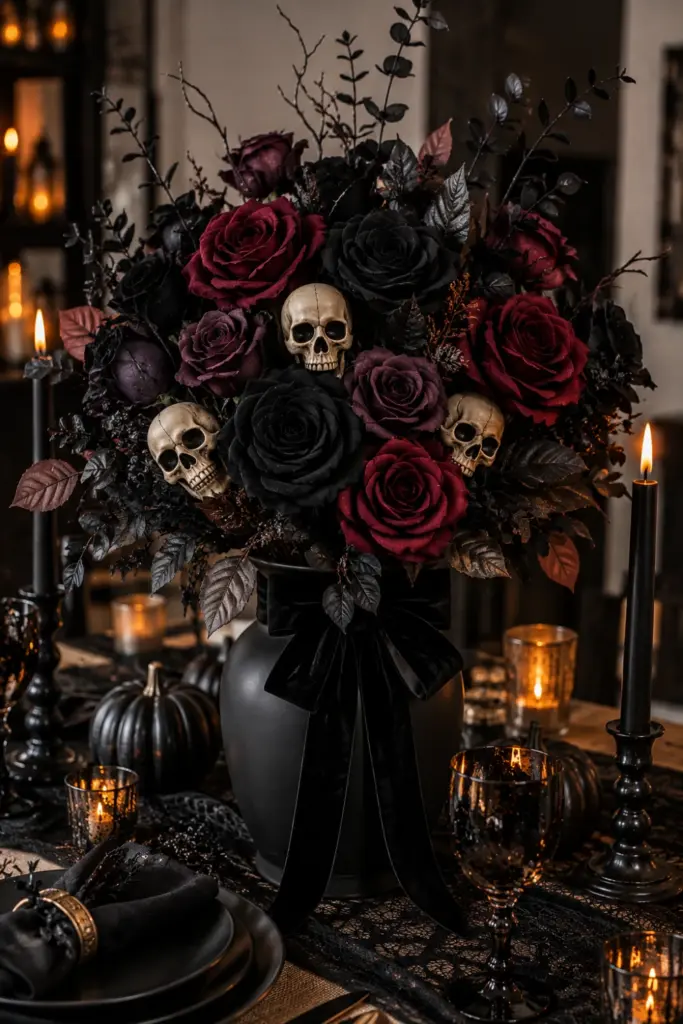
For a sophisticated Halloween party, combine dark flowers with skull accents.
This style feels gothic, polished, and slightly mysterious.
How to make it
- Choose black, burgundy, or deep-purple faux roses.
- Arrange them in a dark vase.
- Add small decorative skulls.
- Layer in faux branches or dark foliage.
- Tie a velvet ribbon around the vase.
- Place the arrangement on a dining or dessert table.
Tip: Mix flower sizes so the arrangement does not look flat.
Extra value: Repeat the same flowers in smaller vases throughout the room for visual continuity.
14. Glow-in-the-Dark Slime Vases
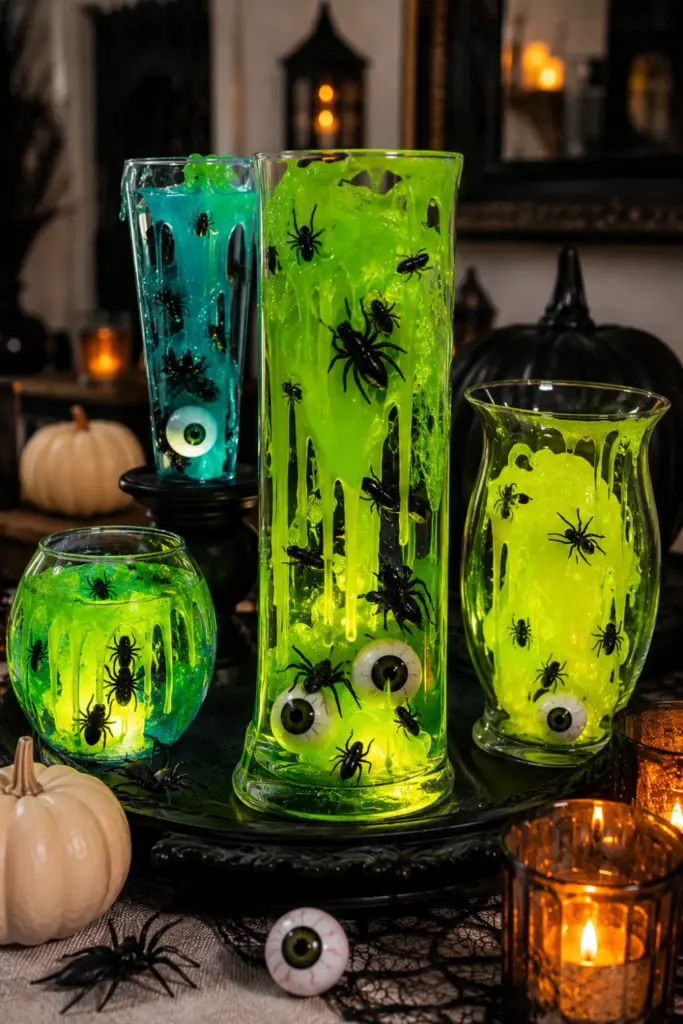
These unusual vases bring a playful neon effect to your Halloween setup.
They are especially fun for younger guests or casual themed parties.
How to make it
- Choose clear plastic or glass containers.
- Fill them with glow-in-the-dark slime.
- Add plastic creepy-crawly decorations.
- Place battery lights nearby.
- Add labels such as “Alien Goo.”
- Arrange them on a tray.
Tip: Keep slime sealed inside its container so it does not become a messy party hazard.
Extra value: Use several containers with different textures and glow levels to create a mini Halloween laboratory.
15. Haunted House Gingerbread Graveyard (Edible Centerpiece)
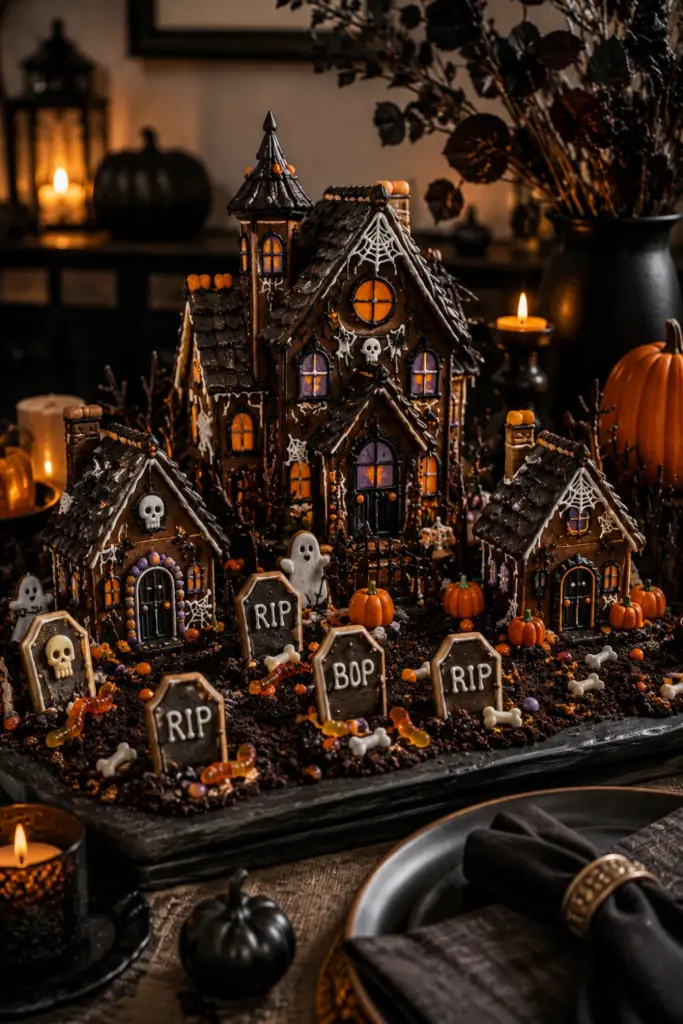
Finish your decorating lineup with an edible centerpiece that looks like a tiny haunted village.
A gingerbread graveyard combines Halloween fun with dessert-table appeal.
How to make it
- Bake or assemble small gingerbread house pieces.
- Decorate them with dark icing.
- Create cookie tombstones.
- Sprinkle crushed chocolate cookies around the base.
- Add gummy worms or candy bones.
- Place everything on a large serving board.
Tip: Use icing to glue decorations securely so the display stays intact.
Extra value: Add edible labels like “RIP” and “Boo” to the cookie tombstones for extra personality.
Final Thoughts
Great Halloween decorating is less about buying everything in the seasonal aisle and more about creating a few strong visual moments.
Choose a color palette, repeat key textures, and give each area of the room a purpose.
Easy ways to make your party look even better
- Choose a palette: Black, orange, white, and deep purple are easy to coordinate.
- Create one focal point: Make the balloon arch, haunted mirror, or floating candles your main attraction.
- Repeat small details: Scatter bats, spiders, skulls, or mini pumpkins throughout the space.
- Layer lighting: Mix candles, string lights, LEDs, and dim lamps instead of relying on one bright overhead light.
- Decorate vertically: Ceilings, windows, walls, and doorways offer valuable decorating space.
- Keep pathways clear: Beautiful decorations should never make it difficult for guests to move around.
- Use removable supplies: Command hooks, removable vinyl, fishing line, and painter-friendly adhesives make cleanup much easier.
- Style your photos: Set aside one decorated corner as a dedicated photo spot.
The best easy Halloween party decoration design ideas are the ones that look impressive but stay manageable.
Start with two or three projects that make the biggest visual impact, then layer in smaller details as your party comes together.
That way, the room feels festive and thoughtfully styled instead of crowded—and your decorations can do plenty of the entertaining before the first guest even arrives.