Summer isn’t just a season; it’s a whole mood that demands a fresh look from head to toe.
If you’re anything like the rest of the Pinterest-obsessed world, you’ve probably spent hours scrolling through aesthetic seaside vibes while dreaming of your next getaway.
We all know that nothing ruins a beach photo faster than chipped, boring polish.
That is exactly why I’ve pulled together this ultimate guide of 15 simple beach nail and summer nail design ideas to help you nail that vacation aesthetic.
Whether you’re a DIY beginner or a pro with a steady hand, these looks are designed to be achievable and totally Instagram-worthy.
You’ll get everything from subtle textures to bold pops of color that mimic the rhythm of the tides.
Let’s dive into these designs and turn your fingertips into tiny pieces of tropical art before the sun sets on summer!
1. Ocean Wave Nails
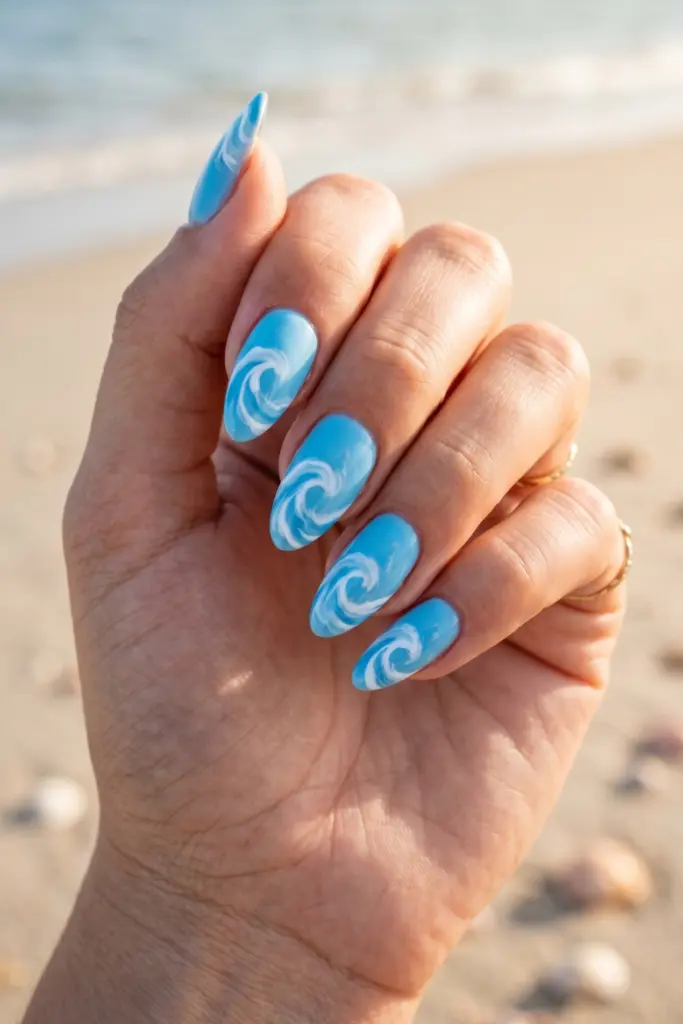
The Surf’s Up Swirl
Capturing the movement of the Atlantic on your nails is actually easier than it looks.
It is all about layering different blues to create depth and motion.
This design looks incredible on almond-shaped nails because the curves mimic the natural flow of water.
It’s basically a wearable vacation for your hands.
Steps:
- Paint a base of light cerulean blue.
- Use a thin detail brush to swirl white polish across the tips.
- While the white is wet, dab a bit of clear top coat to blur the edges.
- Finish with a high-gloss sealer.
Tip: Use a toothpick if you don’t have a professional detailing brush; it works just as well for fine lines.
2. Sandy Beach Gradient
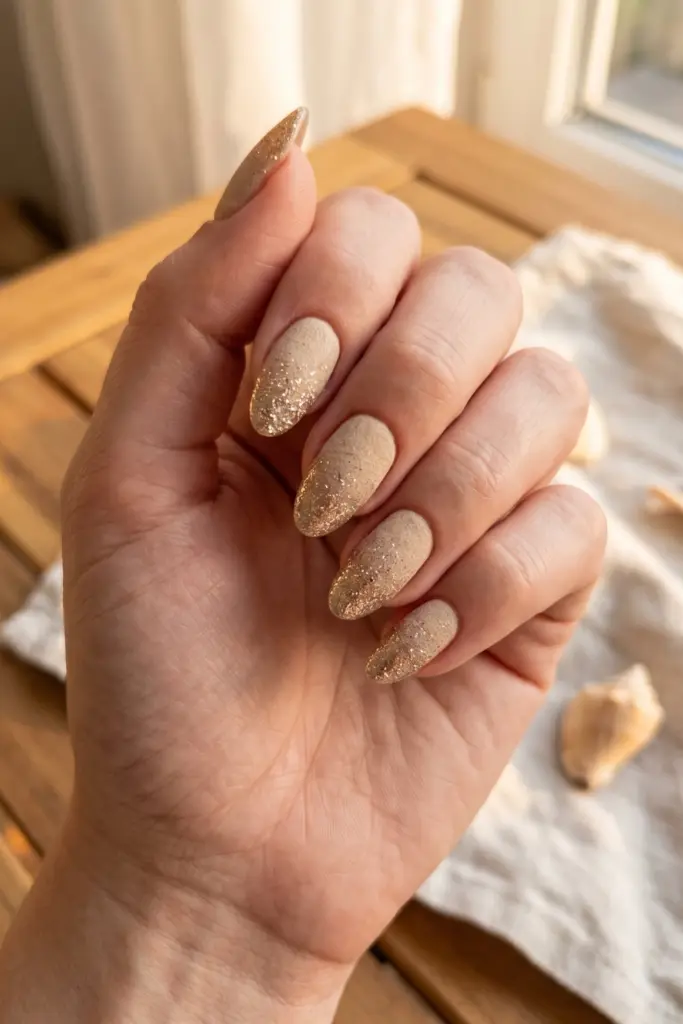
The Golden Hour Grit
Neutral lovers, this one is for you.
It mimics the transition from dry sand to the wet shoreline using subtle glitters and soft nudes.
It’s classy enough for a summer wedding but casual enough for a bonfire.
Honestly, it’s the most versatile look on this list.
Steps:
- Apply two coats of a sandy beige or nude polish.
- Dab a makeup sponge with a light gold glitter.
- Press the sponge onto the tips of your nails, fading toward the middle.
- Apply a second layer of glitter only at the very edge.
Tip: Use a matte top coat on the beige part for a realistic “dry sand” texture versus the “wet” glitter.
3. Seashell Accent Nails
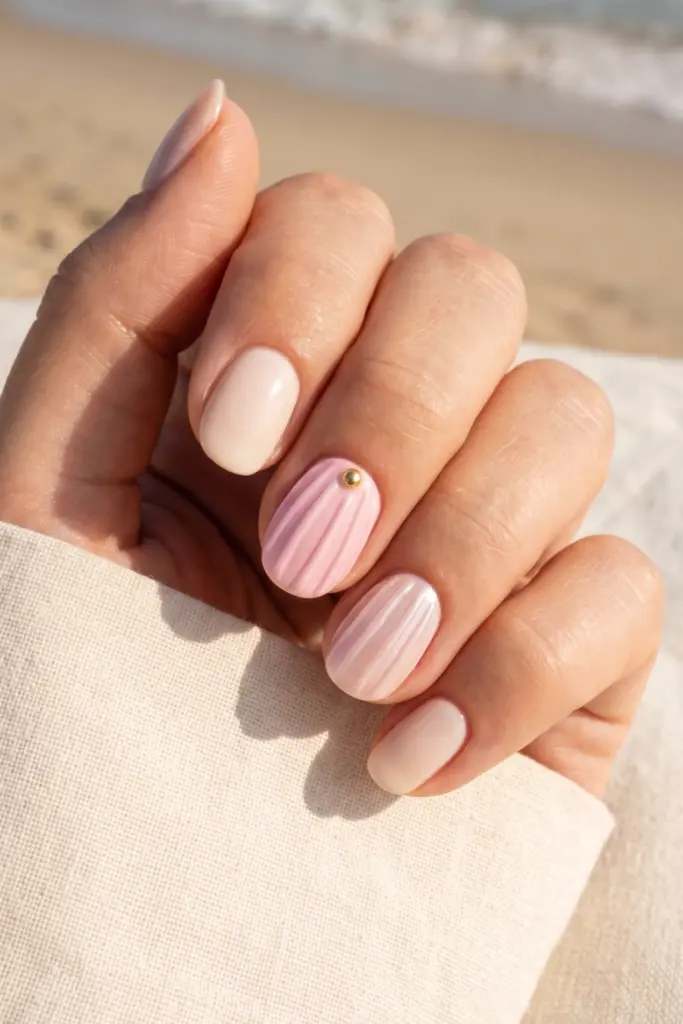
The Little Mermaid’s Secret
This 3D-inspired look gives off major sirencore vibes without needing actual charms.
By using thick polish or gel, you can create ridges that look just like a scallop shell.
It’s tactile, unique, and looks stunning in those “holding a cocktail” photos.
Steps:
- Paint your ring finger a soft pastel pink or cream.
- Use a stripping brush to draw vertical lines from the base to the tip.
- Go over the lines a second time to add height and texture.
- Add a tiny gold bead at the base of the nail.
Tip: A pearlescent base coat underneath the ridges makes the “shell” look much more authentic.
4. Starfish Sparkle
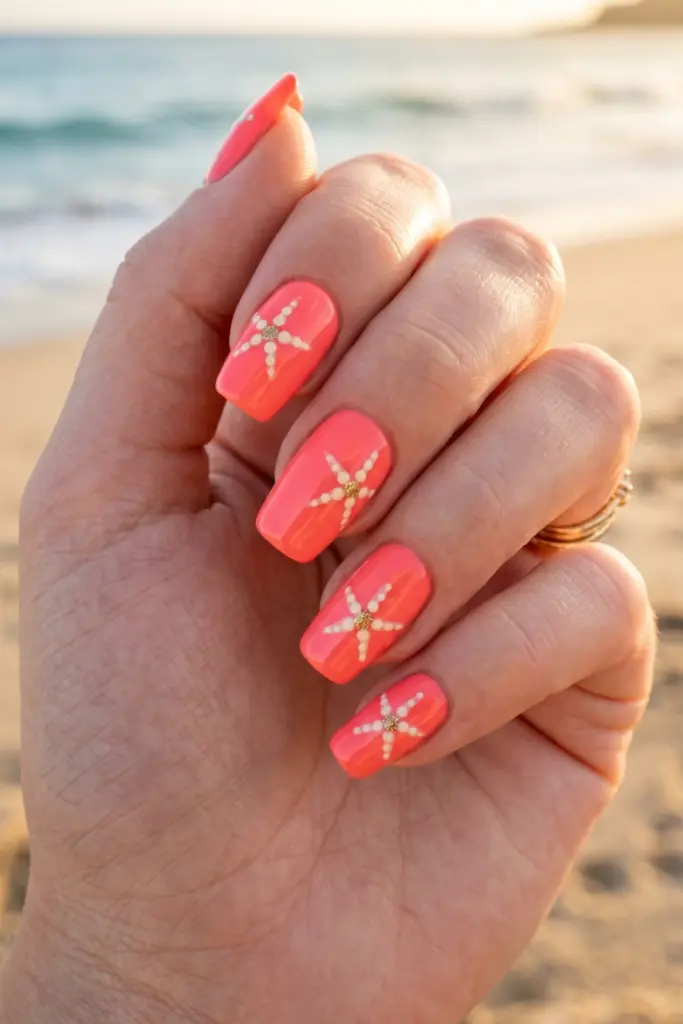
Constellations of the Sea
Starfish are basically the stars of the ocean, right?
This design combines a pop of coral with a bit of celestial-inspired shimmer.
It’s a bit more whimsical and perfect for anyone who wants their manicure to stand out against the blue water.
Steps:
- Choose a bright coral or orange-pink for your base.
- Once dry, use a dotting tool to create five small points in a star shape.
- Connect the dots with a tiny brush to form the starfish.
- Add a dot of gold glitter in the center of the starfish.
Tip: Keep the starfish off-center for a more “organic” and modern Pinterest aesthetic.
5. Palm Tree Silhouette
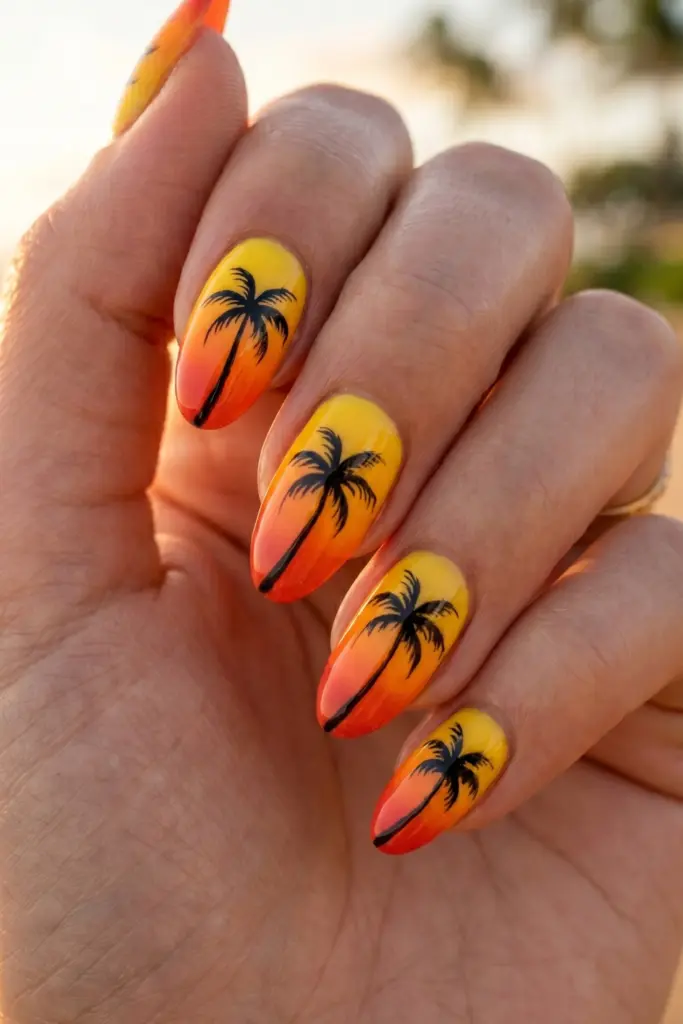
Midnight in Maui
Nothing screams tropical vacation louder than a palm tree against a bright background.
While it looks complicated, it’s really just a series of strategic lines.
It’s the ultimate “out of office” statement for your nails.
Steps:
- Create a gradient background using yellow and orange.
- Use black polish to draw a thin, slightly curved vertical line.
- Flick the brush outward from the top of the line to create four or five fronds.
- Seal with a quick-dry top coat.
Tip: Don’t worry about the lines being perfect; real palm trees are messy and wind-blown!
6. Coral Reef Pop
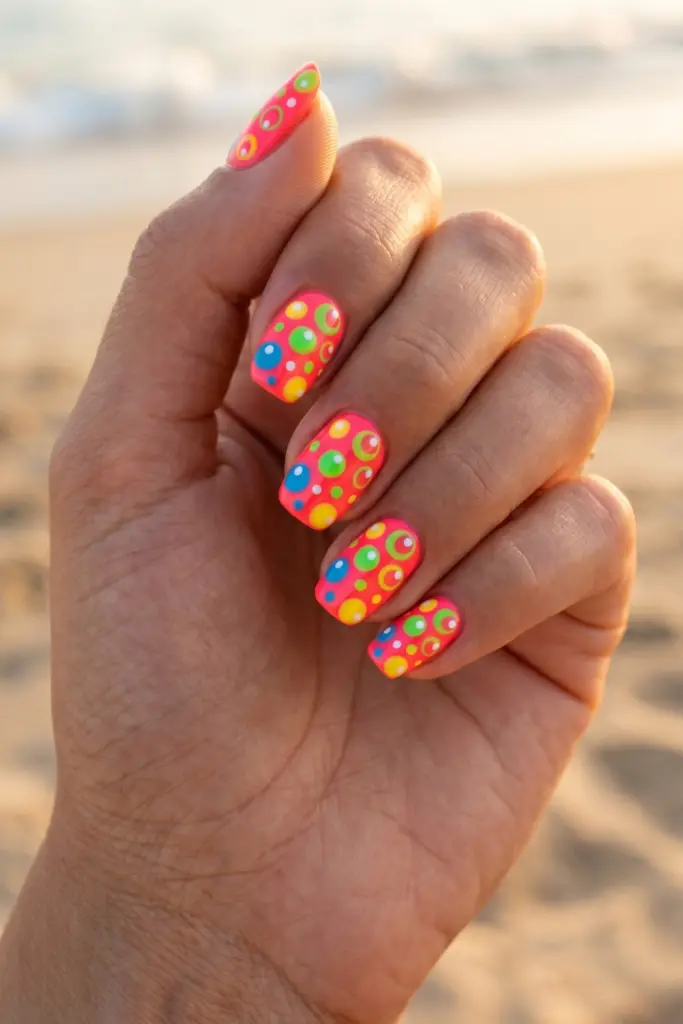
Neon Anemone Vibes
If you’re a fan of bright colors, the coral reef look is your best bet.
It uses vibrant neons to mimic the underwater life found in tropical destinations.
It’s loud, fun, and looks amazing with a tan.
Steps:
- Apply a base of neon pink or bright orange.
- Use a dotting tool to add “bubbles” in a contrasting neon shade.
- Add small white dots inside the colored circles for dimension.
- Finish with a super shiny top coat.
Tip: This look is great for short nails, as the busy pattern distracts from the lack of length.
7. Nautical Navy & White Stripes
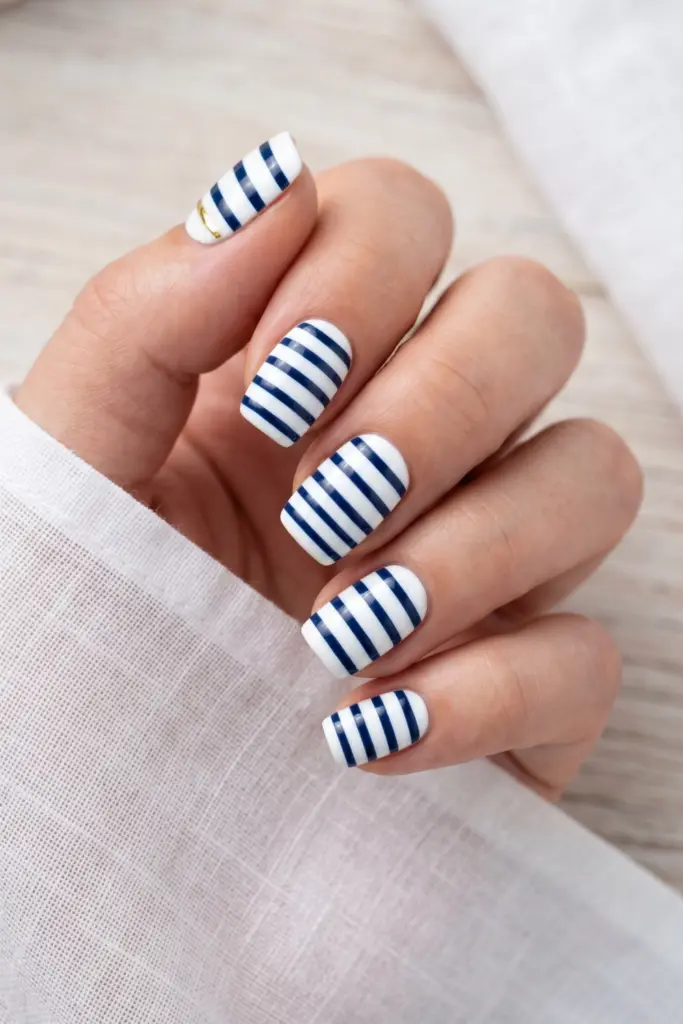
The Yacht Club Classic
For those who prefer a preppy, clean-cut look, you can’t go wrong with nautical stripes.
It’s a timeless design that never goes out of style. It feels very “Hamptons getaway” and pairs perfectly with a white linen dress.
Steps:
- Paint all nails a crisp, opaque white.
- Use striping tape or a steady hand to draw horizontal navy blue lines.
- Ensure the lines are evenly spaced for a professional look.
- Add a gold accent on the thumb for a little extra flair.
Tip: Pull the striping tape off while the blue polish is still slightly tacky for the cleanest lines.
8. Turquoise Water Marble
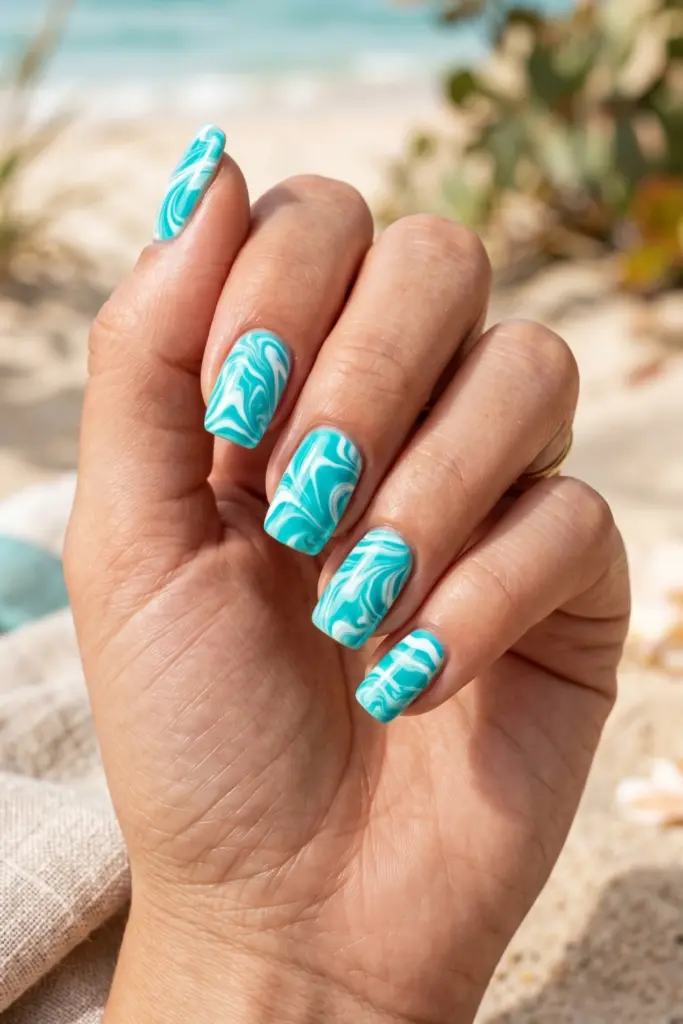
Poolside Reflections
This design mimics the way light hits the bottom of a swimming pool or a shallow Caribbean bay.
It’s mesmerizing to look at and surprisingly easy if you use the “dry marble” technique.
Steps:
- Drop a few dots of turquoise and white polish onto the nail.
- Use a thin needle or toothpick to swirl them together gently.
- Stop before the colors mix too much; you want to see the separation.
- Clean up the edges with an acetone-soaked brush.
Tip: Work quickly! If the polish starts to dry, the swirling effect will look chunky instead of fluid.
9. Pearl White Shimmer
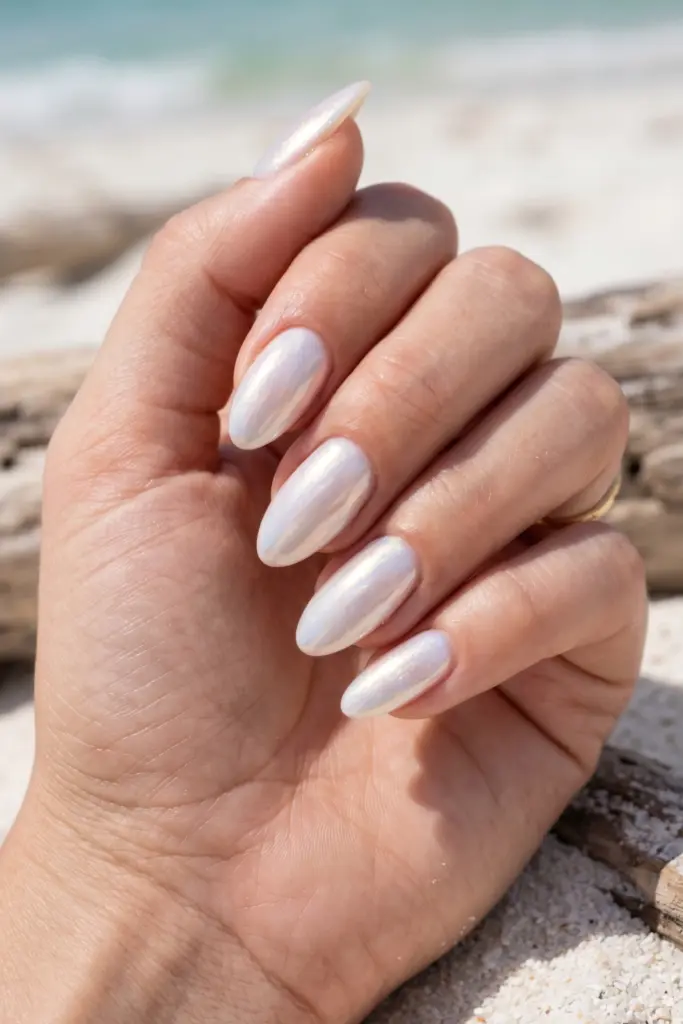
The Iridescent Oyster
Minimalism is a huge trend this summer, and pearl nails are leading the pack.
This isn’t just plain white; it’s a multidimensional shimmer that catches the sun beautifully.
It’s subtle, elegant, and looks expensive.
Steps:
- Apply one coat of a sheer milky white.
- Apply a layer of iridescent or pearlescent topper.
- Repeat the shimmer layer if you want more “glow.”
- Finish with a glossy top coat.
Tip: If you can find a chrome powder, rubbing it over white polish gives the most realistic pearl finish.
10. Sunset Ombre
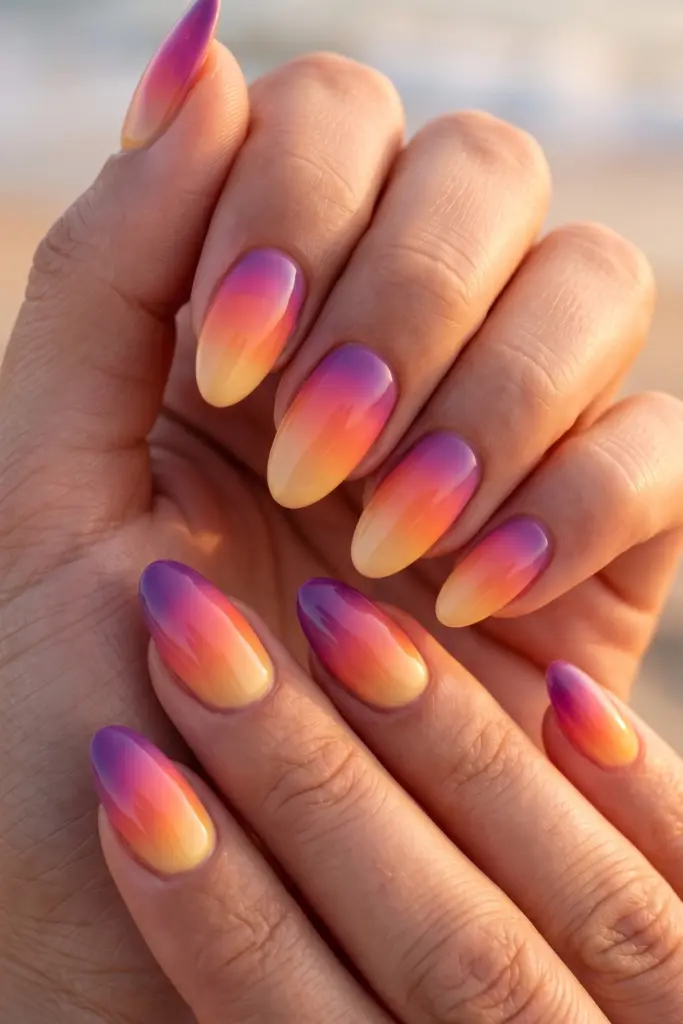
Tequila Sunrise Tips
There is nothing quite like a beach sunset, so why not wear one?
This design blends pinks, oranges, and purples for a warm, glowing effect.
It’s like having a literal horizon on your fingertips.
Steps:
- Apply a base of light yellow.
- On a makeup sponge, paint stripes of orange, pink, and purple.
- Dab the sponge onto the nail repeatedly until the colors blend.
- Apply a clear coat immediately to help the colors bleed together smoothly.
Tip: Protect your skin with liquid latex or tape before sponging to make cleanup a breeze.
11. Sea Foam Green
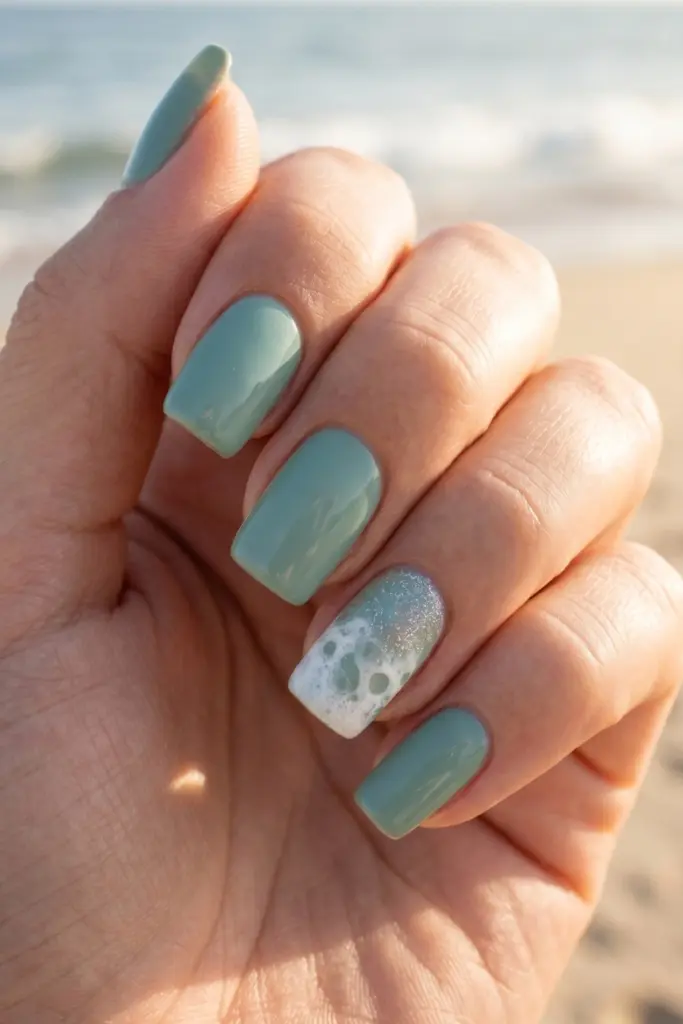
The Gentle Tide
This shade is honestly the unsung hero of summer.
It’s not quite mint and not quite teal; it’s that perfect, refreshing color of the ocean’s edge.
It’s calming and looks great on every skin tone.
Steps:
- Paint two solid coats of a dusty sea foam green.
- On the ring finger, add a “frothy” white tip using a sponge.
- Lightly dab some silver shimmer over the white foam.
- Seal everything with a high-shine top coat.
Tip: This color looks particularly stunning when paired with silver jewelry.
12. Anchor Charm Minimalist
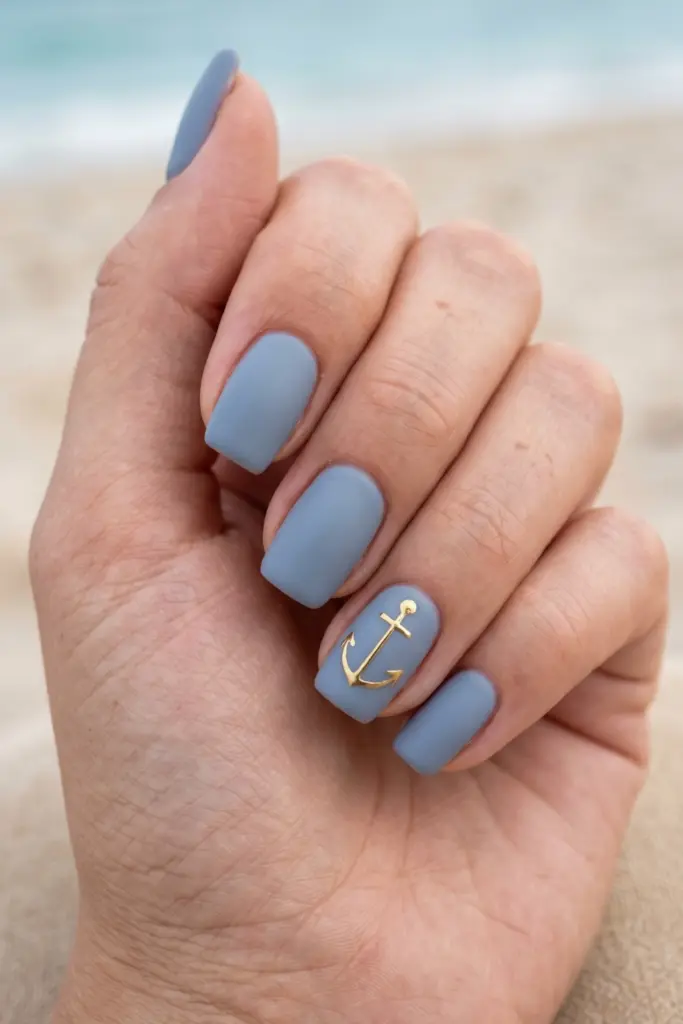
The Captain’s Choice
If you want something “beachy” but don’t want a full mural on your hands, go for an anchor accent.
It’s a simple symbol that carries a lot of weight (pun intended).
It’s the perfect mix of “cool girl” and “seafarer.”
Steps:
- Paint your nails a solid light grey or soft blue.
- On the ring finger, draw a small vertical line with a “U” at the bottom.
- Add a small horizontal bar near the top of the line.
- Put a tiny dot at the very top to complete the anchor.
Tip: Using a metallic gold or silver for the anchor makes it pop against a matte base.
13. Flip Flop Fun
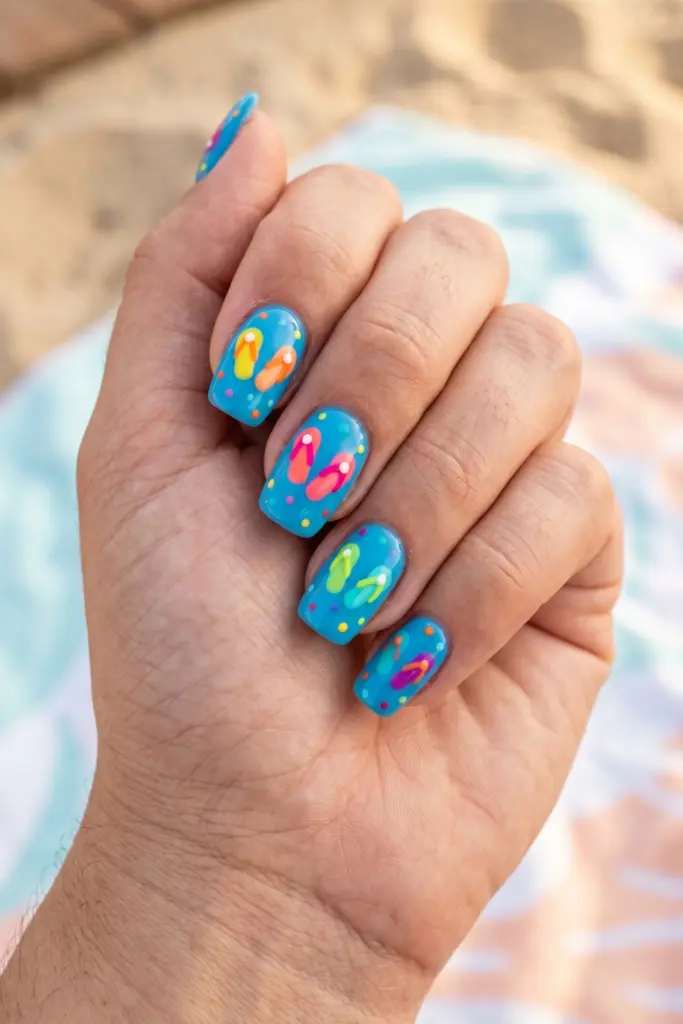
Playful Summer Steps
This is a bit of a “fun” design for those who don’t take their manicure too seriously.
It’s cute, colorful, and perfect for a family vacation or a trip to the water park.
Steps:
- Paint the nail a bright, “pool water” blue.
- Draw two small “V” shapes in a bright contrasting color like yellow.
- Add a small dot where the “V” meets to look like the strap of a flip flop.
- Add tiny polka dots around the “shoes” for extra detail.
Tip: Use different colors for the flip flops on each finger for a mismatched, playful vibe.
14. Jellyfish Glow
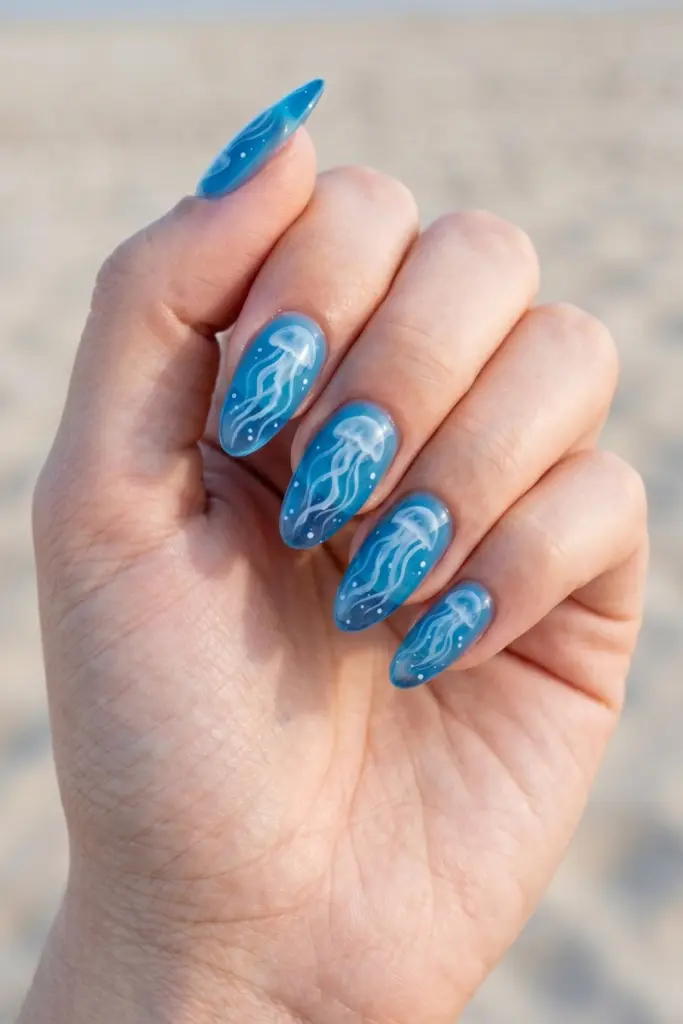
The Ethereal Drift
Jellyfish nails are a rising trend because they use “jelly” polishes (sheer, tinted colors).
They look squishy, translucent, and totally magical.
It’s a more avant-garde take on the beach theme.
Steps:
- Apply two coats of a sheer “jelly” blue polish.
- Use a white polish thinned with top coat to draw wavy, translucent tentacles.
- Add a few tiny white dots for “bubbles.”
- Apply a final coat of the blue jelly polish to “bury” the design.
Tip: The layering is key here; it creates a 3D effect that looks like the jellyfish is floating inside the nail.
15. Coconut Tree Delight
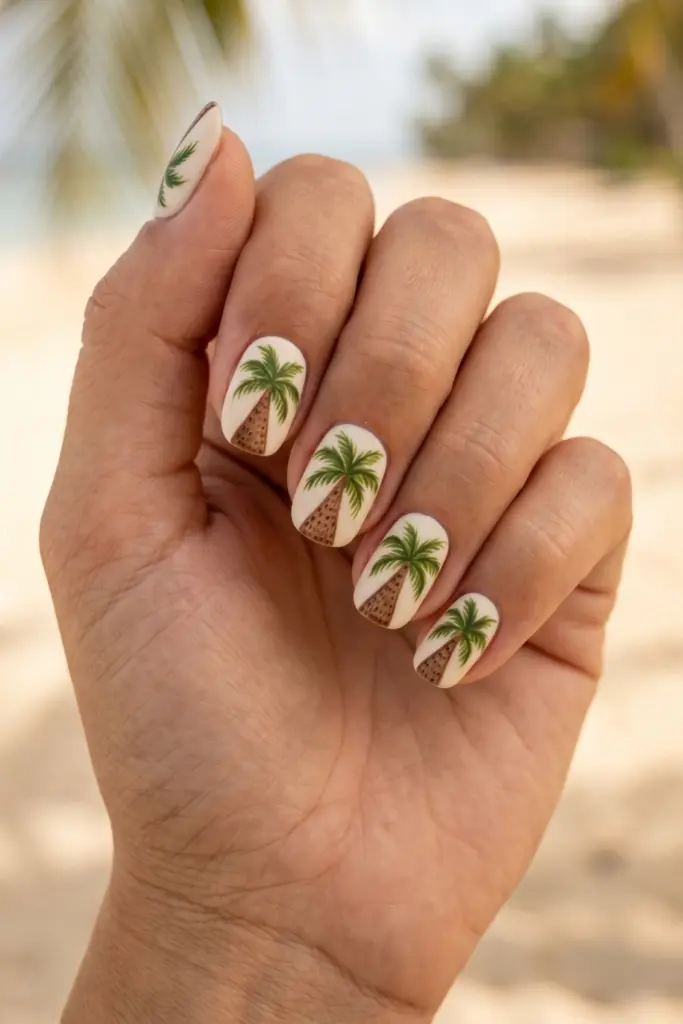
Tropical Island Dreams
Finish off the summer list with a classic coconut vibe.
This design focuses on greens and browns, offering a break from the constant blues and yellows of typical beach art.
It feels earthy and very “vacation mode.”
Steps:
- Paint a base of soft cream or off-white.
- Draw a small brown triangle at the base (the coconut).
- Add long, thin green leaves sprouting from the top.
- Use a dotting tool to add “texture” to the brown coconut.
Tip: A matte finish on this design makes it look like a hand-painted postcard.
Final Thoughts
Finding the perfect summer look doesn’t have to be a chore.
Whether you’re leaning toward the sophisticated Pearl White Shimmer or the playful Flip-Flop Fun, these designs are all about expressing that sunshine-filled joy.
The best part? You can mix and match these ideas to create a custom “skittle” mani that is uniquely yours.
Remember, the key to a long-lasting beach manicure is all in the prep and the protection.
Always use a base coat to prevent staining from those bright neons, and don’t forget to reapply a top coat every few days—especially if you’re spending time in salt water or chlorine.
Summer is short, but your nails can stay fabulous the whole way through.
Now, go grab your polish and get to painting!
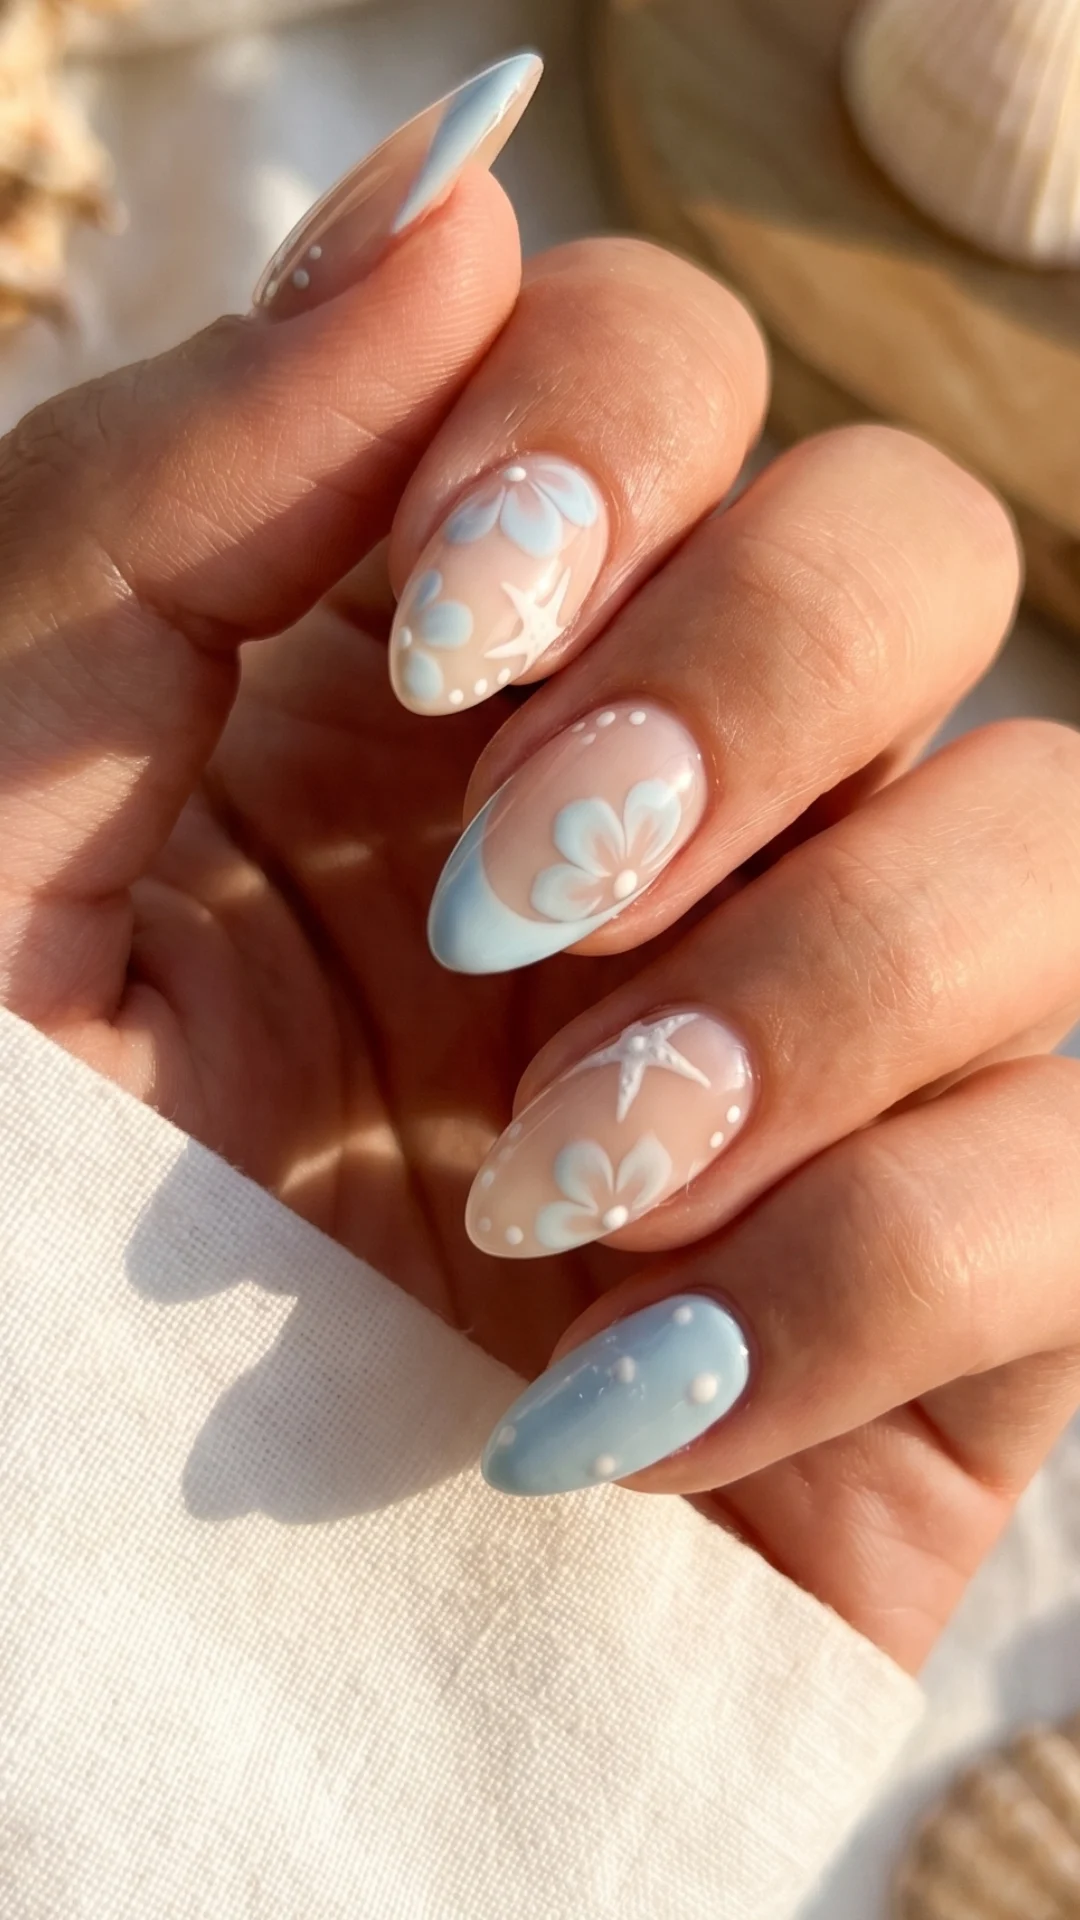
Simple Beach Nails Summer Nail Designs for a Fun Coastal Look
Bring coastal vibes to your fingertips with these simple beach nail summer designs. Featuring seashell accents, ocean-inspired hues, and breezy patterns, these nail ideas are perfect for sunny days by the shore. #BeachNails #SummerNailDesigns #CoastalStyle
Pin it on Pinterest