Summer is finally here, and let’s be real:
Your nails are basically your most important accessory once the sun starts hitting.
Forget those boring neutrals or the same old “ballet slipper” pink you’ve worn since 2012.
It is time to embrace the chaos.
We are talking about 15 simple crazy summer nail designs that will make your hands the star of every poolside selfie and iced coffee hand shot.
You don’t need to be a professional nail tech with a mountain of expensive gear to pull these off.
This list is all about high-impact visuals with low-effort techniques.
Whether you’re heading to a music festival or just vibrating at a high frequency in your backyard, these looks are designed to pop.
From neon swirls to retro vibes, get ready to find your next obsession.
Here is precisely how to level up your manicure game this season.
1. Neon Swirls
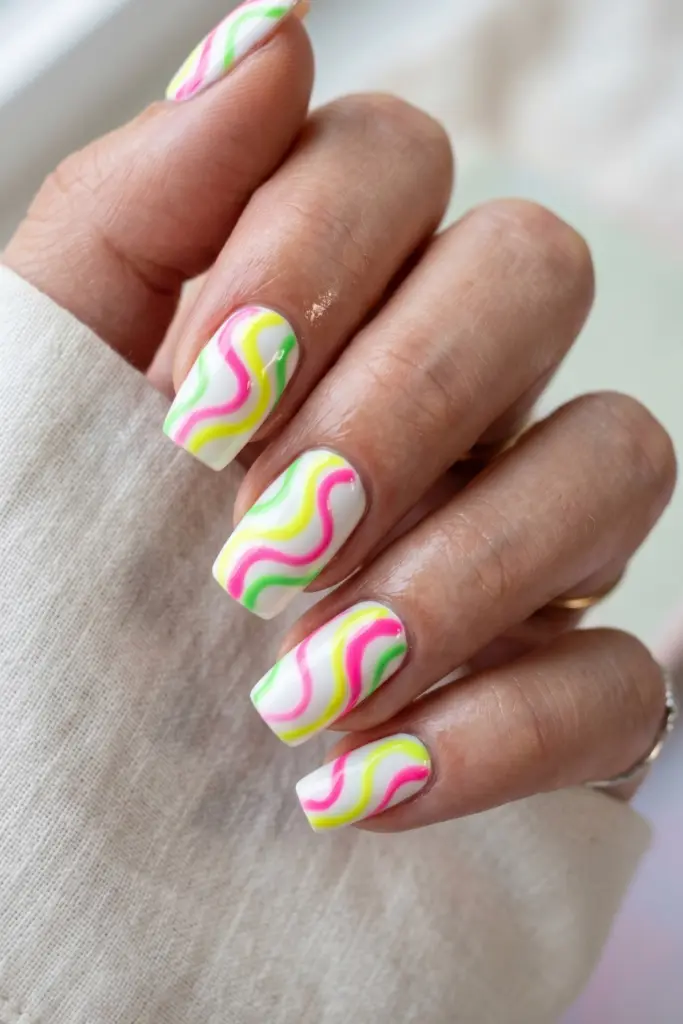
The Electric Slide
These are giving major 70s energy but with a futuristic, highlighter-yellow twist.
It’s the perfect way to wear bright colors without committing to a solid block of neon on every finger.
The negative space makes it look “editorial” and expensive.
Steps:
- Paint your nails with two coats of a crisp white base.
- Take a fine detail brush and dip it into neon pink.
- Draw a loose, flowing “S” shape from the corner to the tip.
- Repeat with neon yellow and green, overlapping slightly.
- Seal it with a high-shine top coat.
Pro Tip: If you don’t have a detail brush, a toothpick or a thinned-out eyeliner brush works wonders for those skinny loops.
2. Fruit Punch
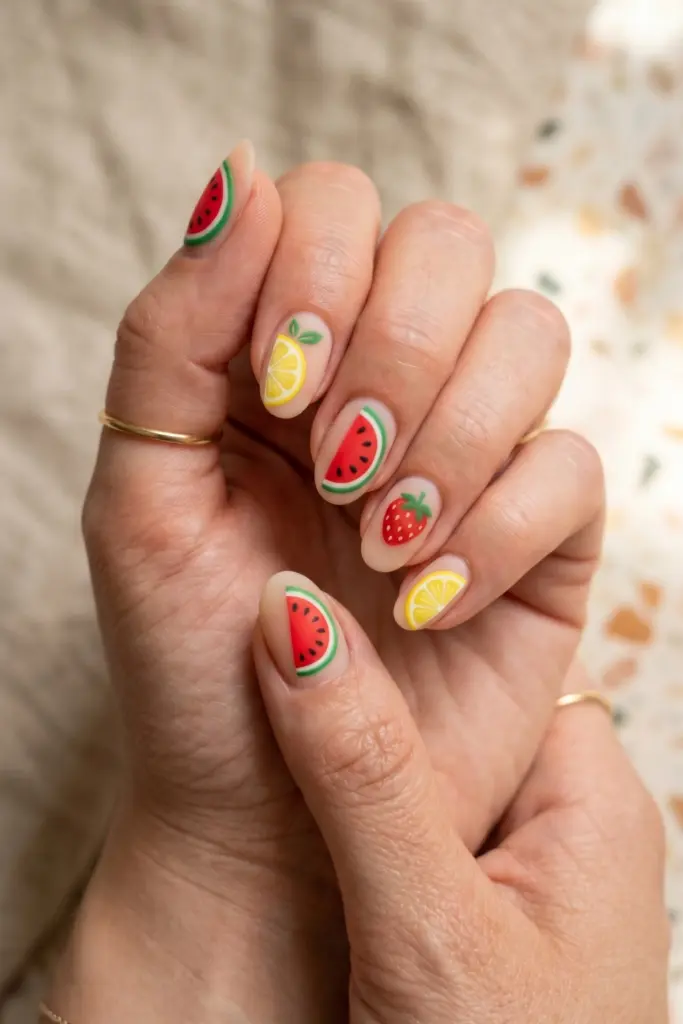
The Farmer’s Market Mani
Nothing screams summer quite like a cold slice of watermelon.
This design is incredibly cute and surprisingly easy because the “fruit” shapes are just basic circles and semi-circles.
It’s whimsical, slightly childish in the best way, and totally Pinterest-worthy.
Steps:
- Start with a clear or “your nails but better” nude base.
- Use a dotting tool to create small red semi-circles (watermelon) and yellow circles (lemons).
- Add tiny green rinds to the watermelons and white “segments” to the citrus.
- Place tiny black dots on the red for seeds.
Pro Tip: Using a matte top coat over the fruit makes them look like realistic candy stickers.
3. Tie-Dye Blast
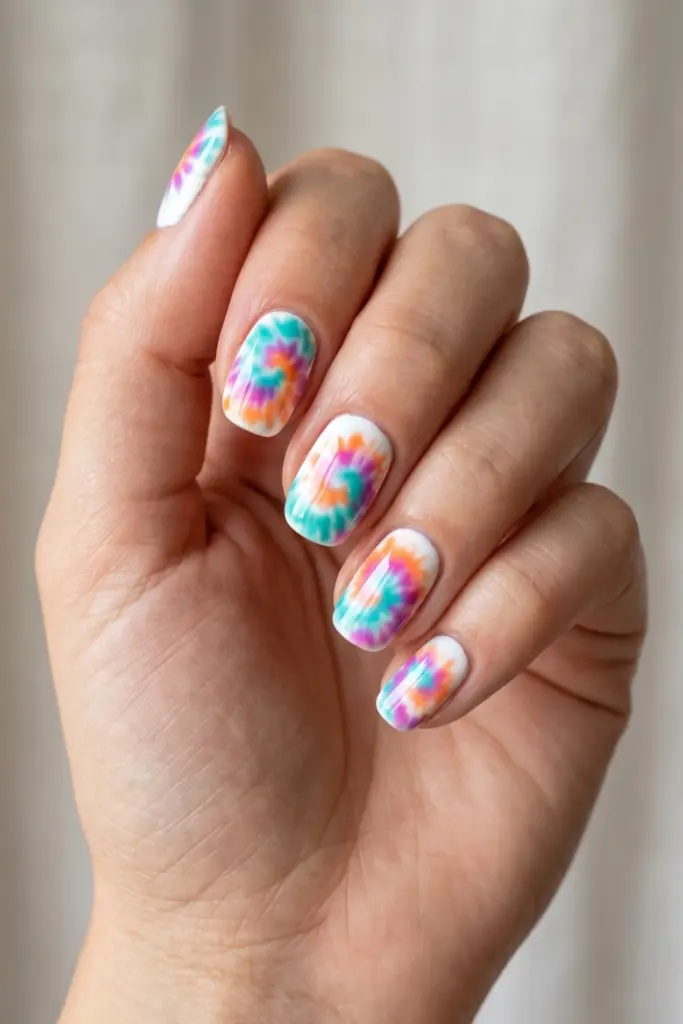
Groovy Baby
This is the ultimate “controlled mess” look.
Tie-dye nails are great because they actually look better when they aren’t perfect.
If the colors bleed into each other, you’ve basically succeeded.
It’s a total throwback to summer camp, but make it fashion.
Steps:
- Apply a white base coat to make the colors pop.
- While the base is slightly tacky, drop a blob of turquoise, magenta, and orange near each other.
- Use a needle or a toothpick to swirl them in a circular motion.
- Let it dry completely before adding a top coat so you don’t smudge the spiral.
Pro Tip: Work on one nail at a time so the polish stays wet enough to swirl properly.
4. Beach Waves
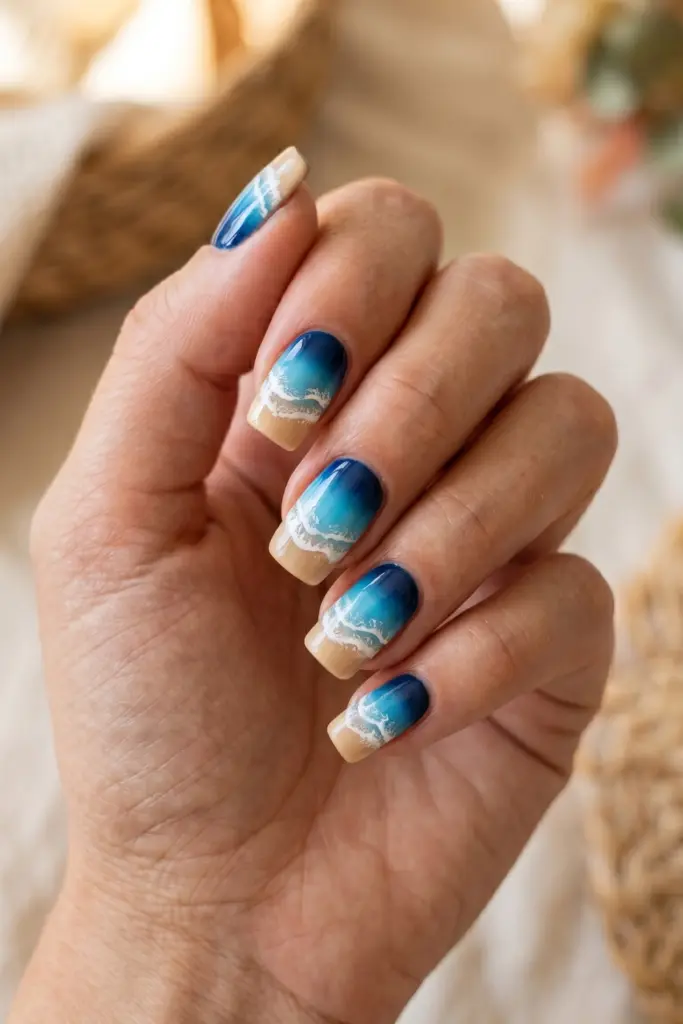
Ocean Eyes
If you can’t get to the coast, you might as well put the coast on your cuticles.
This design uses a gradient technique that looks like deep water hitting the shore.
It’s refreshing, cool, and looks incredibly intricate even though it’s just layering.
Steps:
- Sponge a gradient of dark blue at the base to light blue at the middle.
- Leave the tips a sandy beige color.
- Use a dry brush technique with white polish to create “sea foam” lines where the blue meets the sand.
- Add a glossy top coat to give it that “wet” look.
Pro Tip: A makeup sponge is the secret to a seamless blue-to-sand transition.
5. Palm Tree Silhouettes
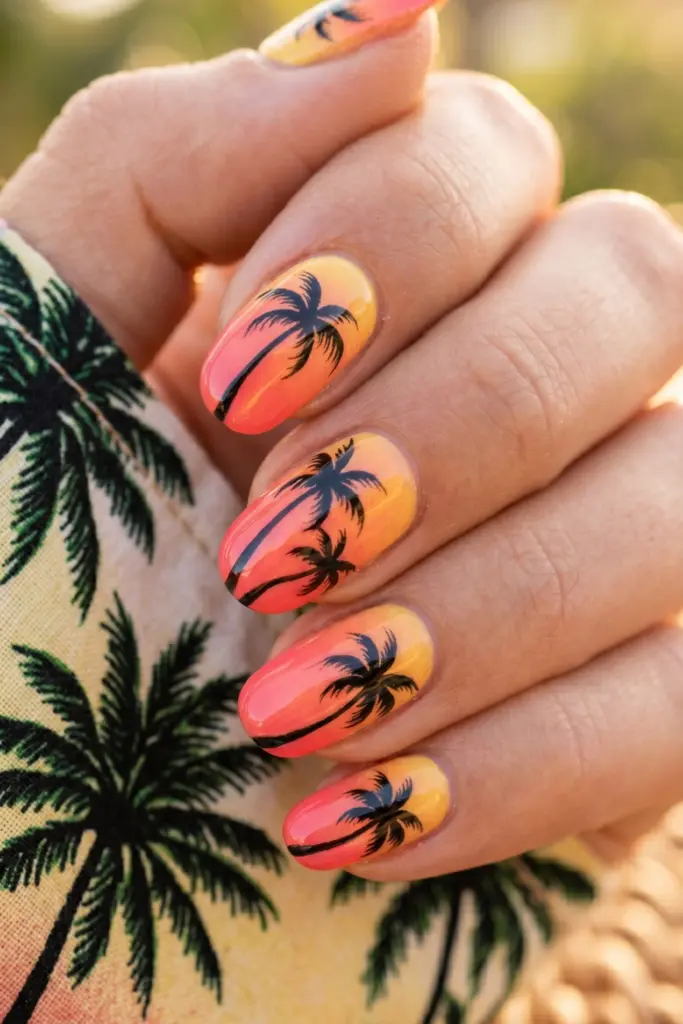
Golden Hour Vibes
There is something so nostalgic about a sunset gradient.
Adding palm trees makes you look like you’ve just stepped off a plane from Maui.
This is the “main character” of summer nail designs—bold, artistic, and very sunset-chic.
Steps:
- Create an ombre base using orange, pink, and yellow sponges.
- Once dry, use a black striper brush to draw a thin vertical line for the trunk.
- Flick small, curved lines out from the top for the palm fronds.
- Keep the trees at different heights for a more natural look.
Pro Tip: Keep the palm fronds “wispy” by using very little pressure on the brush.
6. Ice Cream Drips
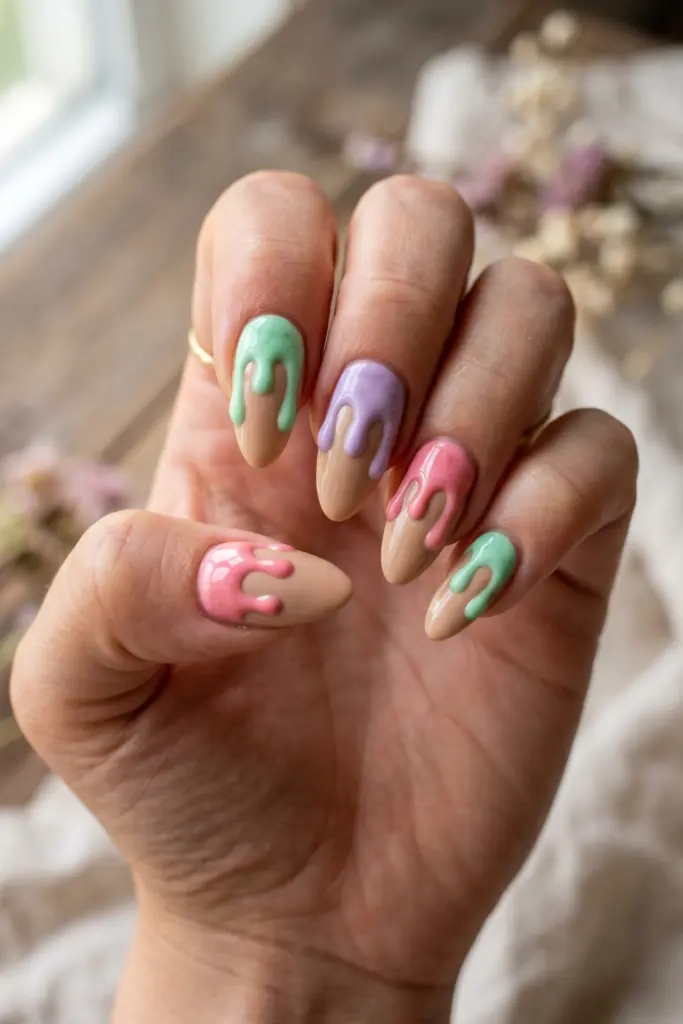
The Sundae Special
Who doesn’t love a melting popsicle?
This design is sweet, literal, and uses pastel shades that look great against a tan.
It’s a bit 3D-heavy in its visual style, making people want to take a second look.
Steps:
- Paint your nails a neutral nude or soft tan (the “cone”).
- Pick a “flavor” (mint green, strawberry pink, or lavender).
- Place a large drop of polish near the tip and drag it upward toward the cuticle.
- Round off the top of the “drip” to make it look thick and gooey.
Pro Tip: Hold your finger pointed toward the floor while the drip dries to let gravity do the work.
7. Rainbow Dots
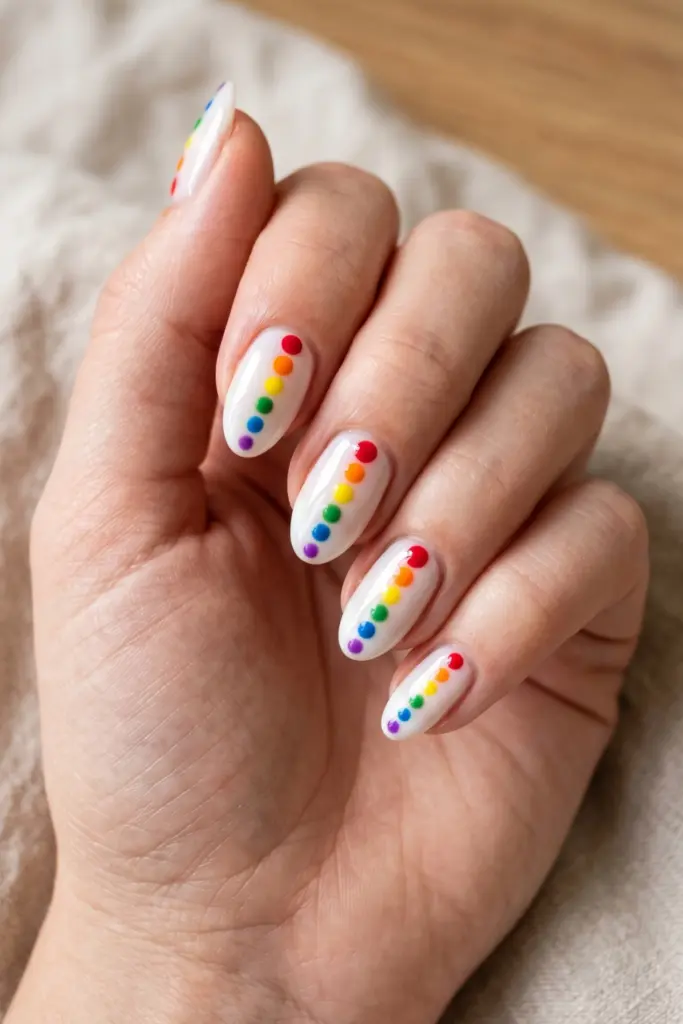
The Confetti Cannon
Sometimes simple is better.
Rainbow dots are the easiest way to get every color of the rainbow onto your hands without looking like a chaotic crayon box.
It’s clean, organized, and works on even the shortest nails.
Steps:
- Start with a clean, naked nail or a sheer white.
- Dip a dotting tool into red, orange, yellow, green, blue, and purple.
- Place one dot of each color in a vertical or horizontal line.
- Keep the spacing even for a professional “graphic design” finish.
Pro Tip: Use different sizes of dotting tools (or the ends of various bobby pins) to add dimension.
8. Abstract Splatter
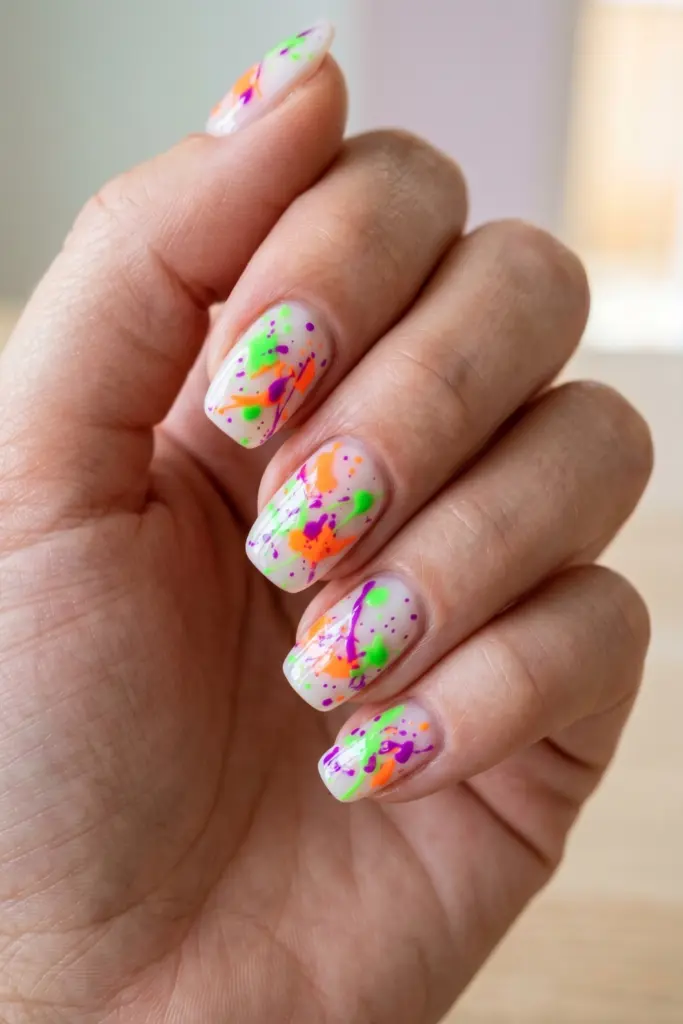
The Studio Sess
Channel your inner Jackson Pollock.
This design is for the girlies who hate straight lines. It’s messy, neon, and looks like a piece of modern art.
Plus, no two nails will ever look the same, which is the whole point.
Steps:
- Apply a sheer or milky white base.
- Dip an old, stiff-bristled brush into neon green polish.
- Flick the bristles over your nail to create a splatter effect.
- Repeat with neon orange and purple.
ScotchPro Tip: Tape around your cuticles with Scotch tape before you start flicking polish to save yourself a massive cleanup.
9. Flamingo Parade
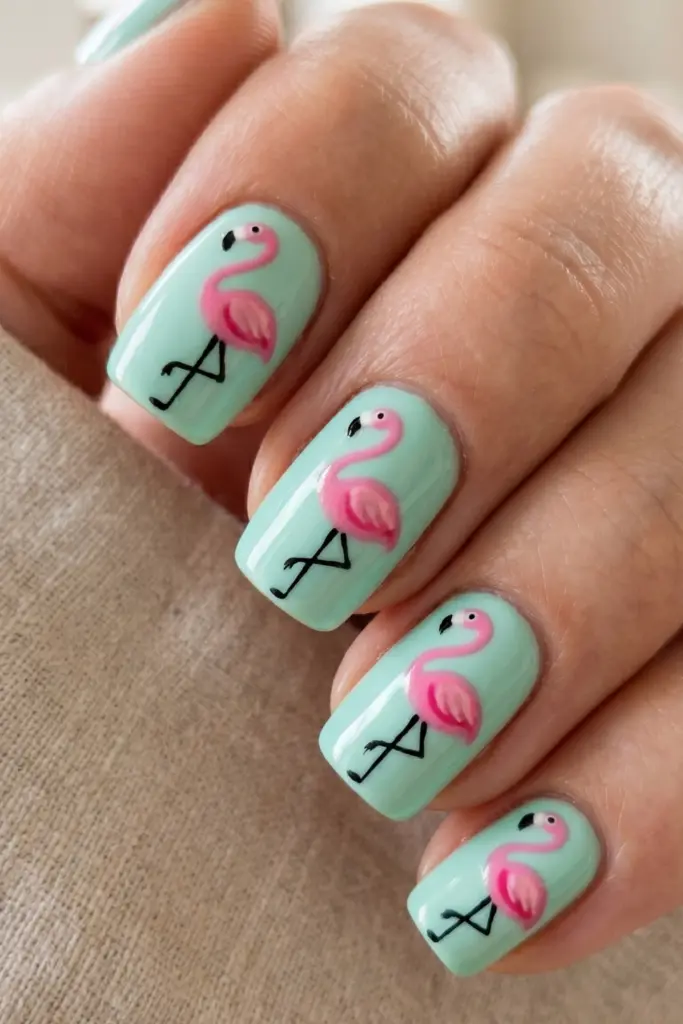
Tropical Punch
Flamingos are the unofficial mascot of summer.
These tiny pink birds add a splash of personality to your mani.
They look complicated, but they are really just a collection of basic shapes: an oval, a curve, and two sticks.
Steps:
- Start with a pale blue or mint green base (the “water”).
- Paint a small pink oval for the body.
- Draw a “2” shape for the neck and head.
- Add two thin black lines for the legs—cross one over for that classic flamingo pose.
Pro Tip: A tiny dot of white polish in the center of the head makes a perfect eye.
10. Sunset Ombre
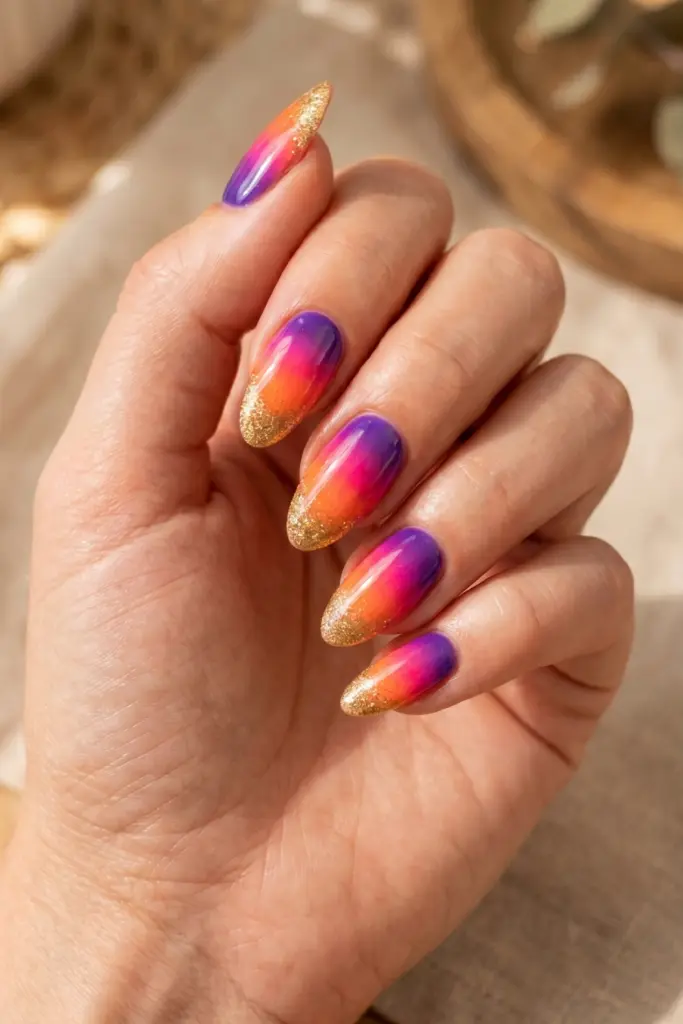
The Horizon Line
This is the “glam” version of the sunset look.
It’s all about the blend and that hit of gold glitter that mimics the sun reflecting off the water.
It’s sophisticated enough for a summer wedding but fun enough for a pool party.
Steps:
- Sponge a gradient of purple (cuticle), pink (middle), and orange (tip).
- While still slightly tacky, apply a gold glitter polish specifically at the transition lines.
- Keep the glitter concentrated at the very tip for a “French” feel.
- Finish with a super-shiny top coat to blend the colors.
Pro Tip: Dab the glitter on with a sponge rather than brushing it on to get a denser sparkle.
11. Starfish & Shells
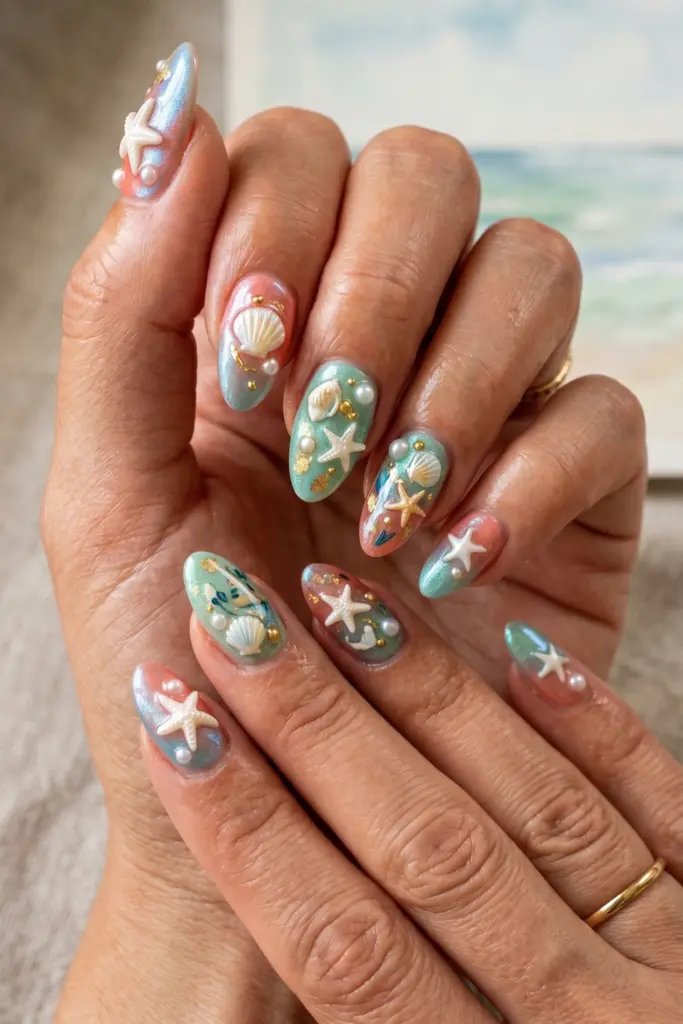
Mermaid Core
We are still very much in the era of “Mermaid Core.”
This design uses stickers or charms to give your nails some texture.
It feels very coastal-chic and looks great with gold jewelry and linen outfits.
Steps:
- Apply a shimmering “coral blue” or seafoam green polish.
- Once dry, apply white starfish or seashell stickers (or hand-paint them if you’re brave).
- Add a tiny pearl stud or gold bead for extra “sunken treasure” vibes.
- Apply two thick layers of top coat to ensure the stickers stay put.
Pro Tip: Press the stickers down with a silicone tool to remove any air bubbles before sealing.
12. Pop Art Comic
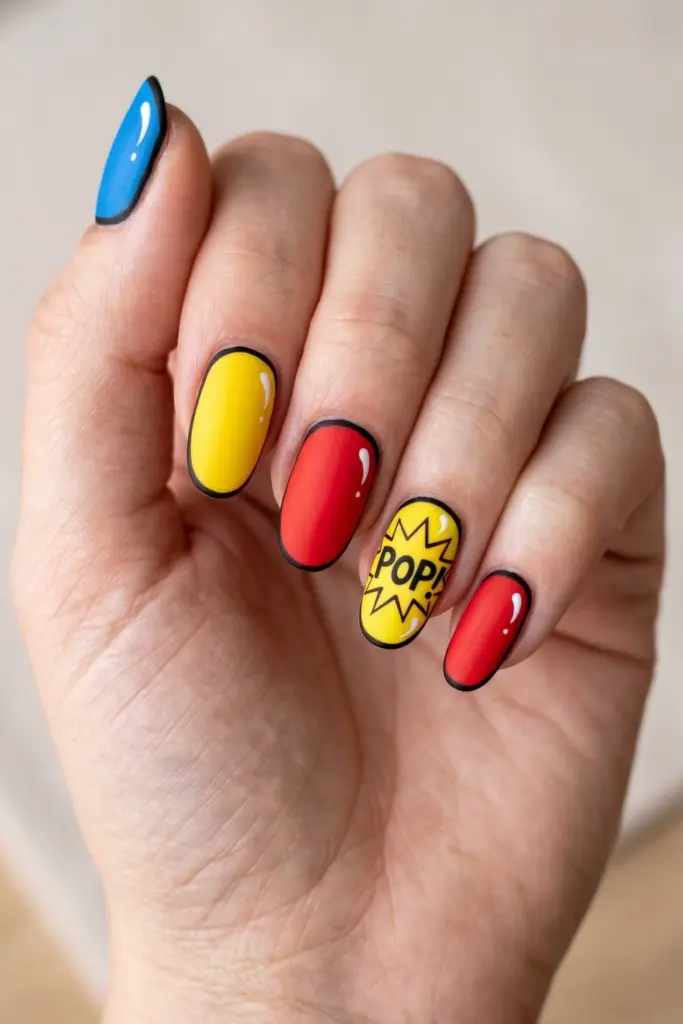
The Graphic Novel
If you want something “crazy” that really stands out, this is it.
It makes your nails look 2D, like they were drawn in a comic book.
It’s bold, high-contrast, and definitely a conversation starter.
Steps:
- Paint each nail a bright primary color (red, blue, or yellow).
- Outline the entire nail in thick black polish.
- Add a “comma” shape in white for a “shine” reflection.
- On one accent nail, write “POP!” in bold black letters over a yellow starburst.
Pro Tip: Use a matte top coat to really sell the “paper” look of a comic book.
13. Glitter Gradient
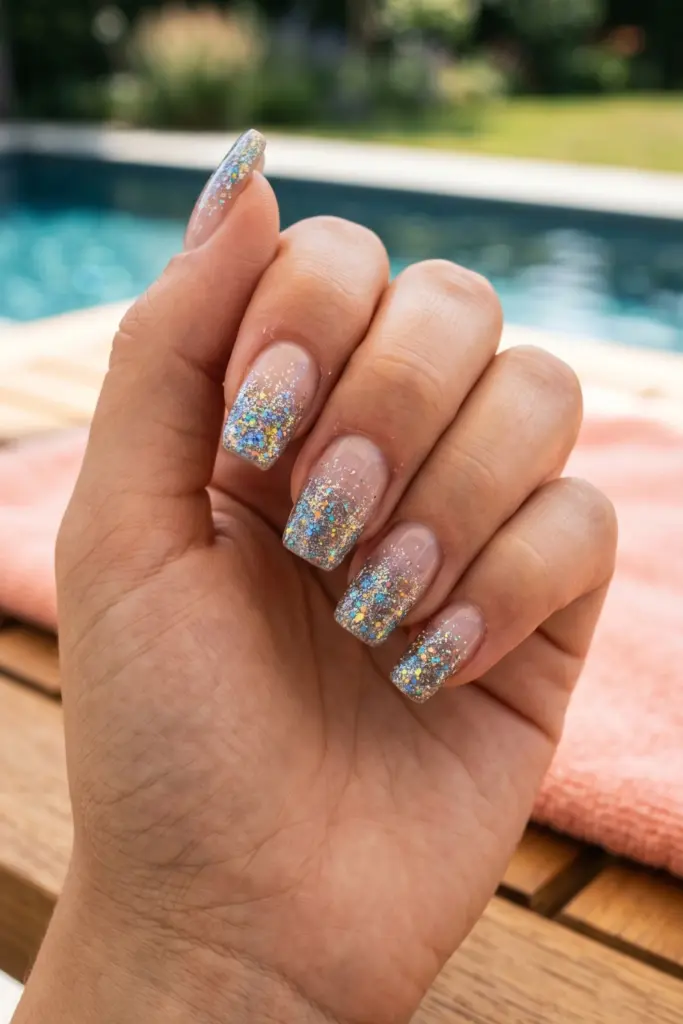
Euphoria High
Summer is the season of shimmer. A glitter gradient is great because it hides regrowth really well. As your nails grow out, the clear base at the bottom makes the gap almost invisible, giving you an extra week between manis.
Steps:
- Apply a clear base coat.
- Take a chunky holographic glitter and apply it heavily to the tips.
- Use a near-dry brush to pull some glitter down toward the middle of the nail.
- Make sure the base remains mostly clear for that “faded” effect.
Pro Tip: If your glitter is sparse, paint it onto a sponge first, then dab it onto the nail for maximum coverage.
14. Animal Instinct
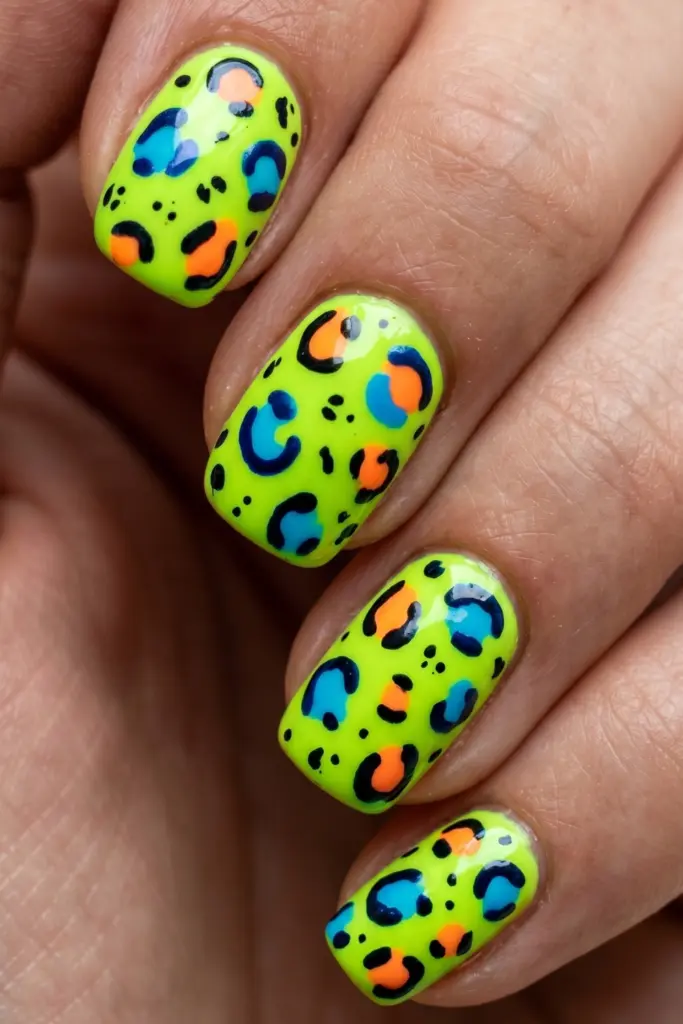
Neon Jungle
Leopard print is a neutral, but in the summer, we turn up the volume.
This look takes traditional animal prints and swaps the browns for electric blues and oranges.
It’s fierce, fun, and very Y2K.
Steps:
- Apply a bright neon base (think lime green or hot pink).
- Use a dotting tool to create random “C” shapes and blobs in a contrasting color.
- Add tiny black flecks around the blobs to define the “spots.”
- Don’t worry about symmetry—nature isn’t perfect!
Pro Tip: Avoid making the spots too round; irregular, shaky shapes actually look more like real leopard print.
15. Checkerboard Party
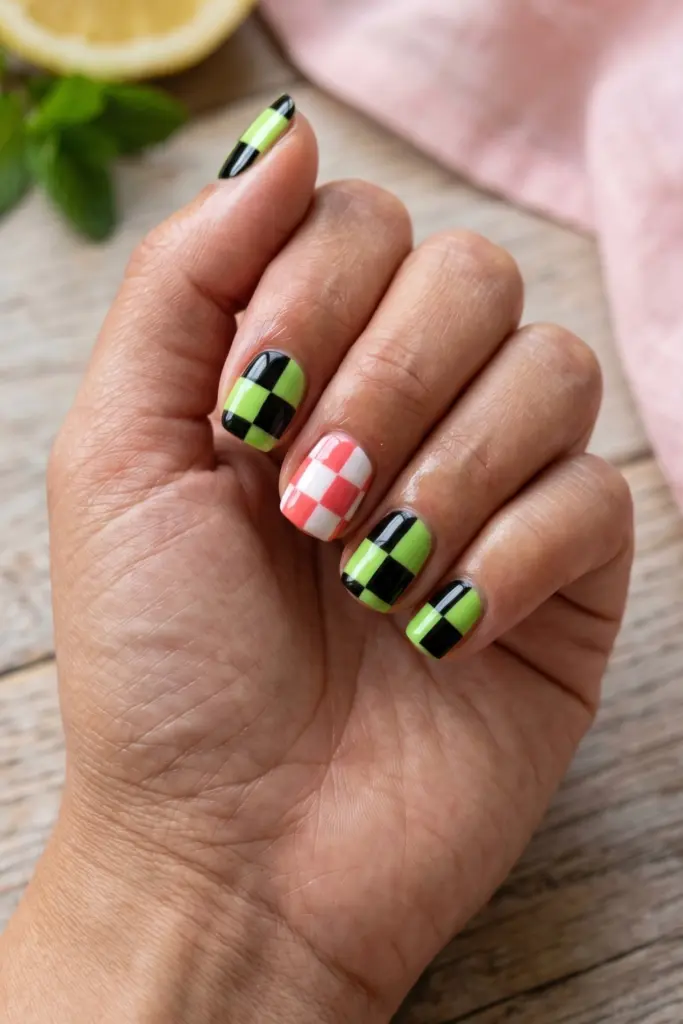
The Trendy Grid
The checkerboard pattern is everywhere right now, from rugs to tote bags.
Putting it on your nails in lime green and black (or pink and white) is the ultimate “cool girl” move.
It’s geometric, edgy, and looks incredibly sharp.
Steps:
- Paint your nail a solid color (like lime green).
- Draw a thin vertical line down the center and a horizontal line across the middle.
- Fill in two of the opposite squares with black polish.
- Use a cleanup brush dipped in acetone to sharpen any wobbly edges.
Pro Tip: Start with the center “cross” to make sure your grid is centered on the nail bed.
Final Thoughts
Look, summer is way too short to have boring nails.
The best thing about these 15 simple crazy summer nail designs is that they don’t have to be flawless to look outstanding.
In fact, a bit of imperfection just adds to that “lived-in, beachy” vibe.
Before you start, make sure you’ve prepped your nails with a good base coat to prevent staining (especially with those neons!).
And once you’re done, take that photo!
Your Pinterest board isn’t going to fill itself.
Whether you’re rocking the “Ice Cream Drips” or the “Pop Art Comic,” wear them with confidence.
Your hands do a lot of work—they deserve to look like a party.
Happy painting!
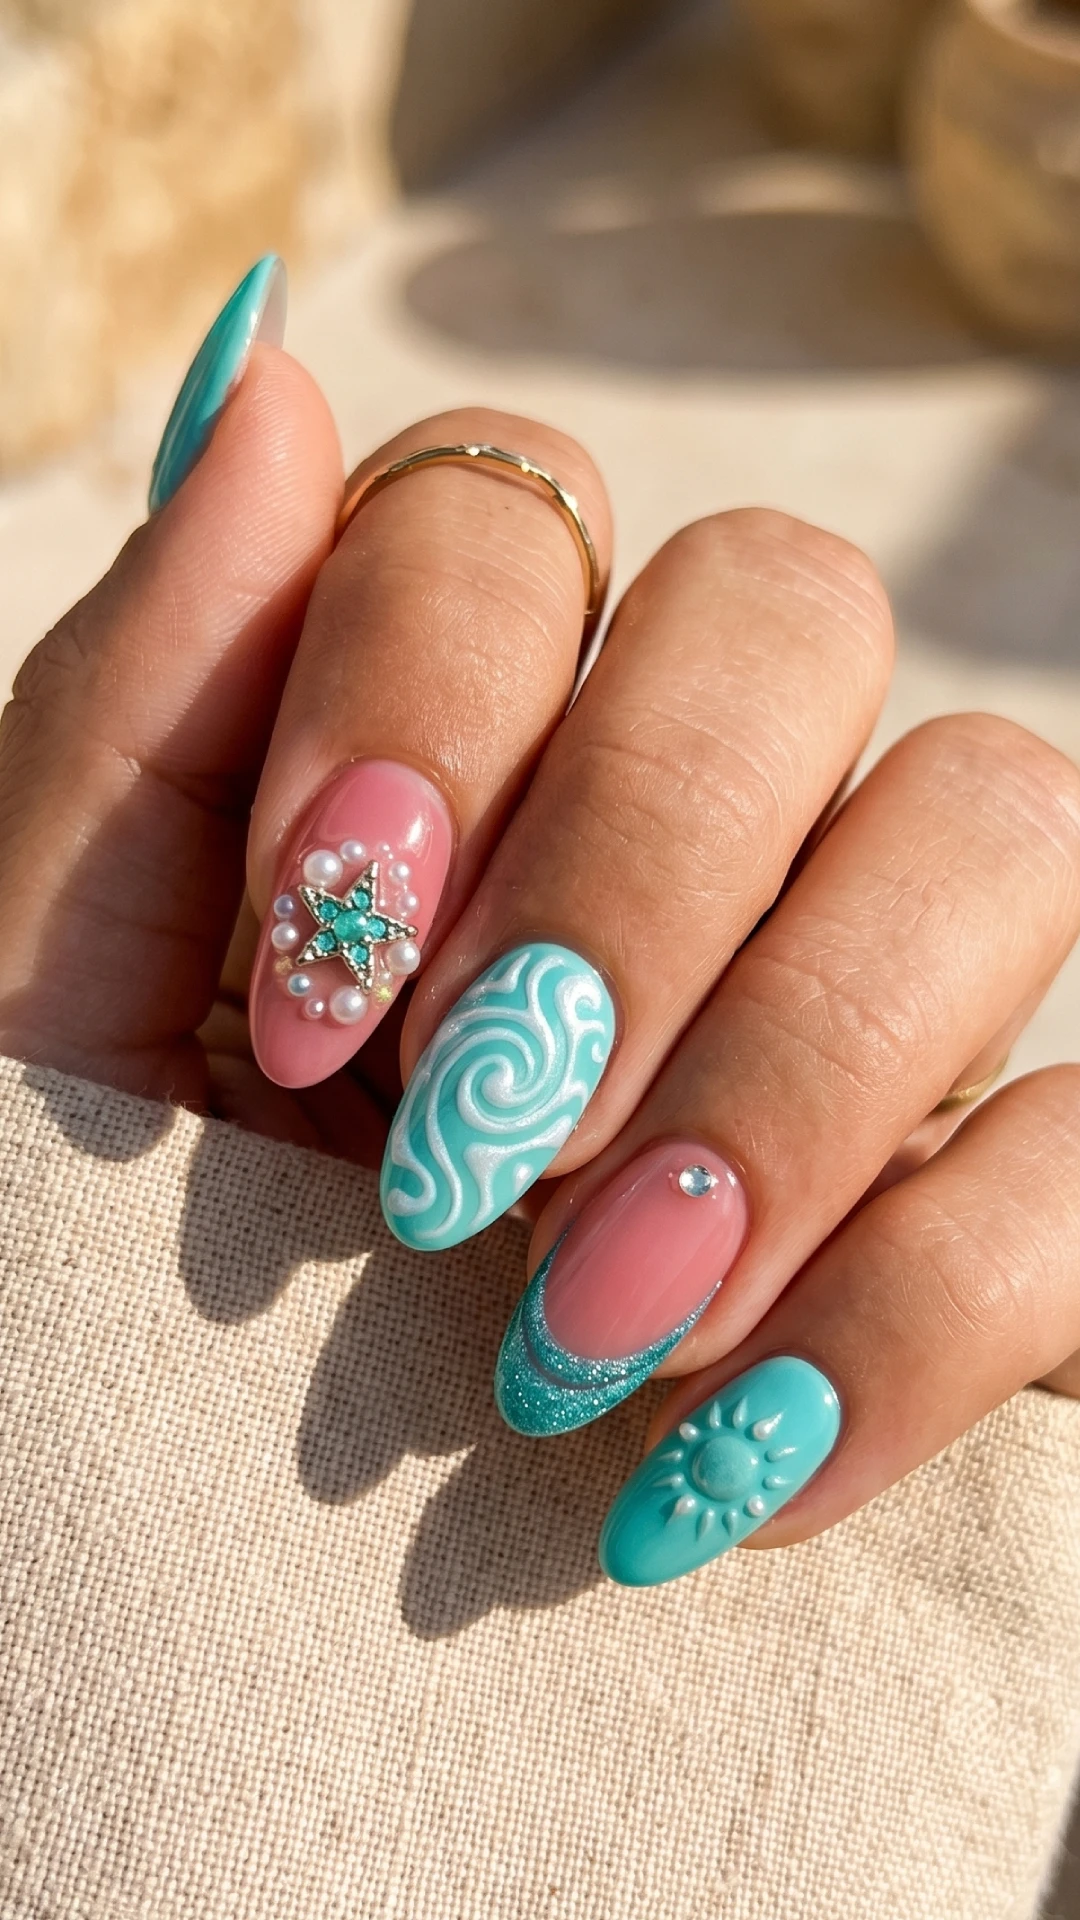
Simple Crazy Summer Nail Designs for Bold Fun
Turn heads this season with simple crazy summer nail design ideas. Featuring bold colors, quirky patterns, and fun accents, these vibrant looks bring personality and excitement to your manicure all summer long. #SummerNails #CrazyNailDesigns #NailArtIdeas
Pin it on Pinterest