Halloween nails are getting bigger, bolder, and more playful, and chunky nail art is perfect when you want a manicure that grabs attention.
These chunky Halloween nail design ideas mix 3D details, glitter, chrome, rhinestones, spooky characters, and glossy finishes.
From cute pumpkins to gothic black-and-gold looks, you’ll get 15 spooky nail ideas, plus simple creation steps and tips to help you recreate your favorite style.
1. Black & Orange 3D Pumpkin Chunky Nails
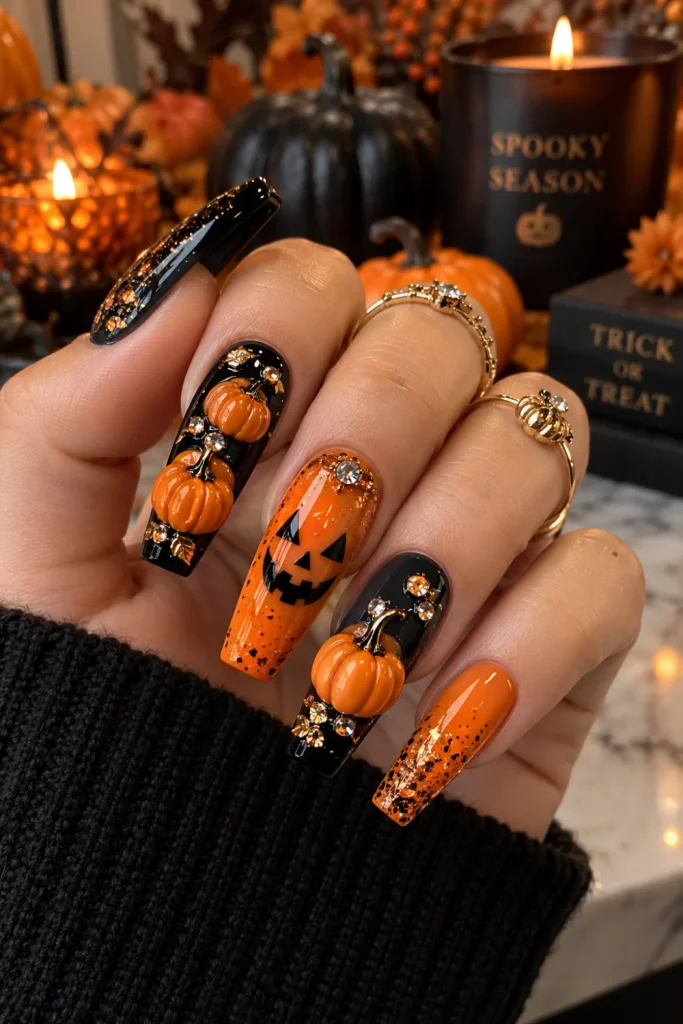
Make Halloween instantly recognizable with a dramatic black-and-orange manicure featuring raised pumpkin details.
The contrast looks especially striking on almond, coffin, or long square nails.
Simple steps:
- Paint alternating nails black and orange.
- Add pumpkin shapes using 3D gel or sculpting gel.
- Add tiny black pumpkin lines and glossy top coat.
- Finish with a few chunky orange gems.
One tip: Keep the raised pumpkins on two or three accent nails so the design stays balanced.
2. Ghost & Glitter Chunky Halloween Nails
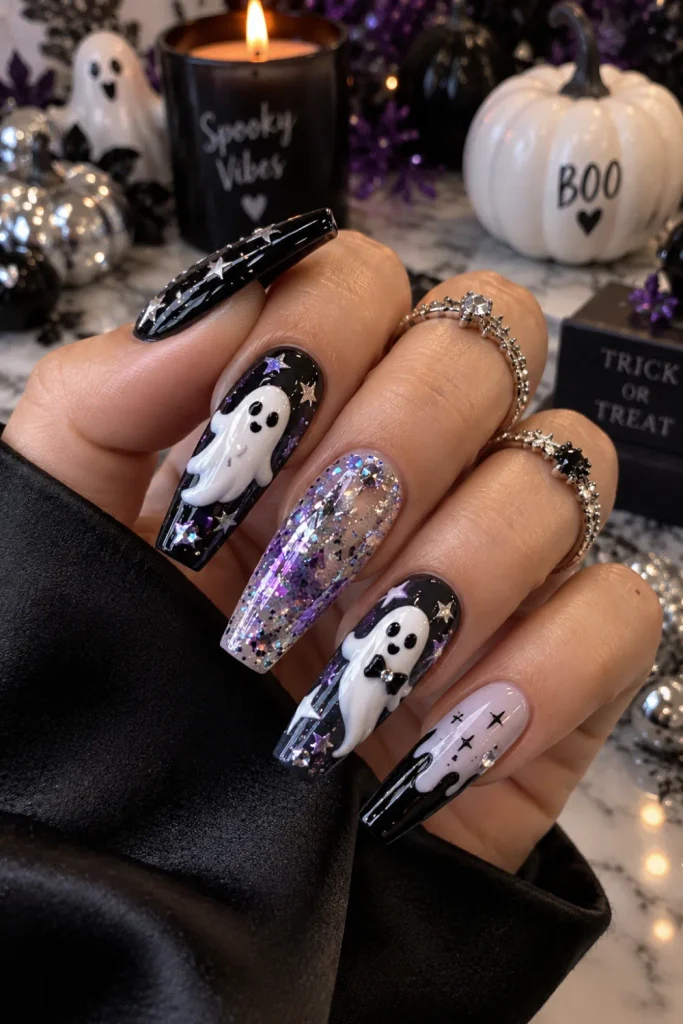
Cute ghosts become extra eye-catching when surrounded by glitter and dimensional accents.
Mix white ghost figures with translucent sparkle, silver glitter, and tiny rhinestones for a playful Halloween manicure.
Simple steps:
- Apply a black, nude, or sheer base.
- Create small white ghost shapes.
- Add black eyes and mouths.
- Layer glitter around selected ghosts.
- Finish with raised accents.
One tip: Use different ghost sizes to make the manicure feel more dynamic.
3. Blood Drip Chrome Chunky Halloween Nails
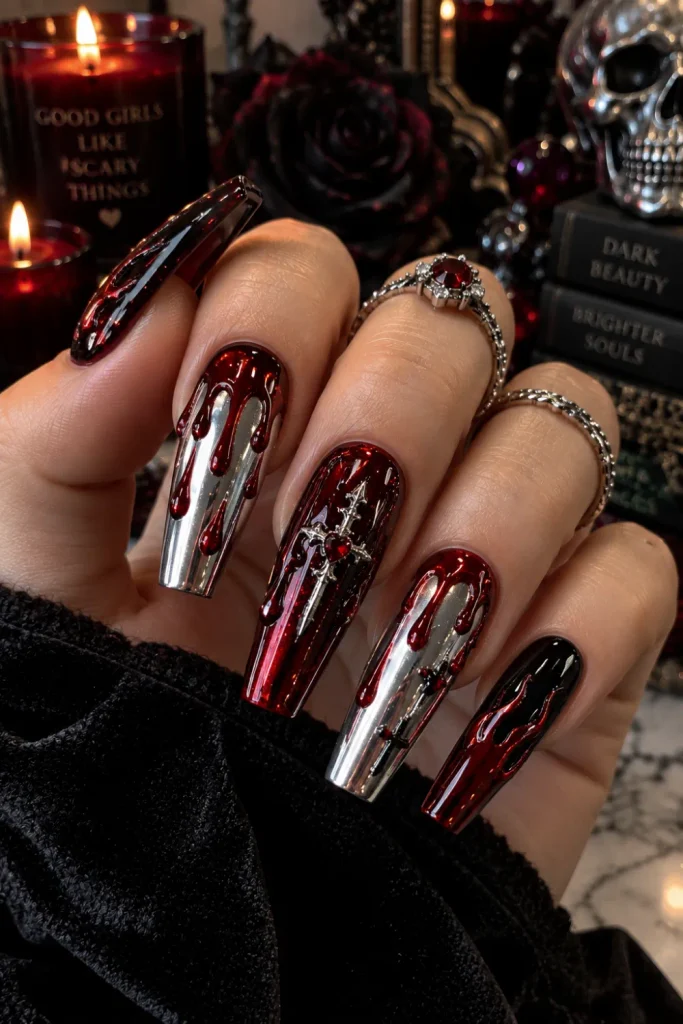
For an edgier Halloween aesthetic, combine reflective chrome with dramatic blood-drip artwork.
Black, silver, deep red, and mirror-like finishes create a bold gothic effect.
Simple steps:
- Start with a black or dark-red base.
- Apply chrome powder to selected nails.
- Paint red blood drips near the cuticle.
- Add raised red gel for extra dimension.
- Seal everything with a glossy top coat.
One tip: Keep the chrome highly reflective for maximum visual impact in photos.
4. Spider Web Rhinestone Chunky Nails
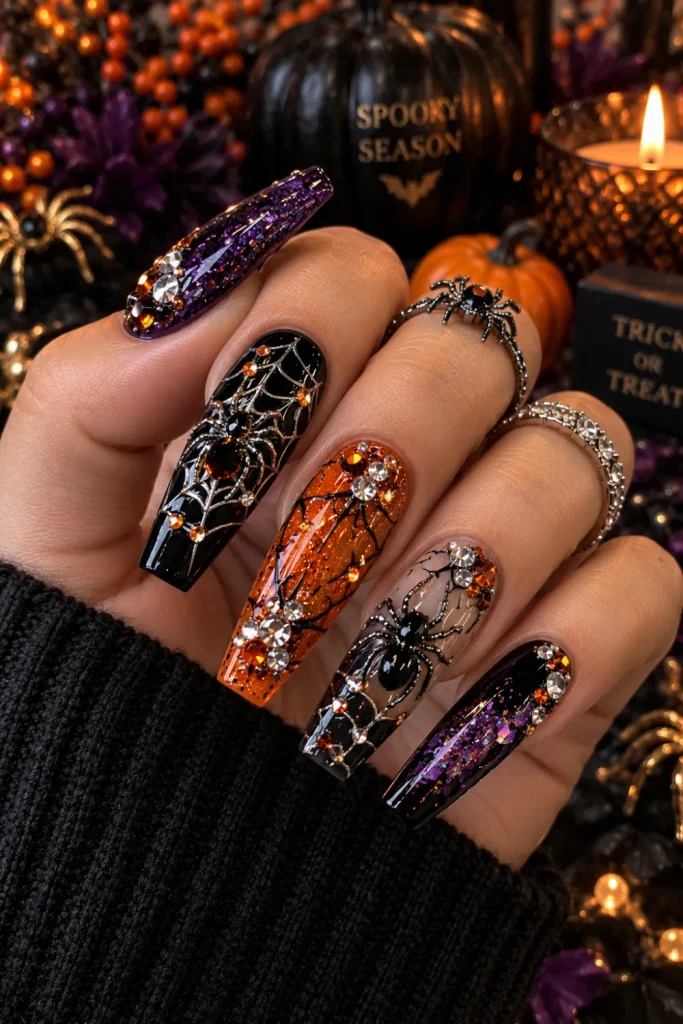
Spider webs get a glamorous upgrade with rhinestones, glitter, and raised Halloween details.
This design works beautifully when you want spooky nails without making them look too cartoonish.
Simple steps:
- Apply a black, purple, or nude base.
- Draw delicate spider webs.
- Add rhinestones where web lines intersect.
- Place a tiny raised spider on an accent nail.
- Add glitter to one or two nails.
One tip: Leave some negative space around the web so the rhinestones stand out.
5. Witchy Purple & Black Chunky Nails
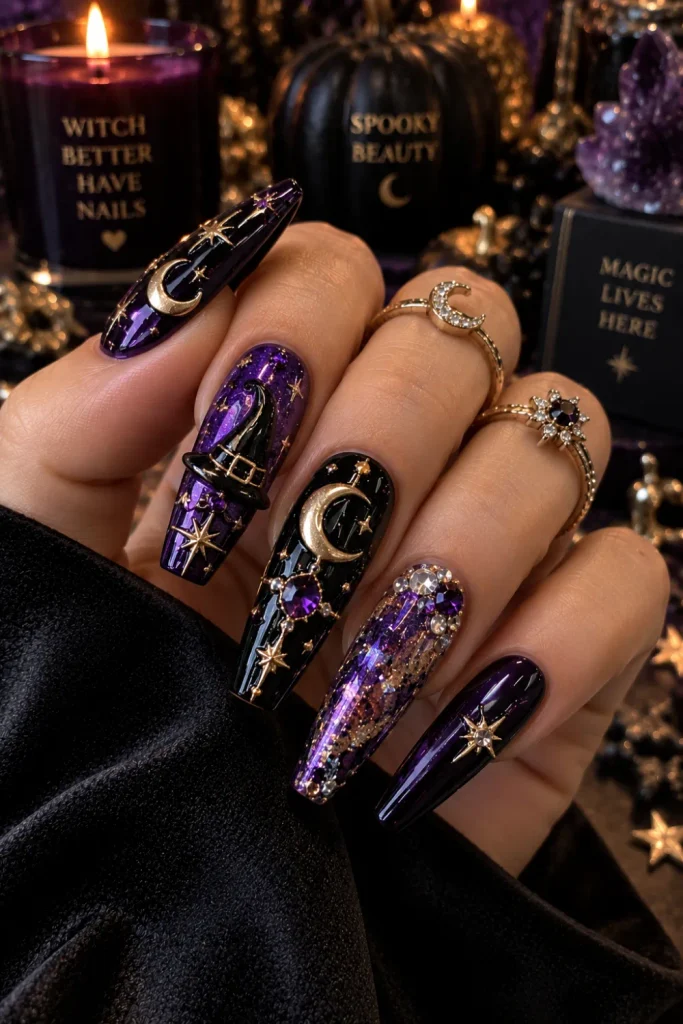
Rich purple and black create a mysterious witch-inspired combination.
Metallic accents, moons, stars, and raised mystical symbols can make the manicure feel luxurious rather than overly busy.
Simple steps:
- Alternate deep purple and black bases.
- Add metallic moon or star details.
- Create raised magical symbols with gel.
- Add small rhinestones or foil.
- Finish with a glossy top coat.
One tip: Choose a dark plum purple instead of bright violet for a more sophisticated result.
6. Frankenstein Green Chunky Halloween Nails
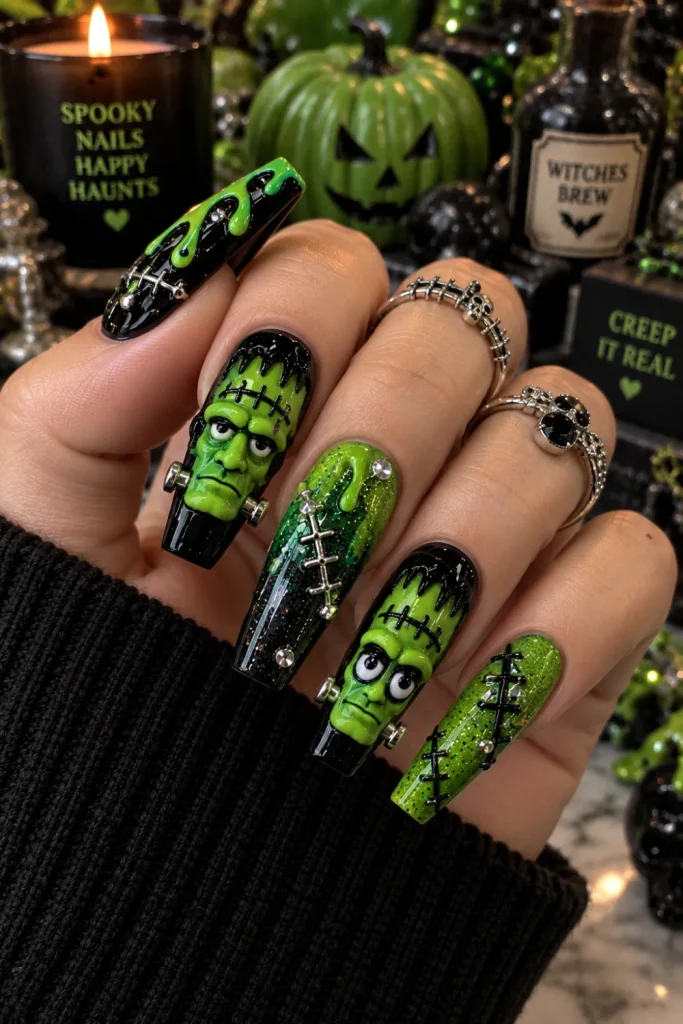
Bring classic Halloween character energy to your fingertips with Frankenstein-inspired green nails.
Raised stitches, bolts, facial details, and black outlines make this style especially fun.
Simple steps:
- Paint the nails Frankenstein green.
- Add black hair or facial details.
- Draw stitched lines across selected nails.
- Add dimensional bolts or raised scars.
- Finish with a glossy seal.
One tip: Use different expressions on each character nail for a playful mixed look.
7. Candy Corn Glitter Chunky Nails
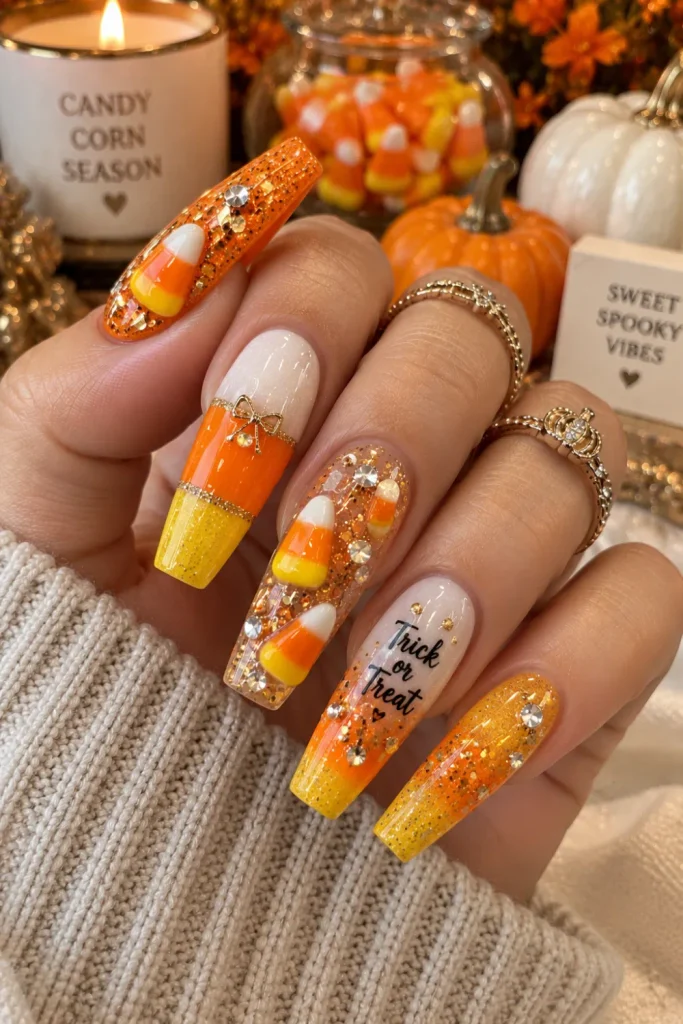
Candy corn colors instantly bring a festive Halloween feel.
Yellow, orange, and white become even cuter when combined with glitter, raised candy details, and glossy dimensional accents.
Simple steps:
- Paint nails in yellow, orange, and white sections.
- Add fine or chunky glitter.
- Create raised candy shapes.
- Add tiny sprinkle-like accents.
- Seal with a shiny top coat.
One tip: Use soft creamy shades instead of neon tones for a polished candy-inspired finish.
8. Jack-O’-Lantern 3D Chunky Nails
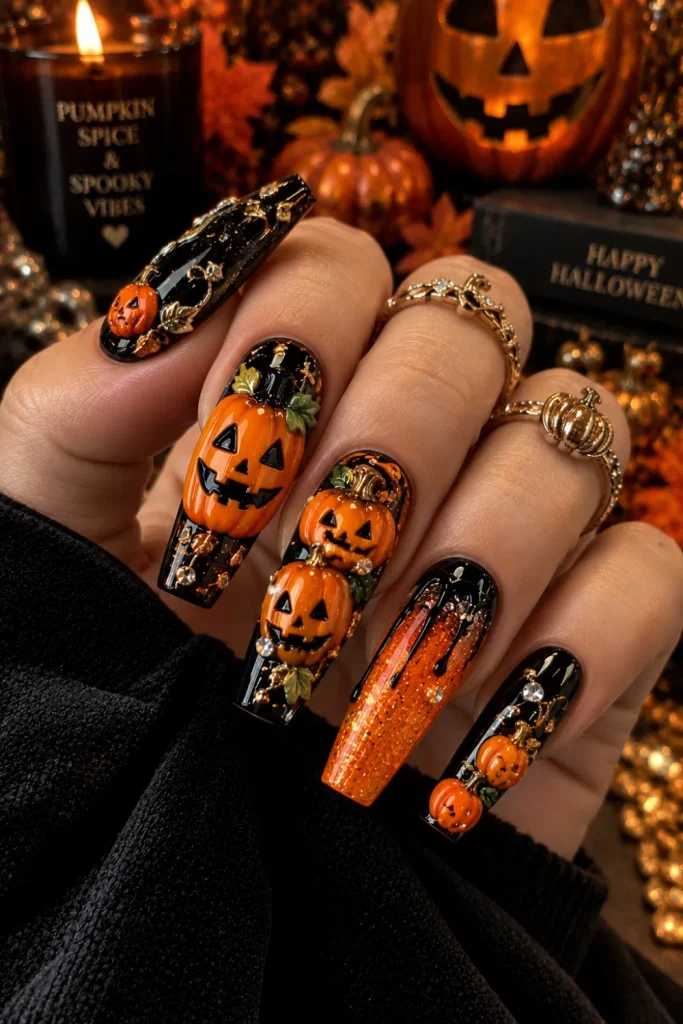
Turn classic jack-o’-lantern faces into miniature nail sculptures.
Orange polish, black expressions, and glossy raised accents create an unmistakable Halloween statement.
Simple steps:
- Apply orange polish to selected nails.
- Build raised pumpkin shapes.
- Add triangular eyes and spooky mouths.
- Paint black stems and details.
- Add glossy finishing gel.
One tip: Try different facial expressions—smiling, angry, surprised, and mischievous—to avoid a repetitive design.
9. Bat & Moon Celestial Chunky Nails
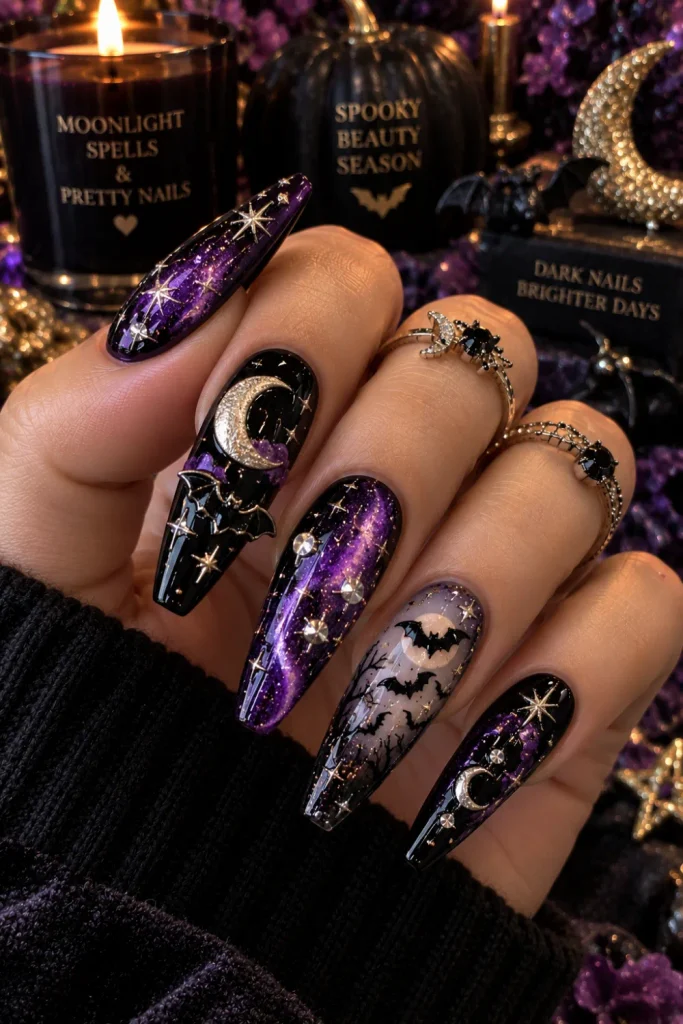
Create a mysterious nighttime manicure using bats, crescent moons, stars, and metallic accents.
Deep navy, black, silver, and purple work especially well together.
Simple steps:
- Apply a dark celestial base.
- Add metallic crescent moons.
- Paint or sculpt tiny bats.
- Scatter stars and rhinestones.
- Finish with a glossy top coat.
One tip: Use tiny reflective embellishments to imitate a starry Halloween sky.
10. Gothic Black Lace Chunky Halloween Nails
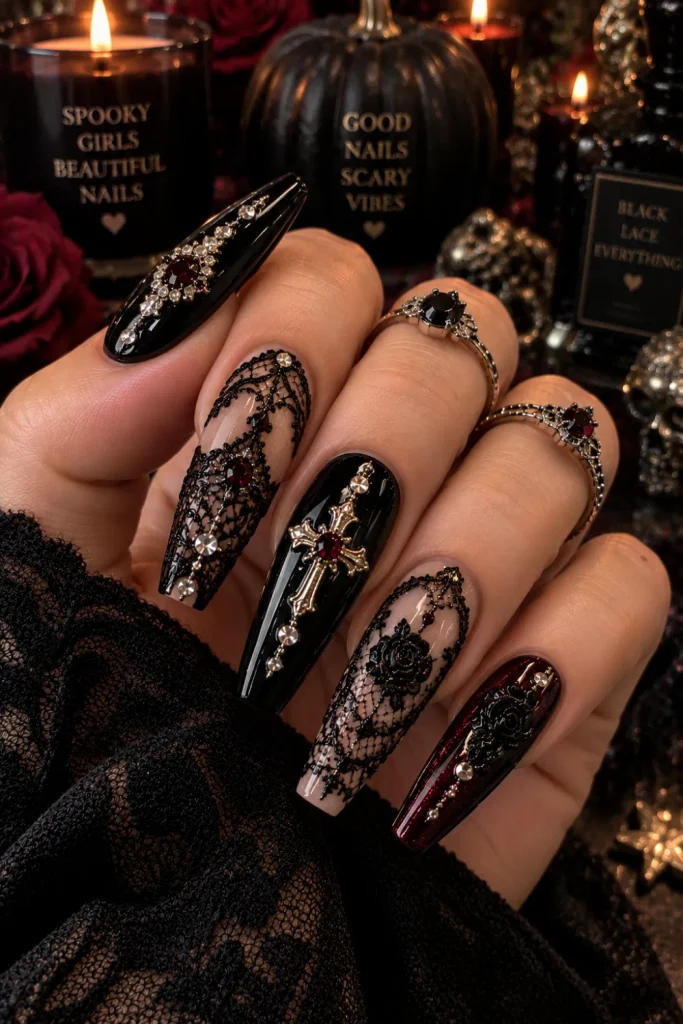
Black lace effects bring elegant gothic drama to chunky Halloween nails.
Add rhinestones and textured details to make the manicure feel luxurious and party-ready.
Simple steps:
- Start with glossy black polish.
- Add lace-like patterns using nail art gel.
- Build raised lace sections.
- Place rhinestones strategically.
- Add a high-shine finish.
One tip: A sheer nude accent nail can make the black lace look more detailed and delicate.
11. Red & Black Coffin Chunky Halloween Nails
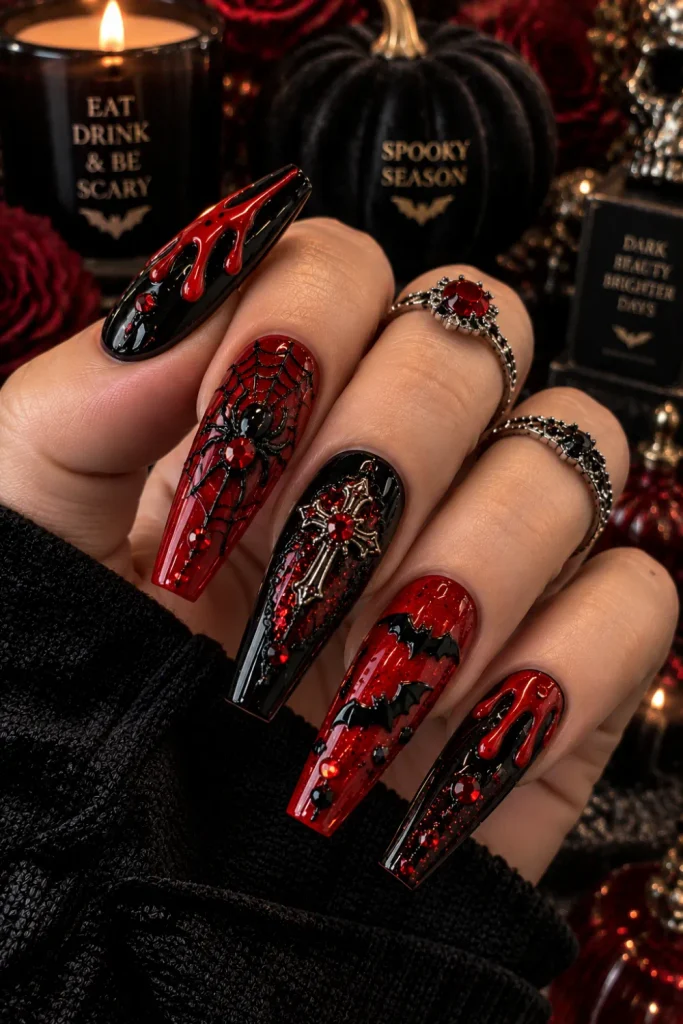
Deep red and black coffin nails deliver a dramatic, slightly vampy Halloween look.
Mix solid colors with dripping details, metallic accents, or raised symbols for extra dimension.
Simple steps:
- Shape nails into a coffin style.
- Paint alternating black and deep red.
- Add spooky raised detailing.
- Incorporate metallic foil or gems.
- Seal with glossy top coat.
One tip: Add one standout red glitter nail to break up a predominantly black set.
12. Haunted House Glow-In-The-Dark Chunky Nails
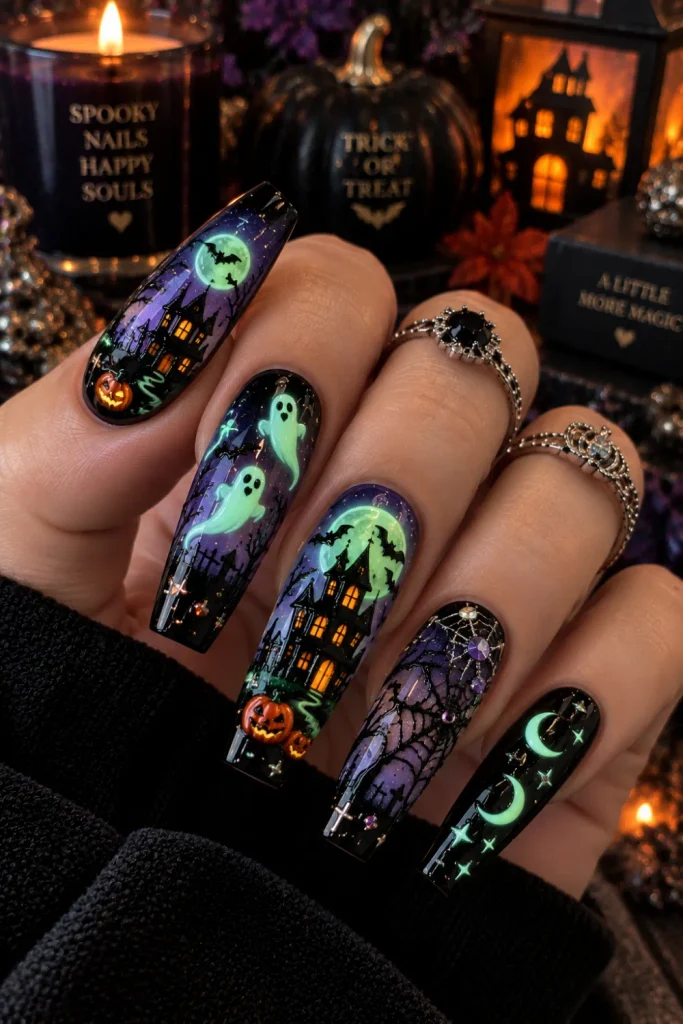
For maximum Halloween drama, create miniature haunted scenes with glowing details.
Dark backgrounds paired with luminous ghosts, windows, moons, or pumpkins make this manicure especially striking after dark.
Simple steps:
- Apply a dark base.
- Paint a haunted house silhouette.
- Add glowing windows, moons, or ghosts.
- Use glow-in-the-dark products on accent details.
- Layer clear 3D elements where desired.
One tip: Test your glow product beforehand so you know how strongly it reacts in low light.
13. Sweet Treat Candy Halloween Chunky Nails
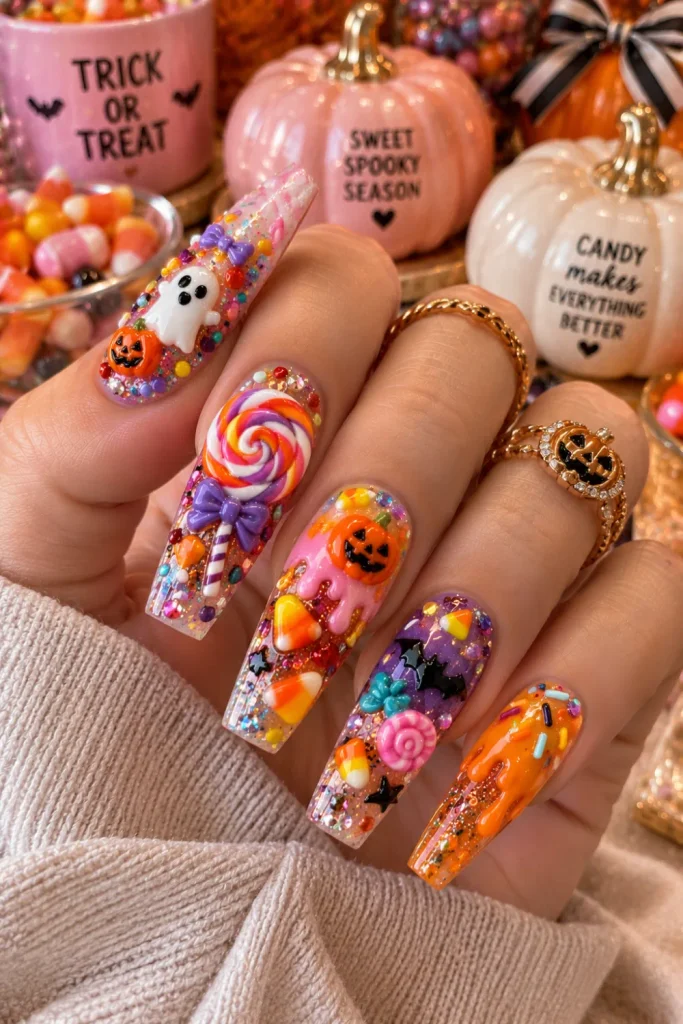
Turn Halloween candy into a colorful manicure with sprinkles, candy pieces, glitter, and playful dimensional decorations.
This is a great option for a cheerful rather than scary vibe.
Simple steps:
- Choose pastel or bright candy shades.
- Paint different candy-inspired bases.
- Add sprinkle details.
- Build raised candy pieces.
- Finish with glitter and gloss.
One tip: Limit the color palette to three or four shades so the set still looks coordinated.
14. Classic Spooky Icons Mixed Chunky Nails
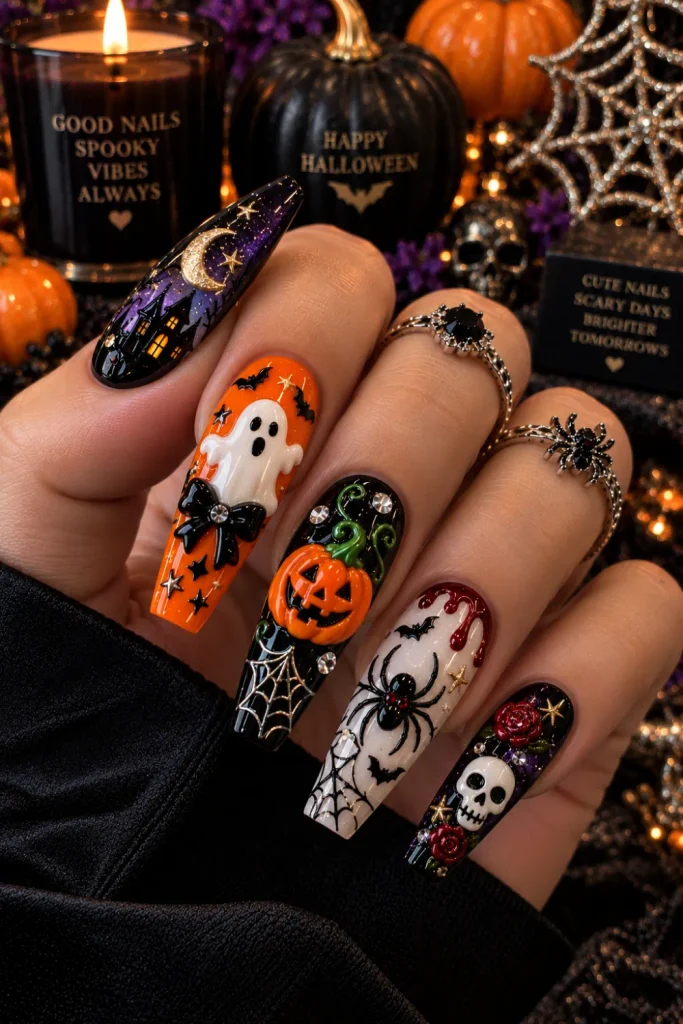
Why choose one Halloween symbol when you can combine them?
Ghosts, bats, pumpkins, spiders, and other spooky icons can create a fun mismatched manicure where every nail tells a different story.
Simple steps:
- Choose a cohesive base palette.
- Assign one spooky icon to each nail.
- Mix flat artwork with 3D details.
- Add glitter or rhinestones to selected nails.
- Finish with a glossy top coat.
One tip: Repeat one color across every nail to visually connect the different icons.
15. Elegant Black & Gold Halloween Chunky Nails
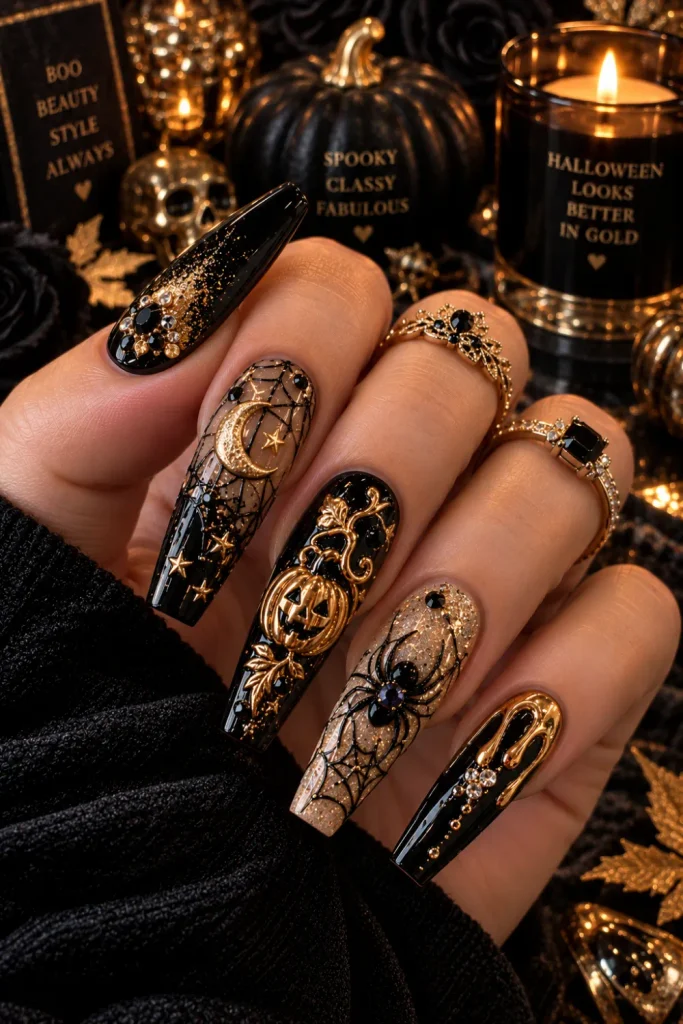
Black and gold prove Halloween nails can be spooky and sophisticated at the same time.
Metallic gold accents, glossy black polish, subtle pumpkins, moons, or spider details create a glamorous finish.
Simple steps:
- Apply glossy black polish.
- Add gold foil or chrome accents.
- Create subtle Halloween symbols.
- Add a few gold rhinestones.
- Finish with a high-shine top coat.
One tip: Use gold sparingly on most nails and make one or two nails the main statement pieces.
Extra Tips for Creating Chunky Halloween Nails
- Plan the weight: Chunky embellishments look beautiful, but too many can overwhelm the nail.
- Layer carefully: Cure each gel layer according to the product directions before adding another raised detail.
- Mix textures: Combine glossy polish, velvet-looking effects, chrome, glitter, gems, and 3D gel for more visual interest.
- Choose a focal point: Decide which two or three nails should carry the biggest decorations.
- Match your nail shape: Coffin and long square shapes offer plenty of space for elaborate designs, while shorter nails can use smaller 3D accents.
- Photograph the details: Close-up shots, angled lighting, and vertical compositions help chunky nail textures stand out in Pinterest images.
- Protect the finished design: Avoid excessive pressure on raised decorations and follow proper nail-prep and curing practices.
Final Thoughts
The best chunky Halloween nail design ideas are the ones that combine personality with strong visual details.
Whether you prefer spooky ghosts, glowing haunted houses, dramatic blood drips, colorful candy, or elegant black-and-gold glamour, there is plenty of room to customize these looks.
For a Pinterest-worthy manicure, focus on contrast, dimension, texture, and one strong visual theme.
A few carefully placed 3D details can make a much bigger impact than covering every nail with decorations.
Save your favorite designs, combine elements from different ideas, and build a Halloween set that feels bold without becoming visually crowded.
Before creating your manicure, prepare your nails properly, choose quality nail-art products, and make sure every dimensional layer is securely cured.
The result should not only look spooky and stylish but also photograph beautifully for Halloween parties, seasonal outfits, and autumn content.
These 15 best chunky Halloween nail design ideas are especially useful for anyone searching for cute Halloween nails, spooky nail art, 3D Halloween nails, gothic manicures, festive nail inspiration, and dramatic seasonal beauty looks.