Want to make your home feel magical this Christmas without spending a fortune on decorations?
These 10 easy DIY Christmas bells for festive holiday decor bring charm, texture, and personality to your space using affordable materials and clever upcycling ideas.
From elegant gold ornaments to rustic farmhouse bells and oversized porch decorations, you’ll discover simple crafts, step-by-step instructions, and styling tips to create a modern, welcoming holiday home.
1. Easy DIY Christmas Bells for Festive Holiday Decor Ideas to Make at Home in 2026

Create beautiful Christmas bells with simple supplies and a little creativity.
These versatile decorations work wonderfully on Christmas trees, door handles, wreaths, and festive shelves.
What you’ll need: Lightweight craft bells, ribbon, greenery, twine, scissors, and decorative beads.
Steps:
- Choose bells that complement your Christmas color palette.
- Wrap the top of each bell with ribbon or natural twine.
- Add a small bow, bead, or artificial evergreen sprig.
- Attach a hanging loop for easy decorating.
- Display your finished bells on a tree, garland, or decorative tray.
Styling idea: Combine matte metallic bells with warm white lights and neutral ornaments for a contemporary Christmas look.
Tip: Stick to two or three complementary colors for a polished, designer-inspired finish.
2. DIY Christmas Bells from Plastic Flower Pots: Easy Upcycled Holiday Decor Ideas for 2026

Old plastic flower pots can become charming oversized Christmas bells.
This budget-friendly craft is perfect for creative decorators who love sustainable holiday projects.
What you’ll need: Small plastic flower pots, metallic spray paint, ribbon, twine, faux greenery, and a lightweight decorative clapper.
Steps:
- Clean and dry the flower pots thoroughly.
- Paint them gold, silver, deep red, or your preferred festive shade.
- Let the paint dry completely.
- Thread twine through a suitable opening in the pot’s base to create a hanging loop.
- Attach a lightweight decorative clapper inside, then finish with a velvet bow or greenery.
Styling idea: Hang several bells at different heights beside a doorway or arrange them along a fireplace garland.
Tip: Use plastic pots without cracks, and secure all hanging components carefully. Lightweight materials make the finished bells easier to display.
3. Rustic Farmhouse DIY Christmas Bells with Twine for Cozy Holiday Home Decor in 2026
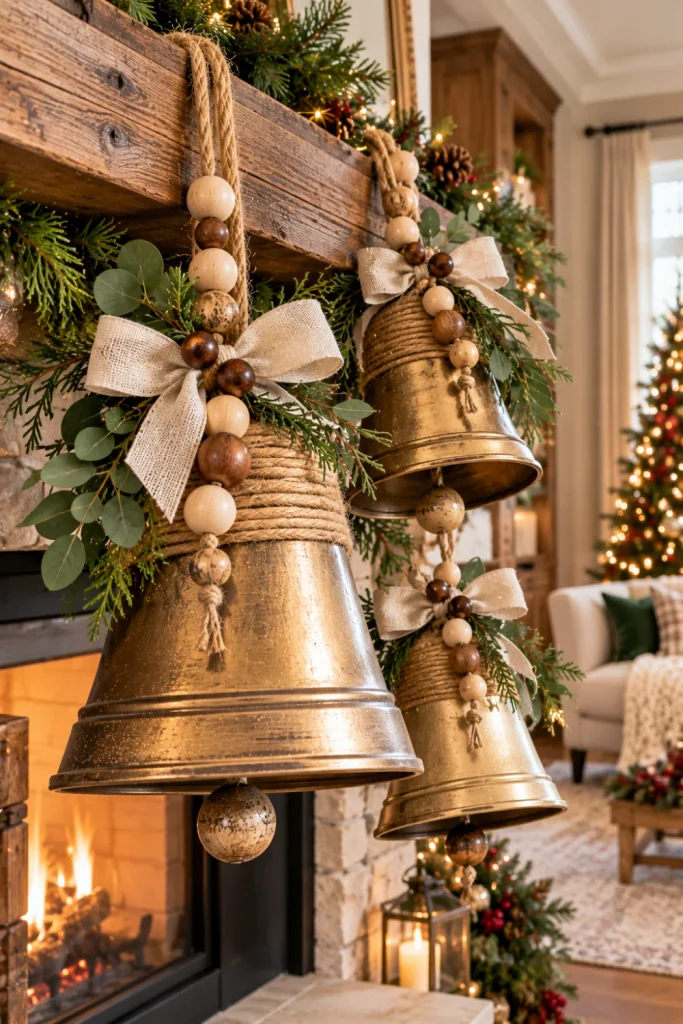
Natural textures bring warmth to Christmas decorating.
These rustic farmhouse bells combine simple materials with understated charm, making them ideal for neutral living rooms, wooden mantels, and country-inspired entryways.
What you’ll need: Metal or lightweight craft bells, jute twine, faux eucalyptus, small wooden beads, and scissors.
Steps:
- Wrap twine around the bell’s upper section, securing it with craft glue.
- Thread wooden beads onto a hanging cord.
- Tie the cord securely to the bell.
- Add a small eucalyptus sprig or a simple linen bow.
- Group three bells together using cords of different lengths.
Styling idea: Display the cluster on a reclaimed-wood shelf, a natural wreath, or a chunky knitted stocking holder.
Tip: Combine rough twine with smooth wood and muted greenery to create contrast without making the decoration look cluttered.
4. Elegant Gold DIY Christmas Bells for Luxury Holiday Decor, Wreaths, and Festive Mantels

Gold bells add instant glamour without requiring expensive ornaments.
Their reflective finish pairs beautifully with cream fabrics, dark green foliage, marble surfaces, and contemporary metallic accents.
What you’ll need: Craft bells, gold paint, a soft brush, satin ribbon, faux evergreen branches, and craft glue.
Steps:
- Clean your bells and apply metallic gold paint if necessary.
- Allow the paint to dry fully before handling.
- Tie a narrow satin ribbon through each bell’s hanging loop.
- Add a small cluster of evergreen sprigs or pearl-style beads.
- Attach the bells to wreaths, garlands, or decorative cabinet handles.
Styling idea: Mix gold bells with warm white lights and deep green foliage for a refined holiday mantel.
Tip: Choose one dominant metallic finish instead of mixing too many competing shades. Consistency makes inexpensive decorations appear more luxurious.
5. DIY Christmas Bell Ornaments with Red Velvet Bows for a Classic and Cozy Holiday Tree

Red velvet bows give simple Christmas bells a traditional, inviting appearance.
This easy project suits classic red-and-green trees while still looking stylish in modern homes.
What you’ll need: Small bells, red velvet ribbon, scissors, thin hanging cord, and optional gold beads.
Steps:
- Cut ribbon into short lengths suitable for small bows.
- Shape each piece into a bow and secure the center with thin cord.
- Attach a bow above each bell.
- Add a gold bead or a small decorative accent if desired.
- Hang the ornaments evenly throughout the Christmas tree.
Styling idea: Coordinate the red bows with velvet stockings, matching gift wrap, and a few gold ornaments.
Tip: Vary the ornament placement across the tree rather than clustering everything in one area. This creates a balanced, professionally styled appearance.
6. DIY Silver and White Christmas Bells for a Frosted Winter Wonderland Holiday Look
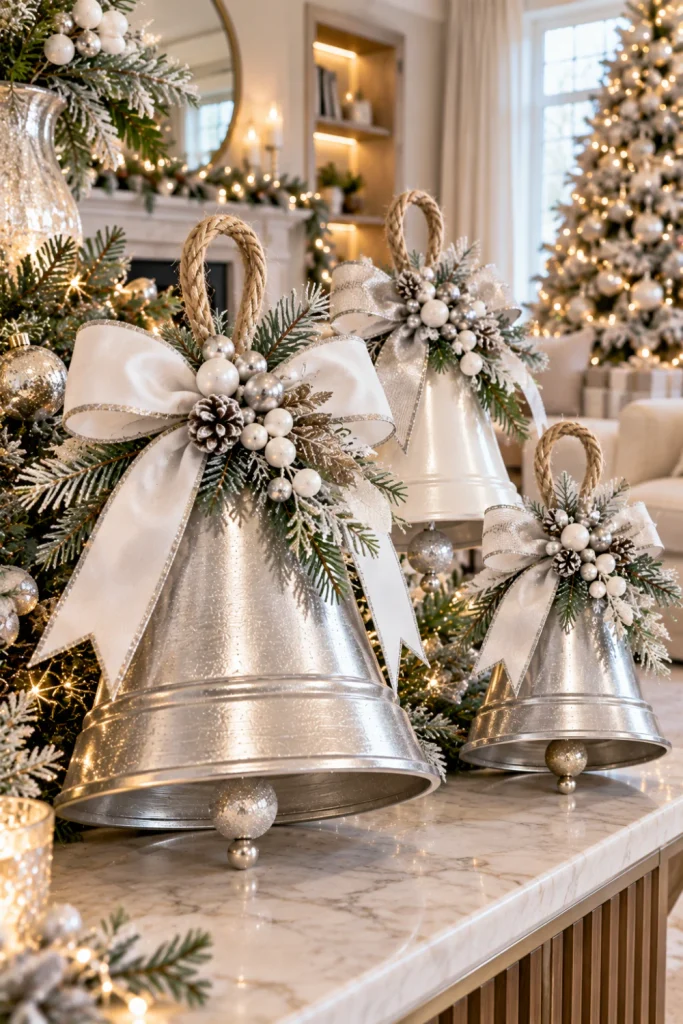
Silver bells and crisp white accents create a cool, elegant holiday atmosphere.
This combination works especially well with snowy artificial trees, glass ornaments, and minimalist winter decorations.
What you’ll need: Craft bells, silver paint, white ribbon, faux snow-effect embellishments, and fishing line or decorative cord.
Steps:
- Paint plain bells silver and let them dry completely.
- Tie white ribbon through the hanging loops.
- Add subtle snow-effect details using craft-safe materials.
- Arrange the bells in small groups or hang them individually.
- Pair them with white ornaments and delicate string lights.
Styling idea: Place silver bells on a white mantel with frosted greenery for a soft, winter-inspired display.
Tip: Use different textures, such as satin, brushed metal, and frosted branches, to prevent an all-white palette from appearing flat.
7. DIY Christmas Bells from Recycled Tin Cans: Budget-Friendly Holiday Crafts to Try
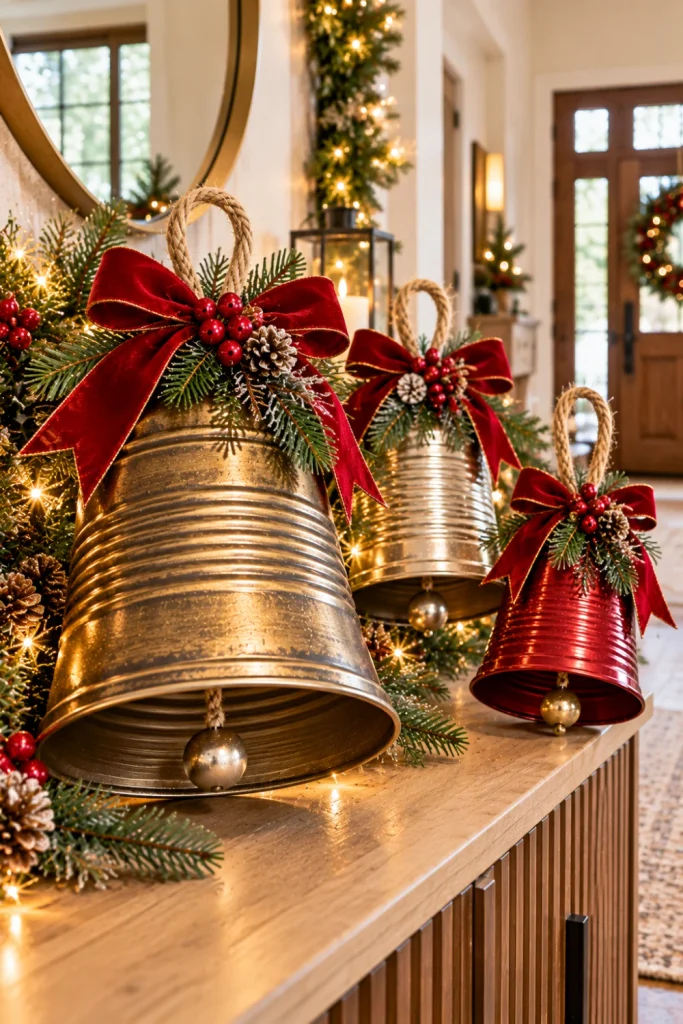
Recycled tin cans can be transformed into statement Christmas bells with paint and decorative ribbon.
This is an affordable project, but preparation is essential because metal edges can be sharp.
What you’ll need: Clean tin cans, metal-safe primer and paint, ribbon, twine, and lightweight decorative elements.
Steps:
- Choose an intact can and remove its label.
- Carefully remove or professionally smooth all sharp edges before crafting.
- Apply metal-safe primer and festive paint according to the product instructions.
- Add a ribbon, painted details, or a hanging cord.
- Display the finished decoration where it will not be knocked or handled roughly.
Styling idea: Use muted gold or antique bronze finishes for a vintage-inspired holiday arrangement.
Tip: Never leave exposed sharp edges. Wear protective gloves during preparation, and avoid hanging heavy cans above doorways or places where people sit.
8. Mini DIY Christmas Bell Ornaments with Twine and Beads for Handmade Holiday Gifts

Tiny bell ornaments make thoughtful handmade gifts and attractive additions to wrapped presents.
Their compact size also makes them useful for decorating garlands, napkin rings, and miniature Christmas trees.
What you’ll need: Mini craft bells, twine, wooden beads, scissors, and small gift tags.
Steps:
- Cut short lengths of twine for the hanging loops.
- Thread one or two wooden beads onto each cord.
- Secure a mini bell beneath the beads.
- Tie the cord into a neat loop.
- Add a small tag or attach the ornament to a wrapped gift.
Styling idea: Use kraft paper, cream ribbon, and natural twine for understated, coordinated gift wrapping.
Tip: Make ornaments in small batches using the same materials. This saves time and creates a cohesive set for gifting.
9. Oversized DIY Christmas Bells for Front Porch Decor, Wreaths, and Festive Outdoor Style

Oversized bells create a welcoming first impression and add visual impact to outdoor holiday decorating.
Their scale makes them especially effective beside front doors, on large wreaths, and in covered porch displays.
What you’ll need: Lightweight plastic bowls or pots, metallic outdoor-rated paint, sturdy ribbon, cord, and weather-resistant decorative accents.
Steps:
- Select lightweight containers with a bell-like shape.
- Clean the surfaces and apply suitable outdoor-rated paint.
- Create a secure hanging point using an appropriate support.
- Attach a wide ribbon or a large weather-resistant bow.
- Display the bells on a protected porch or incorporate them into a sturdy wreath.
Styling idea: Pair oversized gold bells with evergreen garlands, warm lighting, and a simple natural doormat.
Tip: Check wind exposure and use secure fixtures. Keep outdoor electrical decorations weather-appropriate and follow the manufacturer’s safety instructions.
10. DIY Christmas Bell Centerpieces with Greenery and Pinecones for a Beautiful Holiday Table
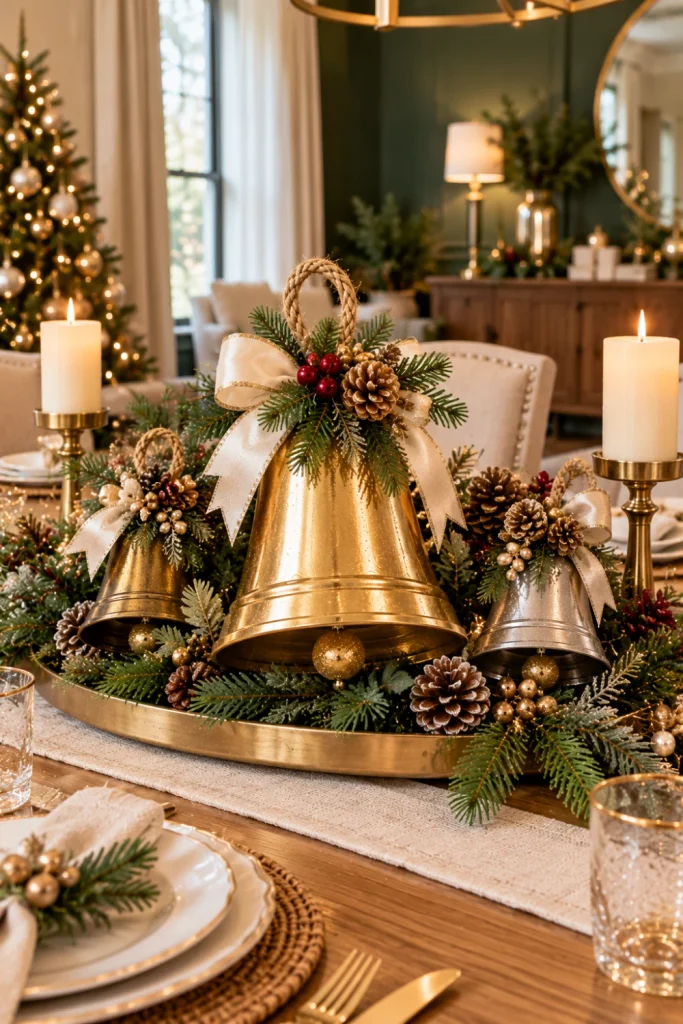
Bring Christmas charm to your dining table with a centerpiece combining decorative bells, evergreen foliage, and pinecones.
It creates a festive focal point without taking up the entire table.
What you’ll need: Decorative bells, a shallow tray, faux or fresh greenery, pinecones, candles, and ribbon.
Steps:
- Place a shallow tray or centerpiece base in the middle of the table.
- Arrange greenery around the base, keeping the design low.
- Add pinecones and position two or three decorative bells.
- Introduce ribbon or a few metallic accents for extra detail.
- Add candles in stable holders, keeping them safely separated from greenery and other flammable decorations.
Styling idea: Combine natural pinecones with gold bells and cream candles for an elegant, modern holiday tablescape.
Tip: Keep the centerpiece low enough for comfortable conversation and leave sufficient space for serving dishes.
Final Thoughts: Make Your Christmas Decor Beautiful on Any Budget
Creating beautiful DIY Christmas bells is a simple way to personalize your home while keeping holiday decorating costs manageable.
From recycled materials to elegant metallic finishes, these projects offer plenty of ways to match your decorations to your space and style.
Before getting started, keep these ideas in mind:
- Choose a consistent palette: Combine two or three colors, such as gold and green, silver and white, or red and natural wood.
- Reuse what you already own: Look for spare ribbon, old ornaments, leftover craft paint, and suitable containers before buying new supplies.
- Mix sizes and textures: Combine oversized bells with miniature ornaments, soft velvet, rustic twine, and natural greenery.
- Prioritize safety: Secure hanging decorations properly, smooth sharp metal edges, and keep candles and flammable materials safely apart.
- Style with intention: Repeat your chosen colors across your tree, mantel, entryway, and dining table to make the whole home feel coordinated.
Ready to create a festive home?
Start with one easy bell project, then build a cohesive Christmas look by repeating its colors and materials throughout your decor.
For even more inspiration, explore related ideas for DIY Christmas wreaths, handmade tree ornaments, budget-friendly Christmas centerpieces, and modern holiday mantel styling.
These complementary projects can help turn a few simple crafts into a complete, inviting holiday decorating scheme.