Halloween at school does not have to mean spending a fortune on decorations.
These Creative Halloween DIY School Decor Ideas Made Easy turn everyday craft supplies into spooky, playful classroom touches that students will actually notice.
From creepy-cute pencil toppers to a giant Frankenstein door, you’ll get simple projects, quick steps, and clever tips for making your classroom feel festive without creating a giant mess.
1. Paper Plate Spider Webs
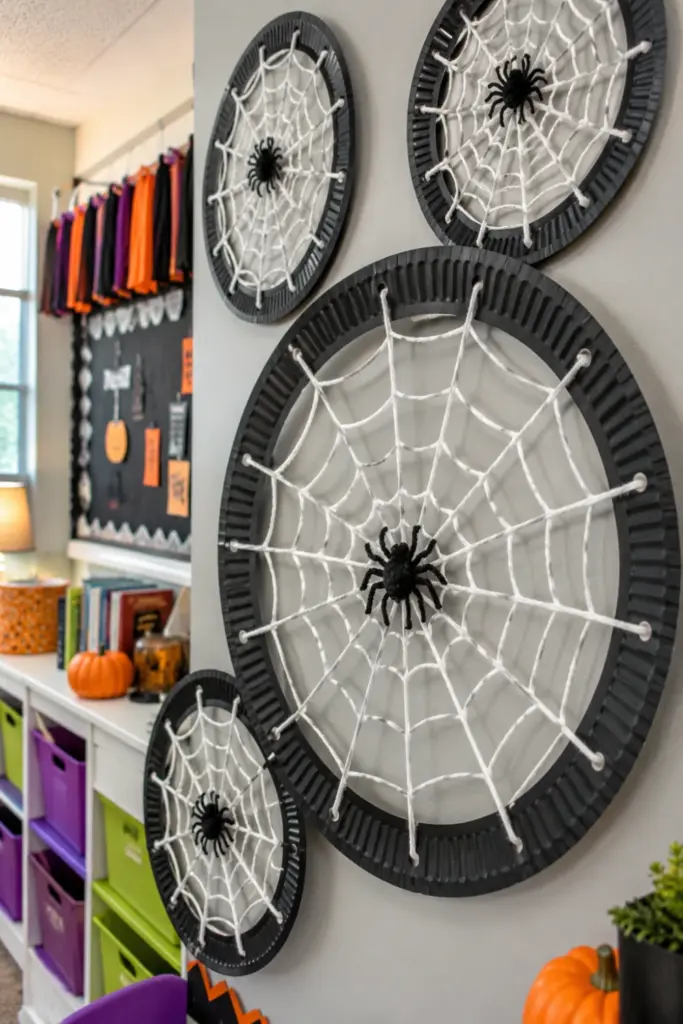
Turn ordinary paper plates into oversized spider webs that look surprisingly impressive on a classroom wall.
How to make it:
- Paint a paper plate black, gray, or purple and let it dry.
- Cut out the center, leaving a wide outer rim.
- Snip small cuts around the rim.
- Wrap white yarn between the cuts to create a web pattern.
- Add a small paper spider in the center.
Tip: Make several sizes and group them together for a more dramatic display.
2. Ghostly Pencil Toppers
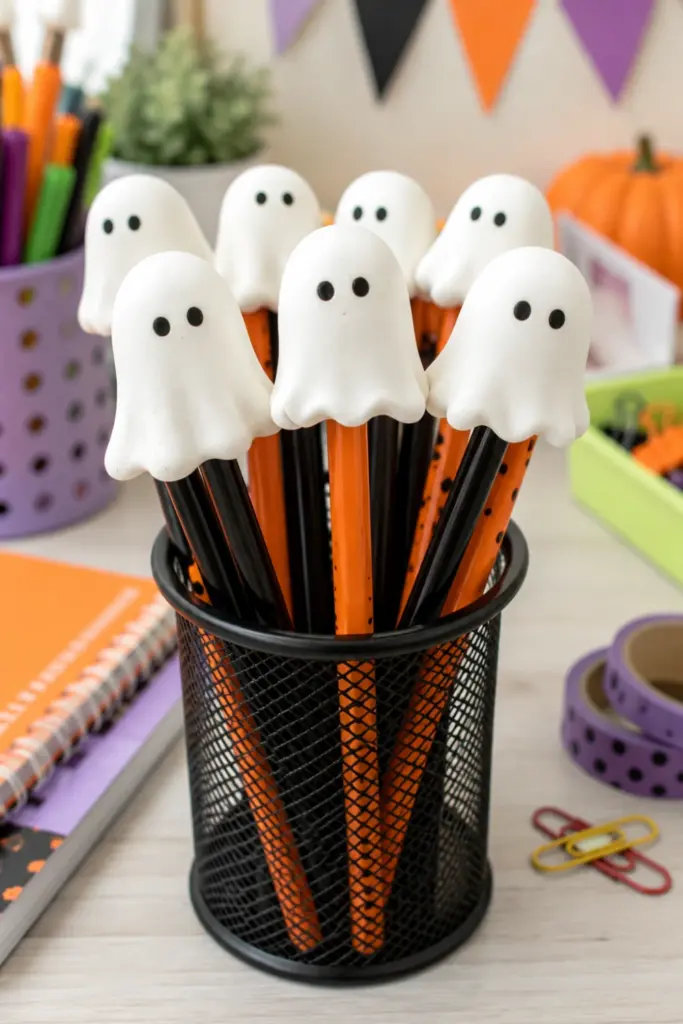
Give classroom pencils a Halloween makeover with tiny ghosts perched on top.
How to make it:
- Roll small pieces of white air-dry clay into ghost shapes.
- Make a tiny opening underneath each ghost.
- Add two black dots for eyes.
- Let them dry completely.
- Slide them gently onto pencils.
Tip: Keep the ghost shapes simple so they stay lightweight and do not make pencils awkward to use.
3. Monster Mouth Bookends
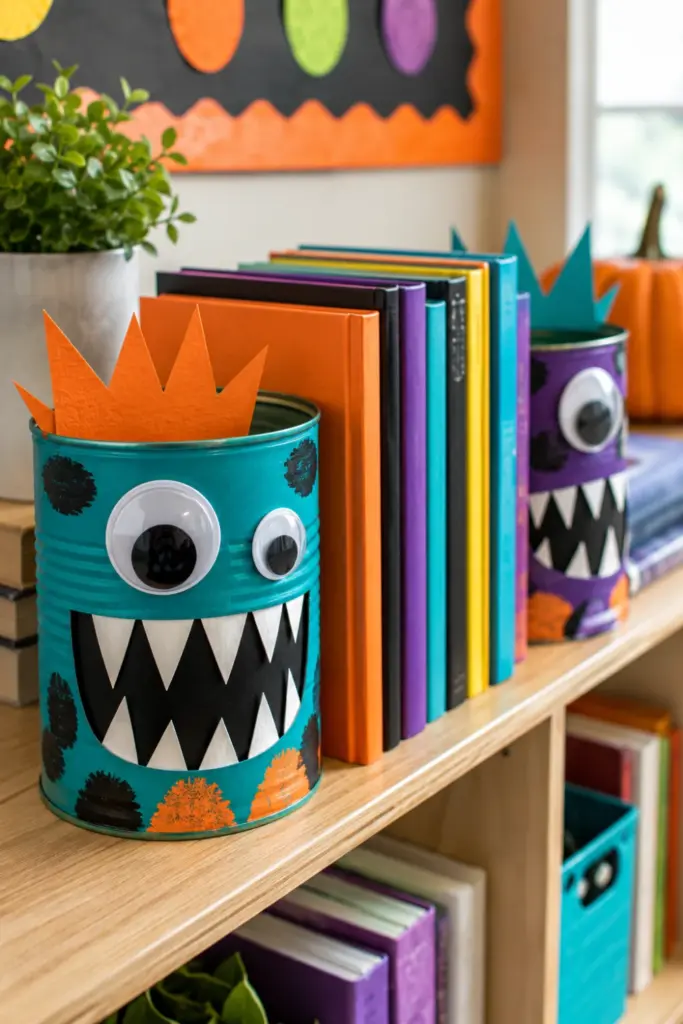
Old cans can become funny monster bookends that bring personality to classroom shelves.
How to make it:
- Clean and dry two sturdy cans.
- Cover them with colored paper or paint.
- Add giant eyes, sharp teeth, and a silly mouth.
- Fill the cans with a little weight, such as pebbles.
- Place one on each side of a stack of books.
Tip: Use different monster faces on each side for a fun mismatched look.
4. Broomstick Bulletin Board
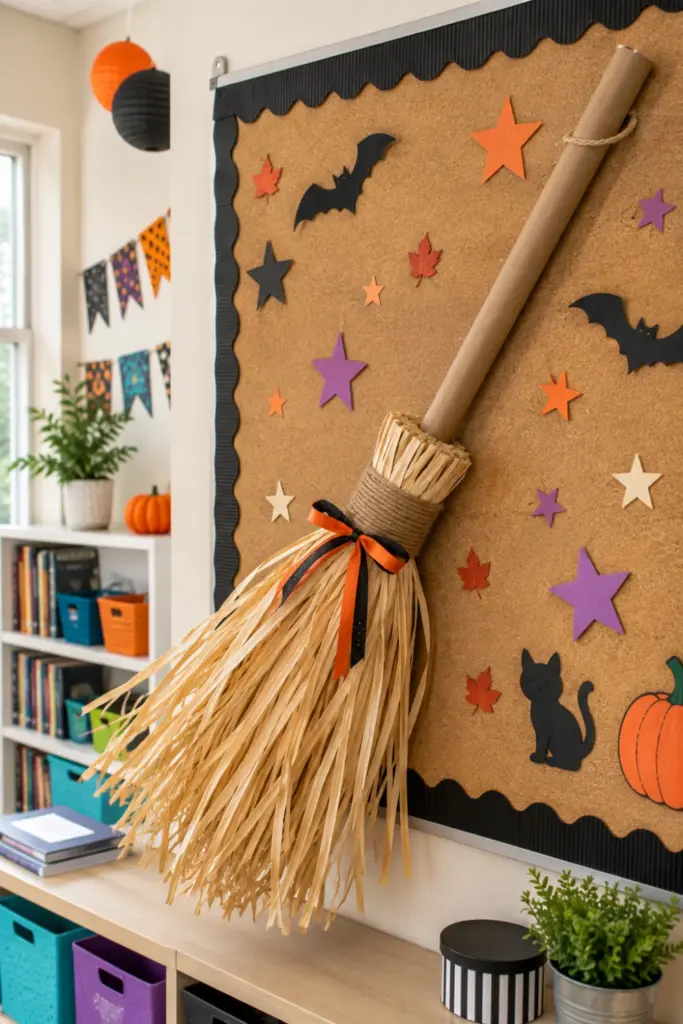
A miniature 3D broom can instantly make a plain bulletin board feel enchanted.
How to make it:
- Use a long cardboard tube or craft stick as the handle.
- Wrap raffia, paper strips, or yarn around one end.
- Tie the strips tightly with twine.
- Add a paper label or small decorative ribbon.
- Mount the broom diagonally across the board.
Tip: Add small paper stars or leaves around it to make the broom feel like part of a larger Halloween scene.
5. Mason Jar Mummies
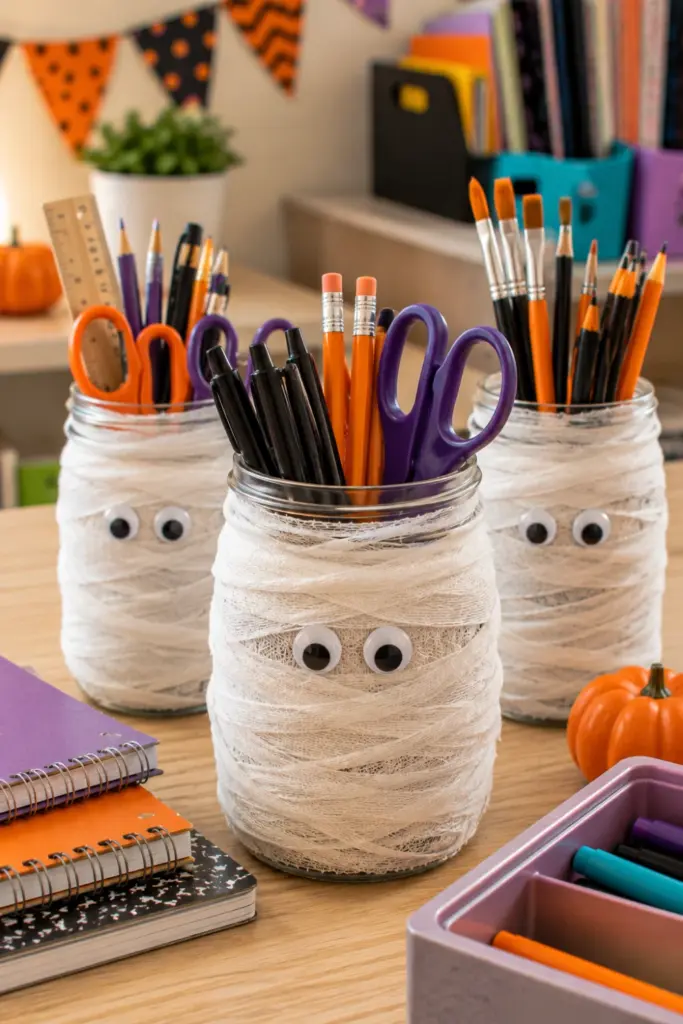
Mason jars become adorable mummy-style containers for pens, pencils, scissors, and markers.
How to make it:
- Clean and dry the jar thoroughly.
- Wrap it loosely with strips of gauze or white fabric.
- Secure the ends with glue.
- Attach two googly eyes between the layers.
- Fill it with classroom supplies.
Tip: Leave some glass visible between the wraps so the mummy looks slightly messy and more playful.
6. Bat Mobile
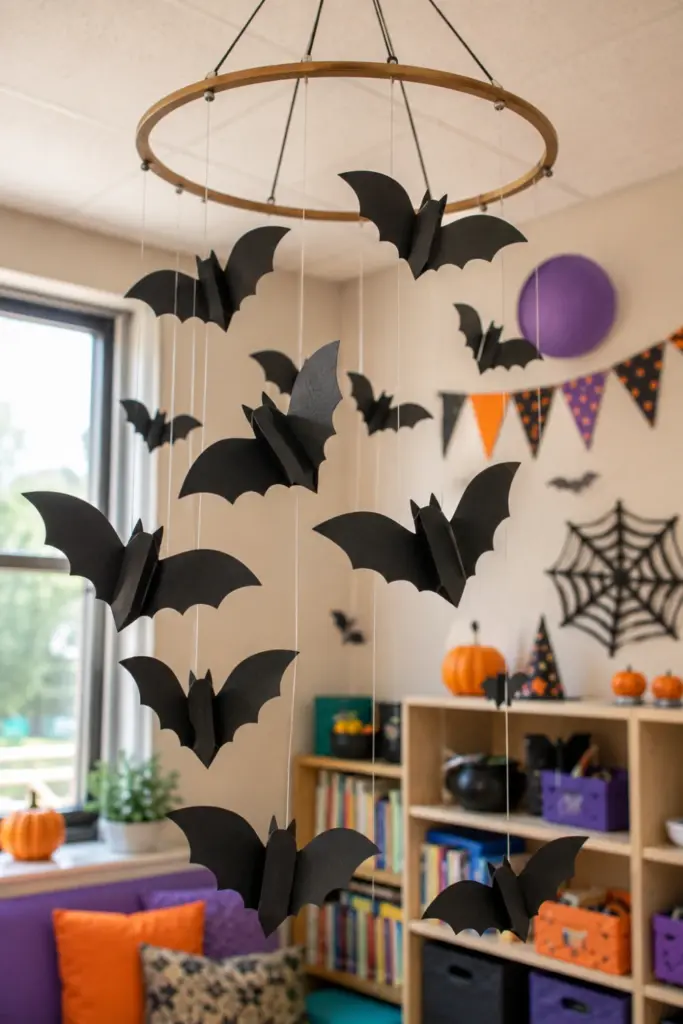
Create a spooky hanging display using lightweight bats that flutter above desks or near the classroom entrance.
How to make it:
- Cut bat shapes from black paper or thin cardboard.
- Fold the wings slightly for dimension.
- Punch a tiny hole near the top of each bat.
- Attach clear thread or string.
- Hang them from a circular frame or sturdy branch.
Tip: Vary the heights so the bats look like they are flying rather than sitting in a straight line.
7. Pumpkin Pinwheels
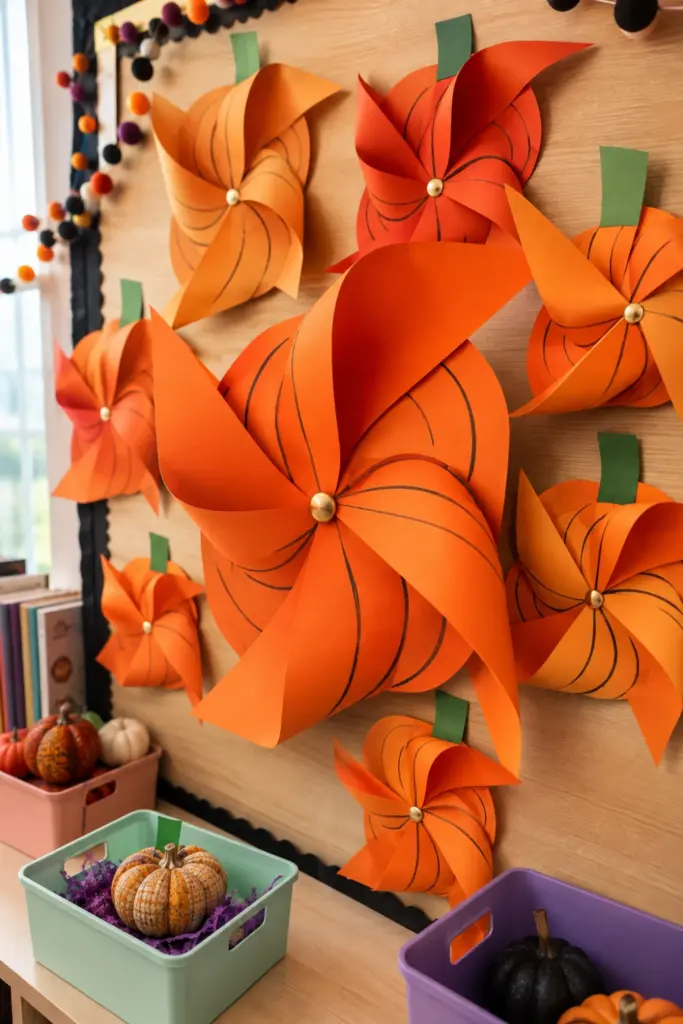
Pumpkin-inspired pinwheels bring a brighter, cheerful Halloween look to classrooms.
How to make it:
- Start with square sheets of orange paper.
- Cut diagonal lines toward the center without cutting all the way through.
- Fold alternating corners inward.
- Secure the center with a brad.
- Add a green paper stem.
Tip: Use several shades of orange for a more layered pumpkin patch effect.
8. “Boo” Banner
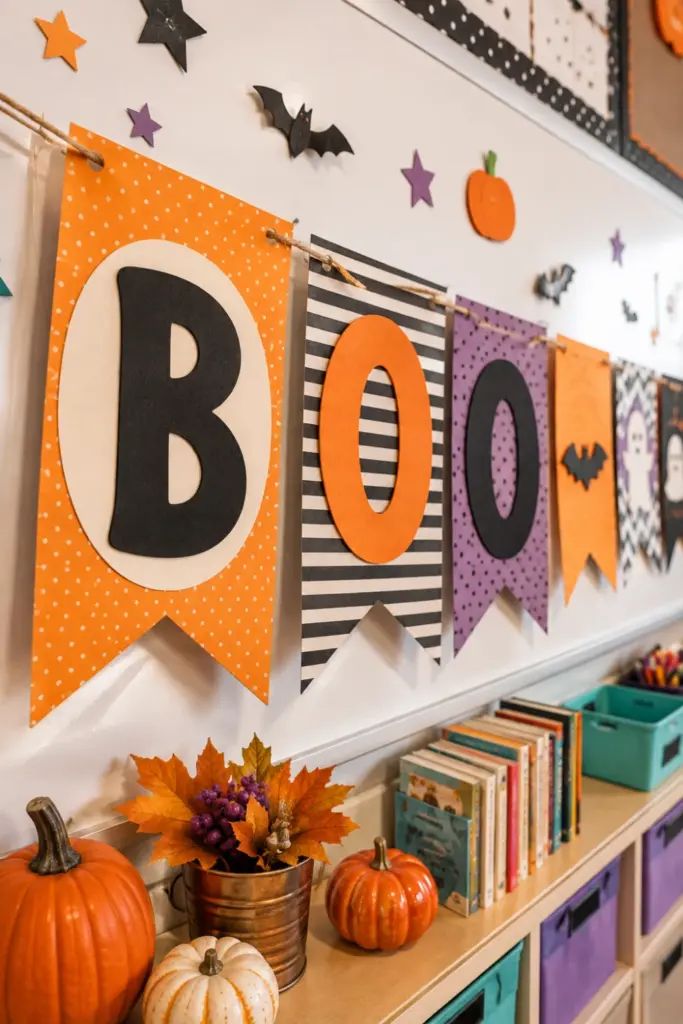
A homemade “Boo” banner gives the classroom an easy focal point and works especially well above whiteboards or doors.
How to make it:
- Choose scrapbook paper in orange, black, white, or purple.
- Cut equal-sized triangles or rectangles.
- Add one large letter to each piece.
- Punch holes at the top.
- Thread everything onto ribbon or twine.
Tip: Mix solid colors with patterned paper so the banner feels handmade instead of overly polished.
9. Skull Eraser Holders
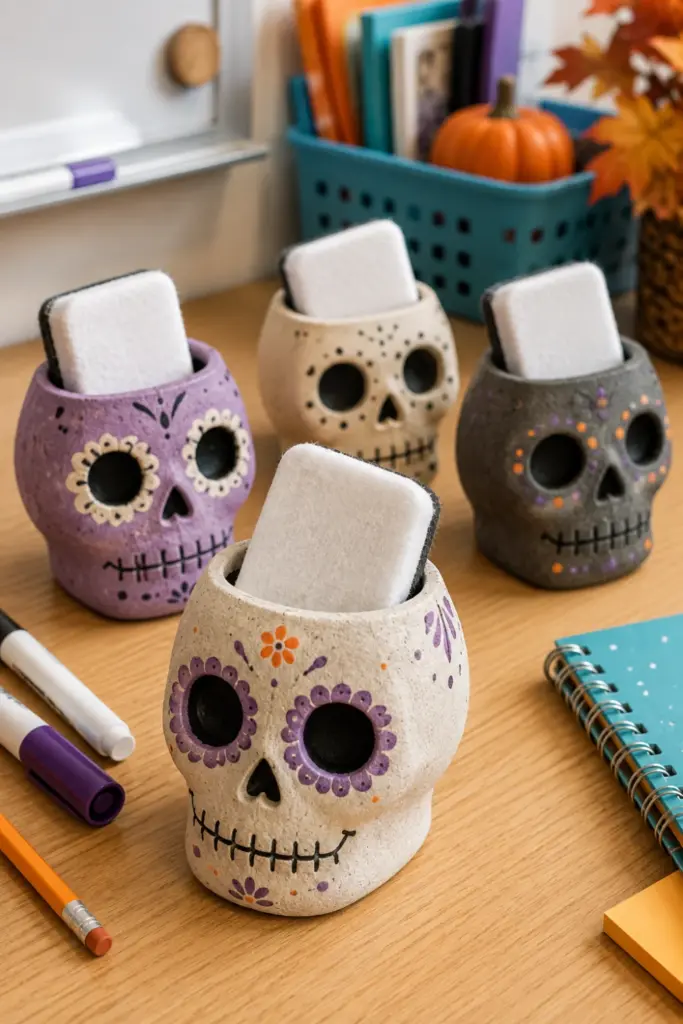
Salt dough skulls can become quirky little holders for whiteboard erasers.
How to make it:
- Mix a basic salt dough using flour, salt, and water.
- Shape small skull-like forms.
- Press a shallow space into the top or back for the eraser.
- Bake or air-dry according to the dough method.
- Paint the skulls after they harden.
Tip: Make the holder wide and sturdy enough that it does not tip over every time someone grabs an eraser.
10. Potions Supply Labels
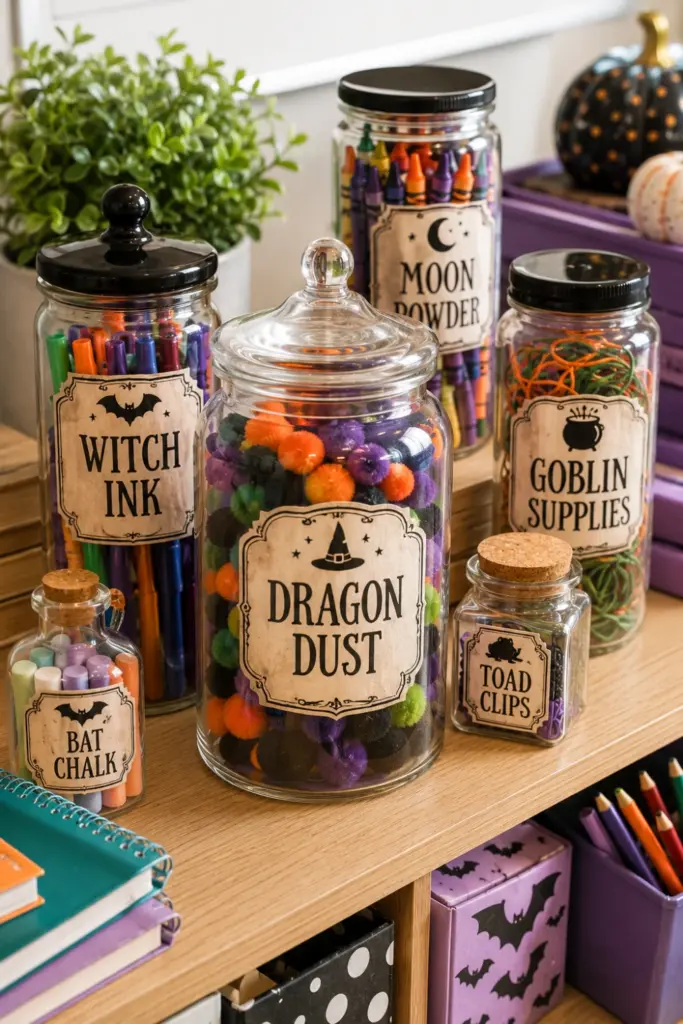
Turn ordinary classroom supply containers into mysterious Halloween “potions.”
How to make it:
- Create spooky labels with names like “Dragon Dust” or “Witch Ink.”
- Print or handwrite them on aged-looking paper.
- Cut the labels neatly.
- Attach them to jars, bins, or bottles.
- Use them for crayons, paper clips, markers, or craft supplies.
Tip: Add tiny warning phrases such as “Handle With Care” for extra character.
11. Frankenstein Door Decor
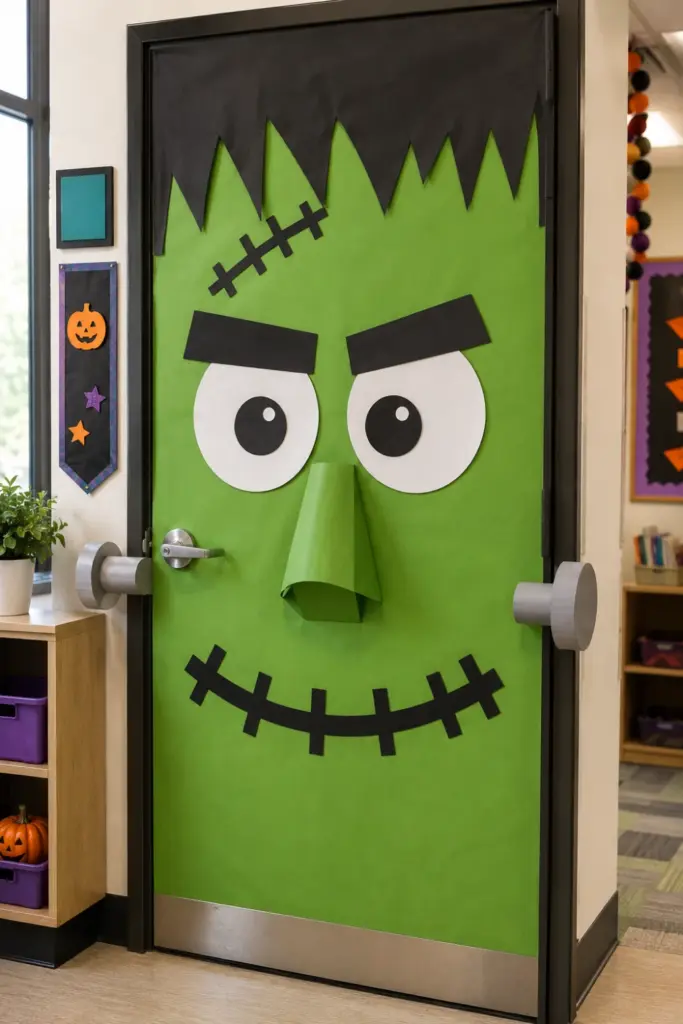
A classroom door can become one giant Frankenstein face with simple construction paper.
How to make it:
- Cover the door with green paper.
- Add black hair across the top.
- Cut large white eyes and dark pupils.
- Create eyebrows, a nose, and a stitched mouth.
- Add small paper bolts on both sides.
Tip: Keep all details oversized so students can recognize the face from down the hallway.
12. Spider Web Window Clings
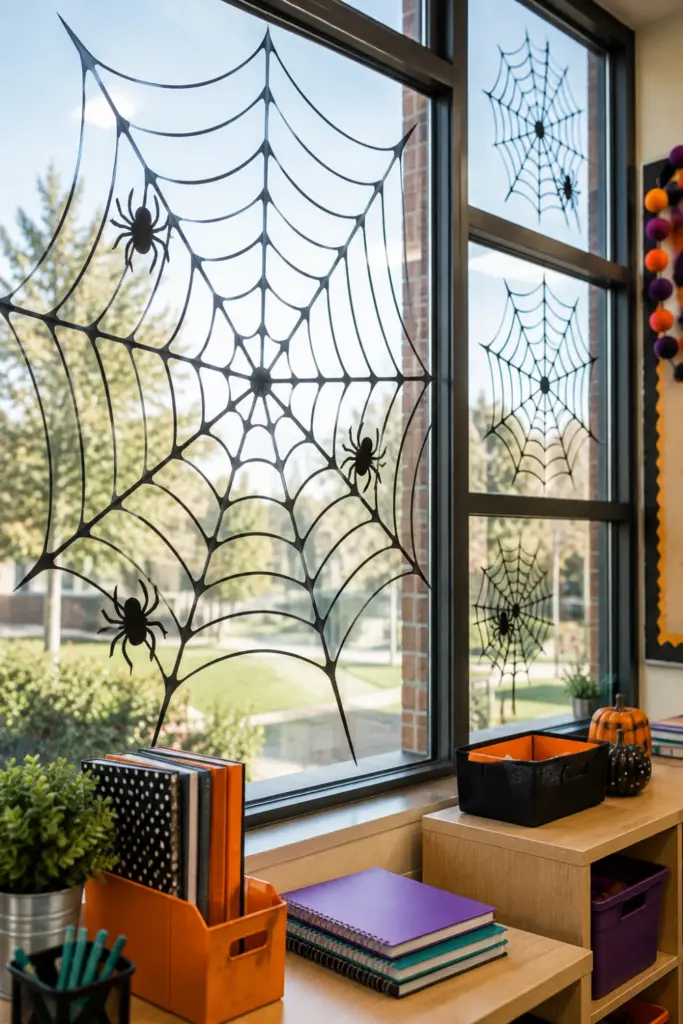
Decorative spider webs can make classroom windows look spooky without permanent changes.
How to make it:
- Draw web shapes onto clear contact paper.
- Cut each web carefully.
- Remove the backing.
- Press the web onto a clean window.
- Add small paper spiders nearby.
Tip: Clean the glass first so the contact paper sticks smoothly and does not collect dust around the edges.
13. Owl Bookworms
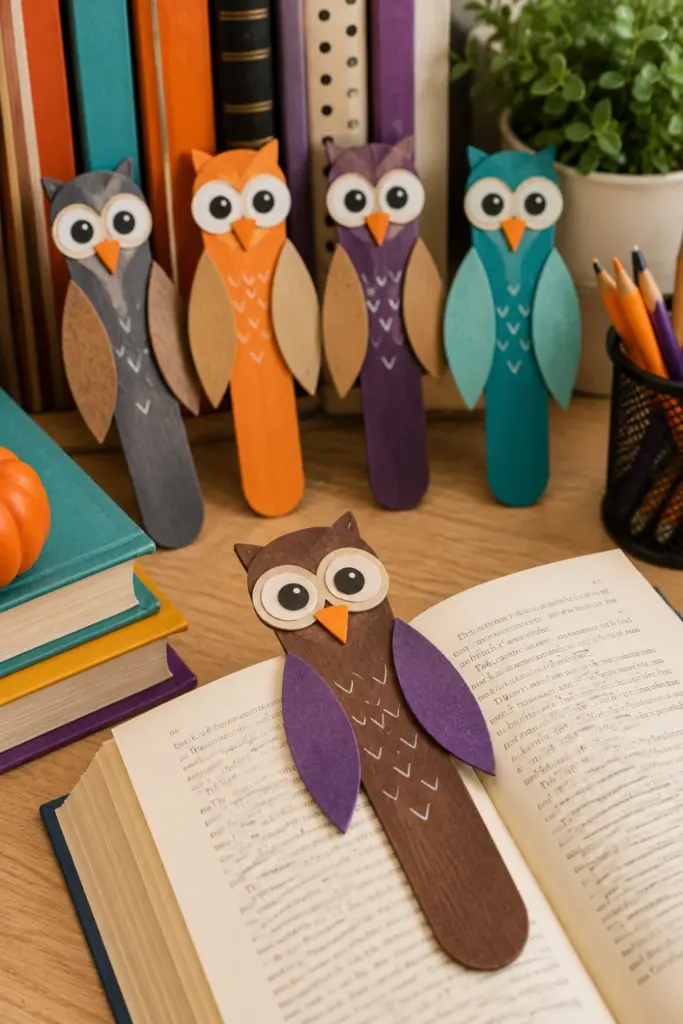
These cute owl bookmarks are a great Halloween craft that doubles as a useful classroom item.
How to make it:
- Paint popsicle sticks brown, gray, black, or orange.
- Add paper wings and large round eyes.
- Glue on a tiny beak.
- Draw simple feather details.
- Let everything dry before using them as bookmarks.
Tip: Give each owl a slightly different expression to make the set feel extra charming.
14. Cauldron Trash Can
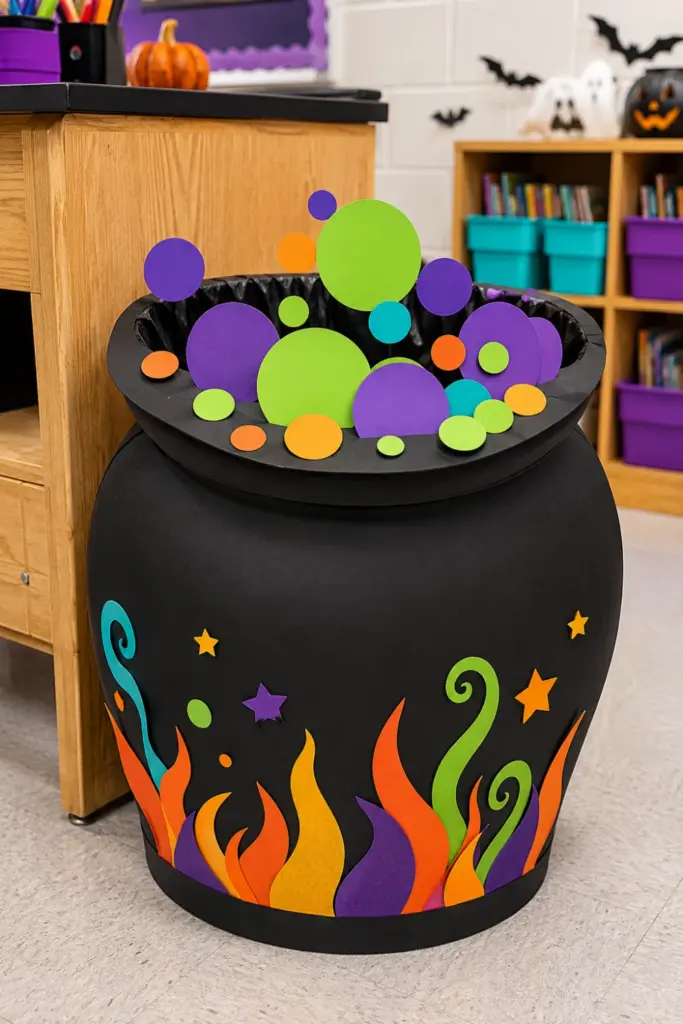
Transform a boring classroom trash can into a bubbling witch’s cauldron.
How to make it:
- Measure the outside of the trash can.
- Cut black paper or cardstock to wrap around it.
- Attach a curved cauldron rim near the top.
- Add green, purple, or orange “bubbles.”
- Create paper flames or potion details around the base.
Tip: Use removable tape instead of permanent adhesive so the trash can can return to normal after Halloween.
15. Skeleton Hand Rulers
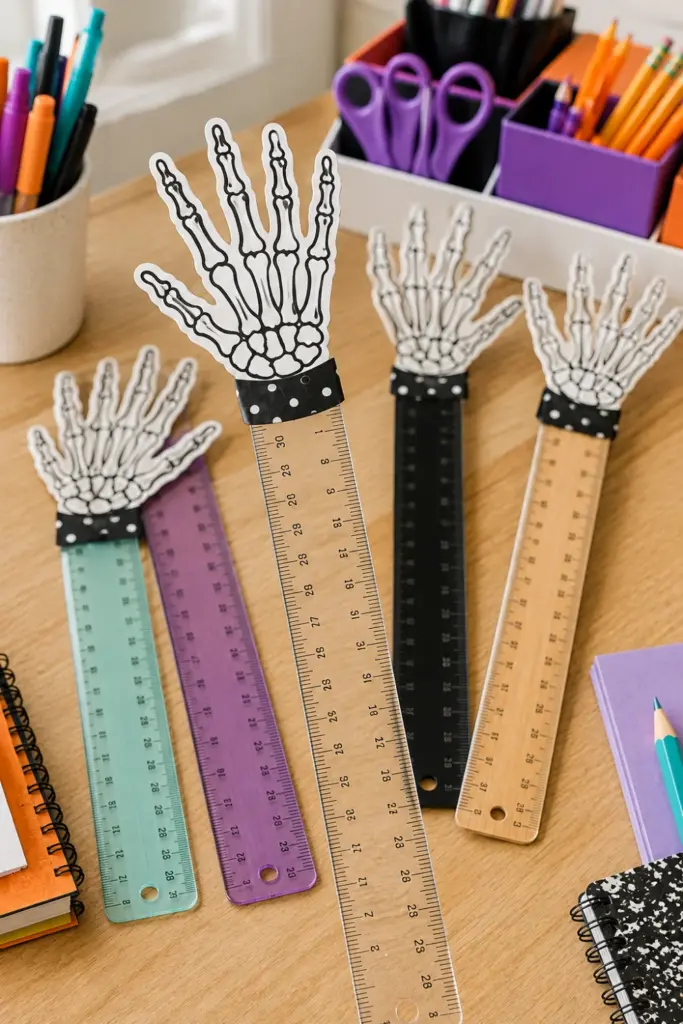
Give students a spooky measuring tool by combining simple rulers with skeleton hands.
How to make it:
- Cut skeletal hand shapes from white cardstock.
- Draw or paint bone details.
- Attach each hand to the top of a ruler.
- Reinforce the connection with strong tape.
- Add a tiny Halloween phrase such as “Measure if You Dare!”
Tip: Laminate the paper hand first if you want it to last beyond one Halloween season.
Final Thoughts:
Make Halloween Decor Fun, Not Fussy
The best classroom Halloween decorations do not need complicated materials or hours of crafting.
A few sheets of construction paper, yarn, paint, jars, and cardboard can completely change the mood of a space.
Easy finishing touches
- Pick a color palette: Stick with two or three main Halloween colors so the room feels coordinated.
- Reuse what you have: Empty cans, mason jars, cardboard, paper plates, and scrap paper can become surprisingly useful.
- Invite student creativity: Let students decorate individual bats, ghosts, pumpkins, or monsters before displaying them.
- Think about safety: Avoid sharp edges, unstable hanging pieces, and decorations that block emergency exits or important classroom signage.
- Make it interactive: Turn simple decor into labels, bookmarks, supply holders, or bulletin-board activities whenever possible.
A classroom does not need to look like a professional haunted house.
A few clever handmade details can create that Halloween feeling while keeping the process affordable, practical, and fun.