Let’s be real: store-bought cards are fine, but they don’t exactly scream, “You’re the best mom ever.”
If you want to actually wow her this year, it’s all about the hand-drawn touch.
Whether you’re a pro with a brush pen or just someone who can doodle a decent heart, these lettering & calligraphy design ideas will help you create something she’ll actually want to frame.
No generic greetings here, just pure, creative love.
1. The Watercolor Bloom Border
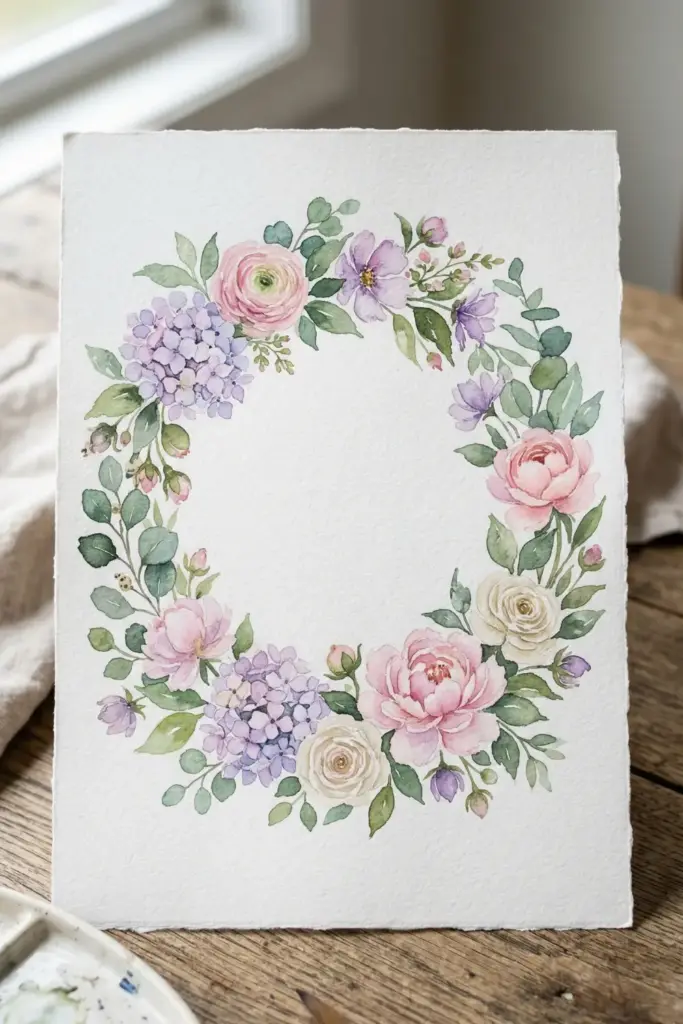
Floral wreaths are a classic for a reason.
They frame your words and add a soft, organic feel that feels instantly high-end.
Steps:
- Lightly sketch a circle in pencil.
- Paint loose watercolor petals around the edge.
- Letter “Happy Mother’s Day” in the center using a bouncy script.
- Add tiny green leaves to fill the gaps.
Tip: Use cold-press watercolor paper; the texture makes the ink look more authentic and professional.
2. Modern Faux-Calligraphy Quote
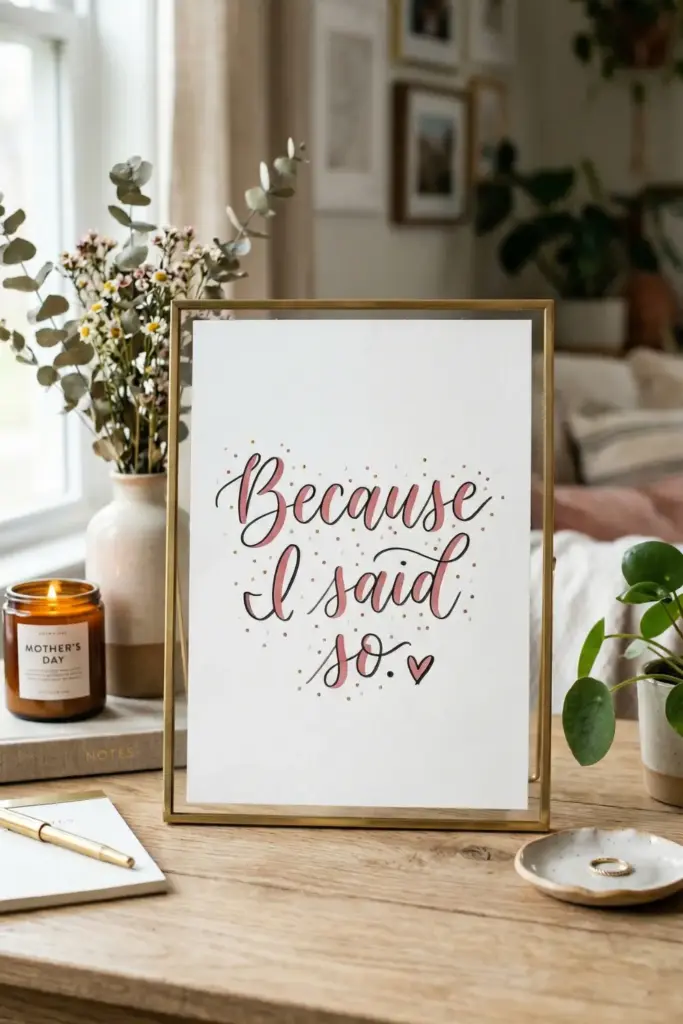
You don’t need fancy nibs for this.
A simple gel pen can create stunning lettering & calligraphy design ideas for decor for a desk-side frame.
Steps:
- Write a favorite “Mom-ism” in your best cursive.
- Go back and thicken every downward stroke.
- Color in the thickened areas.
- Add a few tiny dots around the letters for a “confetti” effect.
Tip: Keep your “up-strokes” thin to make the “down-strokes” really pop.
3. Chalkboard Kitchen Sign
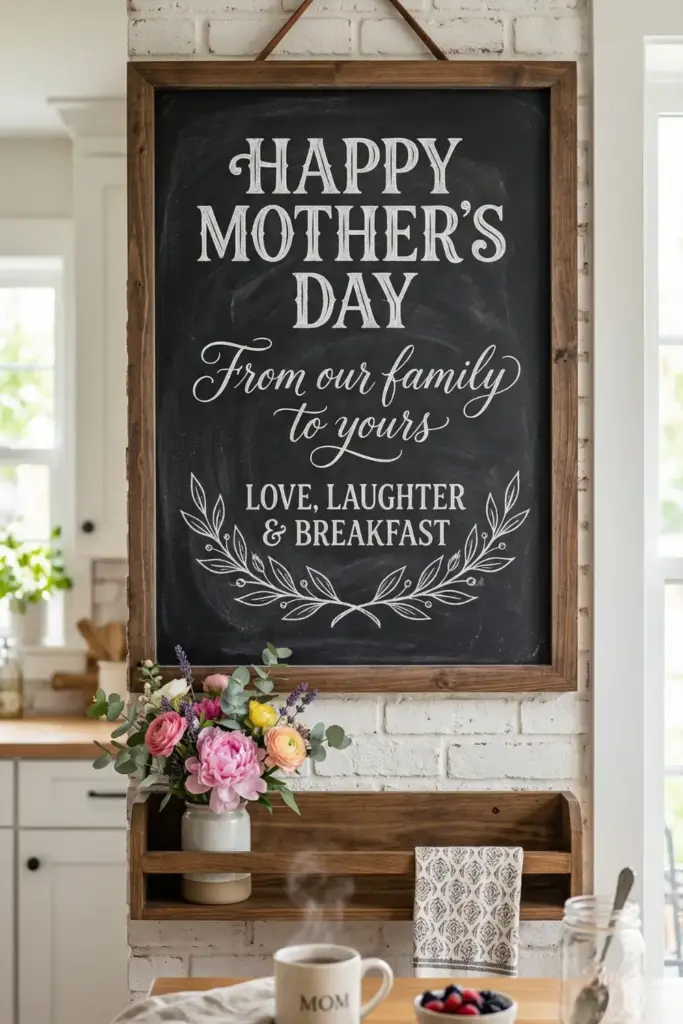
Want to surprise her at breakfast?
A chalkboard sign is temporary but makes a huge visual impact.
Steps:
- Season your chalkboard with a layer of chalk first.
- Use a chalk marker for crisp lines.
- Mix a bold serif font with a flowing script.
- Draw a simple laurel branch underneath.
Tip: If you mess up, a damp Q-tip is your best friend for precision erasing.
4. Gold Leaf Minimalist Card
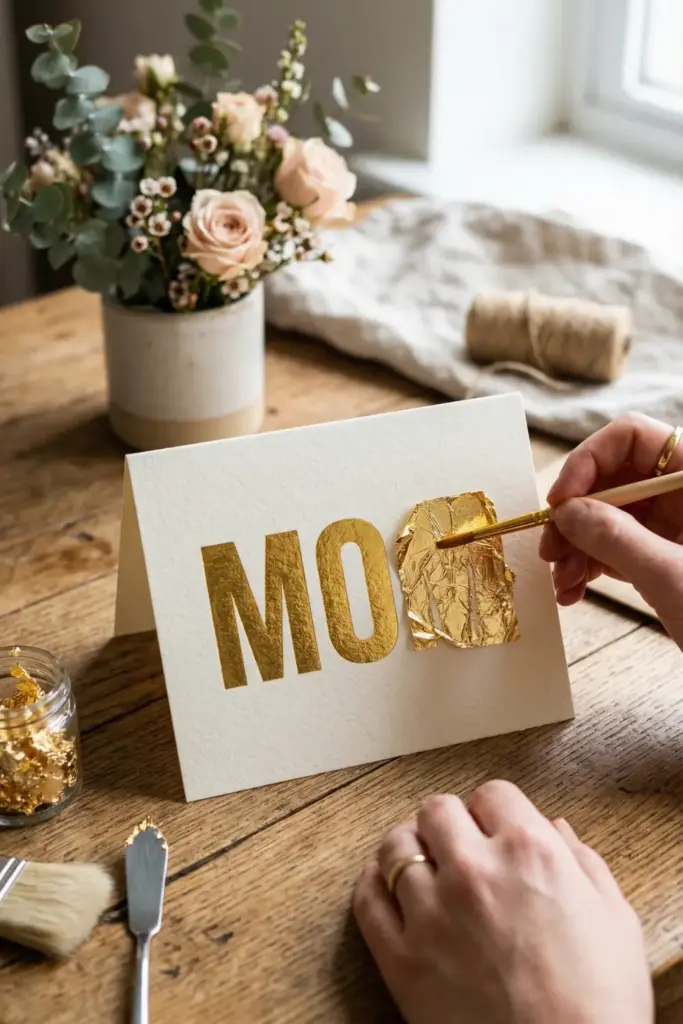
Nothing says “luxury” like a bit of metallic shine. This style is perfect for moms who love a clean, modern aesthetic.
Steps:
- Write “MOM” in large, blocky letters.
- Apply a thin layer of gilding glue to the letters.
- Carefully press gold leaf sheets onto the glue.
- Brush away the excess once dry.
Tip: Work in a room without a fan—gold leaf is so light it will fly away with the slightest breeze.
5. The “Infinity” Heart Design
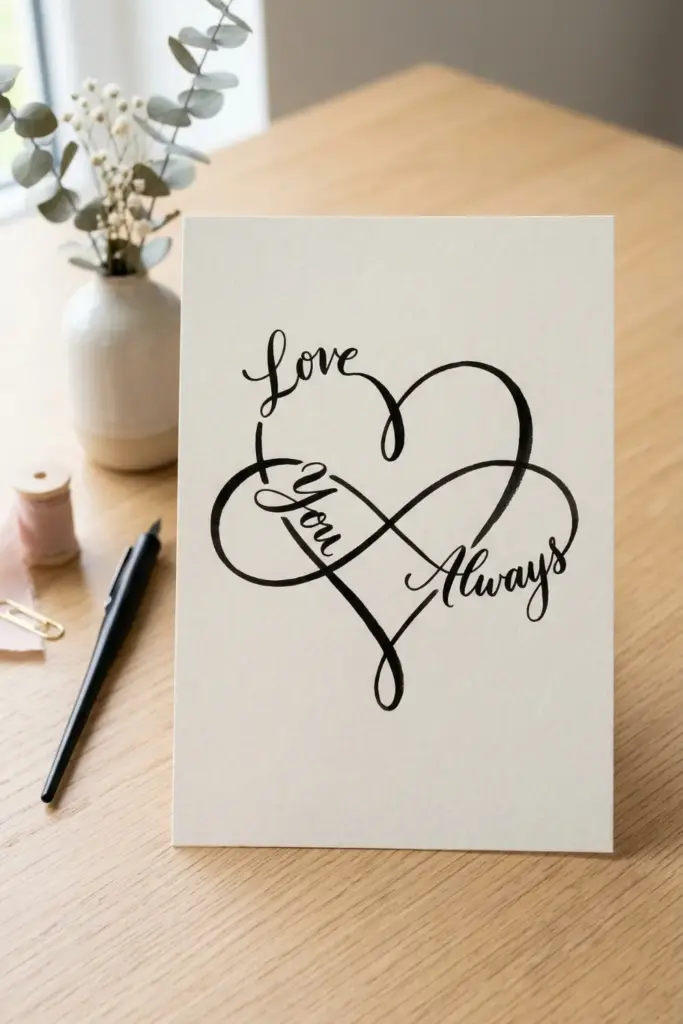
This one is a bit of a puzzle but looks incredible once finished.
It uses a single line to create a shape.
Steps:
- Draw a heart lightly in pencil.
- Write a string of words (like “Love You Always”) along the heart’s path.
- Connect the last letter of the last word back to the first.
- Erase the pencil guide.
Tip: Practice the word spacing on scrap paper first so you don’t run out of room at the “point” of the heart.
6. Botanical Monogram Letter
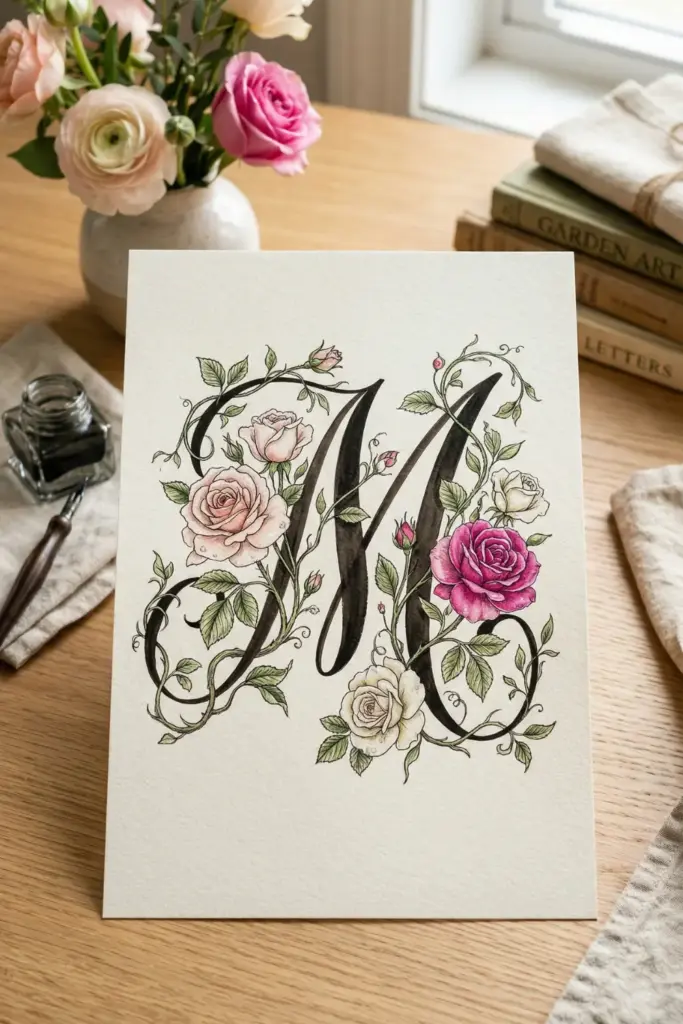
A personalized initial is a great piece of lettering & calligraphy design ideas decor that she can keep up year-round.
Steps:
- Trace a large version of her first initial.
- Intertwine hand-drawn vines or roses through the letter.
- Use a fine liner for the details and a brush pen for the letter.
- Add a splash of color to the flowers.
Tip: Vary the thickness of the vines to give the design more depth and realism.
7. Retro 70s Groovy Script
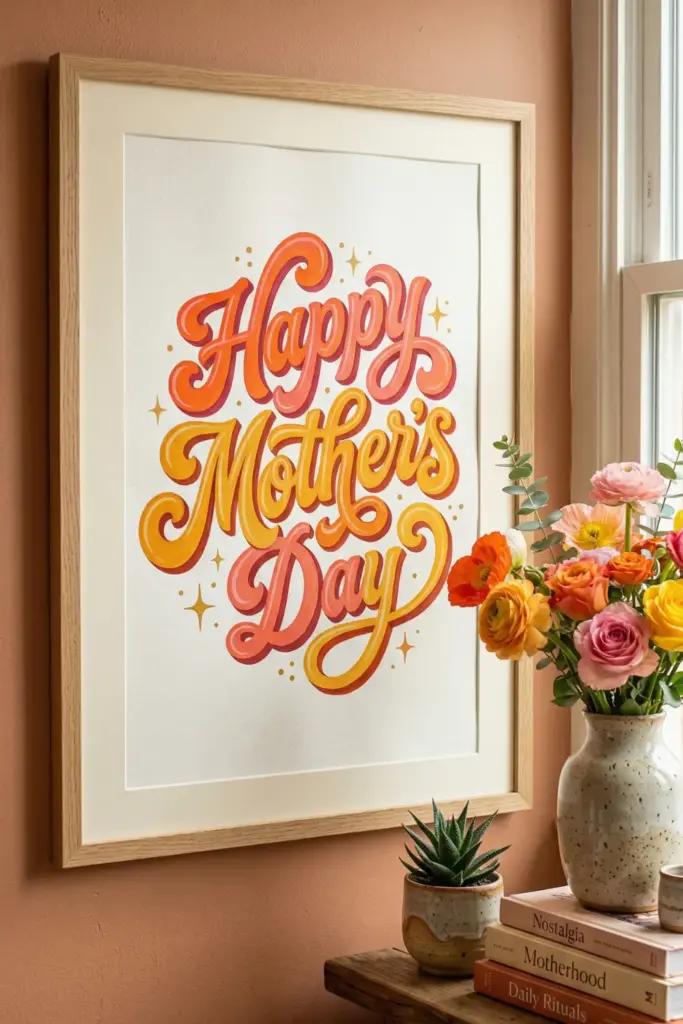
Retro is back in a big way.
This style is fun, vibrant, and full of personality.
Steps:
- Draw thick, bubbly letters with “tails.”
- Use a warm color palette (oranges, pinks, yellows).
- Add a “drop shadow” in a darker shade.
- Finish with some 4-pointed “sparkle” stars.
Tip: Use a light box or a window to trace your sketch onto your final paper for a cleaner look.
8. Shadow Box Lettering
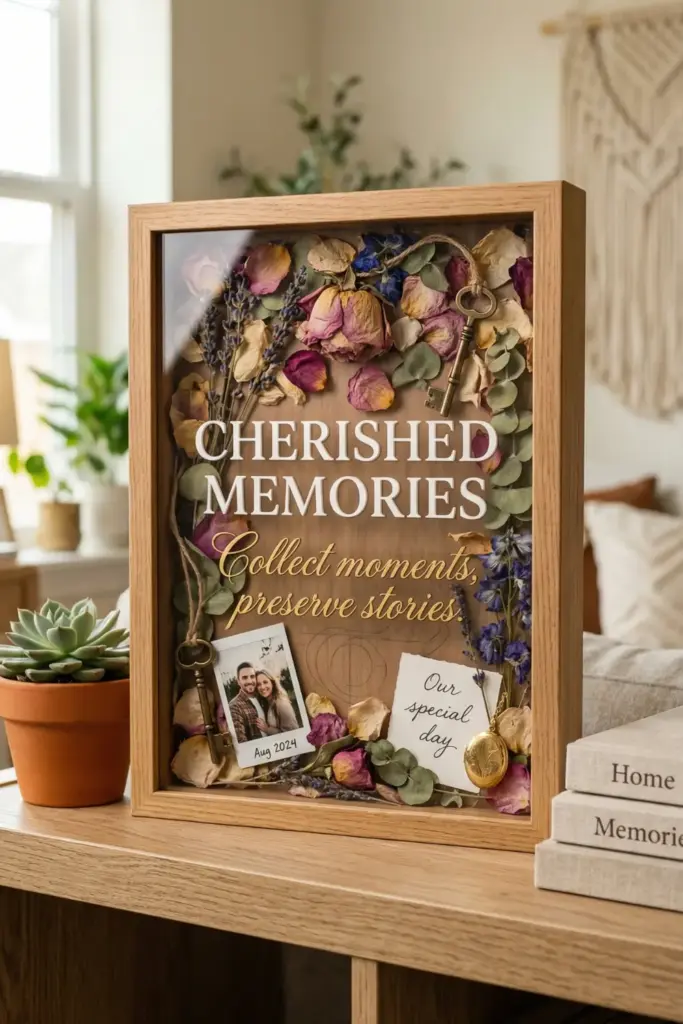
Create a 3D effect by lettering directly onto the glass of a shadow box filled with dried petals.
Steps:
- Clean the glass thoroughly with rubbing alcohol.
- Use an oil-based paint marker.
- Center your message and use a mix of “all caps” and script.
- Fill the box behind the glass with mementos.
Tip: Write your message on a piece of paper and tape it behind the glass to use as a tracing guide.
9. Ombre Brush Lettering
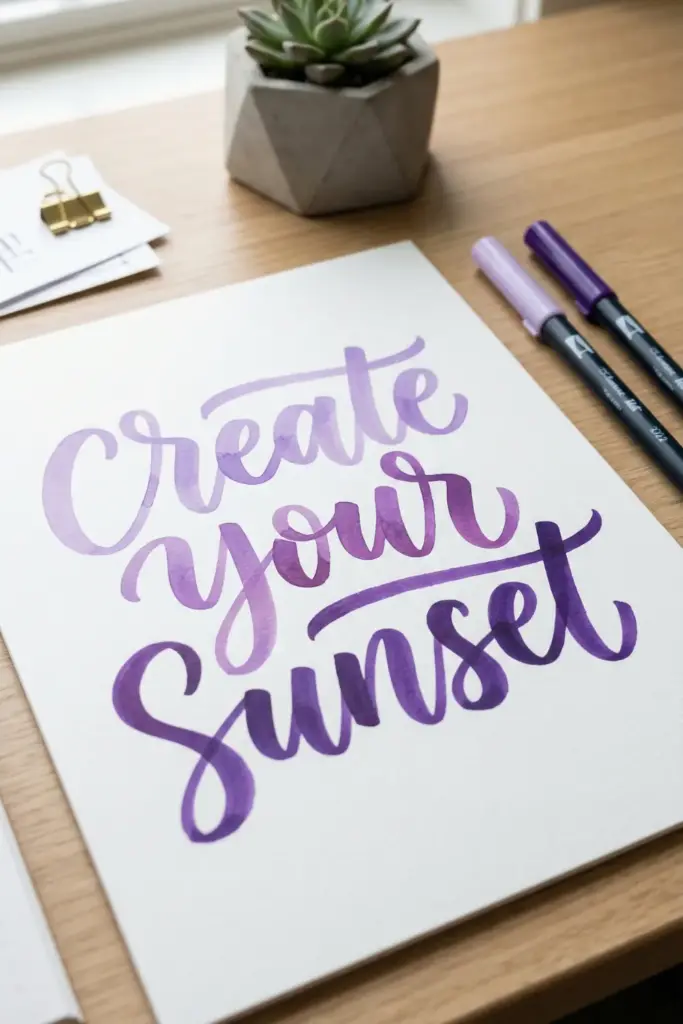
Blending colors creates a sunset-like effect that is mesmerizing to look at.
Steps:
- Pick two markers in the same color family (like light and dark purple).
- Touch the tips of the markers together to transfer ink.
- Start lettering; the color will naturally fade from dark to light.
- Smooth out transitions with a blending pen.
Tip: Use high-quality markers; cheap ones might bleed or damage the tips when touched together.
10. Simple Kraft Paper Tags
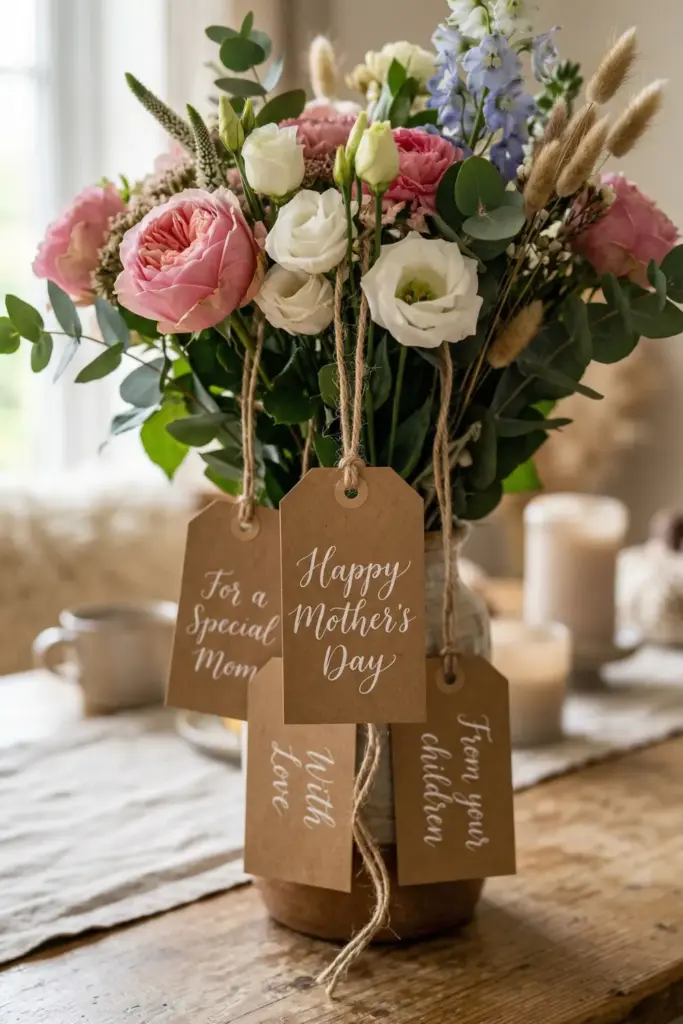
Sometimes, less is more. These are perfect for tying onto a bouquet of flowers.
Steps:
- Cut small rectangles out of brown kraft paper.
- Use white ink for a “blackboard” look.
- Add a single, delicate line of calligraphy.
- Punch a hole and add some twine.
Tip: White ink can be finicky; a high-quality white gel pen or gouache usually works best.
11. Stippled Texture Design
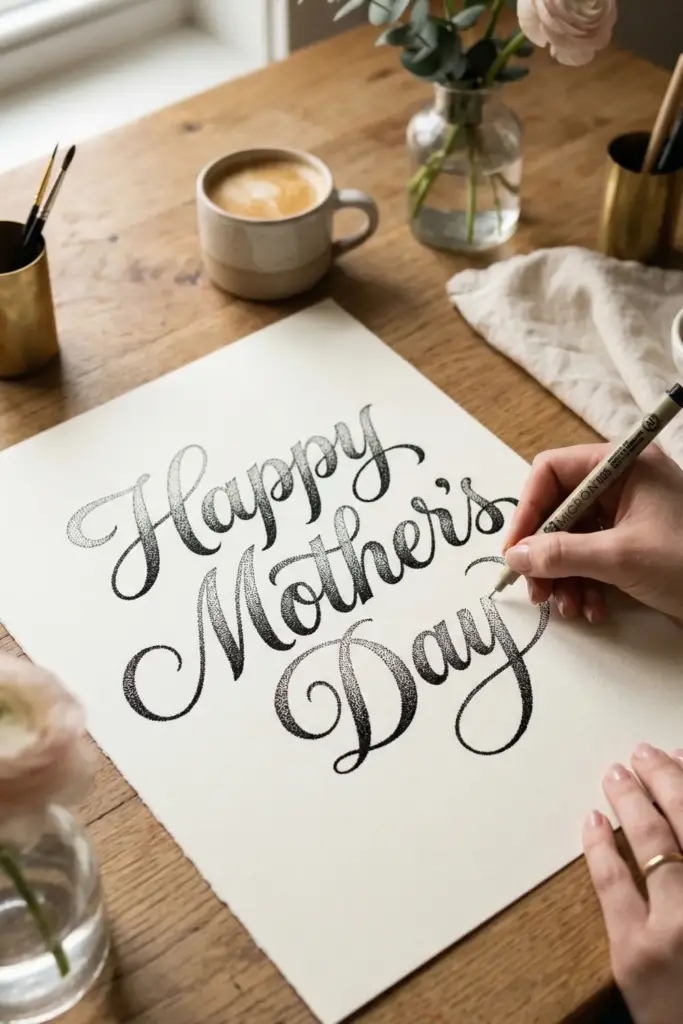
This takes patience, but the “dot” effect creates a cool, vintage-print vibe.
Steps:
- Outline your letters in a light color.
- Use a fine-point black pen to fill the letters with tiny dots.
- Make the dots denser in the areas where you want shadows.
- Keep the tops of the letters “lighter” with fewer dots.
Tip: Don’t rush! If the dots turn into dashes, the effect is lost.
12. Negative Space Florals
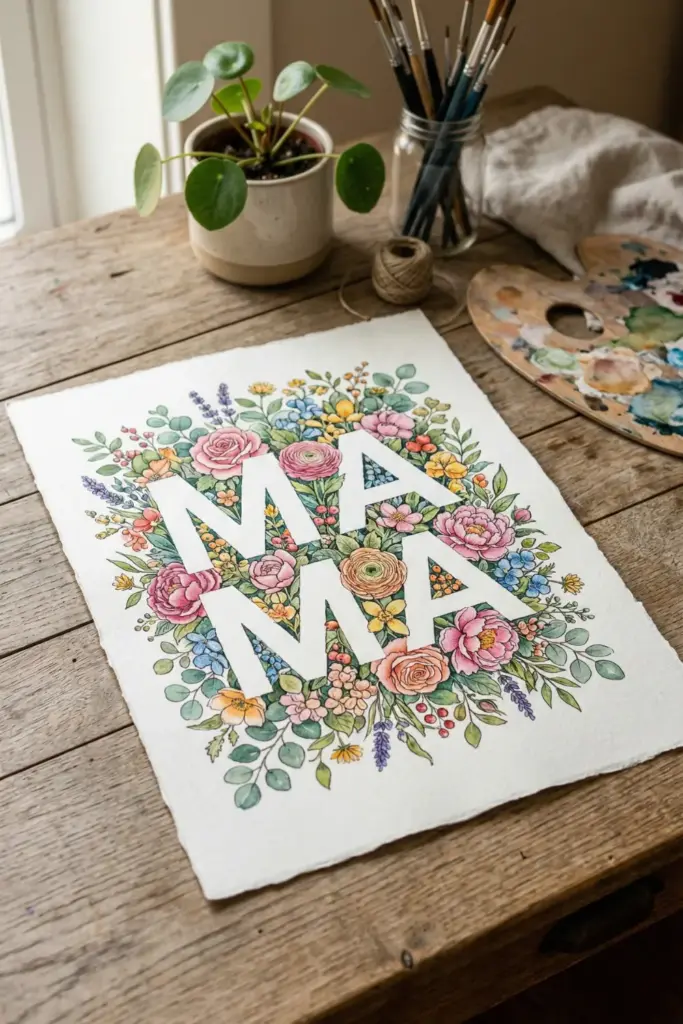
Instead of drawing the letters, you draw everything around them.
Steps:
- Place letter stickers on your paper to spell a word.
- Draw dense flowers and leaves all around the stickers.
- Make sure the edges of the stickers are completely covered in ink/paint.
- Peel the stickers off to reveal the white paper underneath.
Tip: Use low-tack stickers so you don’t rip the paper when you peel them off.
13. Layered Vellum Overlays

This adds a sophisticated, “boutique” feel to a Mother’s Day card.
Steps:
- Letter your main message on a piece of vellum (translucent paper).
- Place a colorful illustration on the cardstock underneath.
- Secure the vellum with a brass brad or a ribbon.
- The colors will show through softly.
Tip: Vellum takes a long time to dry; give the ink at least 20 minutes before touching it.
14. Embossed Heat Lettering
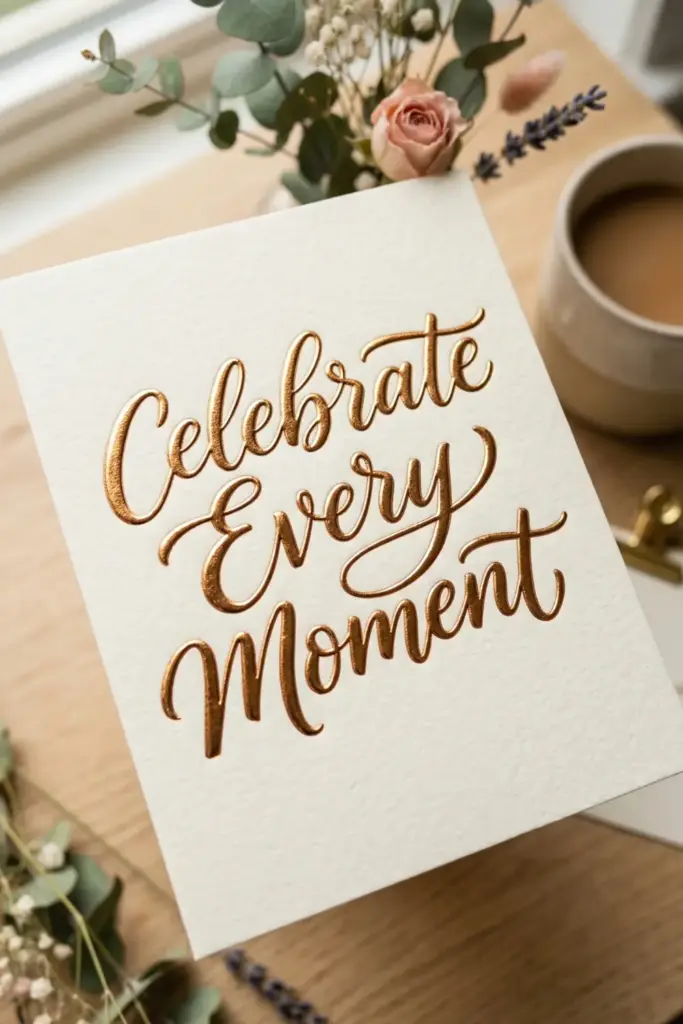
This is basically magic.
You write with a special pen, add powder, and melt it into a raised, shiny surface.
Steps:
- Write your message with an embossing ink pen.
- Sprinkle embossing powder over the wet ink.
- Shake off the excess powder.
- Use a heat tool to melt the powder until it turns shiny.
Tip: Hold the heat tool about 3 inches away and keep it moving to avoid scorching the paper.
15. The “Envelope Art” Surprise
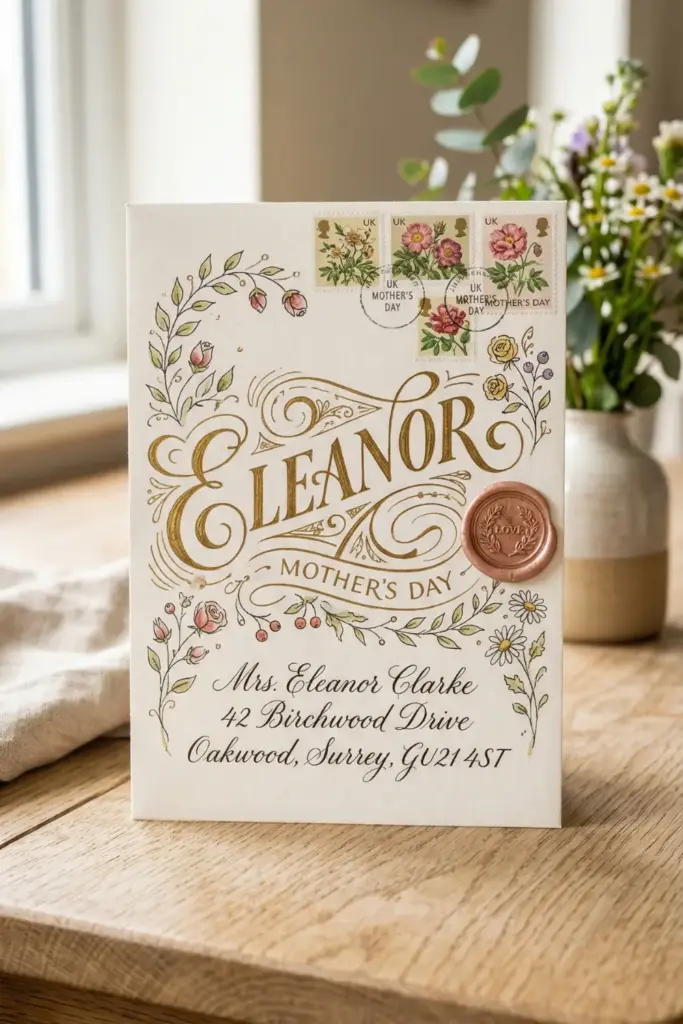
Why wait for her to open the card?
Start the lettering & calligraphy design ideas right on the envelope.
Steps:
- Letter her name in large, ornate script across the front.
- Incorporate the stamps into the design.
- Add small botanical doodles around the address.
- Seal it with a wax stamp if you’re feeling extra.
Tip: Check with your post office if the design is too wild; they need to be able to read the address!
16. Ribbon Lettering Style

This makes your letters look like they are folded pieces of silk ribbon.
Steps:
- Sketch out a script word.
- Add “folds” where the letters curve.
- Use a darker shade of the same color to shade the underside of the folds.
- Add a white highlight on the “top” of the ribbon.
Tip: Imagine a light source coming from one corner to keep your highlights and shadows consistent.
17. Hand-Lettered Recipe Keepsake
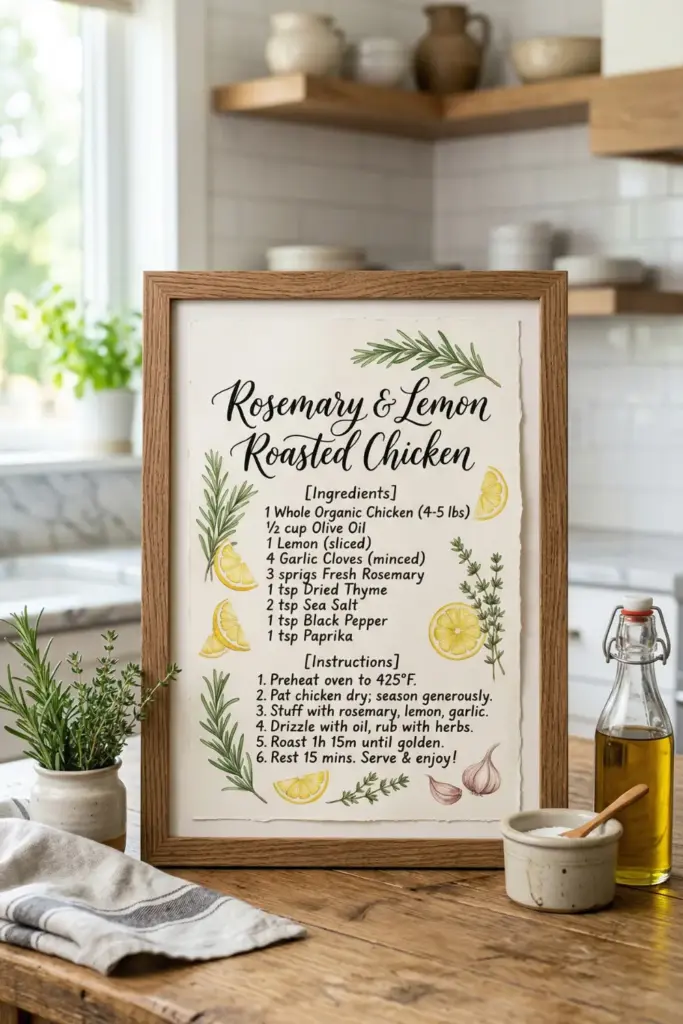
Take one of her signature recipes and turn it into art.
Steps:
- Write the title of the dish in large calligraphy.
- Use a clean, legible print for the ingredients.
- Add small illustrations of the ingredients (like a sprig of rosemary).
- Frame it for the kitchen.
Tip: Use archival ink so the steam and light in the kitchen don’t fade the writing over time.
18. Coffee-Stained Vintage Scroll
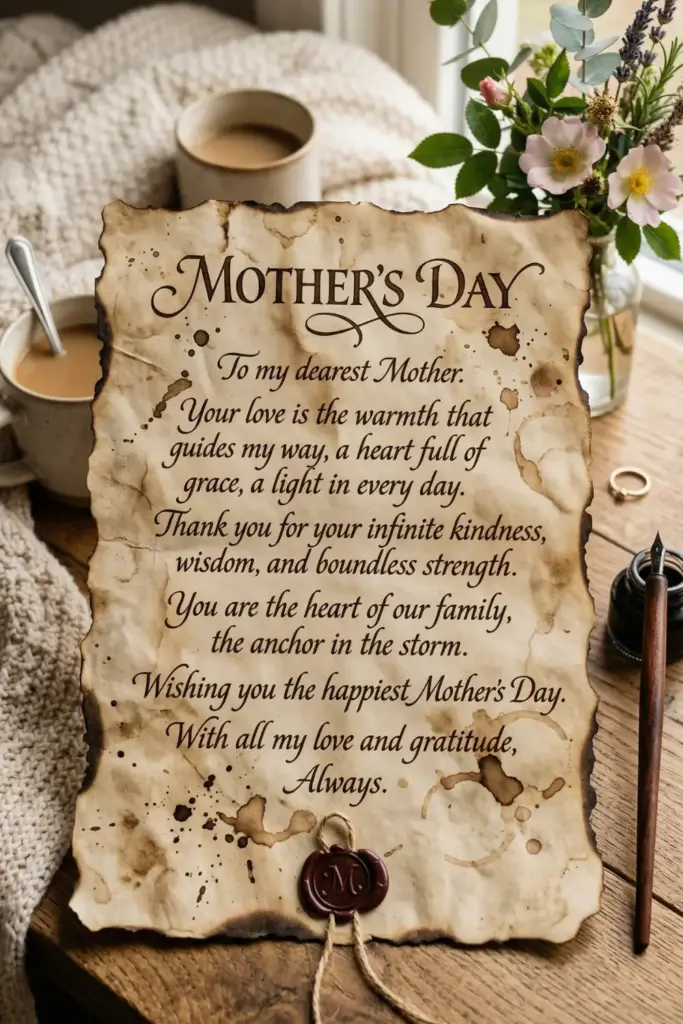
For the mom who loves antiques and a good cup of joe.
Steps:
- Dip a tea bag or coffee-soaked cloth into your paper.
- Let it dry completely (it will crinkle, which is good!).
- Use a dip pen and black India ink for a Victorian look.
- Burn the edges slightly for an “old map” feel.
Tip: Be careful with the fire! Do it over a sink and have water nearby.
19. Geometric Frame Design
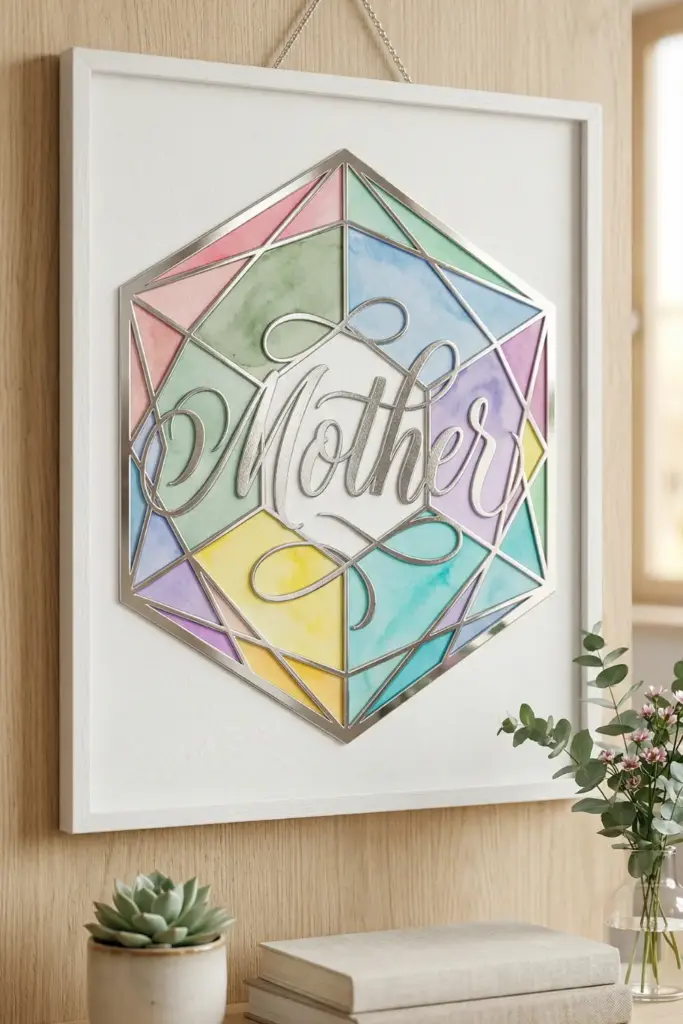
A sharp, angular frame provides a great contrast to soft, loopy calligraphy.
Steps:
- Draw a hexagon or diamond shape with a ruler.
- Letter the word “Mother” so it breaks the lines of the shape.
- Color the sections inside the shape differently.
- Keep the background minimal.
Tip: Use a metallic silver pen for the geometric lines to give it a jewelry-like finish.
20. The “Lined” Script
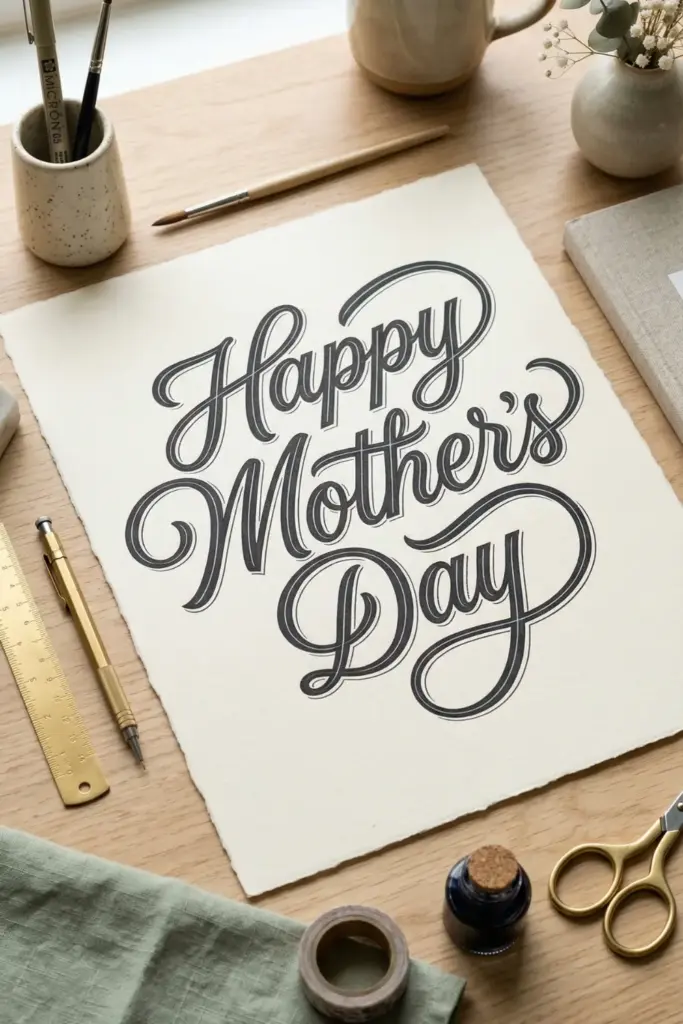
This is a simple way to add complexity to basic lettering without needing a lot of skill.
Steps:
- Write a word in a thick, monoline script.
- Draw a second, thinner line inside the first one.
- Add horizontal “hatch” marks between the two lines.
- It creates an architectural, technical look.
Tip: Use a ruler for the hatch marks if you want a very “clean” industrial vibe.
Final Thoughts
Whatever design you choose, remember that the “perfect” look isn’t the goal; the effort is.
These lettering & calligraphy design decor tips are meant to be a jumping-off point.
You are welcome to mix and match styles!
Maybe do an ombre effect inside a geometric frame or use gold leaf on a coffee-stained scroll.
The more you personalize it to her taste, the more she’ll cherish it.
Happy creating!