Summer is basically synonymous with one specific, sun-drenched color: coral.
It’s that perfect middle ground between “I’m a professional adult” and “I’m currently sipping a margarita on a beach in Tulum.”
Whether you’re a DIY queen or someone who just wants to point at a picture in the salon, finding the right coral summer nail designs can feel like searching for a needle in a haystack of neon pinks and boring beiges.
We’ve all been there—staring at the polished wall until the colors start to blur.
This guide is your ultimate shortcut to a chic, seasonal look.
I’ve rounded up 15 stunning, easy-to-recreate ideas that range from minimalist vibes to fun, punchy accents.
You’re going to get step-by-step instructions for each look, plus professional-level tips to make that manicure last through every pool day and backyard BBQ on your calendar.
1. Coral Ombre Fade – Smooth gradient from soft peach to bright coral on short nails.
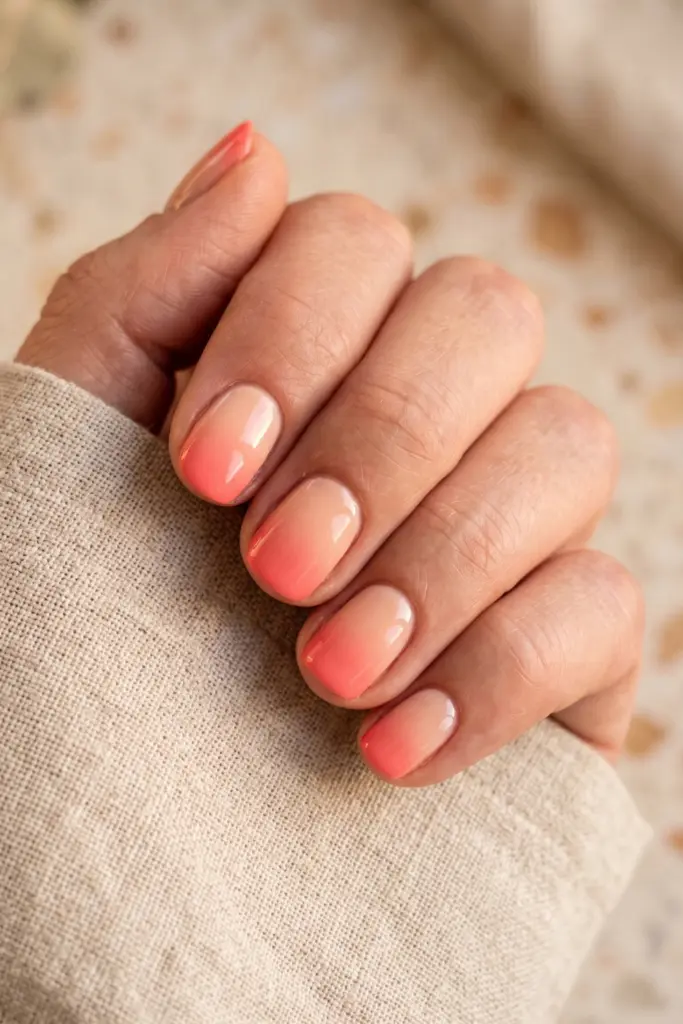
This look is a total mood for those late-summer evenings when the sky looks like a literal painting.
It blends a soft, creamy peach into a vibrant coral for a seamless, dreamy effect that looks way pricier than it actually is to do at home.
It’s the ultimate “vacation mode” aesthetic.
Steps:
- Apply a light peach base coat and let it dry completely.
- On a makeup sponge, paint a horizontal stripe of peach and a stripe of bright coral.
- Dab the sponge onto your nails, moving it slightly up and down to blur the line.
- Finish with a high-gloss top coat to smooth out the texture.
Tip: Use a liquid latex barrier or even just some Scotch tape around your cuticles before sponging for a way faster cleanup.
2. Coral French Tips – Classic French manicure with coral tips instead of white.
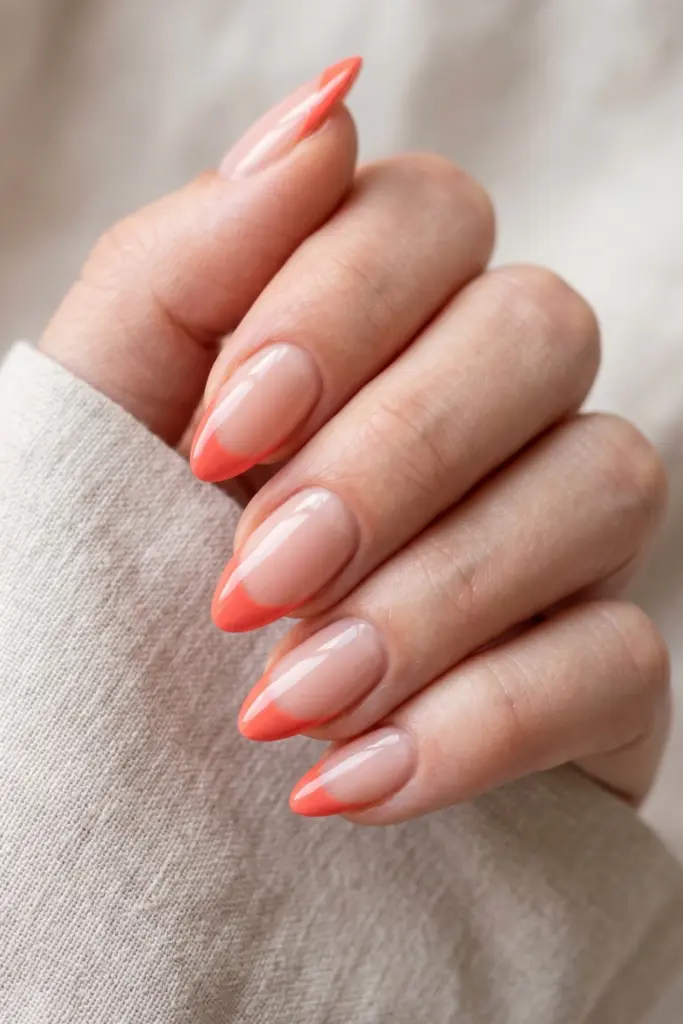
Forget those 90s-style stark white tips for a second.
Coral gives the traditional French mani a spicy, modern update that feels fresh and unexpected.
It’s understated enough for the office but still screams “I have a beach trip planned.”
Plus, it makes your nail beds look miles long.
Steps:
- Shape your nails into a clean almond or square shape.
- Apply a sheer, “your nails but better” nude or pink base.
- Using a thin detail brush, carefully paint the tips of your nails with coral.
- Seal the deal with a clear top coat.
Tip: Use a liquid latex barrier or even just some Scotch tape around your cuticles before sponging for a way faster cleanup.
3. Coral & Gold Glitter Accent – Solid coral nails with one gold glitter accent nail.
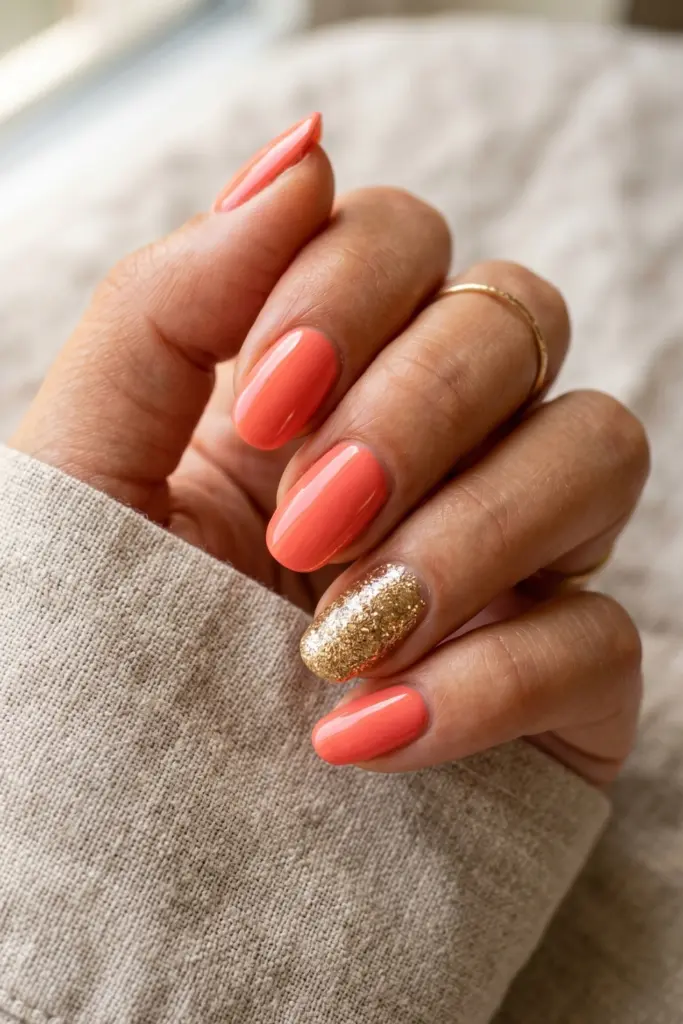
Let’s be real, sometimes a solid color needs a little “wow” factor to keep things interesting.
Gold and coral are basically a match made in heaven—warm, rich, and incredibly flattering on sun-kissed skin.
This is the “lazy girl’s” way to look like you spent hours at the salon.
Steps:
- Paint four of your nails with two coats of vibrant coral.
- On your ring finger, apply a layer of dense gold glitter polish.
- Add a second coat of glitter to ensure there are no “bald” spots.
- Apply a thick top coat to everything to prevent the glitter from feeling scratchy.
Tip: For the glitter nail, sponge the polish on rather than brushing it to get 100% opacity in one go.
4. Matte Coral with Glossy Stripes—Matte-finish coral nails with thin glossy vertical stripes.
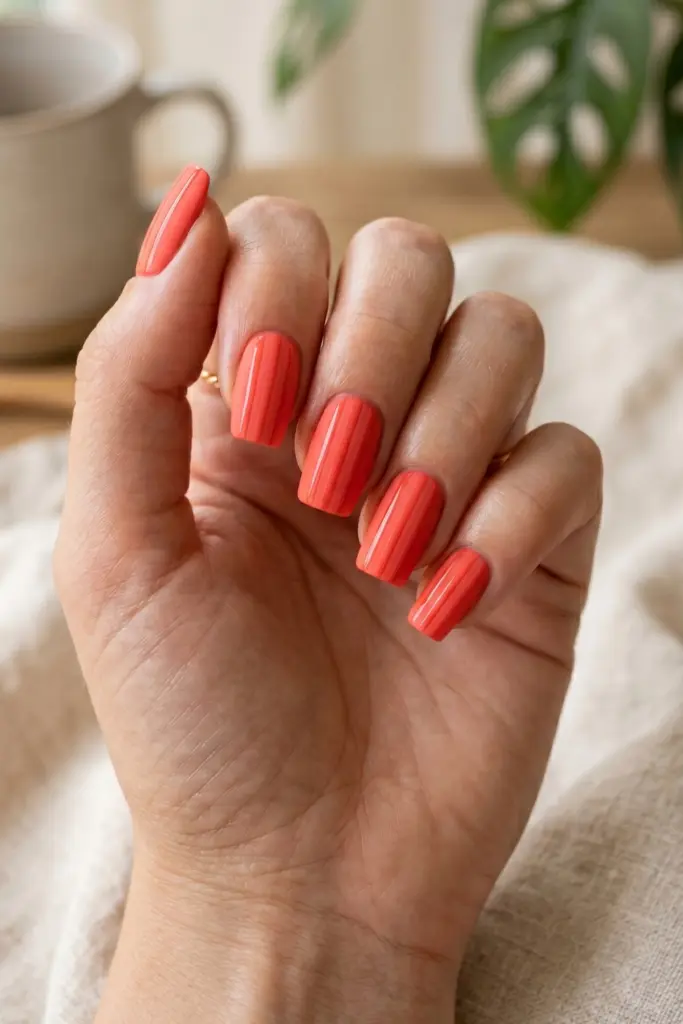
Mixing finishes is such a pro move that most people overlook.
This design plays with light and shadow, using a flat matte base and shiny stripes to create a sophisticated, architectural look.
It’s subtle, but people will definitely grab your hand to get a closer look at the texture.
Steps:
- Apply two coats of coral polish and let dry.
- Apply a matte top coat over the entire nail.
- Once matte, use a thin brush to paint vertical lines using a standard glossy topcoat.
- Let it air dry—do not add another top coat or you’ll lose the contrast!
Tip: Keep the glossy stripes very thin; it makes the design look much more refined and “editorial.”
5. Coral Polka Dots on Nude—Sheer nude base with tiny coral polka dots.
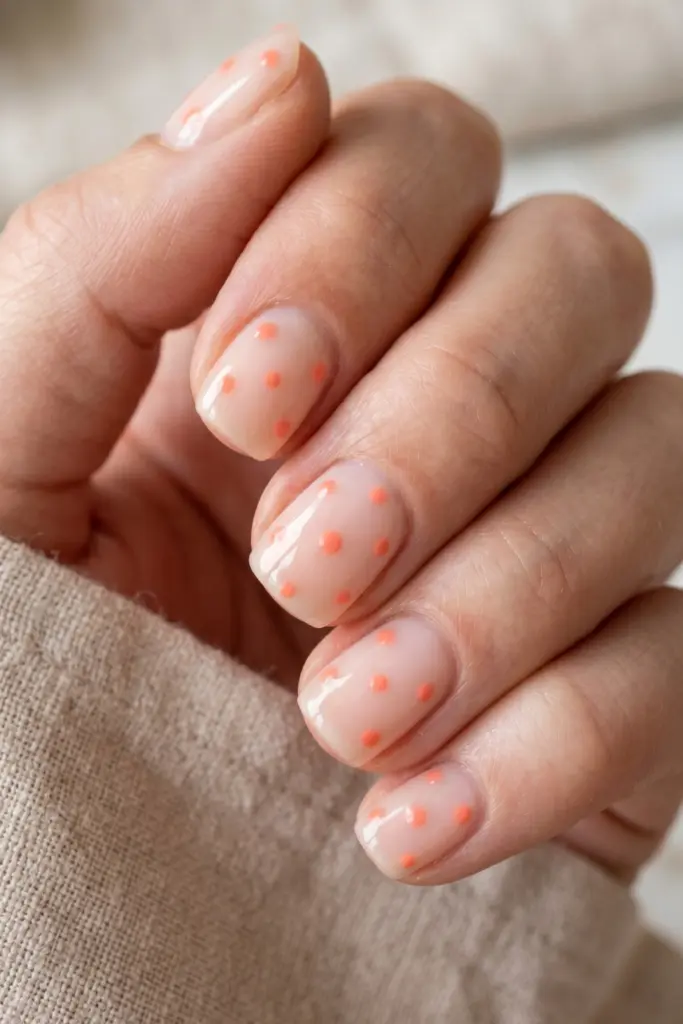
If you’re a fan of the “clean girl aesthetic” but still want a tiny pop of color, this is your winner.
Tiny dots on a nude base look intentional and chic without being overwhelming.
It’s playful, it’s cute, and it goes with literally every outfit in your closet.
Steps:
- Apply one or two coats of a sheer, milky nude base.
- Grab a dotting tool (or the end of a bobby pin—we love a hack).
- Dip the tool in coral and place three to five random dots on each nail.
- Finish with a protective top coat.
Tip: Varying the size of the dots slightly gives the design more visual interest and a “designer” feel.
6. Coral Diagonal Color Block – Two-tone coral and peach diagonal split design.
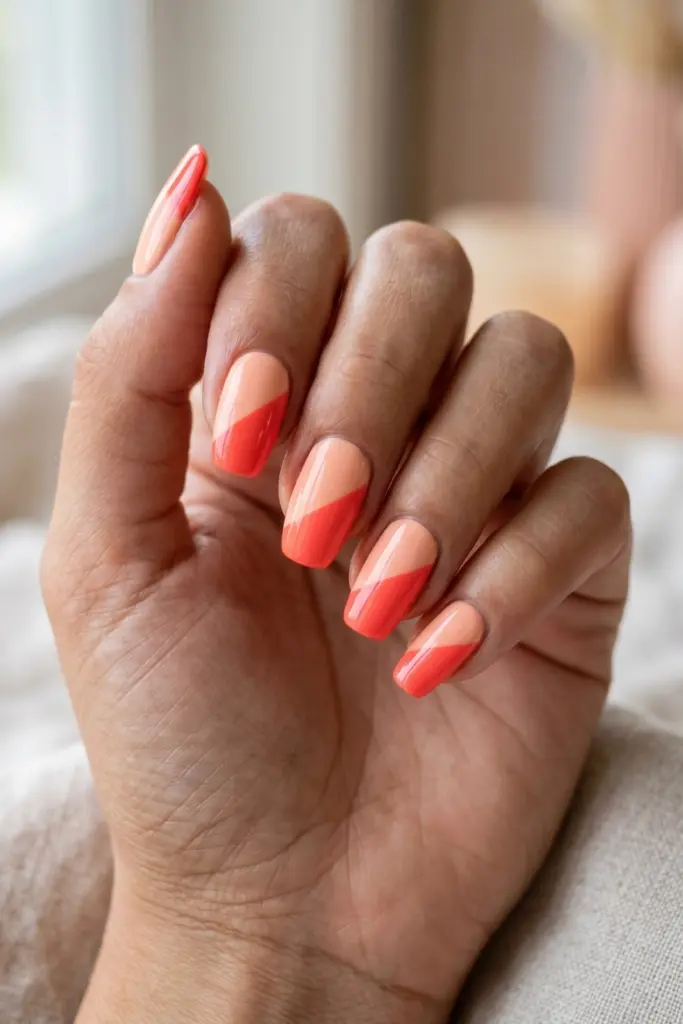
This is for the person who loves a bit of geometric structure.
Combining two shades from the same color family adds depth without the chaos of a full rainbow.
It looks sharp, modern, and very “art gallery chic.”
Steps:
- Paint the entire nail with a soft peach shade.
- Once dry, place a piece of striping tape diagonally across the nail.
- Paint the upper half with a bright coral polish.
- Remove the tape immediately while the polish is still wet for a crisp line.
Tip: Always pull the tape away from the wet polish in one smooth motion to avoid jagged edges.
7. Coral Floral Daisies – White daisy flowers hand-painted on a coral background.
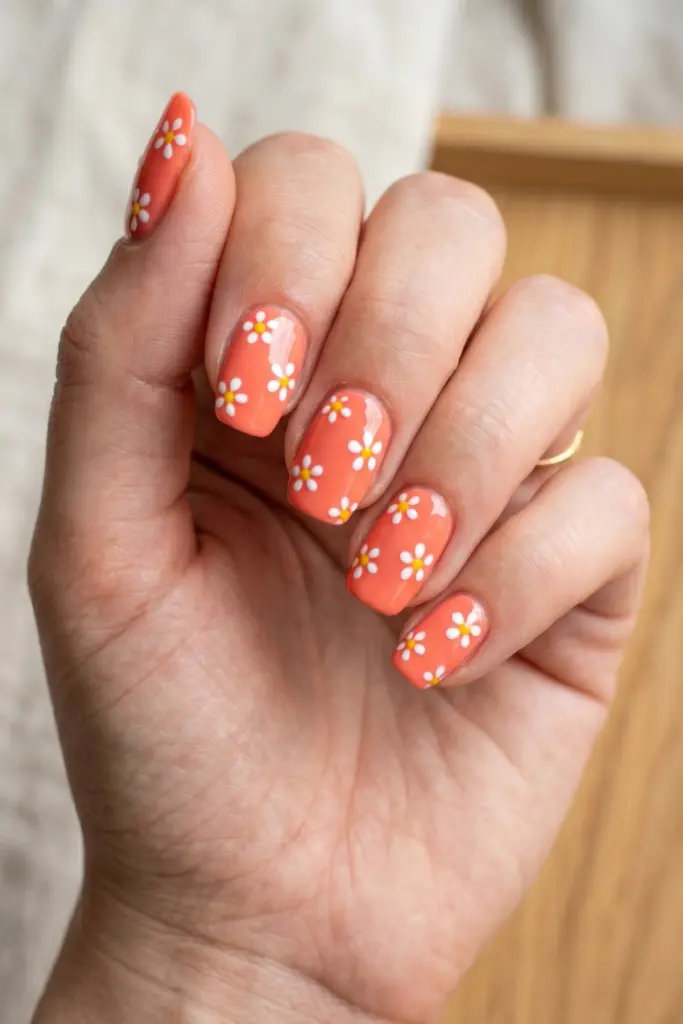
Florals for summer? Groundbreaking.
But actually, white daisies on a coral background feel youthful and incredibly vibrant.
It’s like wearing a summer sundress on your fingertips.
It’s a great way to hide any little imperfections in your base coat, too.
Steps:
- Apply two coats of your favorite coral polish.
- Use a dotting tool to create five small white dots in a circle for the petals.
- Add a single yellow dot in the center of the petals.
- Let the flowers dry for a few minutes before applying a top coat.
Tip: Don’t worry about perfect petals; organic, slightly messy shapes actually look more like real flowers!
8. Coral Swirl Marble – Soft white and coral marble swirl on oval nails.
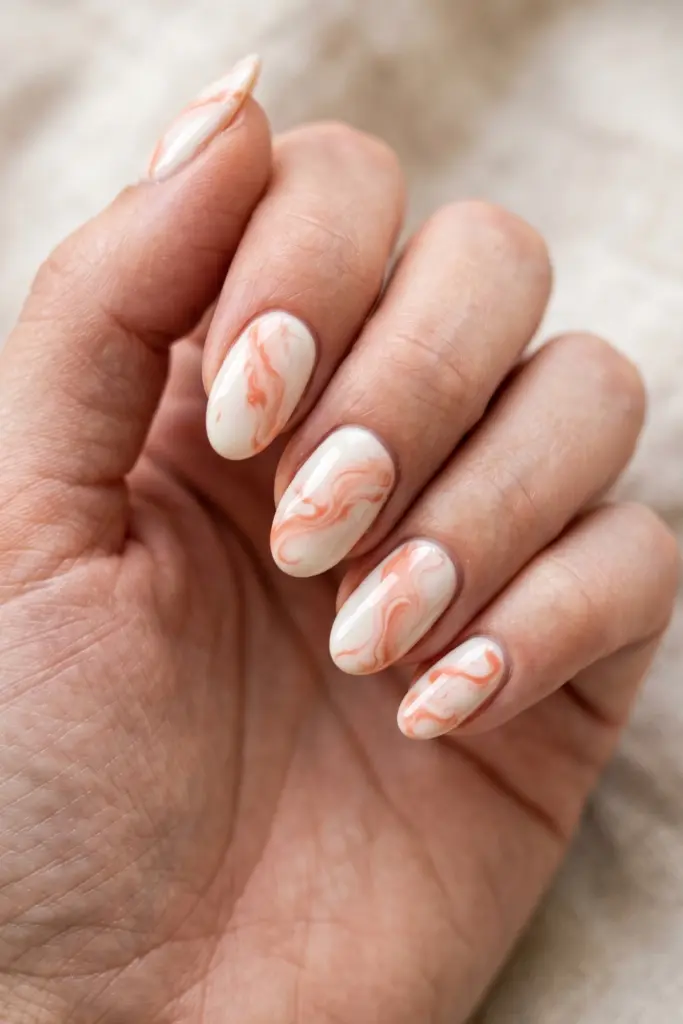
Marbling looks incredibly intimidating, but this swirl technique is actually quite forgiving.
It mimics the movement of water or expensive stone and looks incredibly high-end, especially on oval or almond-shaped nails.
No two nails will look the same, which is part of the charm.
Steps:
- Apply a fresh coat of white polish.
- While the white is still wet, add a few drops of coral polish.
- Use a toothpick or a fine brush to gently swirl the colors together.
- Let it dry completely and seal with a thick, glossy top coat.
Tip: Less is more with the swirling; if you mix too much, the colors will just blend into a solid, muddy orange.
9. Coral Half-Moon Manicure – Bare half-moon at the cuticle with coral covering the rest.
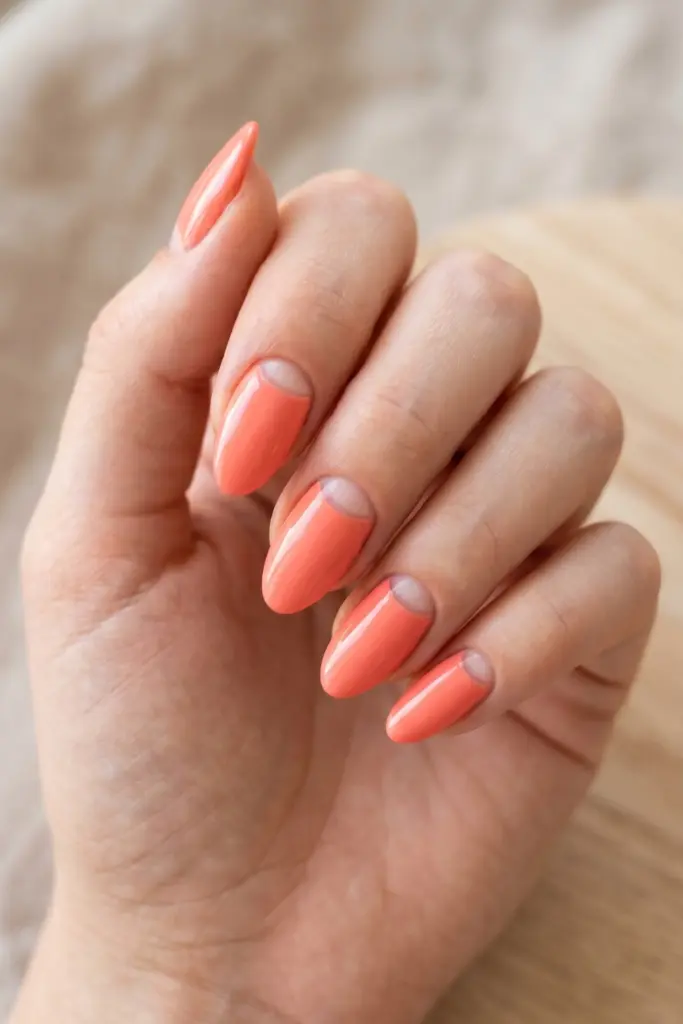
This 1920s-inspired look is making a massive comeback.
Leaving the “moons” at the base of your nails bare (or nude) creates a cool negative space effect.
The best part? It grows out beautifully, so you can squeeze an extra week out of your mani.
Steps:
- Place circular “hole reinforcement” stickers over the base of your nails.
- Paint the rest of the nail with two coats of coral.
- Carefully peel off the stickers while the polish is still slightly tacky.
- Apply a top coat to protect the edges.
Tip: Make sure the stickers are pressed down firmly at the edges so the coral polish doesn’t leak underneath.
10. Coral Leopard Spots – Pale coral base with deeper coral leopard print dots.
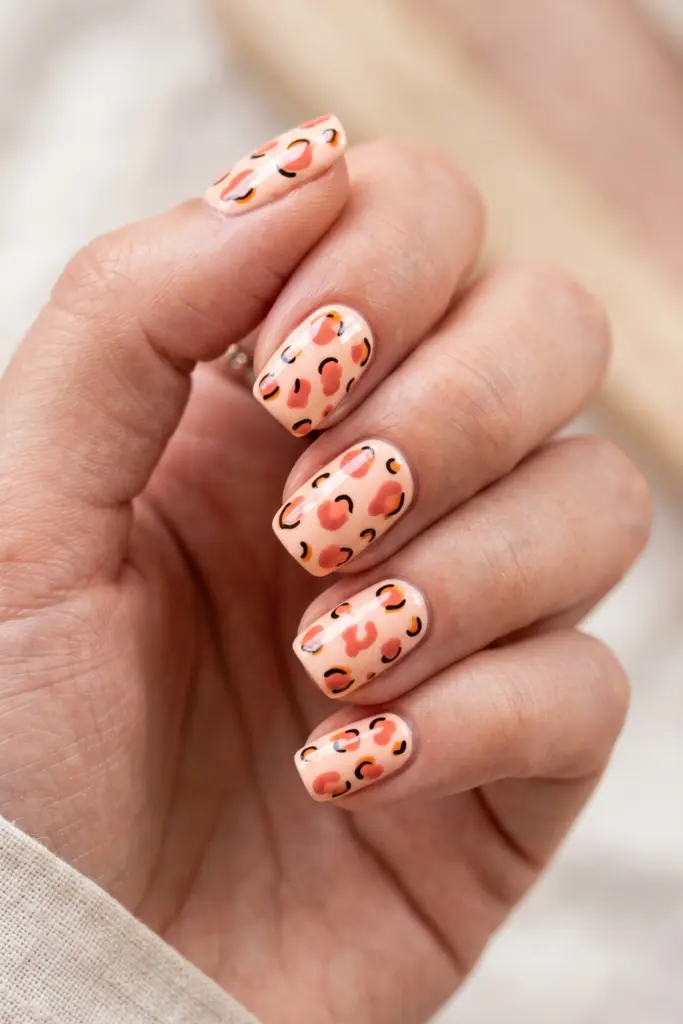
Animal print doesn’t always have to be edgy or dark.
Using two different shades of coral makes leopard print feel soft, feminine, and totally summery.
It’s a “wild” look that still feels sophisticated enough for a brunch date.
Steps:
- Apply a pale, creamy coral as your base color.
- Use a darker, punchier coral to make irregular “blobs” on the nail.
- Using a thin brush or toothpick, add tiny black or dark orange “brackets” around the blobs.
- Seal everything with a top coat.
Tip: Leopard print is supposed to be irregular, so don’t stress over making the spots perfect circles.
11. Coral & Silver Micro Glitter – Sheer coral base packed with fine silver glitter.
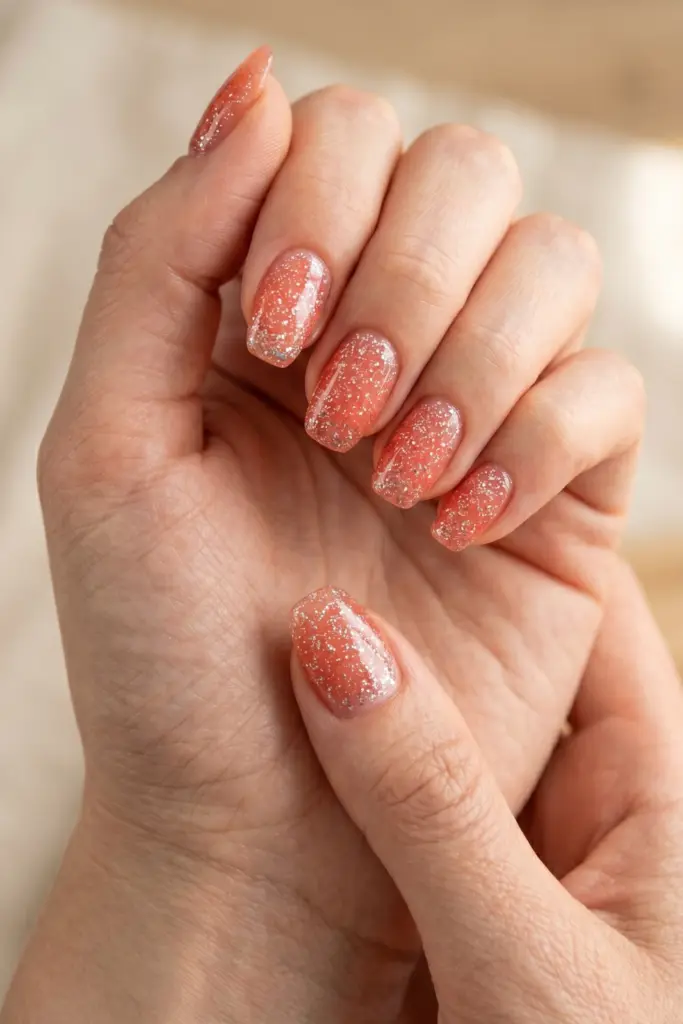
This is for the mermaid-core lovers out there.
A sheer coral base with fine silver glitter looks exactly like sunlight hitting the water.
It’s ethereal, sparkly, and surprisingly low-maintenance because it hides chips so well.
Steps:
- Apply one thin coat of a sheer coral “jelly” polish.
- Apply a silver micro-glitter topper while the first coat is still tacky.
- Add a second thin coat of sheer coral over the glitter for a “layered” look.
- Finish with a high-shine top coat.
Tip: This specific design is a lifesaver for long vacations because the glitter and sheer base make regrowth almost invisible.
12. Coral Abstract Brush Strokes – Messy coral and white brush strokes on a clear base.
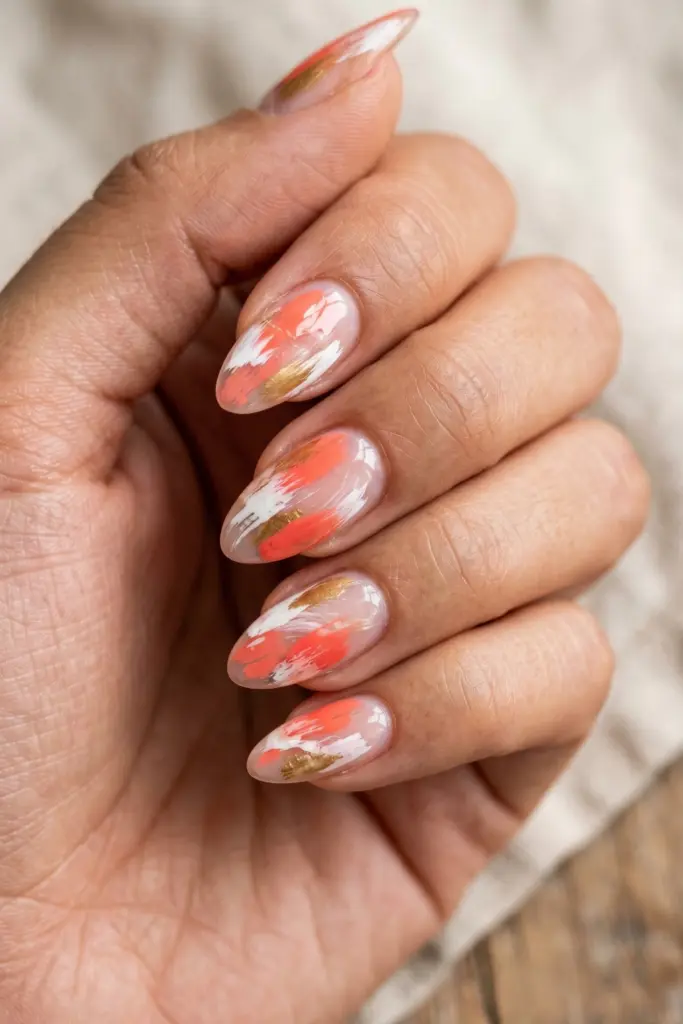
No precision is required here, which is a total win for the “not-so-artistic” among us.
Abstract strokes on a clear or nude base look very “cool girl” and editorial.
It’s the perfect design for someone who wants to look like they spent a lot of money at a trendy boutique salon.
Steps:
- Wipe most of the polish off your brush until it’s nearly dry.
- Swipe the coral polish randomly across a clear base coat.
- Repeat the process with a white or gold polish for contrast.
- Apply a top coat to flatten the brushstroke texture.
Tip: The key is the “dry brush” technique—you want to see those little wispy lines at the end of each stroke.
13. Coral Shell Pearl Accents – Solid coral nails with small pearl and shell stickers.
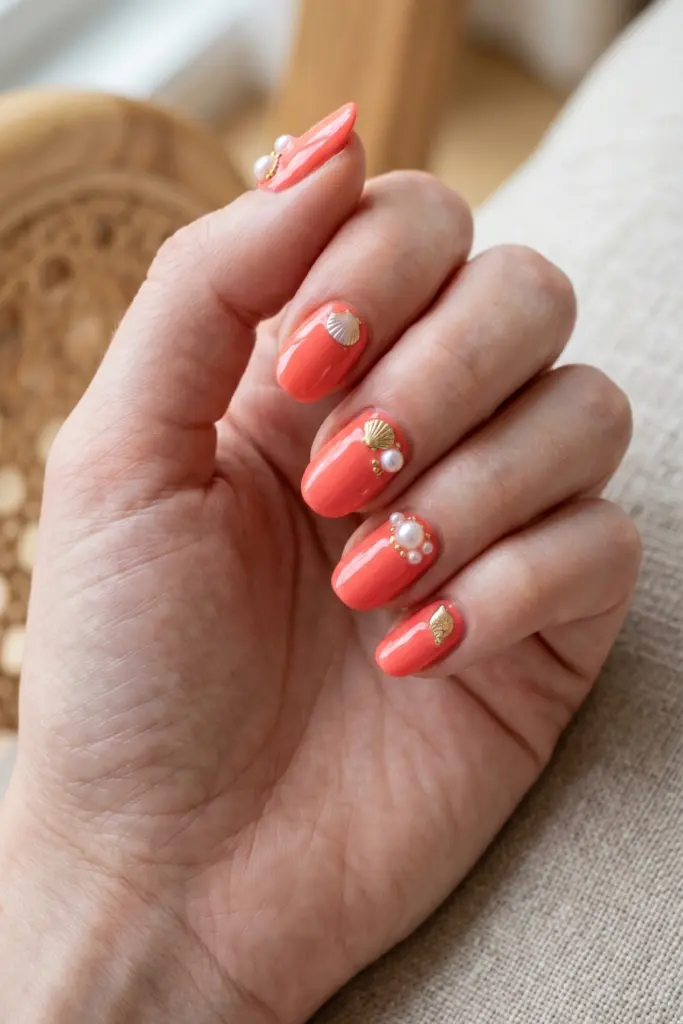
If you want something a bit more tactile and 3D, adding tiny pearl or shell charms is the way to go.
It’s elegant, beachy, and fits right in with that “Coastal Grandmother” aesthetic we all love.
It turns your nails into actual jewelry.
Steps:
- Paint your nails a solid, vibrant coral.
- Apply a tiny drop of nail glue or a thick dollop of top coat where you want the charm.
- Use tweezers to place a tiny pearl or shell sticker/charm.
- Secure everything with a very thick “plumping” top coat.
Tip: Use a wax pencil (or even an old eyeliner pencil) to pick up the tiny charms without them flying across the room.
14. Coral Diagonal Stripes – Thin coral and white diagonal stripes on almond nails.
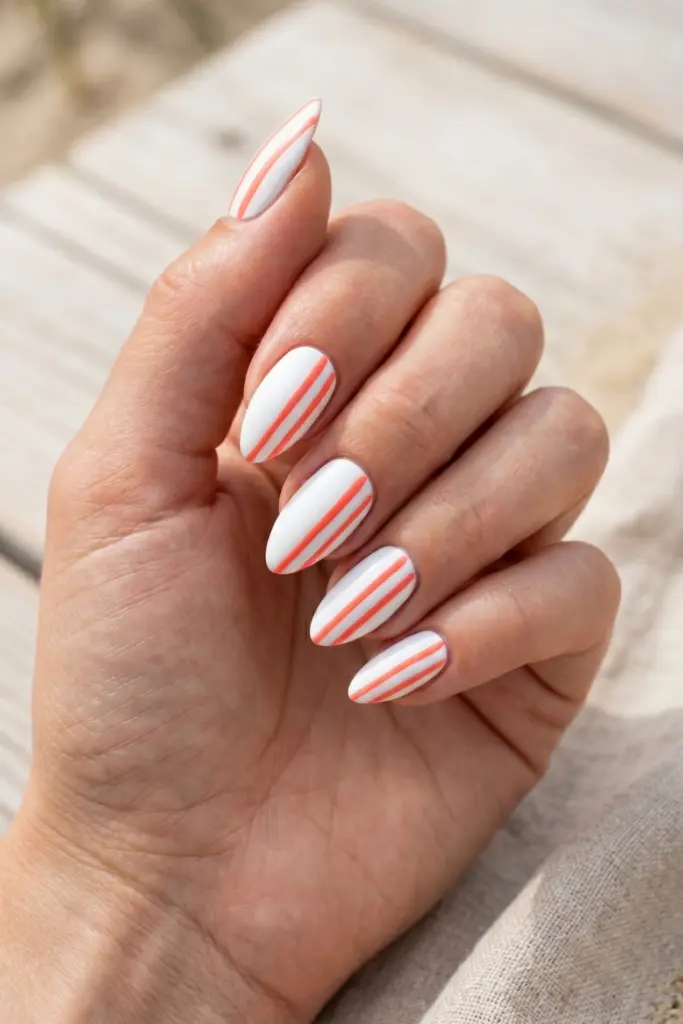
Stripes on almond-shaped nails are a secret weapon for making your fingers look long and slender.
This coral and white combo feels very nautical and preppy—perfect for a weekend on a boat or just pretending you’re on one while sitting in your backyard.
Steps:
- Paint your nails a crisp white and let them dry.
- Use a long liner brush to paint thin coral stripes diagonally.
- Keep the spacing as even as possible, but don’t obsess over it.
- Seal with a quick-dry top coat.
Tip: If you’re nervous about free-handing lines, you can buy “striper” polishes that come with a built-in long, thin brush.
15. High Gloss Solid Coral—One vibrant coral shade with an ultra-glossy top coat.
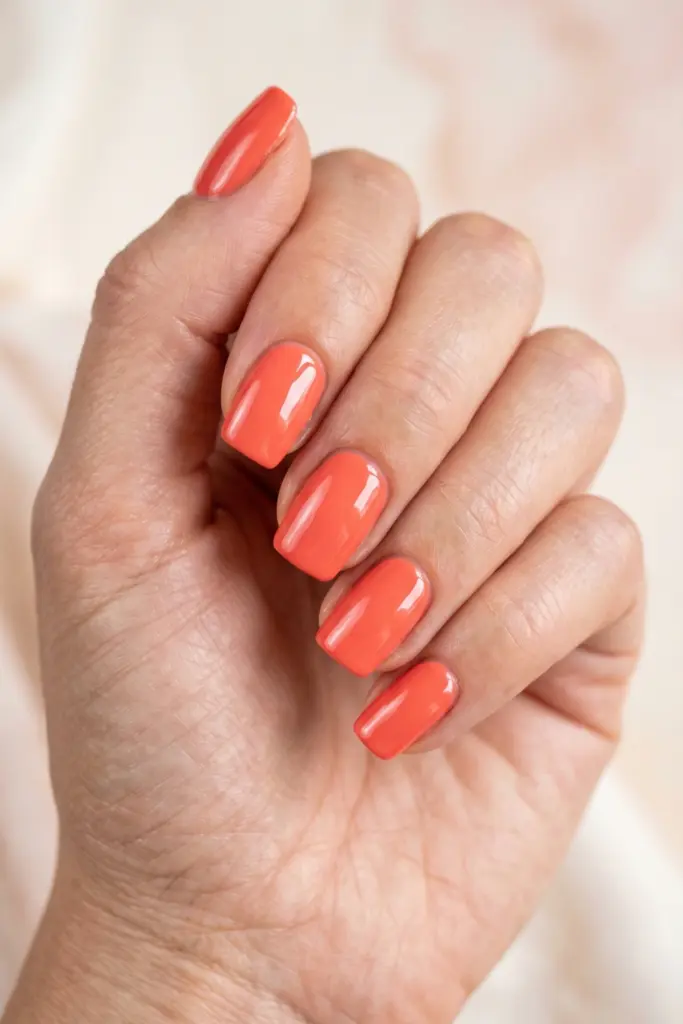
Sometimes, simplicity really is the ultimate sophistication.
A single, perfectly applied shade of coral with a glass-like finish is undeniable. It’s bold, clean, and classic.
It’s the “Power Mani” of the summer world.
Steps:
- Apply a ridge-filling base coat to ensure a smooth surface.
- Paint two thin, even coats of your favorite coral shade.
- Apply a thick, high-gloss top coat (the kind that looks like gel).
- Let it dry completely—no touching!
Tip: Reapply your top coat every three days to maintain that mirror-like shine and prevent edge wear.
Final Thoughts
Coral is basically the “LBD” of summer nail colors—it never goes out of style, and it makes everyone look a little more tan than they actually are.
Whether you go for the full 3D pearl look or stay classic with a high-gloss solid, the key to a great summer mani is all in the prep.
Don’t forget to keep your cuticles hydrated with some oil; even the most beautiful design will look “blah” if your skin is dry from the pool chlorine.
Now, go grab your favorite shade of coral and get to painting—you’ve got a summer to enjoy!
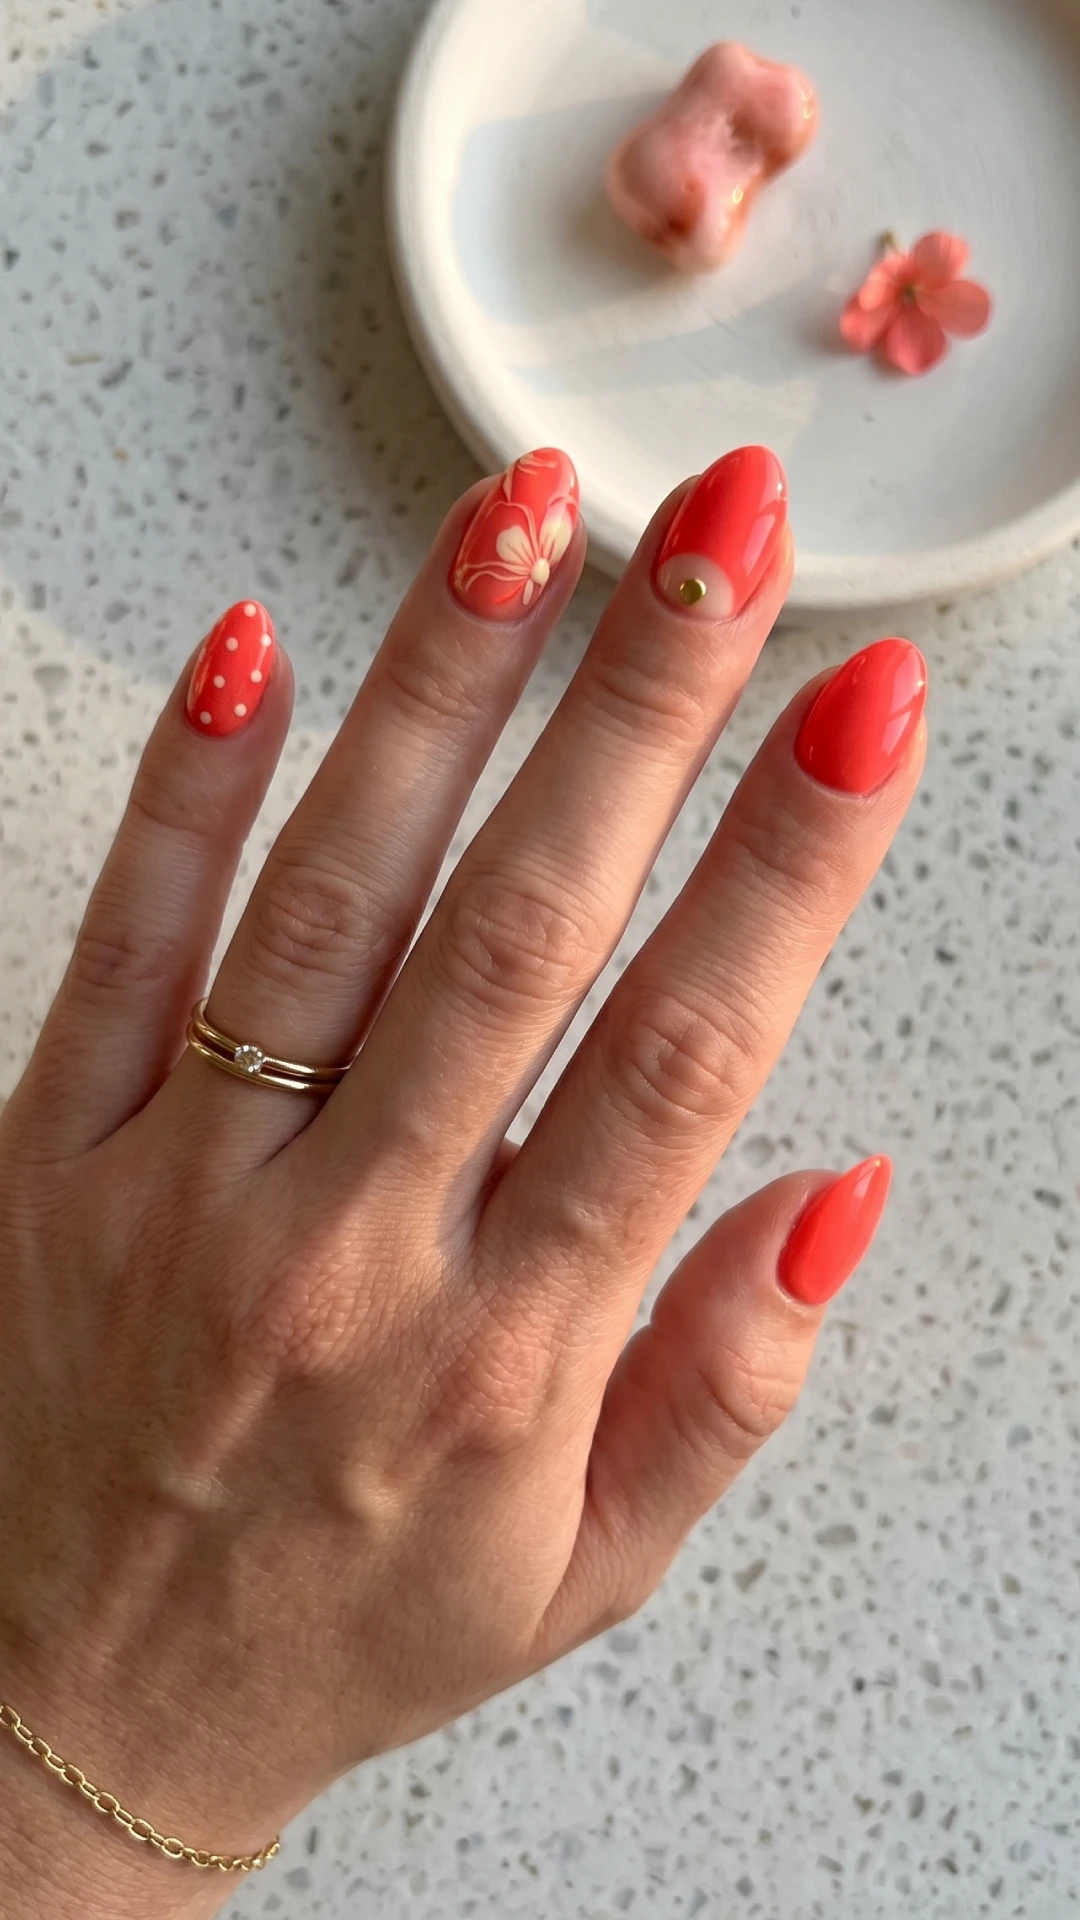
Simple Coral Summer Nail Design Ideas for a Fresh Look
Elevate your summer style with these simple coral nail design ideas. Perfect for sunny days, these vibrant looks bring a fresh and chic vibe to your manicure, making your nails stand out all season long. #SummerNails #CoralNailDesigns #NailArtIdeas
Pin it on Pinterest