Ugh, summer is finally here, and if you’re anything like me, your Pinterest boards are already overflowing with beach aesthetics and iced coffee inspo.
But let’s be real—who has three hours (or $80) to spend at the salon every time a chip happens?
You need something cute, fast, and totally DIY-friendly. Enter the world of summer nail designs that actually look professional without the stress.
I’ve rounded up 15 of the most aesthetic, “scroll-stopping” dotted manicures that scream sunshine.
Whether you’re a minimalist who loves a sheer base or a maximalist craving neon pops, these ideas are foolproof.
You’ll get a breakdown of every look, from color palettes to the simple steps needed to master the dotting tool.
Grab your favorite polish and a toothpick—it’s time to give your nails a serious glow-up for the season!
1. Classic White Dots on Pastel Pink
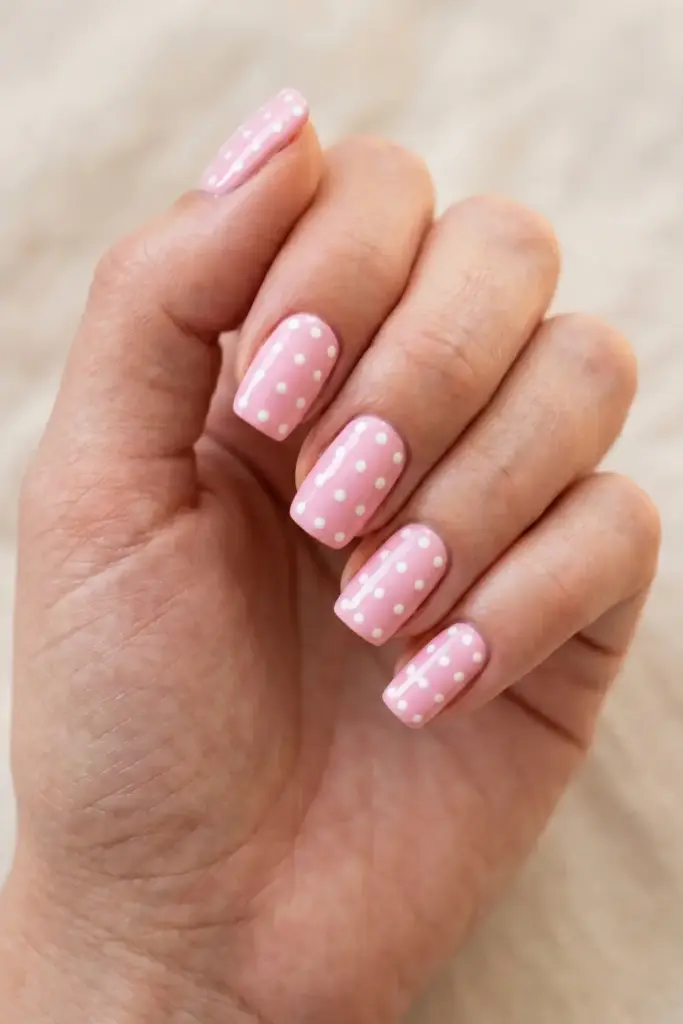
This look is the “clean girl” aesthetic of the nail world. It’s soft, ultra-feminine, and works for everything from a summer wedding to a casual brunch.
The pastel pink keeps things sweet, while the white dots add a crisp, preppy finish.
Steps:
- Apply two coats of a soft pastel pink.
- Dip a dotting tool into white polish.
- Place dots in a grid pattern across each nail.
- Seal with a high-shine top coat.
Pro Tip: If you don’t have a professional dotting tool, the rounded end of a bobby pin works perfectly for consistent, medium-sized dots.
2. Neon Yellow Dots on Coral Base
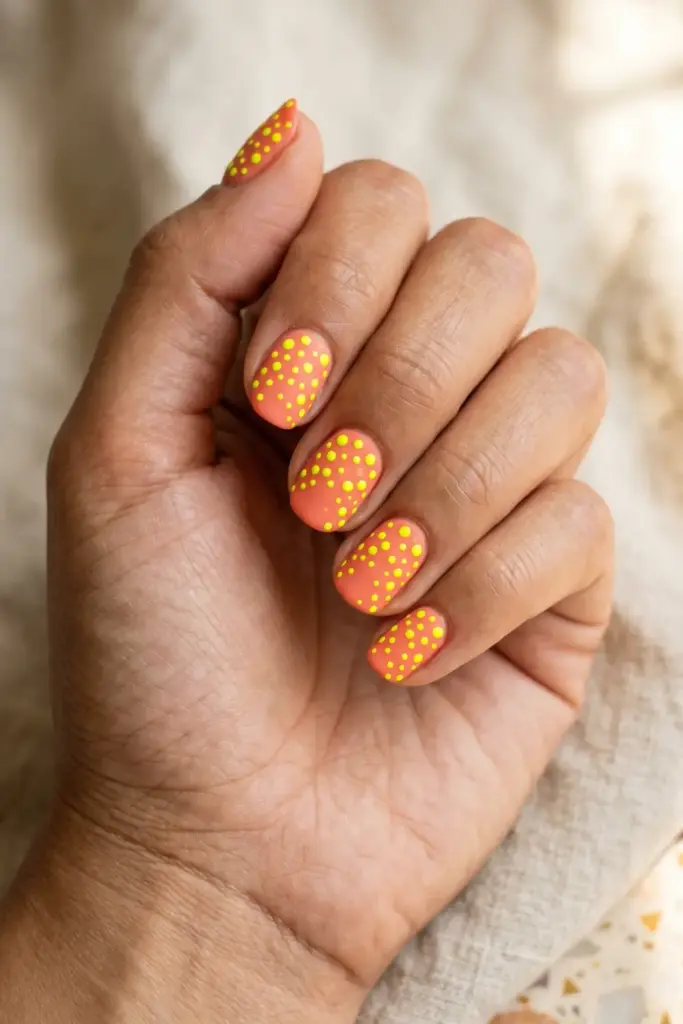
Nothing says “I’m on vacation” quite like neon.
The contrast between the warm coral and the electric yellow creates a high-energy vibe that looks incredible against a summer tan.
It’s bold, it’s bright, and it’s impossible to ignore.
Steps
- Paint your nails with a vibrant coral polish.
- Use a bright neon yellow for the dots.
- Scatter the dots randomly for a fun, bubbly effect.
- Finish with a matte top coat for a modern twist.
Pro Tip: Neon polishes can be sheer; try dabbing a tiny bit of white polish down first, then dotting the neon yellow directly on top to make the color “pop.”
3. Tiny Blue Dots on Sheer Nude
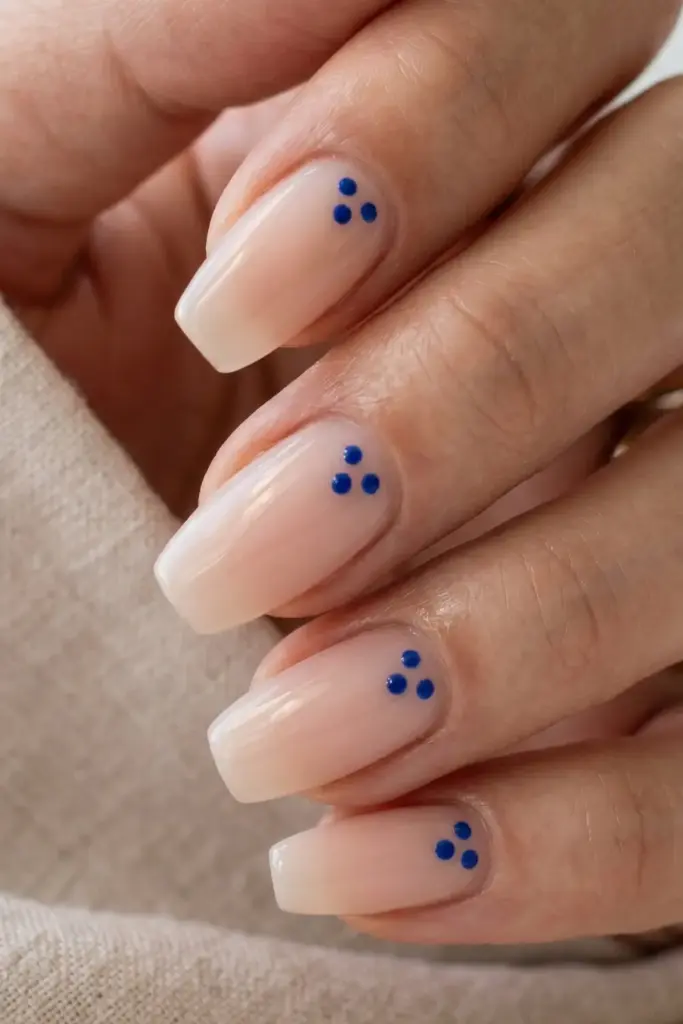
For the girlies who want “quiet luxury” but with a summer twist, this is it.
It’s incredibly subtle—almost like a secret on your fingertips.
The sheer base makes your nails look healthy, while the ocean-blue dots feel like a nod to the Mediterranean.
Steps:
- Use one coat of a sheer, milky nude polish.
- Pick a deep cobalt or navy blue.
- Place three tiny dots near the cuticle of each nail.
- Apply a glossy top coat.
Pro Tip: Keep the dots small by using a toothpick. The smaller the dot, the more “expensive” the manicure looks.
4. Rainbow Dots on White
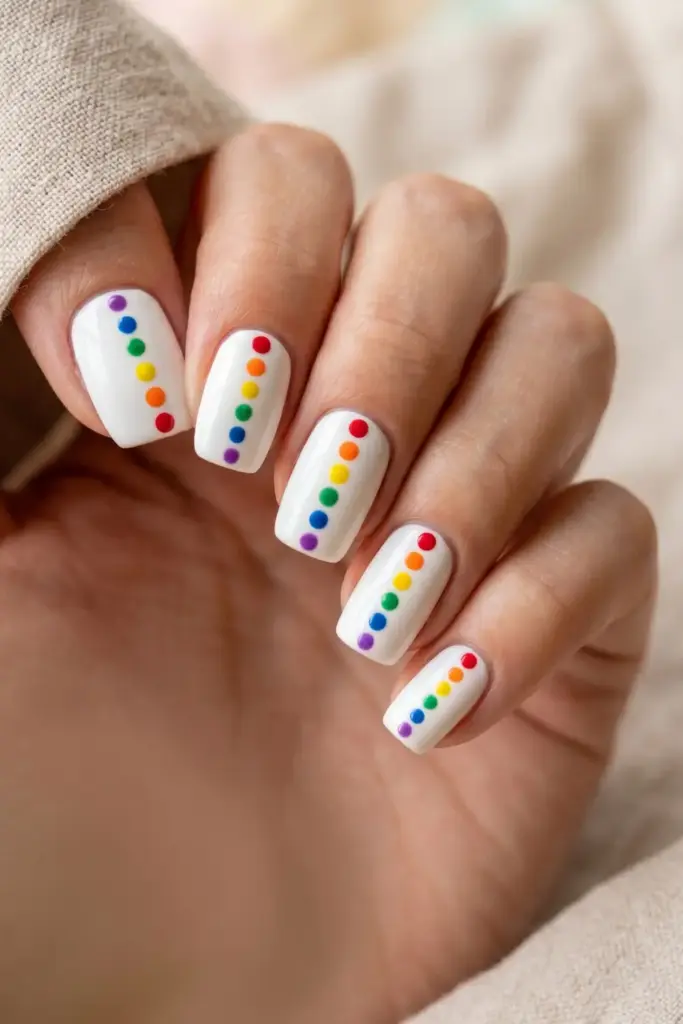
This is pure dopamine in a bottle.
Starting with a crisp white base creates a literal canvas for a rainbow of colors.
It’s playful, nostalgic, and goes with every single outfit in your summer wardrobe.
Steps:
- Apply two coats of opaque white polish.
- Select 5–6 rainbow shades (red, orange, green, etc.).
- Place one dot of each color in a vertical line down the nail.
- Protect the design with a thick top coat.
Pro Tip: To prevent the colors from bleeding into each other, let the white base dry completely before you start the rainbow dots.
5. Minimalist Black Dots on Clear
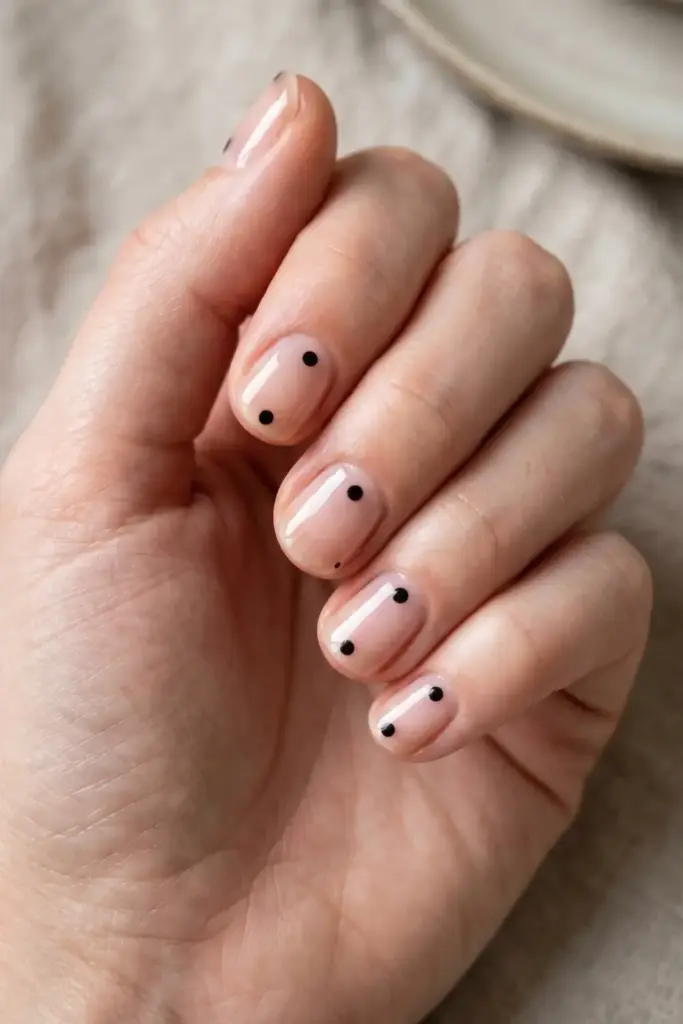
Edgy, modern, and deceptively simple.
This look is perfect for anyone who hates visible regrowth because the base is clear.
It’s a great “transition” look if you aren’t quite ready for the bright florals of summer.
Steps:
- Apply a clear base coat or a very light sheer tinted base.
- Use a jet-black polish for the dots.
- Place one single dot in the center of the nail, or one at the base and one at the tip.
- Finish with a super-glossy top coat.
Pro Tip: Since the base is clear, make sure your natural nails are buffed and tidy—this look puts your nail health on center stage.
6. Glitter Gold Dots on Mint Green
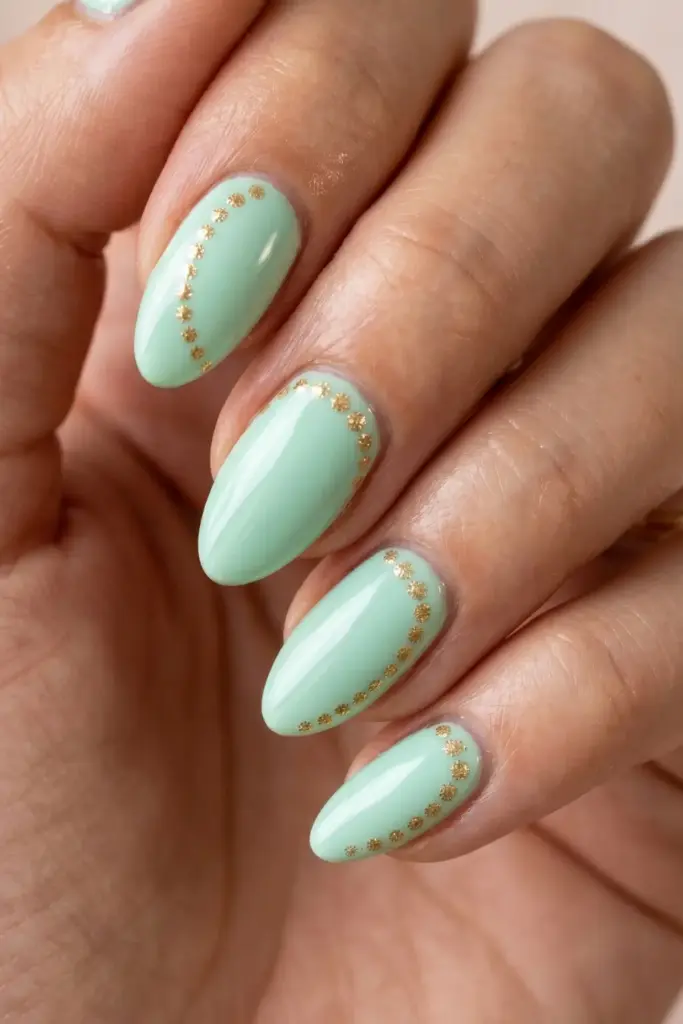
Mint green is a summer staple because it feels so refreshing.
Adding gold glitter dots elevates the look from “cute” to “glam.”
It’s the perfect manicure for a summer evening party or a night out.
Steps:
- Paint nails with a creamy mint green.
- Choose a gold glitter polish with high density.
- Place dots along the side of the nail in a curved line.
- Apply two layers of top coat to smooth out the glitter texture.
Pro Tip: If your glitter polish is too thin, dab a bit onto a piece of foil first and pick up individual glitter chunks with a toothpick for precision.
7. Ombre Fade Dots (Large to Small)
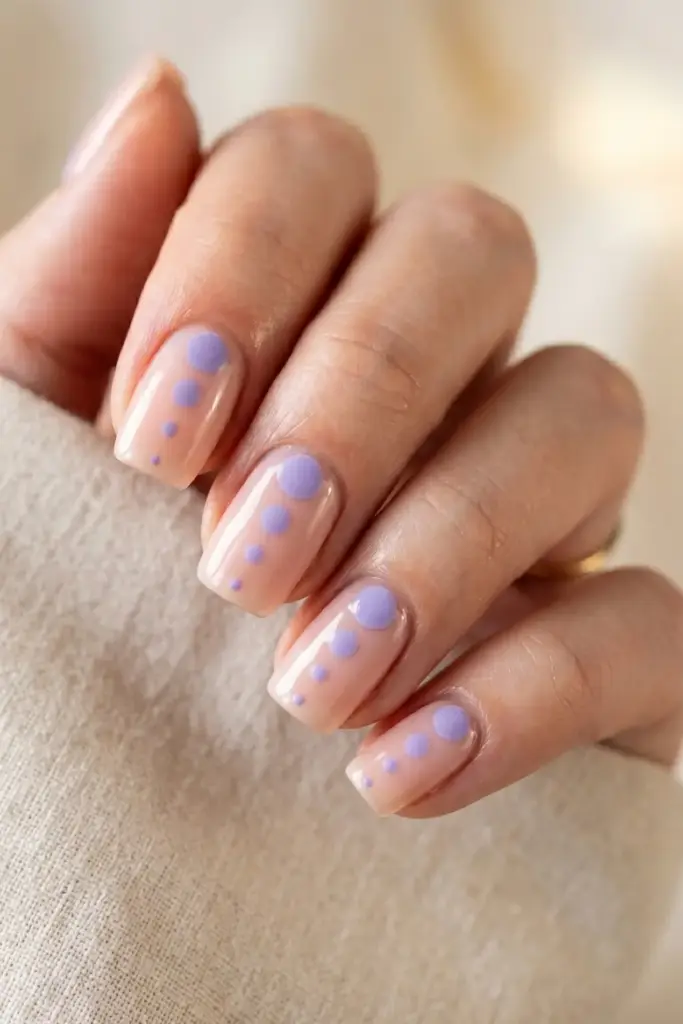
This design creates a cool visual illusion.
By changing the size of the dots, you create a sense of movement on the nail.
Using a single color like lavender keeps it sophisticated rather than chaotic.
Steps:
- Start with a nude or “ballet slipper” pink base.
- Use a lavender polish.
- Place a large dot at the cuticle, a medium one in the middle, and a tiny one at the tip.
- Seal with a top coat.
Pro Tip: Use different tools for this—the back of a makeup brush for the large dot, a bobby pin for the medium, and a toothpick for the small.
8. Watermelon Fruit Dots
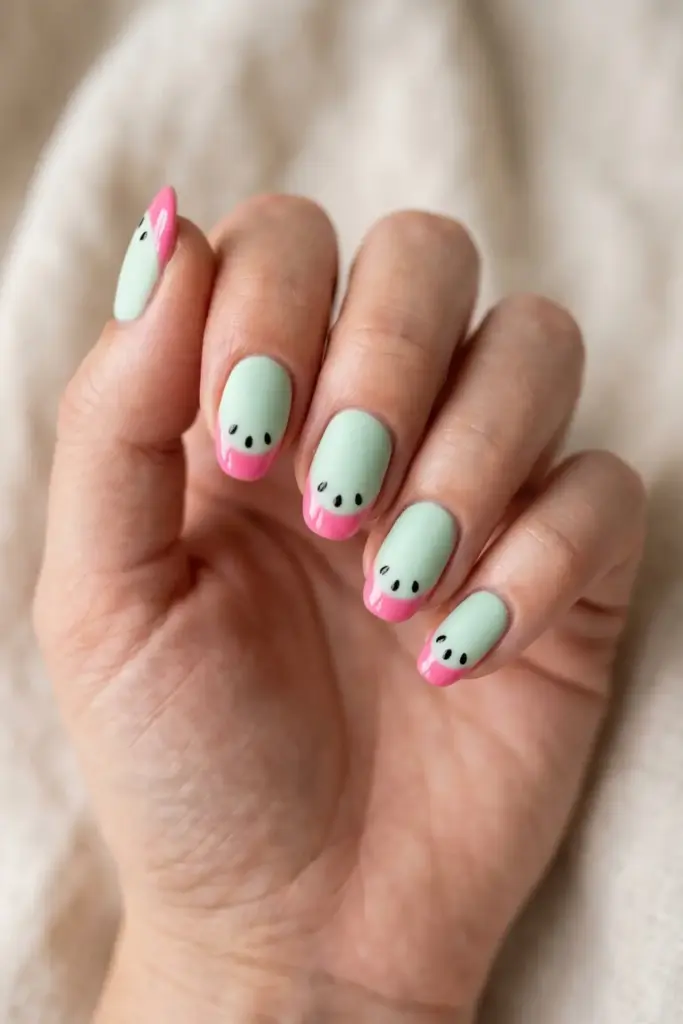
Summer and watermelon go hand-in-hand.
This is a “conceptual” fruit look—it’s not a literal drawing of a melon, which makes it feel much more chic and grown-up while still being totally adorable.
Steps:
- Use a pale, minty green for the base.
- Paint a thin pink “smile line” at the very tip of the nail.
- Use black polish to add 3–4 tiny “seed” dots in the pink area.
- Finish with a high-shine top coat.
Pro Tip: Try a “matte” finish on the green part and a “glossy” finish on the pink tip for a cool texture contrast.
9. Beachy Turquoise & White Wave Dots
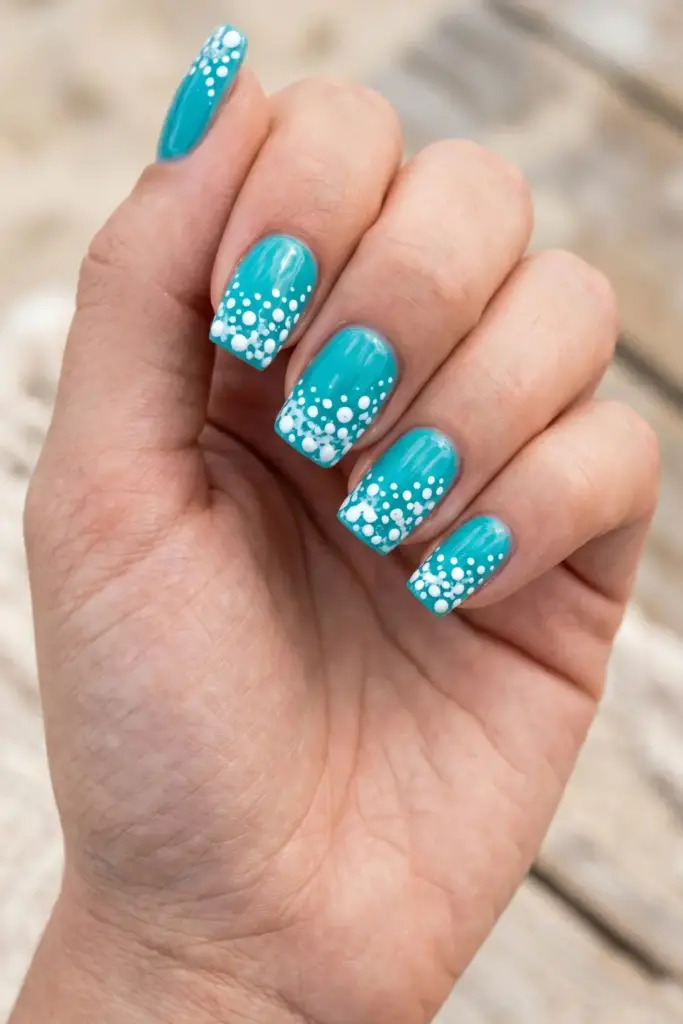
If you can’t get to the ocean, bring the ocean to your hands.
The turquoise base represents the water, and the scattered white dots look like sea foam or bubbles.
It’s incredibly relaxing just to look at.
Steps:
- Paint nails with a bright turquoise or teal.
- Use a crisp white polish.
- Group white dots of varying sizes toward the tip of the nail.
- Apply a “plumping” top coat to give it a watery look.
Pro Tip: Don’t worry about being perfect; waves are messy, so a scattered, irregular dot pattern actually looks better here.
10. Pastel Confetti Dots
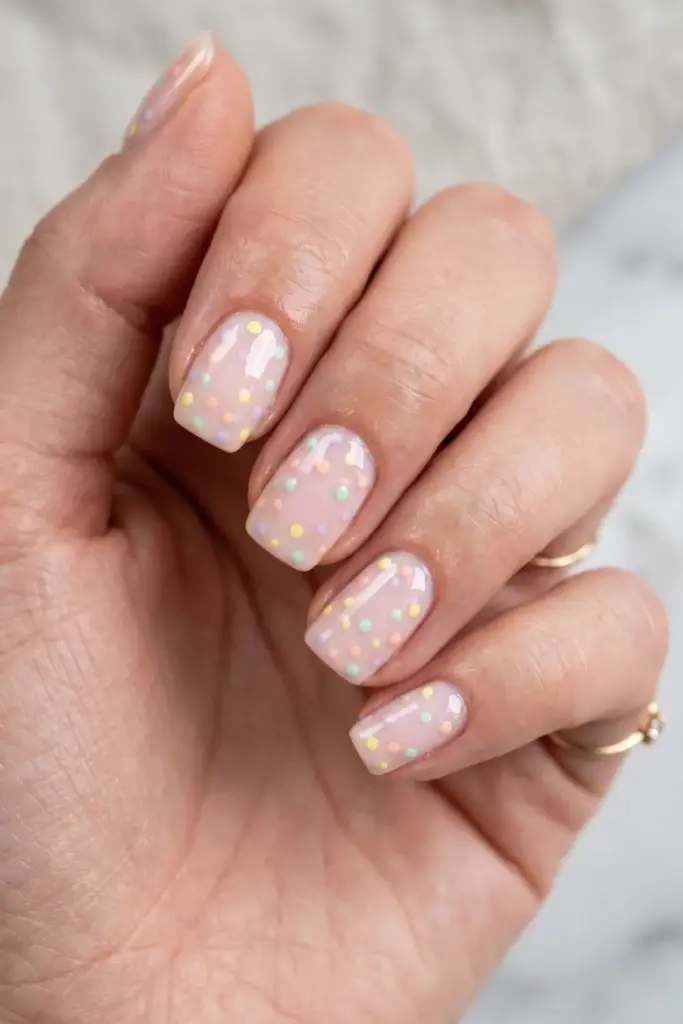
Think of this as a party on your nails.
Using a “barely-there” pink base ensures the pastel dots really stand out.
It’s light, airy, and perfect for the hottest days of July.
Steps:
- Apply two coats of a very sheer, pale pink.
- Gather 4 pastel shades (lemon, mint, peach, and lavender).
- Dot them all over the nail, overlapping some for a confetti effect.
- Seal with a glossy top coat.
Pro Tip: Keep the dots small so the “confetti” looks delicate rather than clunky.
11. Metallic Silver Dots on Lavender
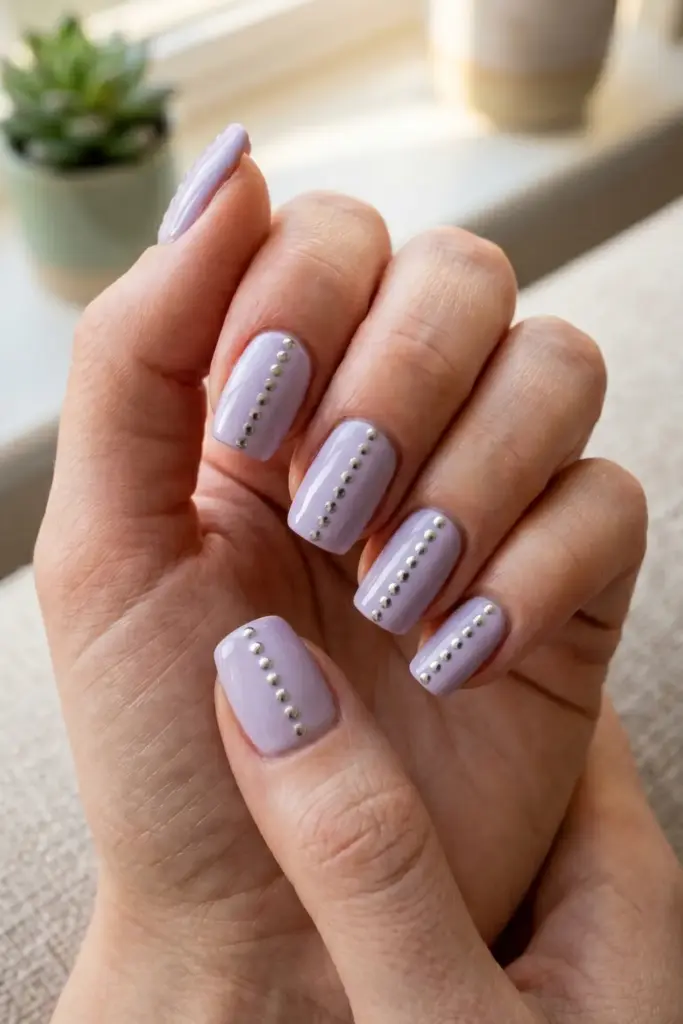
Lavender is a massive trend right now, and adding metallic silver gives it a slightly futuristic, “cool-girl” edge.
The silver catches the sunlight beautifully, making it a great choice for outdoor events.
Steps:
- Paint nails with a creamy lavender polish.
- Use a metallic silver or chrome-finish polish.
- Place dots in a single vertical line down the center.
- Apply a fast-dry top coat.
Pro Tip: Metallic polishes dry quickly, so work fast when dotting to avoid “peaks” in the polish.
12. Gradient Dots from Cuticle to Tip
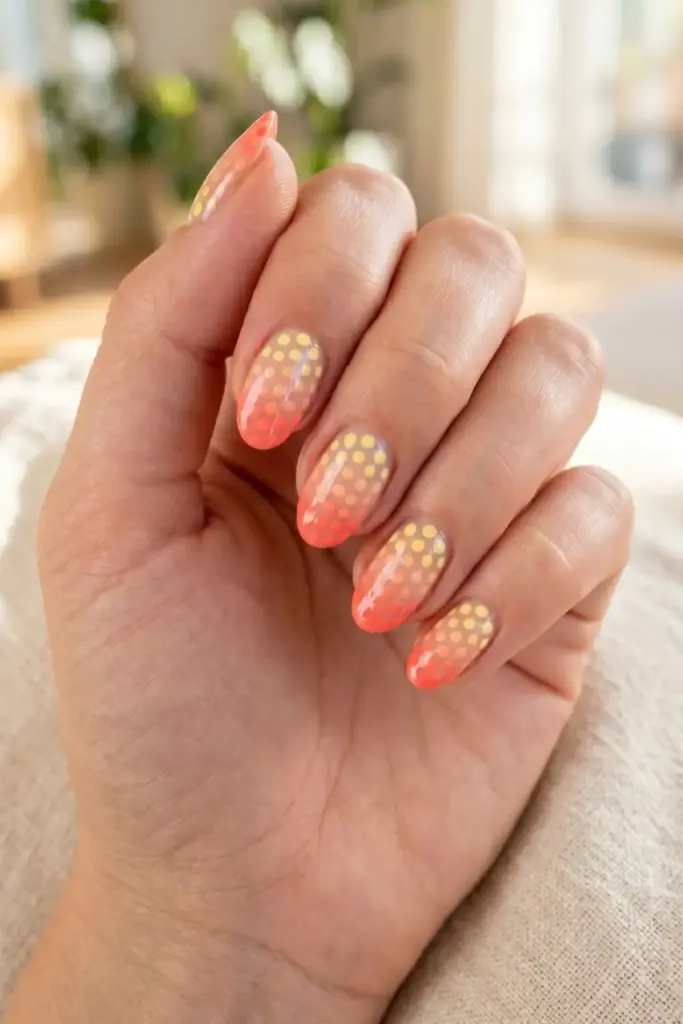
This is for the lovers of sunset colors.
It’s a clever way to do a gradient without needing a sponge.
The shifting hues from yellow to peach look like a summer evening sky.
Steps:
- Apply a clear or nude base.
- Start with pale yellow dots at the cuticle.
- Transition to peach dots in the middle, then coral at the tip.
- Seal with a glossy top coat.
Pro Tip: Clean your dotting tool between every color to keep the gradient looking crisp and clean.
13. Negative Space Dots
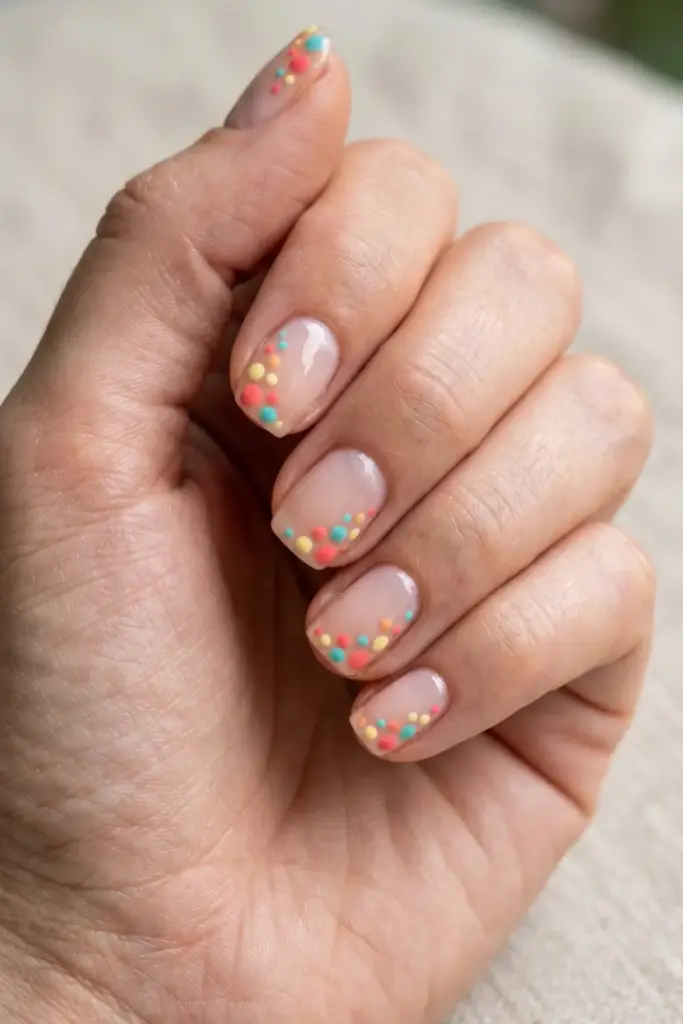
Negative space is a huge nail trend because it’s so low-maintenance.
By leaving most of the nail “naked,” you create a high-fashion look that takes minutes to achieve but looks like you spent an hour at a studio.
Steps:
- Start with a completely clean, buffed nail (or clear base).
- Pick 2–3 contrasting summer colors.
- Place a cluster of dots only in one corner or a stripe down the side.
- Finish with a long-wear top coat.
Pro Tip: Use a nail strengthener as your base coat to keep your natural nails looking healthy under the negative space.
14. Sunset Orange & Pink Dots
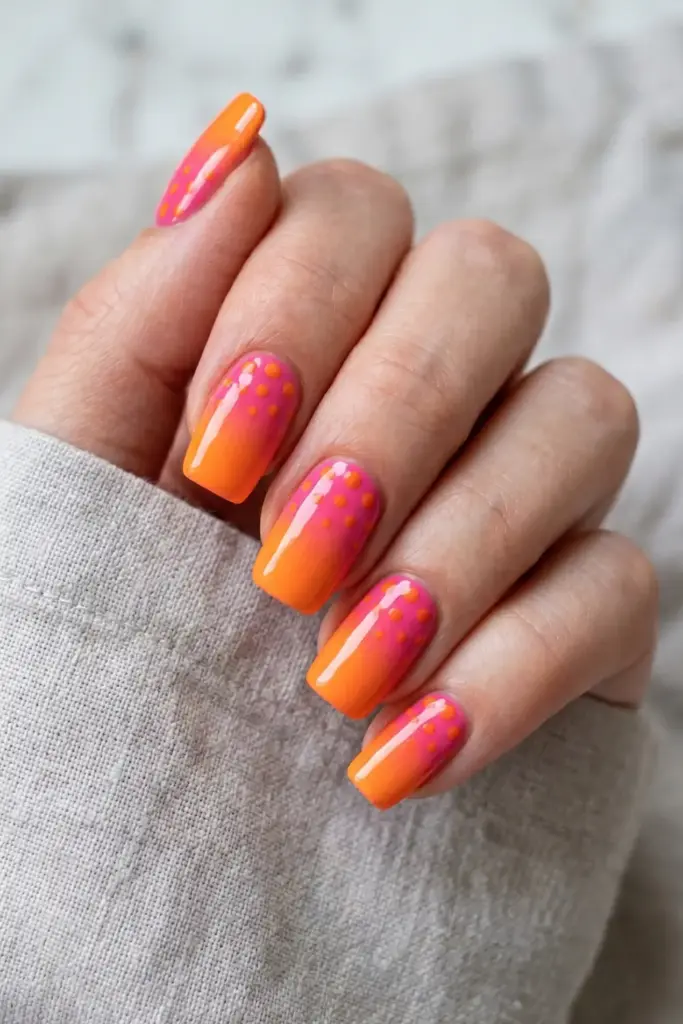
If summer was a color combo, this would be it.
The gradient base feels like a tropical sunset, and the matching dots add a layer of depth that makes the whole look feel professionally done.
Steps:
- Create a gradient base using orange and pink (or just paint half and half).
- Use a darker orange for dots on the pink side.
- Use a hot pink for dots on the orange side.
- Apply a glossy top coat to blend the colors.
Pro Tip: When doing a gradient base, a makeup sponge is your best friend for a seamless blend.
15. French Tip with Dot Accents
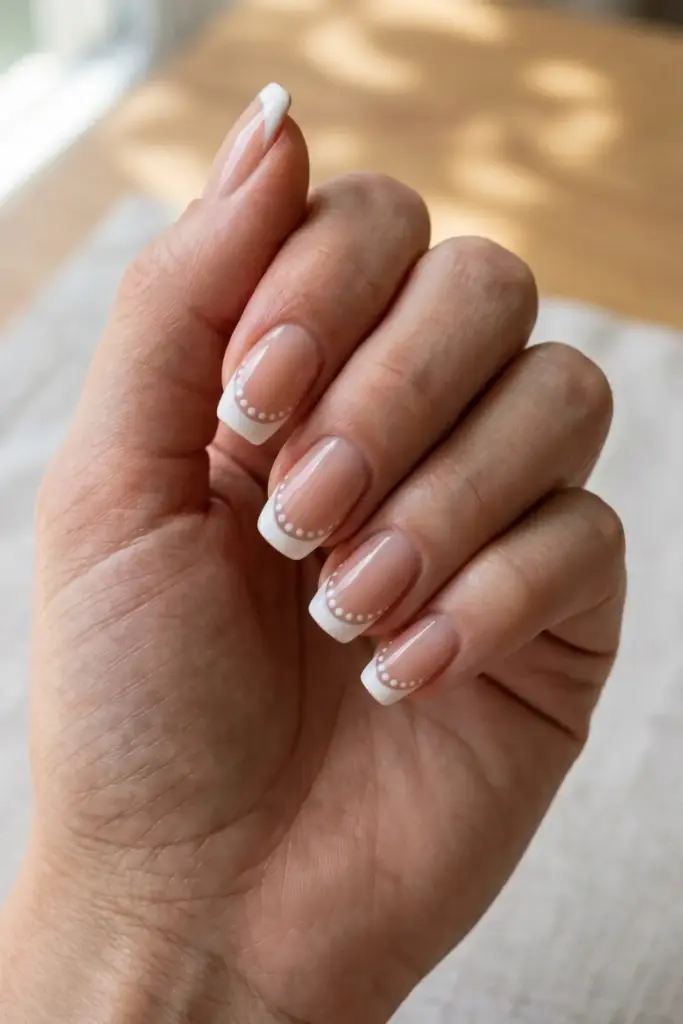
Classic French tips never go out of style, but they can feel a bit… well, basic.
Adding a row of tiny dots along the “smile line” (where the white meets the pink) gives it a modern, playful update.
Steps:
- Paint a standard white French tip.
- Use the same white polish for the dots.
- Carefully place a row of tiny dots right along the edge of the white tip.
- Seal with a high-shine top coat.
Pro Tip: If your French tip line isn’t perfectly straight, the dots are a genius way to hide any little wobbles!
Final Thoughts
Summer is the best time to experiment with your look, and these summer nail designs prove that you don’t need a professional kit to have Pinterest-worthy hands.
The beauty of dots is that they are incredibly forgiving—if one is slightly off-center, it just adds to the “hand-painted” charm.
Plus, these designs are easy to “fill in” if you get a chip, which is a total lifesaver during beach season.
Just remember to always use a good base coat to prevent staining (especially with those neons!) and a high-quality top coat to protect your hard work from the sand and salt.
Happy dotting!
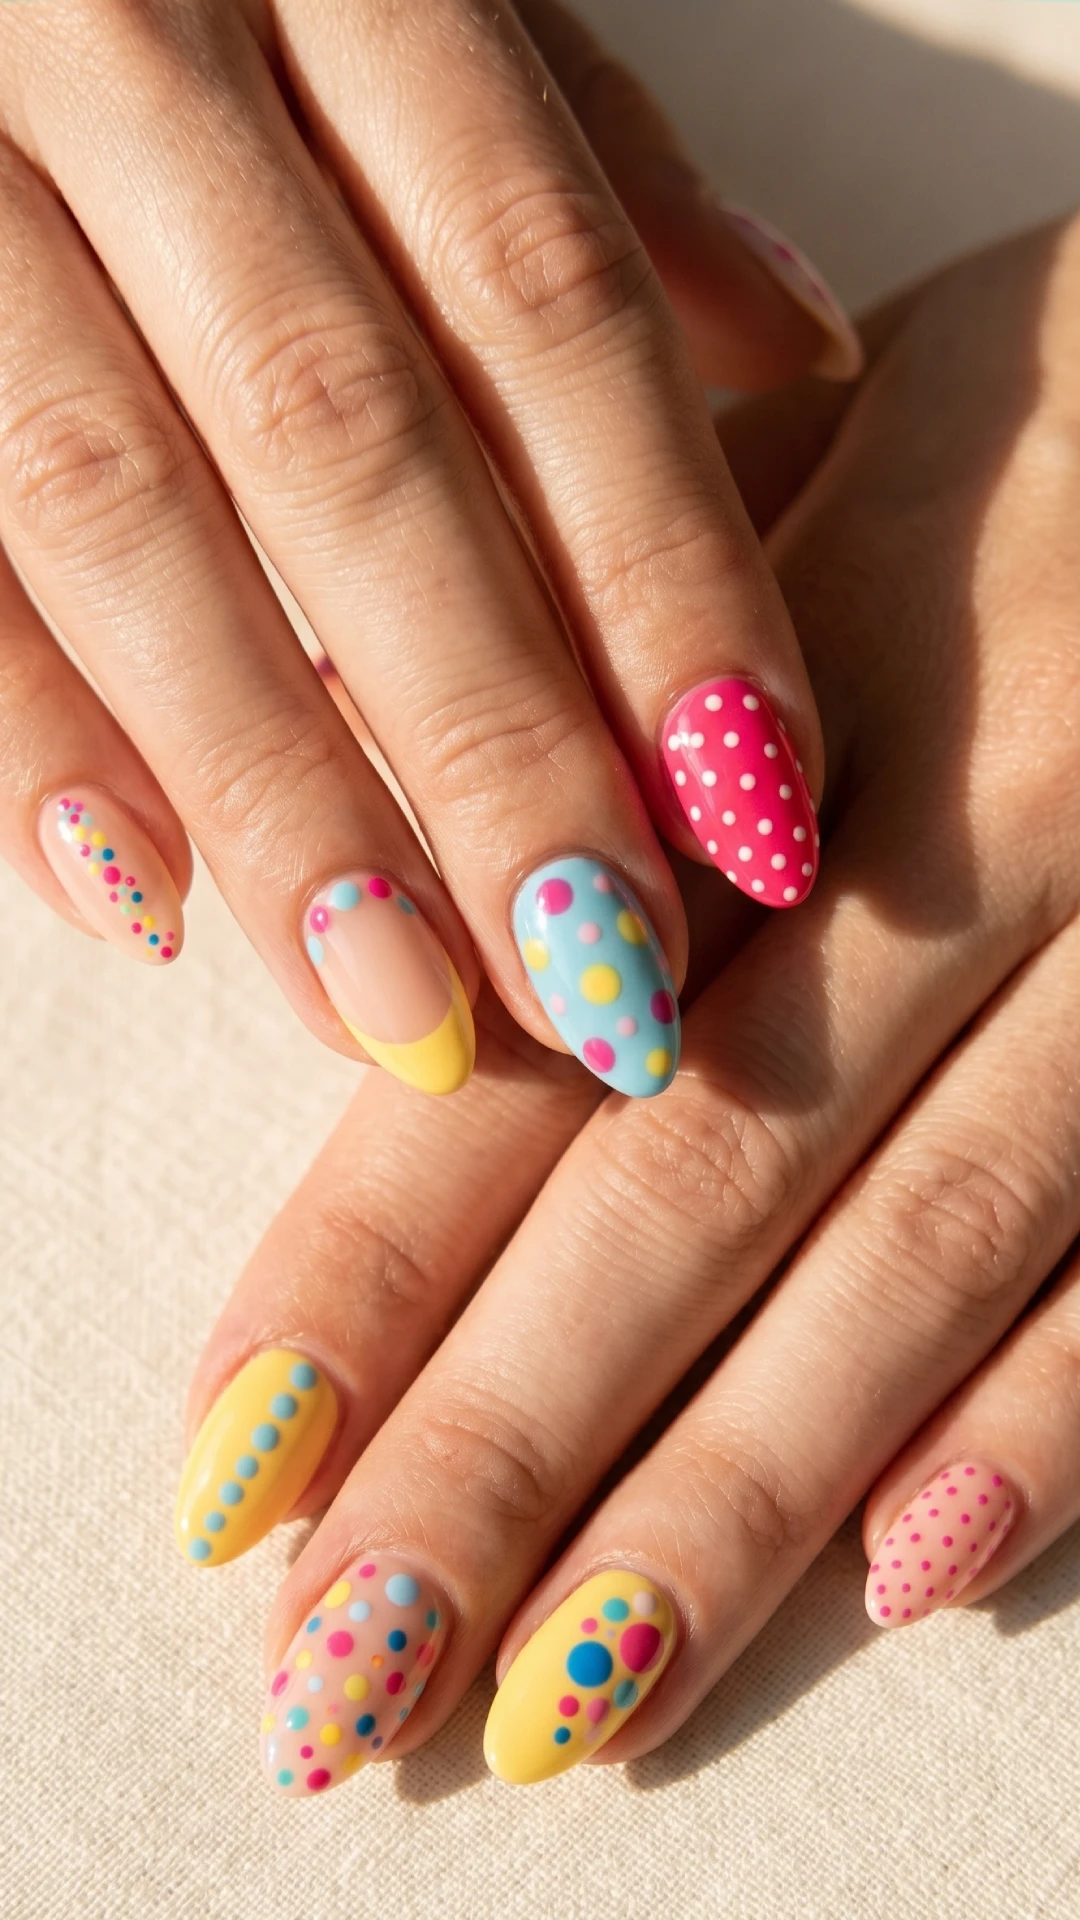
Simple Dots Summer Nail Design Ideas for a Playful Look
Add a fun and chic vibe to your summer style with these simple dots nail design ideas. Perfect for warm weather, these playful looks feature minimalist patterns and vibrant colors that make your nails pop all season long. #SummerNails #DotsNailDesigns #NailArtIdeas
Pin it on Pinterest